A Double Birthday

By | December 16, 2015

Hi there

It is nice hearing the rain outside – the garden is so dry and it’s not even full on summer yet.

This week seems to be the week to have a birthday.  On Monday friends of ours celebrated their birthday’s – like us husband and wife share the same day.  They can never forget our birthdays!

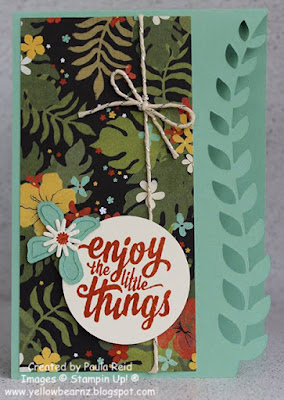
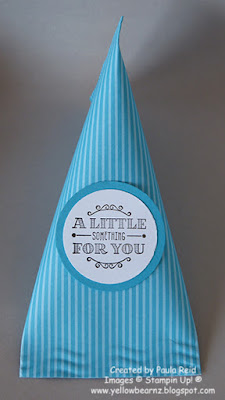
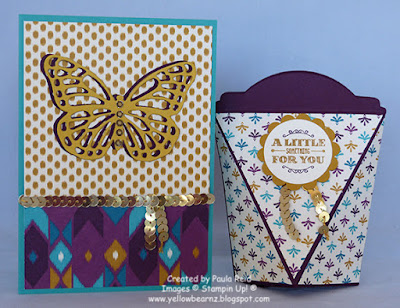
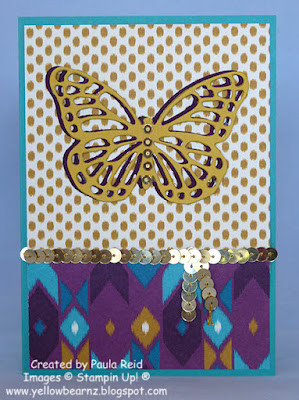
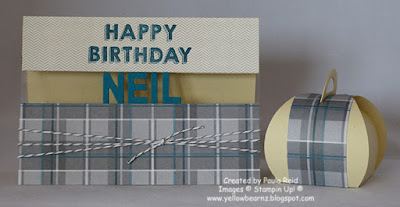
Here are the cards and little gifts (filled with chocolate of course) I made:

Supplies:
Stamp Set – Butterfly Basics, A Little Something
Card Stock – Bermuda Bay, Very Vanilla, Blackberry Bliss, Delightful Dijon
Ink – Bermuda Bay, Blackberry Bliss, Delightful Dijon
DSP – Bohemian DSP
Other – Butterflies Thinlits, Deco Label Thinlits, 13/4″ Scallop Circle Punch, 1 1/2″ Circle Punch, Gold Sequin Trim, Rhinestones, Gold Sharpie Pen (Non SU)

Supplies:
Stamp Set – Party Wishes
Card Stock – Naturals Ivory (retired), Island Indigo
DSP – Adventure Bound DSP Stack (retired)
Ink – Island Indigo
Other – Little Letter Thinlits, Bakers Twine, Curvy Keepsake Thinlit

I hope you had a lovely day Raewyn and Neil.

A Special Birthday

By | December 15, 2015

Hi there

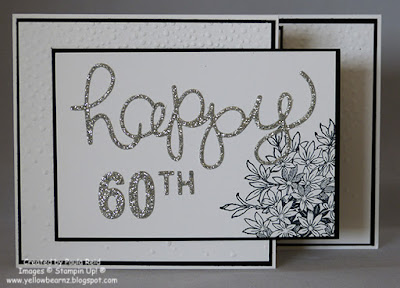
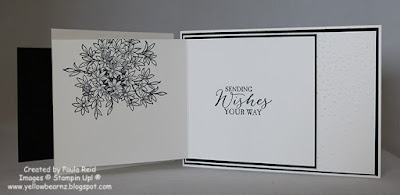
Today a very special family friend celebrated a special birthday milestone which called for a special birthday card :).

So my crafting fingers got to work and here’s what they created:

I used the same style of card I taught at last months Creative Inkers Extravaganza but changed the stamp set to create a completely different look.

A special card has to have some ‘bling’ so I cut the sentiment and numbers out of silver glimmer paper – nice and sparkly.

Supplies:
Stamp Set – Awesomely Artistic, Butterfly Basics
Card Stock – Basic Black, Thick Whisper White, Silver Glimmer Paper
Ink – Momento Black
Other – Softly Falling Embossing Folder, Little Numbers Thinlits, Hello You Thinlits

Balloon Ballerinas

By | December 14, 2015

Hi there

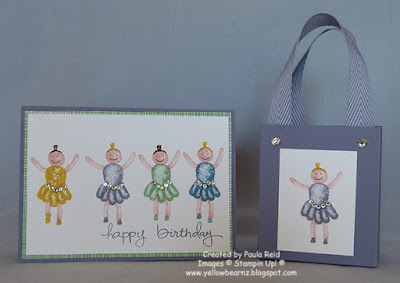
Yesterday our friends daughter turned 3.  I don’t have any little girl stamp sets but did receive a new set at last month’s OnStage which I used to create this cute card – thanks to Kelly Kent I was able to CASE her card.  I did add faces to my ballerinas and also a bit of ‘bling’

The little bag is made using the Gift Bag Punch Board – so quick and easy.

Supplies:
Stamp Set – Balloon Builders, Endless Birthday Wishes
Card Stock – Wisteria Wonder, Whisper White
DSP – Cherry on Top Paper Stack
Ink – So Saffron, Wisteria Wonder, Mint Macaron, Marina Mist, Blushing Bride, Chocolate Chip
Other – Little Letters and Little Numbers Thinlits, Rhinestones

Square Pillow Box

By | December 13, 2015

Hi there

A day late but here are the rest of the projects I taught the ladies.

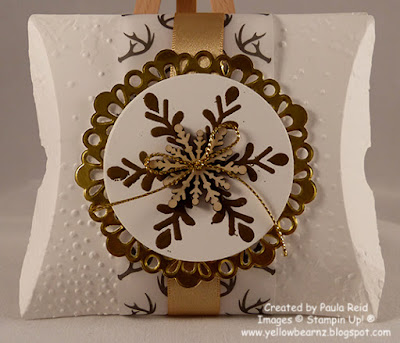
This project was inspired by the one taught by Sally, Heather and Michelle at our recent Creative Inkers Extravaganza.  I didn’t have the stamp set or framelits they used so went with a set that has become my favourite this Christmas – Holly Jolly Greetings.  I’ve also used the Winter Wonderland Designer Vellum Stack to create the belly band.  The Snowflake Elements go so well with this stamp set – I didn’t think I’d use them that much but I have – so much so that I had to buy another packet.
Supplies:
Stamp Set – Holly Jolly Greetings

Card Stock – Whisper White
Ink – Gold Embossing Powder
Paper – Winter Wonderland Designer Vellum Stack
Other – Gold Satin Ribbon, Foil Doillies, Snowflake Elements, Gold Cording, Softly Falling Embossing Folder, Square Pillow Box Thinlit

The other two projects the ladies made were:

For details of this card click here

And details for this card click here

Have a good week

Embellished Ornament Card and Box

By | December 11, 2015

Hi there

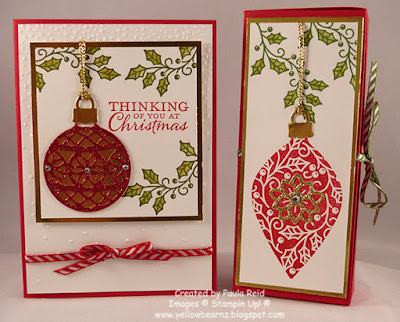
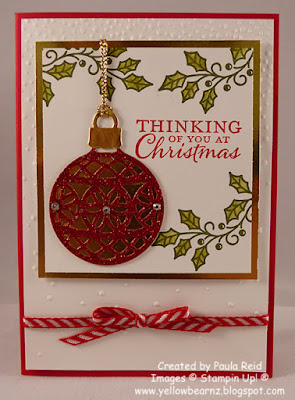
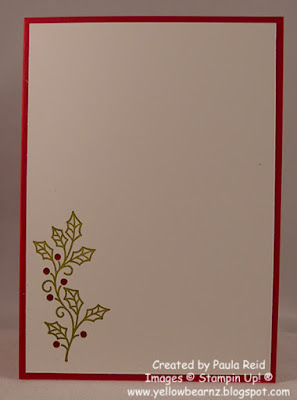
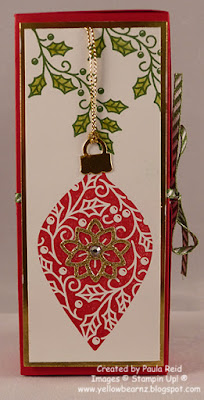
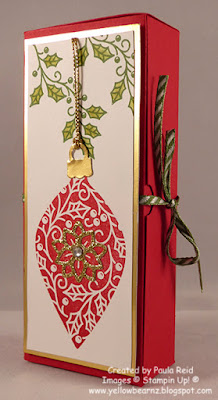
A couple of weeks ago I had an afternoon for a group of lovely ladies and we made 5 projects.  Here are two of the projects using the Embellished Ornaments stamp set and thinlits.

I adapted this box to fit the Whittakers Sante bars – it holds about six of these and are great as a Christmas ‘thank you’ gift.

Supplies:
Stamp Set – Embellished Ornaments
Card Stock – Real Red, Whisper White, Gold Foil, Red Glimmer, Gold Glimmer
Ink – Garden Green, Old Olive, Real Red
Other – Delicate Ornament Thinlits Dies, Gold Cording Trim, Garden Green and Real Red 1/8″ Striped Ribbon, Softly Falling Embossing Folder, Blender Pens, Rhinestones, Dimensionals

Check back tomorrow for two more projects.

Year End Sale – starts today

By | December 10, 2015

Hi there

Stampin’ Up! year end sale has now begun.  Be in quick to grab some amazing deals on products – current and retiring.

During the Year-End Sale, you can find ALL discounted products in one location in the online store: under the Year-End Sale category.  So don’t fret if you don’t see the category “Clearance Rack” on the online store right now – it has been integrated into the Year-End Sale See the savings now!


Also, for one week only, get discounts up to 50 percent off select annual catalogue product! This is only available from 10–17 December as a limited-time offering within the Year-End Sale (which will run until 4 January or while supplies last). See these products here!

So be in quick before things sell our as this is ‘while stocks last’ – the best way to order is online or contact me on yellowbearnz@gmail.com

I will be placing an order tomorrow morning – Friday 11 December at 10:00am

21st Birthday Card

By | December 8, 2015

Hi there

A couple of months ago my brothers eldest turned 21 and I forgot to blog the card I made for him!  (I hadn’t downloaded it to the laptop).

Most of us find masculine cards hard to create – try a ‘special’ birthday – that’s even harder.  I happened to spot this design on Pinterest and thought it would be perfect for Matt’s special birthday.

To create this card I randomly placed all my Little Numbers Thinlits on the card front  plus the ’21st’ and ran it through the Big Shot.  I had to run it through again to change the ‘6’ to a ‘9’.  At this point do not discard the ‘inserts’ for the numbers (0, 4, 6, 8 and 9) – you will need them shortly.  I heat embossed the sentiment with white embossing powder and the adhered a scrap piece of your chosen colour card stock behind the ’21st’ – I went with Daffodil Delight of course!  The card front is then adhered to the base with dimensionals.  Now comes the tricky part – placing the inserts back in the correct place.  I put a bit of Tombow on the back then placed it with tweezers – the ‘8’ was the most trying.
Supplies:
Stamp Set – Endless Birthday Wishes
Card Stock – Pacific Point, Daffodil Delight, Whisper White
Ink – Pacific Point
Other – Little Numbers Thinlits, White Embossing Powder, Dimesionals

Extravaganza Projects – November 2015

By | December 6, 2015

Hi there

I hope you’ve had a good weekend – ours has been rather social.  On Friday night we (along with half of Onehunga) enjoyed the annual ‘lighting of the Christmas Tree’ in Jellicoe Park.  It was great to see so many families enjoying their picnic dinners and enjoying the entertainment.  At 9pm the lights are turned on and the big Norfolk Pine is lit up – it looks amazing.  On Saturday night we went with friends to see the new James Bond movie – a must.

Today’s post has the remaining four projects from the Creative Inkers November Extravaganza – we had a great turnout and everyone enjoyed the day.  Keep and eye out for the next event which will be in March.

Slider Card

Picnic Hamper

Square Pillow Box

Gift Card Purse

Have a good week everybody

Extravaganza Z Fold Card

By | December 3, 2015

Hi there

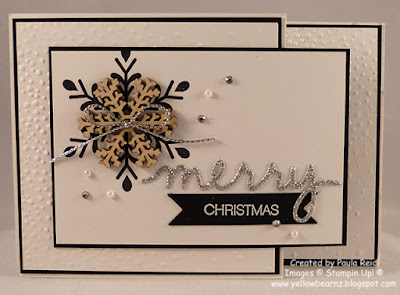
This is the last of the ‘Z’ fold cards for now :).  I taught this one along with Jacque and Kath at last month’s Creative Inkers Extravaganza and then again for a group of friends last week.  It’s rather stunning in Black and White and has a few more layers than the other cards.

I’ve really enjoyed teaching this card style – I hope you have a go at recreating one.

Supplies:
Stamp Set – Holly Jolly Greetings
Card Stock – Thick Whisper White, Basic Black, Silver Glimmer
Ink – Basic Black Archival, Smoky Slate
Other – Snowflake Element, Softly Falling Embossing Folder, Christmas Greetings Thinlits Die, Bitty Banner Framelits, White Embossing Powder, Silver Cording, Pearls, Rhinestones, Gluedots

We’re saying goodbye to retiring products from the holiday catalogue but before we do we’re giving everyone an opportunity to order their favourities.  Retiring products will only be available until 4 January, or while supplies last, so now is the time to order them before they’re gone.  Click here to see what’s retiring. 
 

More ‘Z’ fold card ideas

By | December 2, 2015

Hi there

Here are some more samples I made using the ‘Z’ fold style from yesterday.

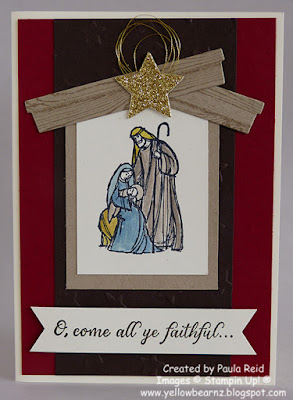
This first one uses the All Ye Faithful set.  I love the line art that you can colour in or leave blank if you wish – I used about 10 different colours to colour these images in!

Supplies:
Stamp Set – All Ye Faithful
Card Stock – Cherry Cobbler, Mossy Meadow, Very Vanilla
Ink – Momento Black, Cherry Cobbler, Hello Honey, Sahara Sand, Pink Pirouette, Soft Sky, Pool Party, Night of Navy, Garden Green, Smoky Slate, Soft Suede

For this one I’ve used the Holly Jolly Greetings set again – this has been one of my favourite sets this Christmas.

The Snowflake Elements (another like) have been sponged with White Craft ink – the only thing is you need to leave them to dry overnight otherwise you’ll have ink on your fingers – this is me speaking from experience the hard way!

Supplies:
Stamp set – Holly Jolly Greetings
Card Stock – Pool Party, Island Indigo, Shimmery White, Basic Gray, Silver Foil
Ink – Pool Party, Island Indigo, White Craft
Other – Christmas Greetings Thinlits Die, Snowflake Elements, Circle Framelits, Bitty Banner Framelits, White Embossing Powder, Confetti Stars Border Punch, Sponge, Rhinestones

I have one more Z fold card to show you tomorrow – this one is slightly different to the other ones but I’m sure you’ll love.

November Card Class Projects

By | December 1, 2015

Hi there

We’ve made it to the last month for 2015!  I haven’t even started thinking of Christmas shopping (I still have to finish my nephews present from last year! – bad aunt).

This afternoon I finally got round to photographing a number of projects I created last month – now I need to blog them all.  So first off are the two projects we created for my monthly card class.  Seeing as we are close to Christmas I decided to do a card and a 3D project.

This is a fancy fold card called a ‘Z’ fold.  The measurements for this card are:
Card base (Smoky Slate) – 10.5cm x 14.8cm (cut 2)
Mat (Real Red) – 9.5cm x 13.8cm (cut 2)
Whisper White – 8.5cm x 12.8cm (cut 1)
Z Fold insert – 9cm x 29.7cm (cut 1) – score at 13cm and 26cm

Adhere the ‘Z’ fold to the base first then close the ‘Z’ fold and put adhesive on the small flap of the ‘Z’ fold (this will then be attached to the back of the front section).  Line the front to the back matching the left hand side first.  This way your card will be aligned when closed.

I saw a number of samples of this Snap Close Box on Pinterest and they looked so cute.  I managed to find a link to a video by Keren sharing the measurements – thanks :).  I made a few changes so that I could get two of these from an A4 sheet of cardstock.  I will try and get my handwritten instructions done into a proper tutorial shortly and post here.  In the meantime enjoy.  The ladies had two colour options to choose from – Mossy Meadow or Real Red.

You may have noticed the red ‘berries’ – these are rhinestones coloured in with a red Sharpie marker – thanks Sally for that tip 🙂

Supplies:
Card
Stamp Set – Holly Jolly Greetings
Card Stock – Smoky Slate, Real Red, Whisper White, Silver Glimmer Paper
Ink – Smoky Slate, Real Red
Other – Snowflake Elements, Silver Cording, Pearls, Rhinestones, White Embossing Powder, Bitty Banners Framelits, Christmas Greetings Thinlits Dies, Curvy Corner Trio Punch

Snap Close Box
Stamp Set – Embellished Ornaments
Card Stock – Mossy Meadow/Real Red, Whisper White, Gold and Red Foil
Ink – Mossy Meadow, Real Red
DSP – Merry Moments DSP Stack
Other – Stylus, Delicate Ornament Thinlits Dies, Rhinestones, Red Sharpie (Non SU)

Congrats to Delys and Heather

By | November 30, 2015

Hi there

A couple of months ago two of my wider team members met some amazing milestones in their Stampin’ Up! careers and I wanted to acknowledge them and what better way to do that than with a personalised handmade card – it’s what we do isn’t it 🙂

When I realised I didn’t have any decent sized ‘congratulations’ stamps I made my own word using the Layered Letters Alphabet stamp set.  This is a Photopolymer set which made it really easy to line the letters up and get them straight.

Mint Macaron and Watermelon Wonder team nicely with Tip Top Taupe – these are three of the 2015-2017 In Colours.  What have you created with these In Colours?

Supplies:
Stamp Set – Layered Letters Alphabet
Card Stock – Tip Top Taupe, Mint Macaron/Watermelon Wonder, Whisper White
Ink – Tip Top Taupe
Other – Chevron/Zig Zag Embossing Folder, Tip Top Taupe Dotted Lace Trim, Rhinestones, Banner Triple Punch

Congratulations ladies on your marvelous achievements 🙂

Cherry on Top Starburst Card

By | November 28, 2015

Hi there

I started to clean my craft desk this afternoon but didn’t get very far – its now messier than when I started!  I got waylaid and ended up creating a card and sorting some bits to make more tomorrow!

Here’s a card I created a while ago using the Cherry on Top DSP stack.  The 6 x 6″ size is great for card fronts and small 3D items.  The below technique is called a Starburst card and is fun to create.

Supplies:
Stamp Set – Butterfly Basics
Card Stock – Bermuda Bay, Tip Top Taupe, Whisper White
Ink – Bermuda Bay
DSP – Cherry on Top DSP Stack
Other – Tags & Labels Framelits, 1/8″ Gold Ribbon

Maybe tomorrow I’ll clean my desk.

Cotton Paper Flower

By | November 27, 2015

Hi there

I hope you’ve had a great day – I have :).  This afternoon I got together with a lovely group of ladies and we made 5 projects – 3 cards and 2 boxes.  I’ll try and take photos of them this weekend and share with you next week.

As I’ve mentioned before my favourite pages in the annual catalogue are pages 148 and 149.  There are so many great products on these two pages – go and check them out.  A new addition to the catalogue this year is the Cotton Paper Assortment.  Here I’ve created a flower using the Flower Medallion punch and the Petite Petals punch.  The petals are held together with a mini brad.  The Large Polka Dot Embossing Folder adds texture to the background card stock.

Supplies:
Stamp Set – Build a Birthday
Card Stock – Bermuda Bay, Whisper White
DSP – Cherry on Top DSP Stack
Ink – Watermelon Wonder
Other – Watermelon Wonder and Crushed Curry Cotton Paper, Large Polka Dot Embossing Folder, Flower Medallion Punch, Petite Petals Punch, 1/8″ Mini Brad

Elegant Dots plus Happy Patterns Mask = Thank You Card

By | November 26, 2015

Hi there

I’m feeling very relaxed after a week away at Owhango (between Taumaruni and National Park).  We had a great time and did lots of walking and took heaps of photos.  Now to get them printed and do my first Project Life album 🙂

Here’s a card I made a while ago that combines one of our decorative masks with a coordinating embossing folder.  To get this effect I ran the Whisper White through the Big Shot with the Elegant Dots Embossing Folder.  Next place the coordinating Happy Patterns mask over the embossed card stock and ink away – I used a dauber to apply the ink.

After creating the background I wasn’t sure what to put on the front so went with just a sentiment created with the Hello You Thinlits.  There are four dies in this set but by cutting off the ‘s’ from the ‘thanks’ you can get an extra word 🙂

Supplies:
Card Stock – Pear Pizzazz, Chocolate Chip, Whisper White
Ink – Blushing Bride
Other – Happy Patterns Decoarative Masks, Elegant Dots Embossing Folder, Hello You Thinlits, Daubers