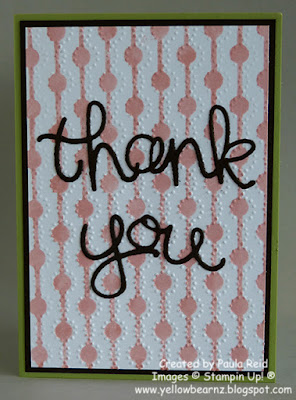
Elegant Dots plus Happy Patterns Mask = Thank You Card

By | November 26, 2015

Hi there

I’m feeling very relaxed after a week away at Owhango (between Taumaruni and National Park).  We had a great time and did lots of walking and took heaps of photos.  Now to get them printed and do my first Project Life album ๐Ÿ™‚

Here’s a card I made a while ago that combines one of our decorative masks with a coordinating embossing folder.  To get this effect I ran the Whisper White through the Big Shot with the Elegant Dots Embossing Folder.  Next place the coordinating Happy Patterns mask over the embossed card stock and ink away – I used a dauber to apply the ink.

After creating the background I wasn’t sure what to put on the front so went with just a sentiment created with the Hello You Thinlits.  There are four dies in this set but by cutting off the ‘s’ from the ‘thanks’ you can get an extra word ๐Ÿ™‚

Supplies:
Card Stock – Pear Pizzazz, Chocolate Chip, Whisper White
Ink – Blushing Bride
Other – Happy Patterns Decoarative Masks, Elegant Dots Embossing Folder, Hello You Thinlits, Daubers

Embellished Ornaments – Inlaid Ornament

By | November 18, 2015

Hi there

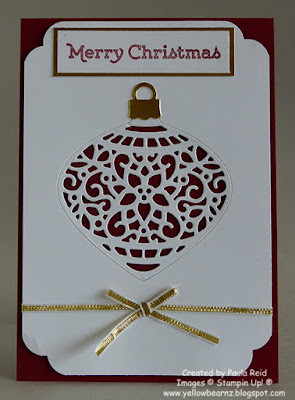
Here’s a card I made ages ago using three new products from the Holiday Catalogue – the Delicate Ornaments Thinlits, Versatile Christmas stamp set and the Curvy Corner Trio Punch.

I die cut the ornament and then put it back in the cutout (I used the new Tear and Tape Adhesive to hold the ornament in place but didn’t remove the backing tape).  The card front is adhered with dimensionals for height and finally – add a bow and you are done.

Supplies:
Stamp Set – Versatile Christmas
Card Stock – Cherry Cobbler, Whisper White, Gold Foil
Ink – Cherry Cobbler
Other – Delicate Ornament Thinlits Die, 1/8″ Gold Ribbon, Curvy Corner Trio Punch, Dimensionals

20% of selected stamps

By | November 16, 2015

Hi there

20% Off Stamps

Stampin’ Up! have just announced a new promotion – 20% of selected stamp sets from now until Friday 20 November.

Check out the full list here.  I will be placing an order tonight at 9:00pm so if there are any stamp sets you want email me before then.

Sprinkles of Life Ice Cream Cards

By | November 13, 2015

Hi there

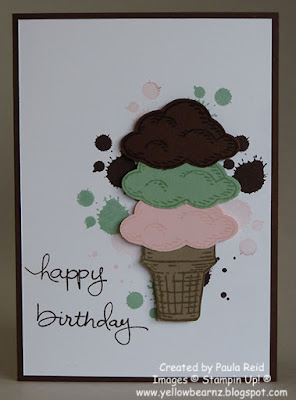
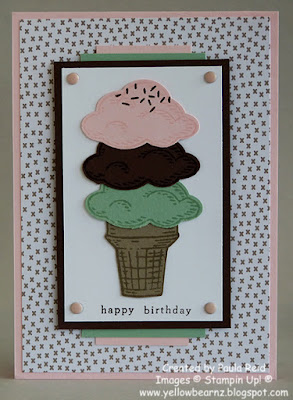
Last night Phil and I walked round to our local Ice Cream haunt – Ollies at Royal Oak.  They have a huge selection of favours.  A new one on the list is Lemon Cheesecake – it was SO yum.  I think there may be more evening walks in that direction!

These cards were made before I found Lemon Cheesecake but I’m sure still taste yum – chocolate, mint and strawberry flavoured ๐Ÿ™‚

Supplies:
Stamp Set – Sprinkles of Life, Gorgeous Grunge, Endless Birthday Wishes
Card Stock – Early Espresso, Chocolate Chip, Mint Macaron, Pink Pirouette, Tip Top Taupe Whisper White
Ink – Early Espresso, Chocolate Chip, Mint Macaron, Pink Pirouette, Tip Top Taupe
Other – Tree Builder Punch, Dimensionals

Supplies:
Stamp Set – Sprinkles of Life
Card Stock – Early Espresso, Chocolate Chip, Mint Macaron, Pink Pirouette, Tip Top Taupe Whisper White
Ink – Early Espresso, Chocolate Chip, Mint Macaron, Pink Pirouette, Tip Top Taupe
DSP – Cherry on Top DSP Stack
Other – Tree Builder Punch, Pink Pirouette Candy Dots, Dimensionals

Gruffalo Birthday Card

By | November 12, 2015

Hi there

This ‘lady of leisure’ has been slack again in the blogging department but I’ll think you’ll like todays post.

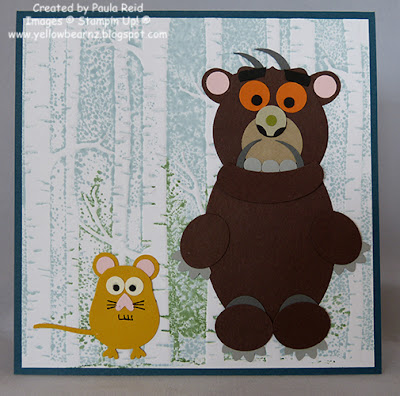
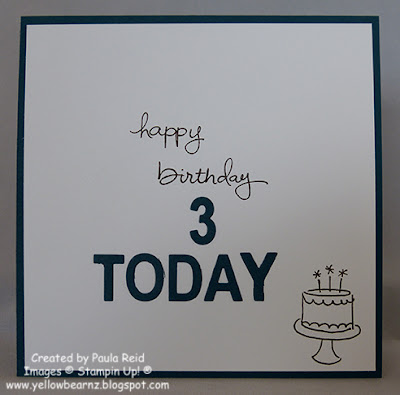
Our neighbours son turned 3 last month and had a ‘Gruffalo’ themed birthday party.  For those of you who don’t have young children and have never read a Gruffalo story book you need to head to the library and read one.  I love reading these stories to the kids when I babysit them – I’m not sure who enjoys them more ๐Ÿ™‚

I checked out Pinterest to see if I could find instructions for a Gruffalo punch art card – and to my surprise I did.  A big thank you to Kelly Kent – she’s a star with punch art creations.

Here’s my creation:

Supplies:
Stamp Set – Endless Birthday Wishes (one of my favourites), Lovely as a Tree
Card Stock – Chocolate Chip, Pumpkin Pie, Pink Pirouette, Basic Gray, Smoky Slate, Sahara Sand, Crumb Cake, Basic Black, Old Olive, Crushed Curry
Ink – Soft Sky, Garden Green, Chocolate Chip
Punches/Framelits – 1/2″ Circle, 1″ Circle, Large Oval, Small Oval, Bird Builder, Cupcake Builder, Owl Builder (mouse), Boho Blossom and Modern Label (retired), Oval Framelit, Deco Label Framelit
Other – Woodlands Embossing Folder

Visit to new Stampin’ Up! office

By | November 9, 2015

Hi there

It feels like summer has finally arrived – the weather has been so nice lately I haven’t wanted to be sitting in front of the computer hence the late blogging of my visit to the new Stampin’ Up! office last week.

I had a lovely time with Emma and did remember to take my camera so here are a few pictures of the office space and some displays she has on show.

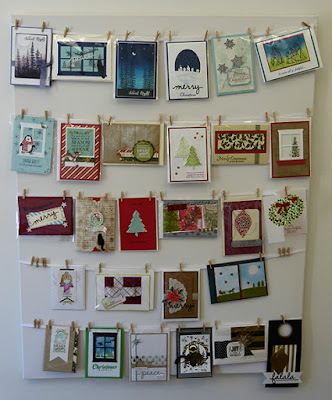
At our last wider team meeting we each made an extra swap so that Emma could add these to her displays and here it is:

We also had a competition for all NZ based demos to send in creations for the new office:

Behind me are some displays of DSP and some of our framelits – I love how she has them displayed so you can see all the different sizes and components – may have to use this idea myself.

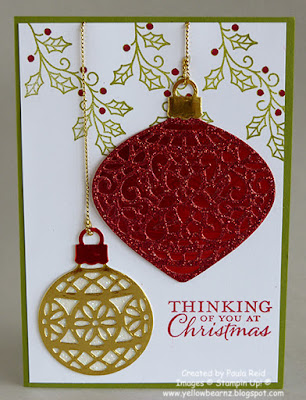
Embellished Ornaments – Glimmer and Shine

By | November 5, 2015

Hi there

Thought I’d get my next post up early as I’m heading to the new Stampin’ Up! office for a visit with Emma our Country Manager :).  Check back tomorrow for some photos – better pack my camera!

This is the second card we made for card class last month using the Embellished Ornaments stamp set and the Delicate Ornaments Thinlits Dies which you can buy as a bundle and save 15%.

To get our red berries we used the Real Red Marker to colour over the stamped image.  There isn’t a coordinating solid image for the smaller ornament so we cut a 1 3/4″ circle from the Dazzling Diamonds Glimmer paper and it fits perfectly behind the ornament.  We found the best way to adhere the foil and glimmer paper was with TomBow.

Supplies:
Stamp Set – Embellished Ornaments
Card Stock – Old Olive, Whisper White
Ink – Old Olive, Real Red
Other – Gold and Red Foil, Red and Dazzling Diamonds Glimmer Paper, Delicate Ornaments Thinlits, Gold Cording Trim, Real Red Marker, 1 3/4″ Circle Punch, TomBow Glue

Square Envelope Gift Card

By | November 4, 2015

Hi there

Finally got round to posting the cards we made at last months card class.  Now that I’m a ‘lady of leisure’ there should be no excuses for irregular blog posts!  My next task is to tidy my craft space so that I can craft!  Why is it you tidy the space and within a day you are back to only having an A4 size clear space?

Anyway on with our creations:

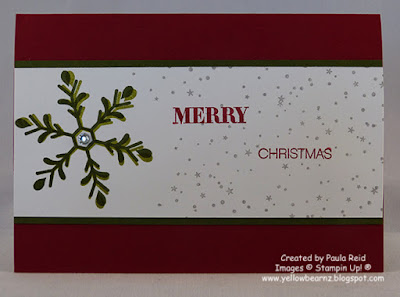
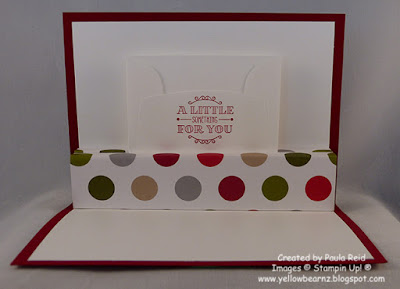
The first card we made was this cool gift card – thanks to Kristine McNickle for the tutorial.  With Christmas fast approaching this is a great way to ‘dress up’ a gift voucher for family and friends.  This style of card can be used of any occasion – just change the design on the front and the paper on the inside.

When designing this card front I originally stamped the ‘snowflake’ in Old Olive but it looked a bit plain so I restamped it in Mossy Meadow and positioned it just off the original image to give a shadow look.  Use the Stamp-A-Ma-Jig to make sure you line the second image just off the first.  The Stamp-A-Ma-Jig is a great tool to have in your kit – check it out on page 176 of the main catalogue.

I forgot to take a photo with the voucher in the envelope! but I’m sure you can image one sitting in the envelope.  The envelope is one of our Square Envelopes (7.9cm x 7.9cm) with the ‘flap’ cut off and is on page 149 of the AC.  This page (and page 147) has to be one of my favourites in the catalogue – there are so many amazing products hidden on these pages.

And here’s a side view.

This card uses the Holly Jolly Greetings stamp set which is sold on its own or as a bundle (save 15%) with the Christmas Greetings Thinlits Dies.

Supplies:
Stamp Set – Holly Jolly Greetings, A Little Something
Card Stock – Cherry Cobbler, Mossy Meadow, Whisper White
DSP – Merry Moments DSP Stack
Ink – Cheery Cobbler, Old Olive, Mossy Meadow, Smoky Slate
Other – Rhinestones, Stamp-A-Ma-Jig, Square Envelopes

Check back tomorrow for our second card ๐Ÿ™‚

SU Colour Challenge and Masking

By | October 27, 2015

Hi there

For those of you in NZ I hope you had an enjoyable Labour Weekend.  The weather was a bit of a mix but we were able to get out for a day trip on Sunday to Karangahake Gorge and had a wonderful day.  Last night we headed to Muriwai on the west coast for a picnic tea and then Phil did some photography.

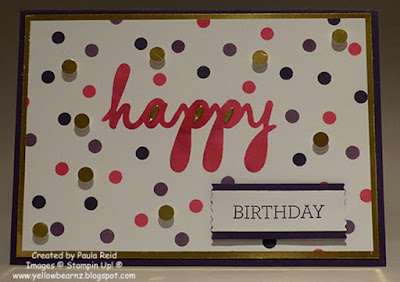
This card should have been blogged a couple of months ago!  It was inspired by a challenge from our Sydney office – use Melon Mambo, Elegant Eggplant, Perfect Plum and Gold combined with a mask.  I’ve gone with the Happy Patterns mask.

The mask comes with the ‘dots’ and the ‘happy’ cut out so I used my dauber in the various colours to create the background and the words.  You do have to be careful not getting ink in the wrong spots!  The gold dots are punched out of gold foil using the Cupcake Builder punch and stuck down with tiny bits of dimensionals for some added height.

Supplies:
Stamp Set – Crazy about You
Card Stock – Elegant Eggplant, Gold Foil
Ink – Melon Mambo, Elegant Eggplant, Perfect Plum
Other – Happy Patterns Decorative Masks, Washi Label Punch, Cupcake Builder Punch, Fine Tip Glue Pen, Daubers, Dimensionals

Awesomely Artistic – Special Birthday

By | October 24, 2015

Hi there

Wow – I can’t believe its been a week and half since I last did a blog!  I’ve had a couple of busy weeks prepping heaps of card kits for a community event that went really well plus my usual monthly card classes – so I haven’t had much ‘down time’ to blog.  I’ve made a list of all the cards I need to show so I’d better start blogging otherwise it will be Christmas before you see them!

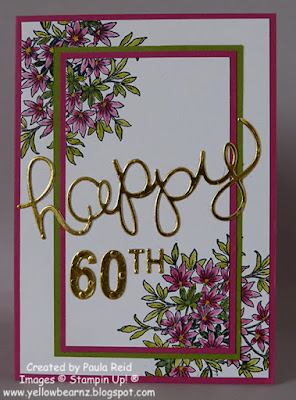
Last month I was fortunate to be asked to one of my customer and dear friends 60th birthday afternoon ‘High Tea’.  It was a lovely afternoon out in Devonport on Auckland’s North Shore.

I know I’ve said it before but this set has got to be my favourite one in the catalogue.  I enjoy ‘colouring in’ – it’s very relaxing and I really enjoyed creating this special card.

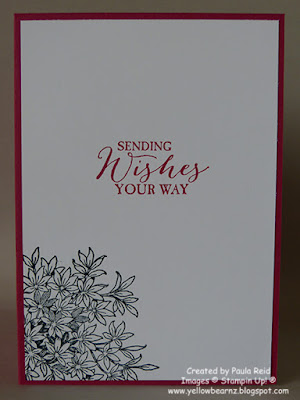
I’ve done a take on the Triple Time stamping technique for the front with lovely colour and then gone with just black and white for the inside.

Supplies:
Stamp set – Awesomely Artistic, Butterfly Basics
Card Stock – Rose Red, Old Olive, Whisper White
Ink – Rose Red, Daffodil Delight, Old Olive, Momento Black
Other – Gold Foil, Hello You Thinlits, Little Numbers Thinlits

Creative Inkers Christmas Extravaganza
Time – 12:30 – 5:15pm (doors open at 12:00pm so come early and check out the display boards)
Cost – $35.00

Venue – Auckland Bridge Club, 273 Remuera Road (Cnr Remuera and Armadale Roads)
What is an Extravaganza?  An Extravaganza event is where you come along for a fun afternoon and create five different projects.  All supplies are provided – all you need to bring are scissors and some adhesive.  We have door prizes and afternoon tea is provided.
If you would like to come please contact me by Wednesday 28 October.

Six Sided Sampler – #GDP005

By | October 7, 2015

Hi there

It feels like Spring has finally sprung today – it’s been a beautiful day here in Auckland.

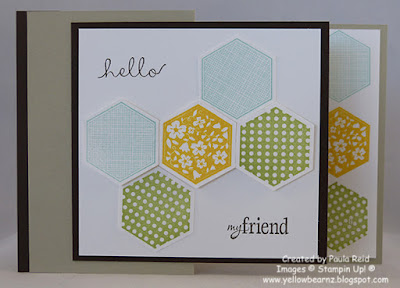
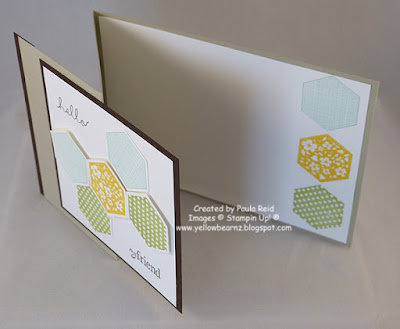
I enjoy creating cards using a challenge for inspiration.  For this card I have used the Global Design Project colour challenge of Daffodil Delight, Soft Sky and Pear Pizzaz.

I already had the card base which was left over from a card class and this is what I ended up with.

Don’t forget to check out Global Design Project and join in the fun.

Supplies:
Stamp set – Six Sided Samplet
Card Stock – Crumb Cake, Whisper White
Ink – Daffodil Delight, Soft Sky, Pear Pizzazz
Other – Hexagon Punch, Dimensionals

Awesomely Artistic – Spotlight Technique

By | October 4, 2015

Hi there

I’ve just realised I haven’t shown you the second card we made at card class last month!  (here’s a link to the first card in case you missed it)

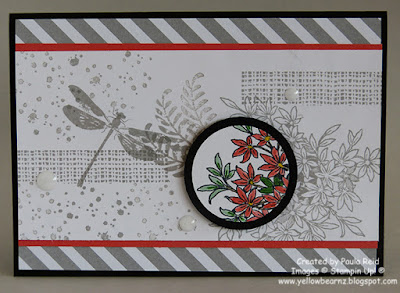
I’m really loving the versatility of Awesomely Artistic.  Here we’ve used it for the Spotlight Technique (CASED from Iina).  All the images are stamped in Smoky Slate and then one area is restamped and coloured in.

Did you notice the new embellishment we used?  They’re called White Perfect Accents and can be found on page 161 of the Annual Catalogue.

Supplies:

Stamp – Awesomely Artistic, Endless Birthday Wishes
Card Stock – Basic Black, Whisper White, Watermelon Wonder
DSP – Neutrals Color Collection
Ink – Smoky Slate, Watermelon Wonder, Mint Macaron, Cumcumber Crush, Daffodil Delight
Other – 1 1/2″ and 1 3/4″ Circle Punch, White Perfect Accents, Blender Pens, Dimensionals

World Card Making Day – Saturday 3rd October

By | September 27, 2015

Hi there

I hope you’ve had a great weekend enjoying the beautiful weather.

Next Saturday (3rd October) is World Card Making Day.  This year I thought I’d have an open home from 2:00 – 4:00pm where you could pop in and make a card for yourself and then we could make some cards for Ronald McDonald House Charity (RMHC).  Stampin; Up! donates time and money to support RMHC.  This year’s RMHC stamp set is Sprinkles of Life and for every set sold Stampin’ Up! donates $3.50 to RMHC.

So if you’re available and would like to come please email me so I know how many kits to prepare.  Please RSVP by Thursday night.

I look forward to seeing you on Saturday.

Butterfly Basics – Colouring with Blender Pens

By | September 25, 2015

Hi there

Here we are at the end of another week – I hope to get some more crafting in this weekend and have a play with some of my stamp sets and accessories that haven’t seen much ink or use lately.  Last weekend I used some challenges for inspiration (and motivation) so I may just do some more of that.  What gets your inspiration going?

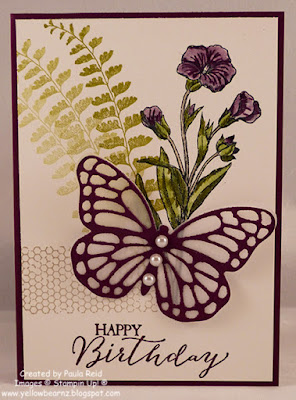
Today’s post is a birthday card for one of my team members – it’s a special birthday – which means a special card is needed.

I find colouring in images very relaxing and this set is great for that.  You get such different finished products each time even though it’s the same image.  For this card I’ve used the Shimmery White on the front rather than Whisper White as it’s really good for watercolouring.  My ink pads became my palette and with the help of my blender pen I coloured in the image.  I start with the lighter colours then add the dark colours for accent.

After cutting out the Butterfly I layered another cut out of vellum behind the card stock for strength and a lovely visual finish.  The finishing touch – some basic pearls.

Supplies:
Stamp Set – Butterfly Basics
Card Stock – Shimmery White, Whisper White, Blackberry Bliss, Vellum
Ink – Momento Black, Perfect Plum, Blackberry Bliss, Pear Pizzazz, Old Olive
Other – Bold Butterfly Framelits, Butterflies Thinlits, Basic Pearls, Blender Pens

Butterfly Basics Challenge Card

By | September 21, 2015

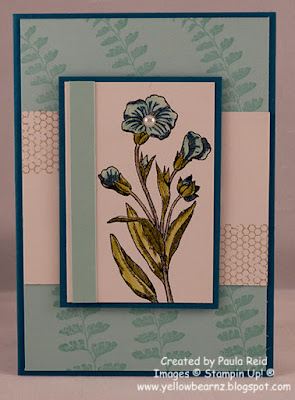
Hi there

It’s ages since I participated in a ‘challenge’ – so today’s card is a sketch challenge and a colour challenge  rolled into one.  For the sketch I’ve gone with one from Freshly Made Sketches – #204 and for my colour combo I’ve used ColorQ – #308 – although I have changed a few of the colours as I didn’t have them.  The original colours were Sahara Sand, Kiwi Kiss, Not Quite Navy and Soft Sky which I’ve changed to Sahara Sand, Old Olive, Island Indigo and Pool Party.  That’s the great thing with a challenge – it gives you a starting point.  I’ve also flipped the sketch 90 degrees.

Supplies:
Stamp set – Butterfly Basics
Ink – Momento Black, Sahara Sand, Old Olive, Island Indigo and Pool Party
Card Stock – Shimmery White, Island Indigo, Pool Party and Whisper White