CASED cards from Impressions Magazine

By | July 7, 2015

Hi there

Well the rain is really starting to fall here in Auckland – I think I might head to bed early tonight.  Nothing like being tucked up in a warm bed with the rain falling on the roof.

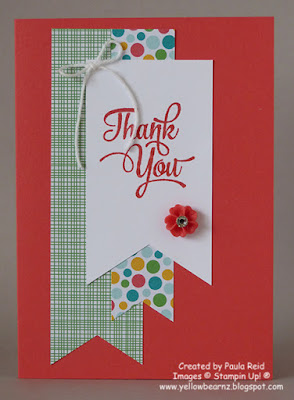
Last week I received my Impressions magazine in the post.  This is a magazine that Stampin’ Up! demos receive every two months and it’s full of ideas and techniques for us to try.  On the front cover were two cards that used the new Banner Triple Punch – I love this punch – so I thought I’d have a go at CASEing them and here’s what I came up with.

Original card

My take on it:

Supplies:
Stamp Set – One Big Meaning
Card Stock – Watermelon Wonder, Whisper White
Ink – Watermelon Wonder
DSP – Cherry on Top Paper Stack
Other – 2015-2017 In Color Blossom Accents, Whisper White Baker Twine, Rhinestone, Banner Triple Punch
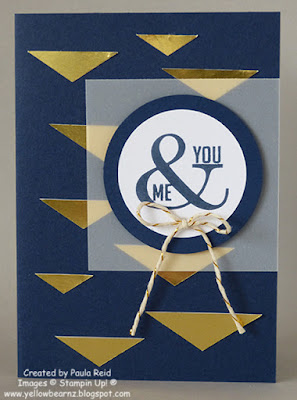
The second card uses the punched ‘triangles’ – so don’t throw them away – they’re great to uses as accents or even a background
Original card

My version

Supplies:
Stamp Set – Perfect Pennants
Card Stock – Night of Navy, Whisper White, Vellum Card Stock, Gold Foil Sheets
Ink – Night of Navy
Other – 2″ and 2 1/2″ Circle Punch, Banner Triple Punch, Gold Metallic Baker’s Twine, Dimensionals

Well I hope you’ve enjoyed my take on these two cards

Bonus Time

By | July 1, 2015

Hi there

From 1 July until 4 August it’s Bonus Time at Stampin’ Up!

Stampin’ Up! are offering amazing discounts on more products in the Weekly Deals and Clearance Rack from 1 July until 4 August.  Check them out below and go to my website to order them.  There will be extra Weekly Deals with up to 30% off retail and extra Clearance Rack items up to 60% off retail.

Newly added Clearance Rack items will be added in the beginning of July and will remain in the Clearance Rack section while supplies last.  Weekly Deals will be offered in limited quantities.  Once the quantity for the discounted items have been reached the items will be removed from the Weekly Deals – but they will still be available at the retail prices.

Week of June 30 – July 6: Limited quantity available at a discounted price: 
 Item # Product Name  Available Quantity 
138379 Build A Banner Kit 40
138315  Kraft Tag A Bag Gift Bags 110
138381  Tag A Bag Accessory Pack 100
138382 2014-2016 In Color Designer Washi Tape 300
139015  Sweet Li’l Things A4 Cardstock Assortment Pack 100
138418 Lost Lagoon 5/8″ Striped Cotton Ribbon 150
138283  Leaflets Framelits Dies   200
139019 Timeless Elegance A4 Cardstock Assortment Pack   100
127012 Floral Frames Collection Framelits Dies    600
130919 Hexagon Punch    250 
133737  Lovely Lace Textured Impressions Embossing Folder   250

Herringbone Technique – June Card Class

By | June 28, 2015

Hi there

Today we had a lovely lunch out with the family to celebrate the May and June birthdays.  We were away for our birthday, my brother was away for his and tomorrow it’s my niece’s birthday and she’s currently in the UK 🙂

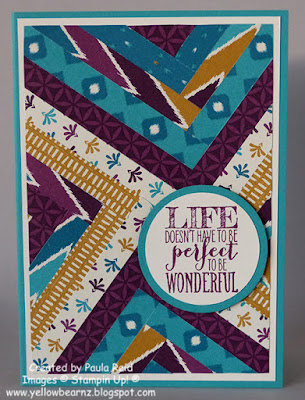
For my second card I wanted to use DSP as I for one always end up with scraps of DSP.  I had thought of doing a Starburst card but then saw some cards using the Herringbone Technique.  I hadn’t made a card using this technique before so went with this option.  I love the bold colours of the Bohemian DSP and teamed it up with Bermuda Bay (one of my favs) for the card base.  All the strips are 1cm wide.
I really love this sentiment – “Life doesn’t have to be perfect to be wonderful”.

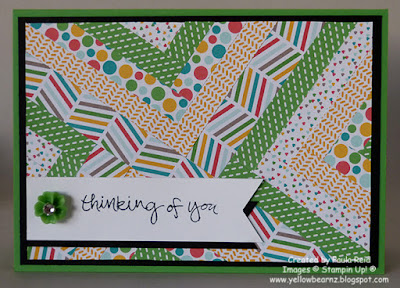
After making the above card I had a go using scraps from the 6″ x 6″ paper stack Cherry on Top.

For this one I cut the ‘centre’ strips at 1.5cm wide and then all the other strips at 1cm wide.

Supplies:
Stamp Set – Perfect Pennants, Sheltering Tree
Card Stock – Bermuda Bay, Very Vanilla, Cucumber Crush, Basic Black
Ink – Rich Razzleberry, Momento Black
Other – 1 3/4″ and 2″ Circle Punch, Banner Triple Punch, 2015-2017 In Color Blossom Accents, Rhinestone

Corner Flip Card – June Card Class

By | June 27, 2015

Hi there

I hope you have survived the cold snap we had last week.  One morning as I drove past the local high school it said -6 – I’m not sure if that was correct but it was a very cold morning for Auckland.  Today has been beautiful and this afternoon Phil and I went for a walk around Western Springs – something I haven’t done for years.  It’s so nice to be able to get outside and go for a walk while the sun shines.

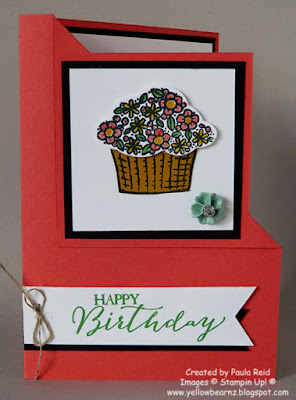
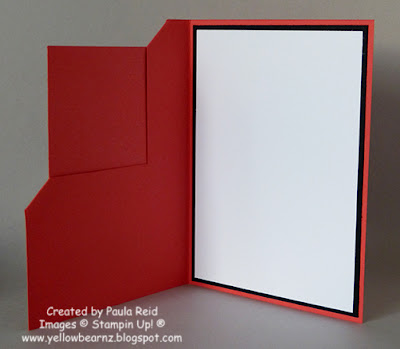
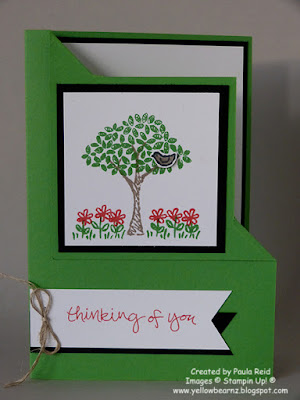
As I was preparing for this months card class I came across a really cool style of card from Dawn Olchefske which I just had to recreate.  After a few attempts I managed to get it to work with our NZ card measurements.  I gave the ladies two options for the front image – both using the Ronald McDonald House Charity set – Sprinkles of Life.  I love this new stamp set, it’s so versatile.

In her video Dawn shows a cool way of tying a bow using the handheld stapler – I’m sure I’ll be using this new technique on other cards.

Supplies:
Stamp set – Sprinkles of Life, Sheltering Tree, Butterfly Basics
Card Stock – Watermelon Wonder/Cucumber Crush, Delightful Dijon, Basic Black, Whisper White
Ink – Momento Black, Watermelon Wonder, Delightful Dijon, Cucumber Crush, Tip Top Taupe
Other – Tree Builder Punch, Banner Triple Punch, 2015-2017 In Color Blossom Accents, Linen Thread, Handheld Stapler, Rhinestone

2015-2017 In Colors Bookmark

By | June 21, 2015

Hi there

What a difference a night makes – today the rain has gone and we were able to have a lovely walk around the base of One Tree Hill/Cornwall Park with my parents.

Yesterday I showed you the card we made at my recent workshop.  Today’s post shows a bookmark the ladies also made using the new In Colors ink and cardstock and a new punch.  It’s always nice to have the real thing in your hands rather than just looking at it the catalogue.

I’m really liking the new In Colors (Mint Macaron, Delightful Dijon, Watermelon Wonder, Tip Top Taupe and Cucumber Crush) and have a number of creations to show you over the next couple of days.
The new punch we used was the Banner Triple punch – check it our on page 165 of the new catalogue.  You can cut your banner to three different widths – 2″ (5cm), 1 1/2″ (3.8cm) and 1″ (2.5cm).
Check back tomorrow for another card using new products.

Build a Birthday Make and Take

By | June 20, 2015

Hi there

It’s a bit wet and cold here today in Auckland – a great indoors day.  I have managed to finally get my monthly newsletter out – better late than never.  If you would like to receive a copy of my monthly newsletter then click on the button to the right of the screen and sign up.

In the last couple of years Stampin Up have introduced Designer Series Paper Stacks which have been great.  They were sized 11.4cm x 16.5cm (great for card fronts) but this year they have changed the size to 6″ x 6″ – this gives a bit more flexibility for project creation.  I love making 3D items and this size is perfect for some of the boxes I create.  Watch this space for some new creations 🙂

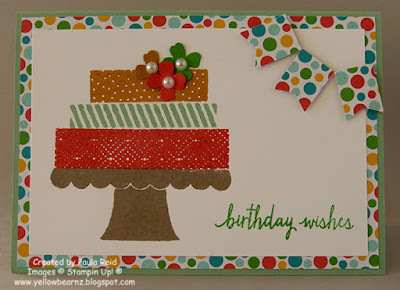
In the meantime here’s a card we made as our ‘Make and Take’ at a recent workshop I held which uses the new Cherry on Top Designer Series Paper Stack and a new stamp set – Build a Birthday.

Supplies:
Stamp Set – Build a Birthday, Perfect Pennants
Card Stock – Mint Macaron, Delightful Dijon, Cucumber Crush, Watermelon Wonder, Whisper White
Ink – Tip Top Taupe, Mint Macaron, Delightful Dijon, Cucumber Crush, Watermelon Wonder
DSP – Cherry on Top DSP Stack
Other – Itty Bitty Punch Pack, Banner Punch, Pearls, Dimensionals
Well I’m now off to tackle my craft space – I have a nice big desk but at the moment there is only about an A4 size of space to work on!

2015-2016 Annual Stampin’ Up! Catalogue is here

By | June 4, 2015

Hi there

I must still be on ‘holiday’ time – running a bit late in ‘Sharing the Fun’ of the new annual Stampin’ Up! catalogue.

If you haven’t received your copy of this fabulous catalogue then drop me a line or give me a call and I’ll get one out to you.  In the meantime you can view a pdf version by clicking here.

I’ll be back soon with some projects using products from the new catalogue.

Have fun checking out the catalogue.

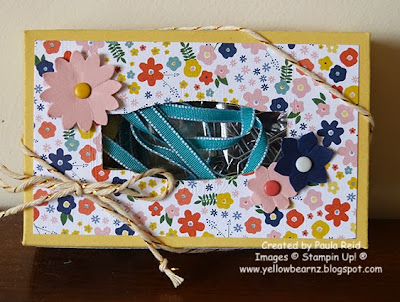
Fold Flat Window Box

By | May 28, 2015

Hi there

There are a couple of overseas blogs that I follow of fellow Stampin Up demos – one being Sam Donald in the UK.  She is very creative and makes some really cool projects and cards.

Recently she made a cute box that I just had to CASE.  She had made it to hold soap to give away as a gift but I’m sure it can hold a number of things – including chocolate!

Although mine holds an assortment of embellishments ready to give away.
Supplies:
Card Stock – So Saffron, Night of Navy, Blushing Bride
DSP – Flower Pot DSP
Other – Candy Dots, Gold Bakers Twine, Project Life Framelits – Cards and Labels, Window Sheet

Happy Birthday Phil (and to me)

By | May 26, 2015

Hi there

I’m coming to you today from Roche Percee Beach in New Caledonia :).  Phil and I are on holiday and today we are celebrating our birthday 🙂  That’s right – we share the same birthday (just different years) – how cool is that.  So we decided to spend this years birthdays in sunny New Caledonia.

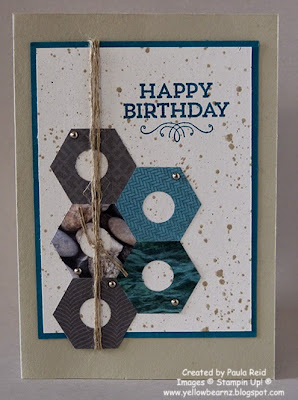
Phil’s card is a CASE from Di Barnes – I suddenly remembered on Sunday afternoon that I hadn’t made him a card and with a busy week ahead I had to get my skates on.  I checked out my Pinterest ‘Masculine’ Board for ideas and this one caught my eye.

The layout for this could be used for masculine of feminine depending on the colours/papers you use and by adding some bling or a bow.  I’ve used some scraps fro the Adventure Bound DSP pack to create my ‘bolts’.  As per Di’s tutorial – these are easy to create.  Using a 1/2″ circle punch, punch in the centre of your DSP then place the Hexagon punch over the circle and punch.

Supplies:
Stamp – Hey You, Gorgeous Grunge
Card Stock – Sahara Sand, Island Indigo, Naturals White
DSP – Adventure Bound
Other – 1/2″ Circle Punch, Hexagon Punch, Linen Thread, 1/8″ Mini Brads

Painted Petals and Chalk Ink

By | May 25, 2015

Hi there

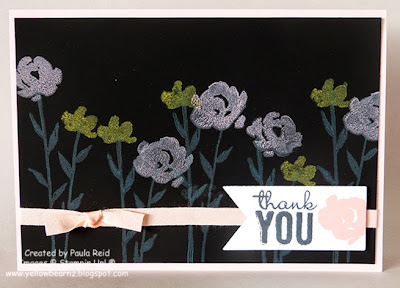
At our team training last month our ‘Make and Take’ project was this lovely card using the Painted Petals set, Chalkboard Card Stock and the Chalk Ink.  It’s a two step stamp set – (step one – stamp the stems and step two – stamp the flowers)

Two step stamp sets are great especially for flowers when you want the image to be in two or more colours.

Supplies:
Stamp – Painted Petals
Card Stock – Blushing Bride, Chalkboard, Whisper White
Ink – Aquamarine, Rose Coral and Yellow Citrus Chalk Ink, Momento Black
Other – Blushing Bride 1/4″ Cotton Ribbon

More Masculine Cards

By | May 23, 2015

Hi there

By the time you read this I’ll be relaxing in sunny New Caledonia.  Just so you don’t miss me I have scheduled a number of posts while we are away.

Here are the last of my masculine cards 🙂
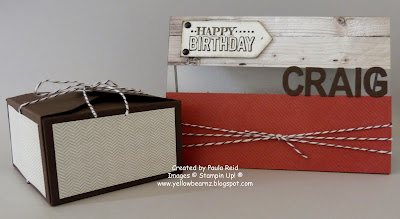
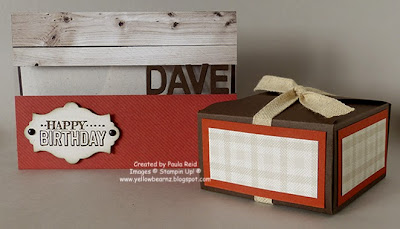
I forgot to take a photo of the box that went with this card!
My ‘Little Letters’ framelits have had a bit of a work out over the last couple of months 🙂
You will note a cute box with the cards above – these were made using the Gift Box Punch Board and they are so easy to make and don’t require any adhesive to put together AND they hold at least six Whittakers Chocolates!  The card stock is an 8″ x 8″ square so you get one out of a sheet of A4 card stock.  I really do like making 3D boxes.

May Card Class

By | May 21, 2015

Hi there

This week I’ve held my card classes and these are the cards we made.

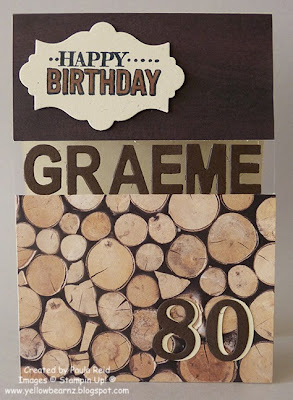
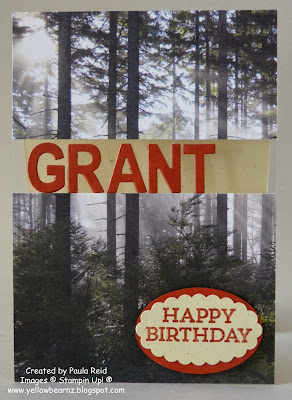
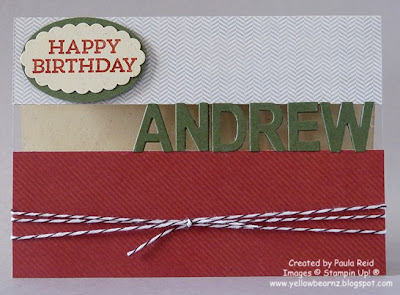
I wanted to do a masculine card to showcase the great DSP pack – Adventure Bound.  This design of card (by Julia Leece) can be used for any occasion – just change the DSP for a different look. Depending on the length of the name you can make this card in a portrait or landscape orientation.

This first one is for my brother whose birthday is next month – how organised is that.

And this one if for a friend of ours

This card style has been great as I seem to have had a heap of masculine birthdays in the last couple of months – I still have a few more creations to show.  I’ve loved using the Adventure Bound DSP for these cards.
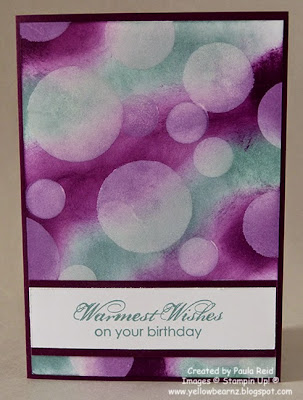
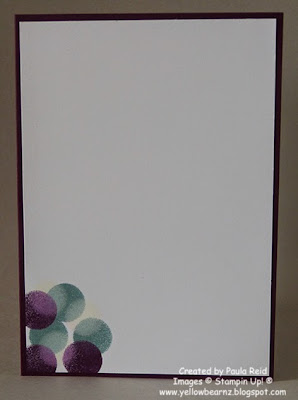
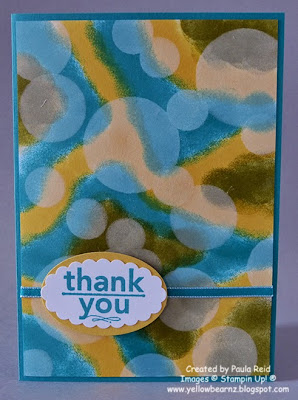
The second card is a technique called Bokeh – first you ink your card stock then create a template and apply Whisper White Craft ink.  I used the heat tool to dry off the ink before applying the Craft ink and then used the heat tool again as the Craft ink takes ages to dry.  I’ve been a bit late getting on board with this technique but better late than never.  It’s a fun technique although you do get a bit inky 🙂
This was my first attempt using a sponge to apply the colour – Blackberry Bliss and Lost Lagoon

For my second card I used a dauber – quite a different effect.  Here I’ve used Daffodil Delight, Bermuda Bay and Old Olive

Altered Notebooks

By | May 19, 2015

Hi there

I’ve cleared all the photos from my camera (in preparation of our holiday) and found these which I took ages ago.  They’re some more altered notebooks using the 3B1 notebooks.  I just cut them in half with my Table Top Cutter and covered them with DSP and then the fun begins to add the embellishments.

For the bottom pad in the photo above I adhered the DSP to a piece of Coaster Board (pg 192 of the AC) and then punched it out using the Pansy Punch.  It gives the flower a bit of dimension off the notebook.  The small flowers are stamped with the Pictogram Punches set and then punched out with the Petite Petals Punch.

These pens are great – you can get them at Warehouse Stationery or The Warehouse.  The end comes off allowing you to wrap a piece of DSP around the cartridge and then putting it back in the barrel of the pen to give the pretty pattern to match the notebook.

These make great gifts to give away.

Supplies:
Stamp Set – Pictogram Punches, Embellished Events
Card Stock – Whisper White
DSP – A variety of retired papers
Other – Brads, Coaster Board, Pansy Punch, Petite Petals Punch, Label Framelits, Buttons

Happy 5th Birthday Jake

By | May 18, 2015

Hi there

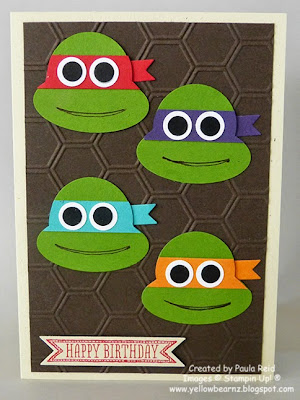
Last Tuesday our neighbours eldest son turned 5 and headed off to school 🙂  He had a great first day and is still enjoying it.

At the moment he’s really into Ninja Turtles which was the theme for his party.  So I’ve kept with the theme for our card to him.  I CASED this card from Pinterest – not sure who the original creator was but ‘thanks’.

Supplies:
Stamp set – Sketched Birthday
Card Stock – Naturals White, Early Espresso, Gumball Green (retired), Real Red, Elegant Eggplant, Bermuda Bay, Pumpkin Pie, Whisper White, Basic Black
Other – 1 3/4″ Circle, Large Oval, Owl Builder Punch, Itty Bitty Banner Framelits, Little Letter Framelits, Junior Typeset Alphabet (retired), Honeycomb Embossing Folder

April Card Class Project

By | May 17, 2015

Hi there

Where have the weeks gone!  I have my May card classes this week and I haven’t even shown you what we made last month!

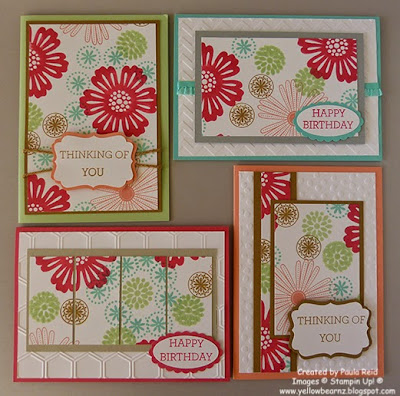
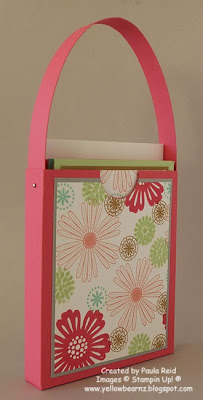
One Sheet Wonders (OSW) are a great way to create cards.  Most OSW use a sheet of 12 x 12 cards stock or DSP but last year I created one that uses an A4 sheet of card stock.  Depending on the stamp set you use you can create some very different cards.  Here’s one I did last year with a Christmas theme (and the template).  For my class last month I used one of the retiring sets – Mixed Bunch and the retiring In Colours 2013-2015 – you get a totally different look.

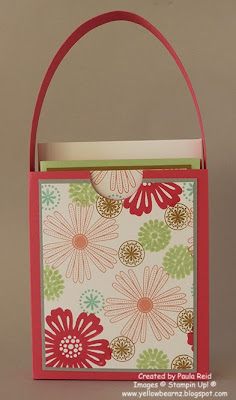
With my OSW you can also create a bag to hold your four cards and envelopes.  If you didn’t want to make the bag you could create more cards just by cutting the panels into different sections.  Maybe I should do another template with that option?

Supplies:
Stamp – Mixed Bunch, Crazy about You
Card Stock- Strawberry Slush, Pistachio Pudding, Coastal Cabana, Crisp Cantaloupe, Baked Brown Sugar, Smoky Slate, Whisper White
Ink – Strawberry Slush, Pistachio Pudding, Coastal Cabana, Crisp Cantaloupe, Baked Brown Sugar
Other – 1 1/4″ Circle, Large Oval, Scallop Oval, Decorative Label Punch, 1/8″ Mini Brads, Hexagon EF, Chevron EF, Decorative Dots EF, Baked Brown Sugar Thick Bakers Twine