From the Herd

By | January 6, 2015

Hi there

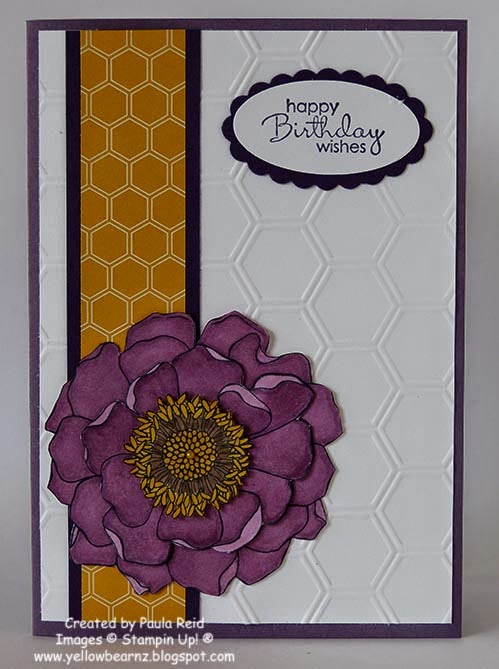
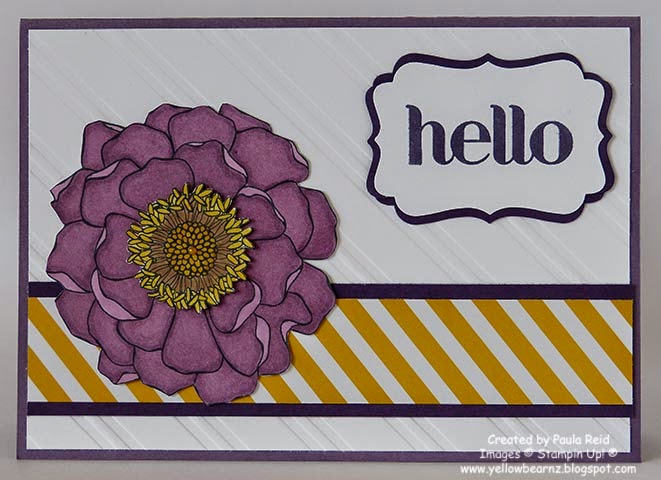
There are so many great products in the new Occasions Catalogue – my wish list is a long one!  After having a quick look through the catalogue I returned to page 15.  I think this set is so cute so here’s my first creation with ‘From the Herd’.  I have more ideas in my head for this set – I just need the time to sit and create.

Here are the 13 stamps that make up this set.
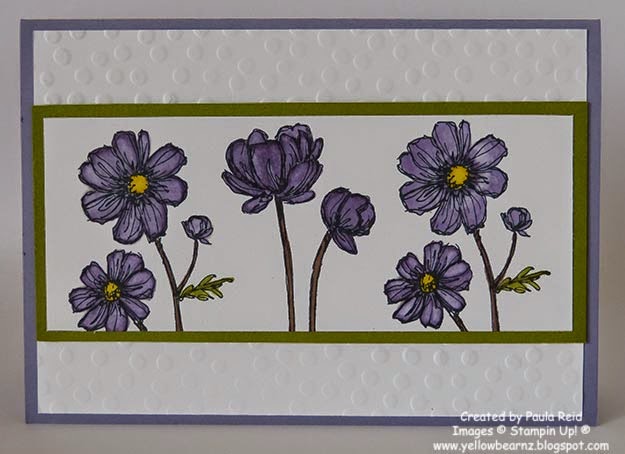
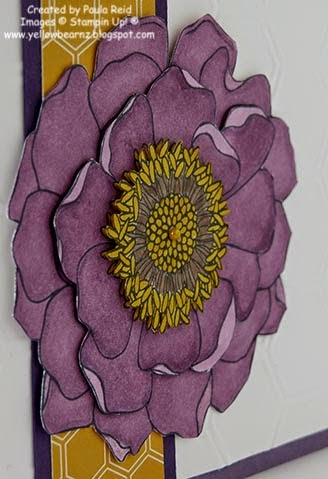
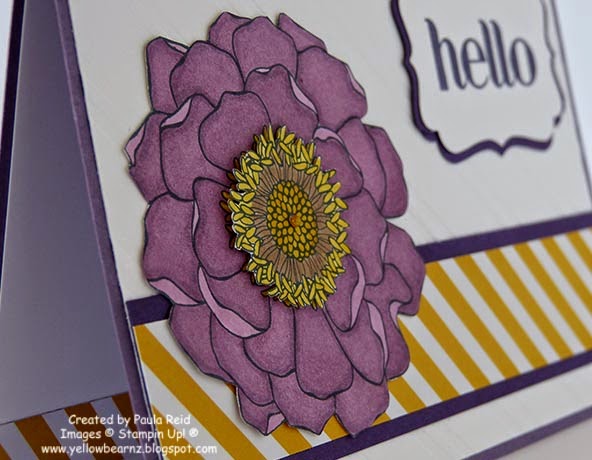
I’ve used my Blendabilities to colour this image – have you noticed that you can choose a Blendabilities assortment as your FREE item when you purchase $110 NZD worth of product?
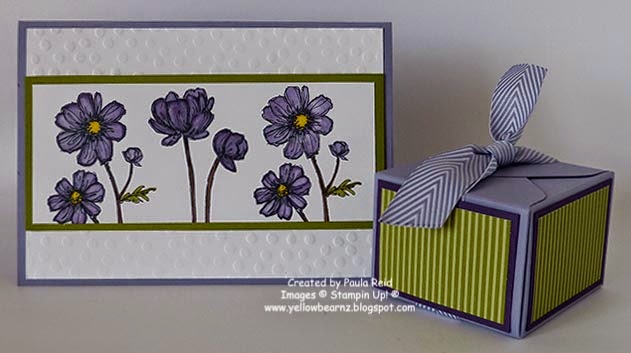
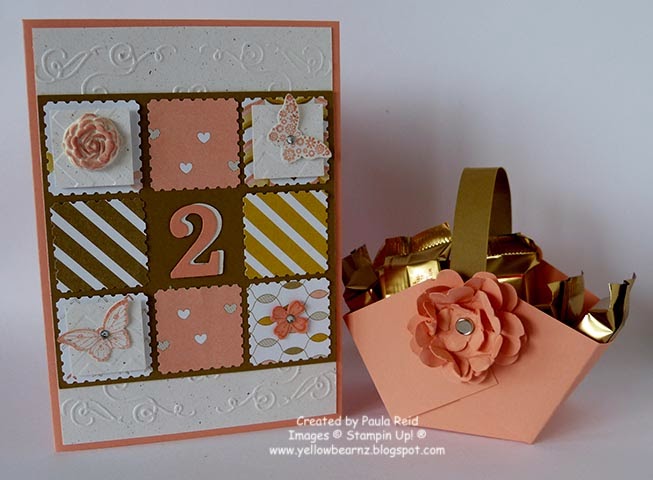
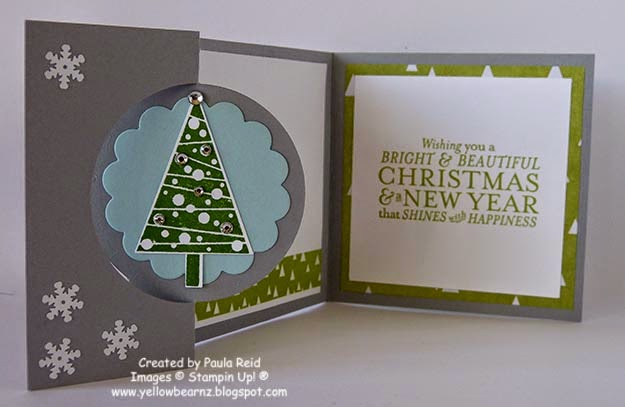
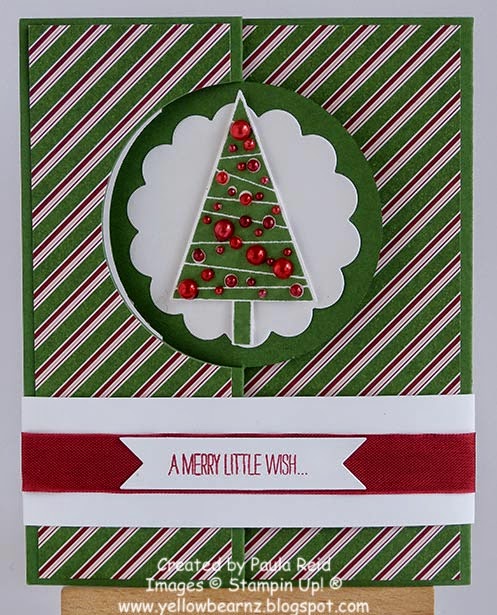
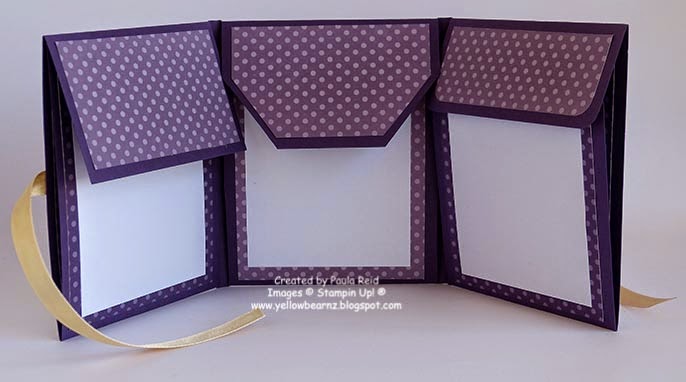
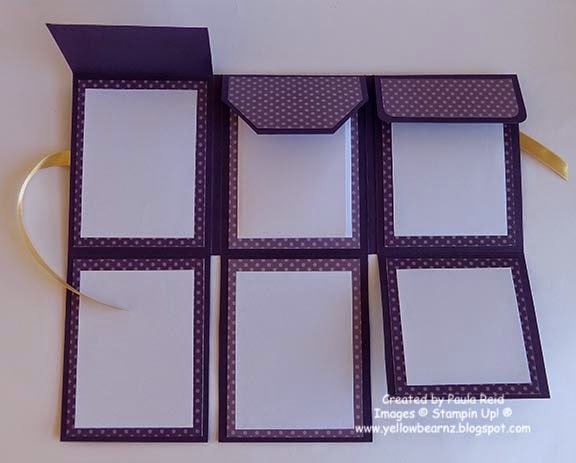
The Square Framelits came in handy to create the card.  The largest framelit – which is a scallop square formed the card base and then I used the 3 11/16″ frame for the picture.  I cut the mat to a 3 7/8″ square.
Supplies:
Stamp – From the Herd
Card Stock – Daffodil Delight, Night of Navy, Whisper White
Ink/Blendabilites – Momento Black, Melon Mambo, Pumpkin Pie, Smoky Slate, Crumb Cake, Daffodil Delight, Wild Wasabi
Other – Square Framelits
Don’t forget – if you have a big wish list like me why not host a party with some friends.

Occasions Catalogue and Sale-A-Bration have arrived

By | January 6, 2015

Hi there

The new Occasions Catalogue and Sale-A-Bration are now here 🙂  Click on the side bar to view the new catalogues.

The Occasions Catalogue is filled with great new products I’m sure you’ll love.

Along with the Occasions Catalogue we have Sale-A-Bration happening until 31st March 2015.  

MainAd_OLO_Jan52104_SP

What is Sale-A-Bration?  Well you get one FREE product for every $110 NZD that you spend

Ecard_SABshop_dbws_01.06.15_SP
So why not host a party during this time – there are great Hostess Benefits to be had.  If your party orders are over $450 NZD you get an additional $45NZ D in Hostess Benefits.  Contact me now to book a party for you and your friends.
Ecard_SABhost_dbws_01.06.15_SP
It’s also a great time to join Stampin’ Up! as a new Demonstrator.  New Demonstrators can choose one of the following limited-time Sale-A-Bration offers when joining between 6 January 2015 and 31 March 2015.  So if you’re interested in joing Stampin’ Up! please contact me for more details.

Ecard_SABjoin_dbws_01.06.15_SP

I’ll be back later with a project showcasing one of my favourite new sets from the Occasions Catalogue.

Label Thinlits Gift Card and Box

By | January 3, 2015

Hi there

I’ve been doing a bit of a cleanup of my photos and realised I hadn’t blogged my nephews birthday card from November – oops.

What do you get a 16 year old for his birthday?  Well this one is easy – give him a gift voucher to go shopping for birthday AND Christmas in one hit and buy clothes 🙂  Well I don’t take him shopping – the tradition is that he heads out for the day with his Gran (my Mum) and I just hand over the money at the end – works well for all parties 🙂

As there was no ‘gift’ to open on the day a box filled with chocolates is always a good substitute.

Supplies:
Stamp – Hey You, Another Great Year (retired)
Card Stock – Island Indigo, Brushed Silver, Whisper White
DSP – All is Calm
Other – Label Card Thinlit, Labels Framelits, Gift Box Punch Board, Silver Satin Ribbon

Bloom with Hope

By | January 2, 2015

Hi there

And Happy New Year – I hope your had a great New Years’ Eve and the New Year is off to a good start.  We had a very relaxing NYE which was really nice – watched the ‘Lego’ movie :).  Yesterday we went for a picnic to Woodbridge Gardens in Coatsville – the gardens were beautiful and cover 3 hectares.  While we were there Phil took a photo of me so that I could finally update my profile photo – the last one was taken back in 2011 when my hair was shorter.

Today’s project is one I created last month but ran out of time to show – note to self – be more organised for 2015!

Bloom with Hope is a Hostess only set (pg 240 of the Annual Catalogue) so if you’d like to own this set for yourself why not contact me to arrange a time for a workshop.  There are also added benefits for the next couple of months as Sale-A-Bration starts from Tuesday 6 January through till 31 March.  Check back on Tuesday for more information regarding Sale-A-Bration.

Supplies:
Stamp – Bloom with Hope, Hey You
Card Stock – Wisteria Wonder, Old Olive, Elegant Eggplant, Whisper White
Ink – Momento Black
Blendabilities – Wisteria Wonder, Crumb Cake, Old Olive, Daffodil Delight
Other – Decorative Dots Embossing Folder, Gift Box Punch Board, Wisteria Wonder Chevron Ribbon, Old Olive DSP Colour Collection (retired)

It’s a beautiful day here in Auckland so this evening we are heading to my favourite beach – Piha.  Have a wonderful evening.

Flower Shop with Vellum Card Stock

By | December 31, 2014

Hi there

I hope your holidays are going well and you’ve had some relaxation time.

My final card to show you for 2014 is one I taught at this months card class.  It’s for my friend who has a birthday today – Happy Birthday Karenina – I hope you’re having a great day with your lovely family.

It uses one of my favourite flower sets – Flower Shop.  Instead of stamping on card stock we stamped the flowers on Vellum Card stock with white embossing powder and coloured in from the back using a dauber.  This isn’t my idea – I CASED it from Rebecca Borkowski.  Why reinvent the wheel.  I did change a few things to suit the stamps I had.

Supplies:
Stamps – Flower Shop, Summer Silhouettes, Hey You
Card Stock – Strawberry Slush, Whisper White, Vellum Card Stock
Ink – Pear Pizzazz, Strawberry Slush, Coastal Cabana, Crisp Cantaloupe
Other – White Embossing Powder, Beautiful Wings Embosslit, Old Olive Bakers Twine, Wide Oval Punch, Basic Pearls, Large Scallop Edgelit, Dimensionals
I hope you all have a wonderful and safe New Years’ Eve with family and friends.
Thank you for visiting my blog this year – I have now reached over 115,000 visitors to my blog :).
Here’s to a great 2015

Happy Birthday Angela

By | December 30, 2014

Hi there

We had a great day out yesterday walking part of the Rail Trail through the Karangahake Gorge.  It was such a beautiful day with heaps of people out biking the trail.  After our walk we visited a nearby waterfall then headed to Kaiaua for fish and chips – yummy.

Today’s card was for a friend who had her birthday a couple of weeks ago – we had about four birthdays within a couple of days.

I wanted to use vellum for the Curvy Keepsake box so kept the theme running on the card as well.  I adhered the vellum to a piece of Whisper White card stock before adhering to the car base.

Supplies:
Stamp – Another Great Year (retired)
Card Stock – Brushed Silver, Whisper White
Ink – Wisteria Wonder
Other – Fancy Foil Silver Vellum, Clear Embossing Powder, Dimensionals, Wisteria Wonder Blendabilities, Curvy Keepsake Framelit

Happy Birthday Elise

By | December 28, 2014

Hi there

I hope you all had a lovely Christmas – ours was very relaxed spending time with the family.  The tree and all the Christmas decorations are now packed away and I’ve made a start on cleaning my craft space ready for the New Year.  I started on the cupboard and found a plastic bag with 9 bags of Whittakers mini slabs so I packed them into my ‘chocolate’ container – they ‘just’ managed to fit in.  On going back to the cupboard I found another plastic bag with another 9 packets of mini slabs!! I think I’d better stop buying chocolate and start making some projects to use them up.  Don’t worry the use by date isn’t till July 2015 :).

Now on with the card – a friends daughter turned two earlier this month and this is the card and basket I made.

I had the embossed piece of card stock sitting on my desk from some other project that changed so I used that as my base.  My nine squares fitted perfectly in-between the embossing and balanced the card front.  The little basket is one I saw on Dawn Griffith’s blog years ago and really love.
Supplies:
Stamp – Papillon Potpouri, Pictogram Punches
Card Stock – Crisp Cantaloupe, Baked Brown Sugar, Naturals White
DSP – Lullaby
Ink – Crisp Cantaloupe
Punches – Postage, Bitty Butterfly, Itty Bity Accents, Petite Petals, Pansy
Other – Simply Pressed Clay, Blossoms Clay Mold, Filigree Frame Embossing Folder, Chevron Embossing Folder, Timeless Type Alphabet Junior Sizzlets (retired)

Enjoy your holidays

Merry Christmas

By | December 25, 2014

Hi there

Merry Christmas everyone.  For those of you with children – I hope you weren’t woken too early 🙂

Over the last 25 days our neighbours two little boys (4 and 2) have been coming up each night to open an Advent Calendar box.  It has been so much fun watching them as they take turns each night to open a box and see what’s inside – chocolate :).  As they come up the drive you can hear ‘my turn tonight’ – they are so cute.

And here is the finished calendar:

I hope you all have a happy and safe Christmas with family and friends.
For unto you is born this day in the city of David, a saviour, who is Christ the Lord – Luke 2:11

Trim the Tree

By | December 23, 2014

Hi there

I am officially on holiday for two weeks 🙂  We are SO looking forward to having a break and just relaxing around home and doing some day trips.

Here is my final Christmas card for 2014 which I taught at a class earlier this month.

The ladies hadn’t crafted much before and did really well.  It was a fun evening.
I’ve used the small sequins adhered with a glue dot as my ‘bling’ on the Christmas tree. The sentiment was punched out with the Word Window punch then the ends squared off to fit perfectly in the banner framelit from the Label Card Thinlits set.
Supplies:
Stamp – Festival of Trees
Card Stock – Crumb Cake, Real Red, Garden Green, Whisper White
Ink – Garden Green, Real Red, Early Espresso
DSP – Trim the Tree Paper Stack
Other – Tree Punch, Itty Bitty Accents Punch, Label Card Thinlits, Frosted Sequins, Glue Dots

Only two more sleeps 🙂

Star Framelits Christmas Card

By | December 22, 2014

Hi there

Well it’s not many sleeps now till Christmas so I’d better hurry up and share with you the last of my Christmas cards.  This is one we made at last weeks card class.  Well actually I’ll share two cards with you which you can make from the pieces required.

I CASED this card and wrote the name down so I could link back to the blog post – but my desk is messy again and I can’t find the piece of paper!  Will update once I’ve located it.
To create these nest all the star framelits inside each other and cut one from card stock and one from DSP.  I cut my card stock 10cm x 14.3cm.  For the DSP star I cut two 3 3/4″ squares (different patterns) then cut them in half on the diagonal to create a total of four triangles.  Cut a 5 1/2′ square out of copy paper and adhere your triangles (point bit into the middle) then nest all the star framelits inside each other and cut.
Alternate the card stock and DSP to create the above cards.  I adhered the stars with Snail.
Supplies:

Stamp – Petite Pairs
Card Stock – Cherry Cobbler, Whisper White
DSP – Trim the Tree Paper Stack
Ink – Cherry Cobbler
Other – Star Framelits, Circle Card Thinlit, Word Window Punch, Modern Label Punch, Frosted Sequins, Dimensionals

Circle Card Thinlits Die – Extended Cards

By | December 20, 2014

Hi there

Sorry for the break in blogging so to make up I’ll show you three cards I’ve made recently using the Circle Card Thinlits die.

The first two are extended cards and you can get two of these from an A4 sheet of card stock which is great.

The first one uses the Wondrous Wreath stamp set and matching framelits.

The second card uses the Festival of Trees set and matching punch.

And the last card is an extended gift card – similar to the one we made at the Christmas Extravaganza

The section on the right is where you can put a gift card.
Supplies: Card One
Stamp – Wondrous Wreath, Bright and Beautiful
Card Stock – Smoky Slate, Lost Lagoon, Whisper White
Ink – Pear Pizzazz, Lost Lagoon
DSP – All is Calm
Other – All is Calm Washi Tape, Circle Card Thinlits Die, Wonderful Wreath Framelit, Silver Embossing Powder, Frosted Sequins
Supplies:  Card Two
Stamp – Festival of Trees, Bright and Beautiful
Card Stock – Smoky Slate, Pool Party, Whisper White
Ink – Garden Green, Pear Pizzazz
DSP – All is Calm
Other – Circle Card Thinlits Die, Tree Punch, All is Calm Washi Tape, Frosted Sequins, Glue Dots, Rhinestones
Supplies: Card Three
Stamp – Festival of Trees, Endless Wishes
Card Stock – Garden Green, Whisper White
Ink – Garden Green, Cherry Cobbler
DSP – Trim the Tree Paper Stack
Other – Bitty Banner Framelits, Circle Card Thinlits, Wide Oval Punch, Basic Pearls, Cherry Cobbler Blendibilities, Cherry Cobbler Seam Binding Ribbon, Dimensionals.
Over the holidays I’ll try and put together a tutorial showing how to make both styles of cards.

Wondrous Wreath Leaving Card

By | December 10, 2014

Hi there

I recently had to make a leaving card for one of the ladies at work.  She loved my Wondrous Wreath card in a non Christmas layout so I replicated it for her leaving card.

This card is made using a 12 x 12 sheet of card stock and with a few cuts and scores it transforms into this really cool album card which is also great for a leaving card.

Supplies:
Stamp Set – Wondrous Wreath
Card Stock – Elegant Eggplant, So Saffron, Crushed Curry, Perfect Plum, Calypso Coral, Crisp Cantaloupe
DSP – Elegant Eggplant and Perfect Plum Colour Collection (retired)
Other – Boho Blossom Punch, Owl Builder Punch, Glue Dots, Rhinestones, Dimensionals

Blended Bloom – Wisteria Wonder

By | December 6, 2014

Hi there

I forgot to do a post last night showing my final card using Blended Bloom! So here it is:

Wisteria Wonder is not a colour I’ve used much but I must admit this does look nice.  The ‘leaf’ image is from the Hostess set ‘Bloom with Hope’.  I’ve again raised the first layer of petals and made them a bit darker than the rest of the flower.  This card took some time to create as there was heaps of manual cutting around all the leaves – but the result is well worth it.
Supplies:
Stamp set – Blended Bloom, Bloom with Hope

Card Stock – Wisteria Wonder, Whisper White
Ink – Momento Black
DSP – First Edition Specialty Paper (retired)
Blendabilities – Wisteria Wonder, Old Olive, Daffodil Delight
Other – Wisteria Wonder 3/4″ Chevron Ribbon, Dimensionals

Well I’m off now to get ready for my day – hope you have a good one.

Blended Bloom – Daffodil Delight

By | December 4, 2014

Hi there

Sorry this post is a bit late – been a busy evening.

Yellow is my favourite colour (no surprises there!) so I couldn’t not create a ‘yellow’ Blended Bloom card.  For this card I layered the first ‘row’ of petals and centre with dimensionals.

To get my doily sitting correctly I cut it in half then covered up the gap with the matted piece of DSP.  I love the papers in the Moonlight Paper Stack and this one goes really well with the colours I’ve chosen.

Supplies:
Stamp Set – Blended Bloom, Sketched Birthday
Card Stock – Whisper White, Lost Lagoon, Basic Gray
Ink – Hello Honey, Momento Black
DSP – Moonlight Paper Stack
Blendabilities – Daffodil Delight, Crumb Cake
Other – Paper Doilies, Bitty Banner Framelits

Blended Bloom – Rich Razzleberry

By | December 3, 2014

Hi there

I’ve got two Rich Razzleberry cards to show today.  The first one I made for one of the ladies I used to work with.  Her favourite colour was purple so I’ve used a range of ‘purple’s’ on her card.

The card base is Perfect Plum, the trim is Elegant Eggplant and the flower is Rich Razzleberry.  I found the strip of the honeycomb paper from the Moonlight paper stack and matched it with the Honeycomb Embossing folder – I love how the Stampin’ Up! products mix and match.

Here’s a close up of the flower showing the different layers.  I was originally going to use dimensionals in between each layer but it was going to end up too high so I cut out a circle of card stock instead and used that as my ‘spacer’ between the layers.
Supplies:
Stamp Set – Blended Bloom, Petite Pairs
Card Stock – Perfect Plum, Elegant Eggplant, Whisper White
Blendabilities – Rich Razzleberry, Daffodil Delight, Crumb Cake
Ink – Momento Black, Elegant Eggplant
DSP – Moonlight Paper Stack
Other – Large Oval, Scallop Oal, Honeycomb Embossing Folder, Basic Pearl
The second card uses the same products as above – just a different patterned paper and of course the coordinating Stripes Embossing Folder.

The sentiment is from Four You – this is a great set and covers all the sentiments you need.  I’ve used my favourite punch – Decorative Label to punch and mat the sentiment.

For this flower I only layered the centre – done in the same way as the above card.  Did you notice the coloured basic pearl in the centre of the flower?  This was done using the Blendabilities – they’re not just for colouring in images.

I still have a few more cards using this stamp set so check back tomorrow for another installment.