Hi there
It’s hard to believe it’s only a month till Christmas – let’s hope the weather improves within the month!
Yesterday I attended our annual Thanksgiving Dinner at my upline Jacque‘s house. It’s a lovely time to spend together – sharing food, reflecting on the year and giving thanks for all that has happened – the good and hard times. Thank you Jacque and Rob for opening your home so that we can share Thanksgiving with you.
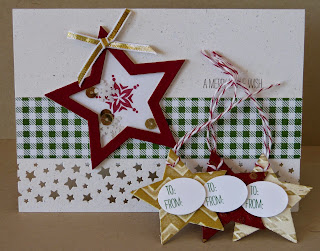
Now on with the project. This is the Christmas card I taught at my card class last week – it’s based on a swap I got from Sally Williams.
I changed the card front to be a Shaker Card using the foam Shaker Frames which are on page 205 of the Annual Catalogue. These frames come in circles but if you cut them up you can create all sorts of shapes for your shakers. The base star has been heat embossed – first ink you stamp up with VersaMark, then ink it with Night of Navy ink (it won’t damage you ink pad as VersaMark is clear) and then stamp on your card stock. Apply Clear Embossing powder and heat. A great way to get whatever colour you want.

Here’s a closer view of the ‘shaker’. To make the ‘shaker’ I cut one star out of Brushed Silver then added another star cut out of Window Sheet to the back of the Silver star then adhered my Shaker Frame pieces of foam to the Window Sheet. Once that was done I added the sequins then removed the backing from the foam and added another Window Sheet star – this stops the sequins falling out and is easier to adhere to the embossed star. Add some adhesive to the Window Sheet (I used my snail but only on top of the foam part) and adhere on top of the star.
To finish off the card I adhered (with a Two-Way Glue pen) some stars punched with the Confetti Stars Punch.
Thanks Sally for the card idea.
Supplies:
Stamp Set – Bright and Beautiful
Card Stock – Night of Navy, Brushed Silver,m Whisper White
Ink – Night of Navy
Other – Silver and Clear Embossing Powder, Silver Metallic Bakers Twine, Shaker Frames, Stars Framelits, Frosted Sequins, Confetti Stars Punch, Window Sheets
Check back tomorrow for the second card we made which was an invitation card.


