Blended Bloom – Rich Razzleberry

By | December 3, 2014

Hi there

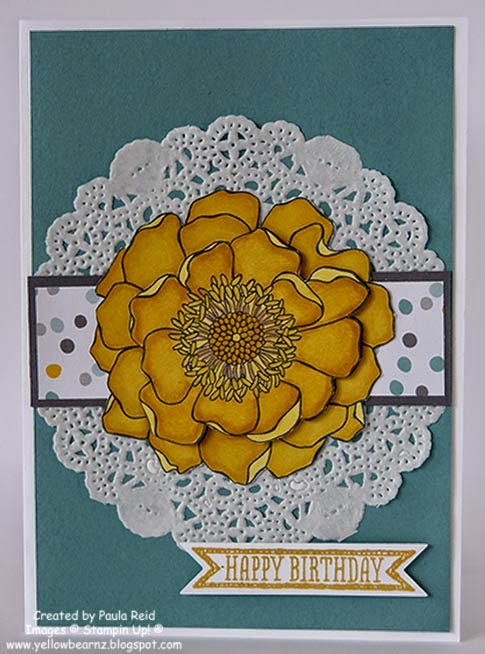
I’ve got two Rich Razzleberry cards to show today.  The first one I made for one of the ladies I used to work with.  Her favourite colour was purple so I’ve used a range of ‘purple’s’ on her card.

The card base is Perfect Plum, the trim is Elegant Eggplant and the flower is Rich Razzleberry.  I found the strip of the honeycomb paper from the Moonlight paper stack and matched it with the Honeycomb Embossing folder – I love how the Stampin’ Up! products mix and match.

Here’s a close up of the flower showing the different layers.  I was originally going to use dimensionals in between each layer but it was going to end up too high so I cut out a circle of card stock instead and used that as my ‘spacer’ between the layers.
Supplies:
Stamp Set – Blended Bloom, Petite Pairs
Card Stock – Perfect Plum, Elegant Eggplant, Whisper White
Blendabilities – Rich Razzleberry, Daffodil Delight, Crumb Cake
Ink – Momento Black, Elegant Eggplant
DSP – Moonlight Paper Stack
Other – Large Oval, Scallop Oal, Honeycomb Embossing Folder, Basic Pearl
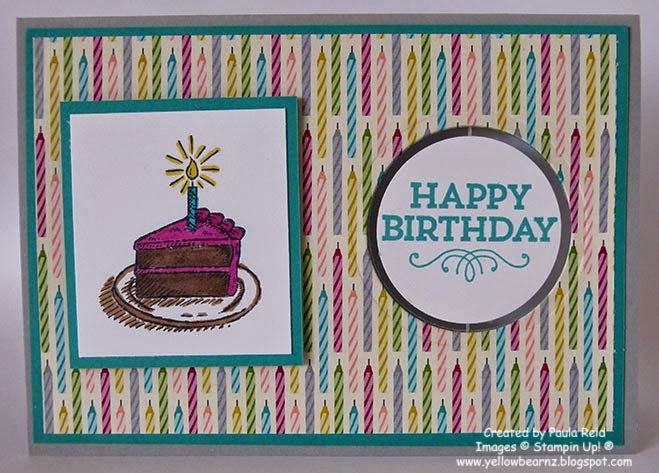
The second card uses the same products as above – just a different patterned paper and of course the coordinating Stripes Embossing Folder.

The sentiment is from Four You – this is a great set and covers all the sentiments you need.  I’ve used my favourite punch – Decorative Label to punch and mat the sentiment.

For this flower I only layered the centre – done in the same way as the above card.  Did you notice the coloured basic pearl in the centre of the flower?  This was done using the Blendabilities – they’re not just for colouring in images.

I still have a few more cards using this stamp set so check back tomorrow for another installment.

Blended Bloom – Pumpkin Pie

By | December 2, 2014

Hi there

Today’s ‘Blended Bloom’ is paired with Pumpkin Pie.  I’ve left the sentiment off at the moment as I wasn’t sure what type of card I would use this for.

I have found the colouring in rather relaxing and nice to do at the end of a busy day.

Supplies:
Stamp Set – Blended Bloom
Card Stock – Pumpkin Pie, Whisper White
Ink – Momento Black
Blendabilites – Pumpkin Pie, Daffodil Delight
DSP – First Edition Specialty Paper (retired)
Other – Hello Honey Satin Ribbon, Basic Black Grosgrain Ribbon (retired), Dimensionals

Blended Bloom – Coastal Cabana

By | December 1, 2014

Hi there

I thought I’d take a break from Christmas Cards and show you some of my creations using the lovely Blended Bloom stamp set and Blendabilities markers.

This is one of the first cards I made using the three shades of Coastal Cabana Blendabilities.  I started with the darkest around the edge then moving to the mid tone and then finally the lightest tone.

I made this tissue box cover to go with the card for a friends birthday.
Supplies:
Stamp set – Blended Bloom
Card Stock – Coastal Cabana, Bermuda Bay, Whisper White
Ink – Momento Black
Blendabilities – Coastal Cabana, Daffodil Delight, Crumb Cake
DSP – First Edition Specialty Paper, Kaleidoscope (both retired)
Other – 2013-2015 In Colour Sequins, Linen Thread, Basic Pearls, Itty Bitty Accents Punch, Oval Framelits, Dimensionals

Criss Cross Invitation Card

By | November 25, 2014

Hi there

Each month my Card Class ladies make two cards – this month we had a special request for an ‘Invitation Card’ design as well as a Christmas Card (see yesterday’s post).

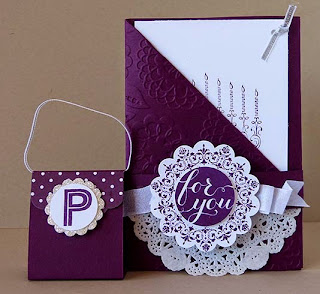
Now I haven’t done any invitation cards before so I flicked through my ideas book for some different styles of cards and came across a ‘Criss Cross’ card.  I had to do some changes in the measurements as it was originally designed to fit the US Letter size card.  This style could be used for all sorts of cards – just change the front sentiment for an embellishment or a different sentiment.

I’ve left my insert blank at the moment but I’m thinking I’ll use this card to invite our neighbours two little boys to come up each night and help me build an Advent Calendar (made using our Tiny Treat Boxes).

Supplies:
Stamp Set – Sketched Birthday
Card Stock – Soft Sky, Naturals White, Whisper White, Lost Lagoon
Ink – Lost Lagoon
DSP – All Is Calm
Other – Silver Satin Ribbon, Apothecary Accents Framelits, Small Oval Punch

Bright and Beautiful Shaker Card

By | November 24, 2014

Hi there

It’s hard to believe it’s only a month till Christmas – let’s hope the weather improves within the month!

Yesterday I attended our annual Thanksgiving Dinner at my upline Jacque‘s house.  It’s a lovely time to spend together – sharing food, reflecting on the year and giving thanks for all that has happened – the good and hard times.  Thank you Jacque and Rob for opening your home so that we can share Thanksgiving with you.

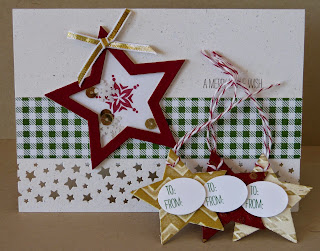
Now on with the project.  This is the Christmas card I taught at my card class last week – it’s based on a swap I got from Sally Williams.

I changed the card front to be a Shaker Card using the foam Shaker Frames which are on page 205 of the Annual Catalogue.  These frames come in circles but if you cut them up you can create all sorts of shapes for your shakers.  The base star has been heat embossed – first ink you stamp up with VersaMark, then ink it with Night of Navy ink (it won’t damage you ink pad as VersaMark is clear) and then stamp on your card stock.  Apply Clear Embossing powder and heat.  A great way to get whatever colour you want.

Here’s a closer view of the ‘shaker’.  To make the ‘shaker’ I cut one star out of Brushed Silver then added another star cut out of Window Sheet to the back of the Silver star then adhered my Shaker Frame pieces of foam to the Window Sheet.  Once that was done I added the sequins then removed the backing from the foam and added another Window Sheet star – this stops the sequins falling out and is easier to adhere to the embossed star.  Add some adhesive to the Window Sheet (I used my snail but only on top of the foam part) and adhere on top of the star.
To finish off the card I adhered (with a Two-Way Glue pen) some stars punched with the Confetti Stars Punch.
Thanks Sally for the card idea.
Supplies:
Stamp Set – Bright and Beautiful
Card Stock – Night of Navy, Brushed Silver,m Whisper White
Ink – Night of Navy
Other – Silver and Clear Embossing Powder, Silver Metallic Bakers Twine, Shaker Frames, Stars Framelits, Frosted Sequins, Confetti Stars Punch, Window Sheets
Check back tomorrow for the second card we made which was an invitation card.

Suspension Card

By | November 15, 2014

Hi there

What a day – I know it’s Spring but the weather today has been more like Winter.  I’ve had enough of all the wind and rain – roll on Summer.

Yesterday our friend’s son turned 6.  I was going to make him a Sweet Treats Cup card but had made his older brother one back in January so thought I’d better do a different card.  I looked through my list of different style cards and settled on a Suspension card – haven’t made one of these in ages.

Here’s a side view so you can see the sentiment suspended more – it also swivels around a bit.

For my Keepsake Box I cut the portions out of card stock then cut two pieces out of DSP and adhered them to the card stock before putting the box together – inside I popped four mini Whittaker slabs.

After Mister 6 had shared his treats with the family he came back and said to me ‘ for my next birthday can you please make me a card like Seb’s?’  Well I guess I should have gone with my first choice of card!  At least I know what style of card to make for him next year 🙂
Supplies:
Stamps – Sketched Birthday, Hey You
Card Stock – Smoky Slate, Bermuda Bay, Whisper White
DSP – Birthday Basics (retired)
Ink/Blendabilities – Bermuda Bay, Daffodil Delight, Coastal Cabana, Crumb Cake, Melon Mambo
Other – Curvy Keepsake Thinlit Die, Circle Thinlits, Dimensionals, Waxed Floss (non SU)

Snowflake Card Thinlits Die – Auckland Extravaganza Projects

By | November 11, 2014

Hi there

Sorry for being missing in action last week but I was busy preparing for last weekend’s Creative Inkers Christmas Extravaganza event.  It was heaps of fun with over 100 ladies busy creating all afternoon.

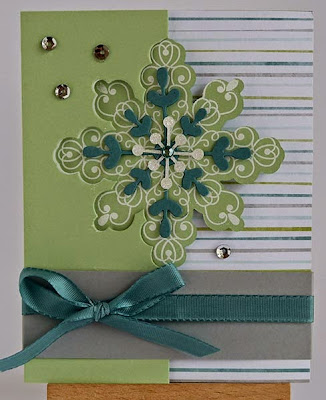
Here is the project I taught with Jacque and Narelle.  It uses the Snowflake Card Thinlits Die to create an extended card and gift card holder all in one.

and then opened so you can see the gift pocket on the right hand side ready for a gift card to be slotted in.

We did two variations – one using Pistachio Pudding and the other using Soft Sky.  The stamp set is Letterpress Winter and the DSP is the lovely All Is Calm.

Here are the other projects taught by:
Angela, Kathryn and Kath

Barbz, Vanessa, Justin and Sarajane
 

Rachael, Ann and Laurie

Sally, Leslie and Christine

Well I think we’re in for some cold, wet weather over the next few days so keep warm and dry – I’m sure Summer is just around the corner.

Inlaid Embossing – Shoebox Swap for Team Training

By | November 3, 2014

Hi there

Where did the last 10 days go?  I can’t believe we’re now in November which means that Christmas is just round the corner.  At least I have made a start on my Christmas cards.
Last month at team training we did a ‘Shoebox’ swap.  This was the first time I’d done one of these.  The idea is you bring all the bits for your card and then everyone makes it.  I decided to use the Inlaid Embossing technique for my card and this is what we all made.

It was an easy card to prep – add a variety of circle punches (I used 1/2″ up to 1 3/4″), a variety of embossing folders and scraps from the Brights Collection.  Never throw away your off cuts they make great cards.  This style of card can be used for all sorts of occasions – just change the colour of your card stock, punches and sentiment and away you go.
I adhere my circles with a Glue Stick – that way you can position them a bit before they really stick to the card base.  Once everything is stuck down place your card front in your chosen embossing folder and run through the Big Shot or Texture Boutique Machine.  Finally adhere to a card base and add a sentiment.
Supplies:
Stamp Set – Label Something
Card Stock – Real Red, Old Olive, Tempting Turquoise, Bermuda Bay, Pacific Point, Daffodil Delight, Whisper White
Ink – Real Red
Other – Arrows Embossing Folder, Artisan Label Punch

Bloom Cupcakes

By | October 25, 2014

Hi there

For those of you not in New Zealand, this weekend is our Labour Weekend.  It’s the first long weekend we’ve had since the beginning of June.  Traditionally this is the weekend you get out in the garden and start planting the summer veges.  It has certainly been the weather for it today – lovely blue skies and warm in the sun.  We managed to weed the front garden and prepare the vege garden – so a good day all round.

One of the guys I work with, his wife owns and runs Bloom Cupcakes on the North Shore here in Auckland.  They make the most amazing cupcakes (and they have GF).  On Wednesday night they won the Top Shop 2014 in the Food and Beverage category for Auckland – they also came second in the Overall Regional category.

So I just had to make a card to congratulate them – I knew exactly what to make and here it is:

You can also see it on the Bloom Cupcakes Facebook page here and here
Supplies:
Card Stock – Melon Mambo, Whisper White, Early Espresso, So Saffron, Pink Pirouette, Real Red
Punches – Word Window, Build A Cupcake, Scallop Edge Border
Other – Little Letters, White Satin Ribbon, Glue Dots

For all the Kiwis out there I hope you are enjoying your Labour Weekend too.

Wondrous Wreath with Flowers

By | October 22, 2014

Hi there

I love it when a stamp set can be used for more than one theme.  Wondrous Wreath doesn’t have to be just for Christmas.  Last week I taught the following card to my card class and they loved it.  I must admit it’s not my own creation – I CASED it from Carol after seeing her version on Pintrest – thanks Carol.

Carol’s card was a square one but I wanted our standard A6 size.  To fill the front I used the Stylish Stripes embossing folder.  Embossing folders add great texture to blank card stock.  The flowers are from the Boho Blossom punch with the centers cut using the smaller ‘eyes’ from the Owl Builder punch.  My flowers are So Saffron and Crushed Curry, Calypso Coral and Crisp Cantaloupe, Perfect Plum and Elegant Eggplant.
Supplies:
Stamp Set – Wondrous Wreath, Itty Bitty Banners
Card Stock – Elegant Eggplant, Perfect Plum, So Saffron, Crushed Curry, Calypso Coral, Crisp Cantaloupe, Whisper White
Ink – Pear Pizzaz, Old Olive, Elegant Eggplant
Other – Boho Blossom Punch, Owl Builder Punch, Bitty Banner Framelits, Wonderful Wreath Framelit, Stylish Stripes Embossing Folder, Blackberry Bliss Satin Ribbon, Rhinestones, Dimensionals

Wondrous Wreath – Circle Card Thinlits

By | October 20, 2014

Hi there

I hope you all enjoyed the Creative Inkers Blog Hop last night.  If you missed it check out my post here – it will take you to 15 other blog sites all showcasing Christmas cards and gifts.

Today my card uses the Circle Card Thinlits die in an extended format (the Label Card Thinlits die is on the Weekly Specials list this week at only $50.96 – normally $67.95).  You can get two of these cards from one A4 sheet of card stock 🙂

Here it is closed

and now open

As the wreath is slightly bigger than the ‘circle’ I adhered the front section shut which means it won’t swivel like the one I made here.  I stamped the little flowers (on the front of the card) with Cherry Cobbler ink but they looked a bit dull so I covered them with Cherry Cobbler Dazzling Details.  I love using Dazzling Details – you get the glitter effect without having glitter all over you and your craft space!

Don’t forget if you would like to purchase the Label Card Thinlits die while it’s on special email me now as I’m placing an order on Tuesday (21st October) evening.

Supplies:
Stamp Set – Wondrous Wreath, Bright & Beautiful
Card Stock – Cherry Cobbler, Whisper White, Gold Foil
Ink – Cherry Cobbler, Old Olive, Mossy Meadow
DSP – Trim the Tree Paper Stack
Other – Circle Card Thinlits Die, Wonderful Wreath Framelits, Cherry Cobbler Dazzling Details, Cherry Cobbler Seam Binding Ribbon, Basic Pearls

Holiday Supplement Catalogue

By | October 20, 2014

Hi there

The Holiday Catalogue has been a hit so far, but we’re thinking that it really isn’t possible to have too much of a good thing!  So this year Stampin’ Up! are giving us some additional Christmas themed products in the Merry & Bright Extra Special Christmas Supplement – check it out here.

I will be placing an order tomorrow night (Tuesday 21st October) so if you want to order anything just send me an email or you can place an order on line.

Check back later tonight for some more creations using products from the Holiday Catalogue.

Creative Inkers Christmas Blog Hop

By | October 19, 2014

Hi there

It’s time for another Creative Inkers Blog Hop.  The theme this time is Christmas.

If you’ve been following the blog hop you will have come from Lisa Bullock’s blog.  If you’ve just joined my blog sit back and enjoy a feast of Christmas creations.  At the bottom of this post is a list of all the blogs – just in case you get lost.  Now on with my project.

The products I’m using are from the Holiday Catalogue – Gift Box Punch Board, Filigree Frame Textured Impressions Embossing Folder and the Bright & Beautiful stamp set.

I decided to go with a more ‘regal’ look rather than the traditional ‘red and green’.

The design of this embossing folder fits more for the US card size than our A6 size.  To overcome this I cut a piece of Naturals White card stock 10.3cm x 13.5cm and the image will then fully imprint on your card stock – thanks Sara for your tips. By cutting your card stock to this size you end up with a ‘gap’ on the card front.  To fill the gap I used the lovely Gold Satin Ribbon, wrapped it around the card front and tied a knot – mission accomplished :).  It’s also nice seeing the strip of gold ribbon from the inside.  The sentiment is heat embossed with gold directly onto the card base.  Using the Deco Label Framelits (it’s the only one the fitted the sentiment in perfectly) I cut a ‘hole’ in the Naturals White overlay.  To create the gold frame I placed two Deco Labels inside each other and cut at the one time – this creates a perfect frame.  The images on the inside of the card are also heat embossed with gold.

To finish off the gift I made two boxes using the new Gift Box Punch Board.  I started with the same size card stock – 8″ x 8″ – but scored then at different measurements.

Supplies:
Stamp Set – Bright & Beautiful
Card Stock – Blackberry Bliss, Brushed Gold, Naturals White
Other – Gold Embossing Powder, Filigree Frame Embossing Folder, Gift Box Punch Board, Deco Labels Framelits, Gold Satin Ribbon

I hope you’ve enjoyed this post – now it’s time to head over to Heather Stewart’s blog to see what she’s created.

Lovely as a Tree – Sympathy

By | October 16, 2014

Hi there

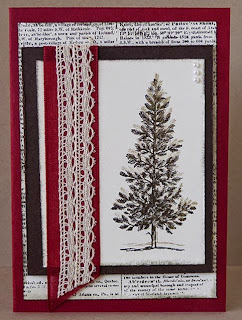
I recently needed to make a quick sympathy card for a guy I used to work with.  My ‘go to’ stamp set in cases like this is Lovely as a Tree and here’s what I created.

I’ve heat embossed the image in Early Espresso then using a Blender Pen applied ink to colour the trees and grass.  I really love this effect – the trees end up looking 3 dimensional.
Sorry there’s no picture of the inside – I realised after I’d written in it that I hadn’t taken the photo!

Supplies:
Stamp set – Lovely as a Tree, Thoughts and Prayers (for sentiment that was on the inside!)
Card Stock – Early Espresso, Very Vanilla
Ink – Old Olive, Cajun Craze, Crushed Curry
Other – Early Espresso Embossing Powder, Heat Gun, Dimensionals, Blender Pens

Tape It – World Card Making Day project

By | October 8, 2014

Hi there

I’ve finally found time to post the card I made on Saturday for World Card Making Day.

Often we (or is it only me) forget to use stamp sets we’ve had for a while.  So I set myself a challenge in creating a card last Saturday – use a set that hasn’t seen ink for some time.  And the winner was ‘Tape It’.  The original plan was to have the images stamped directly onto the card front but as I started stamping some of the images didn’t end up being the same distance apart – so a quick change of plan was needed.  I finished stamping the images then cut them out and arranged them on the card front with dimensionals.

There were a couple of images that weren’t the full length so they got adhered to the inside of the card.

It’s great when a card comes together nicely after a slight hiccup 🙂

Supplies:
Stamp Set – Tape It, Four You
Card Stock – Real Red, Naturals White
Ink – Real Red, Momento Black, Wild Wasabi, Island Indigo, Tangerine Tango, Crushed Curry, Early Espresso
Other – Dimensionals