Sweet Treat Cup Card

By | September 30, 2014

Hi there

Yesterday my nephew turned 20 (not sure where those years have gone!).  I wanted to make a fun card for him and here’s what I created.

To create my background I’ve used the Dots Decorative Mask and matched the inks to the M & M’s inside the sweet treat cup.
As you know no birthday card is complete without a chocolate treat container.
I love the new Curvy Keepsake Box die and they are so quick to make.  Inside they hold some Whittakers mini chocolate slabs and one box also contains some money 🙂 to go towards some new boots he wanted.
Supplies:
Stamp Set – Hey You
Card Stock – Real Red, Whisper White
Ink – Real Red, Daffodil Delight, Pacific Point, Tangerine Tango, Wild Wasabi, Early Espresso
Other – Curvy Keepsake Box Thinlit Die, Washi Tape, Decorative Label Punch, Sweet Treat Cup, 1 3/4″ Circle Punch, 2 1/2″ Circle Punch
Happy Birthday Matt – hope you had a great day 🙂

Endless Wishes One Sheet Wonder and an ESAD Blog Hop

By | September 27, 2014

Hi there

Welcome to the ESAD Holiday Catalogue Blog Hop.  You may have arrived from Christie’s blog or just joined my page.

So what is ESAD?  ESAD stands for “Extra Special Australasian Demonstrators” and it is an on-line group just for Australian and New Zealand Stampin’ Up! demonstrators.
 
We love what we do & love to share with our customers, friends, and wonderful blog visitors. We also share what we love in our ESAD Demonstrator community, through swaps, challenges, sharing knowledge, ideas & friendship, and we’re always there to help and support each other.
 
So if you’re a Stampin’ Up! demonstrator located in Australia or New Zealand, then please feel free to leave me a comment with your email address and I’ll contact you with information on how to join our wonderful group.
 

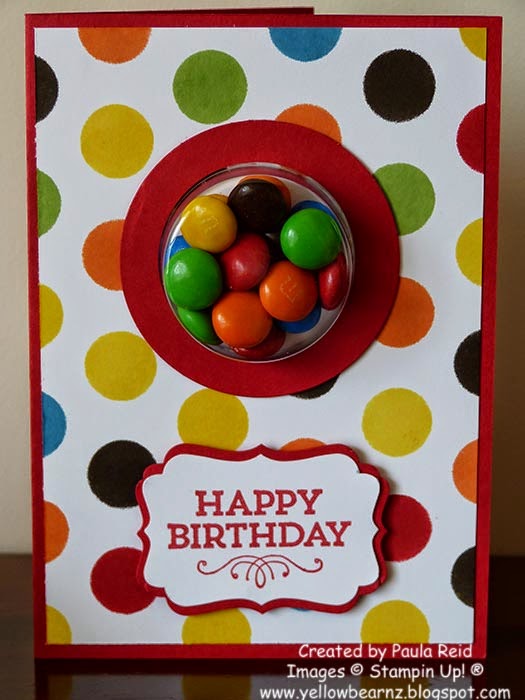
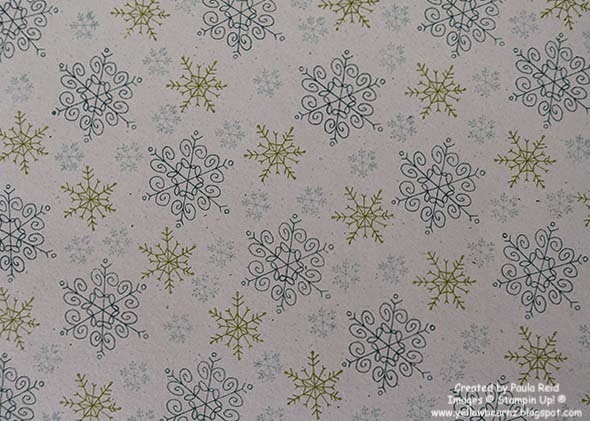
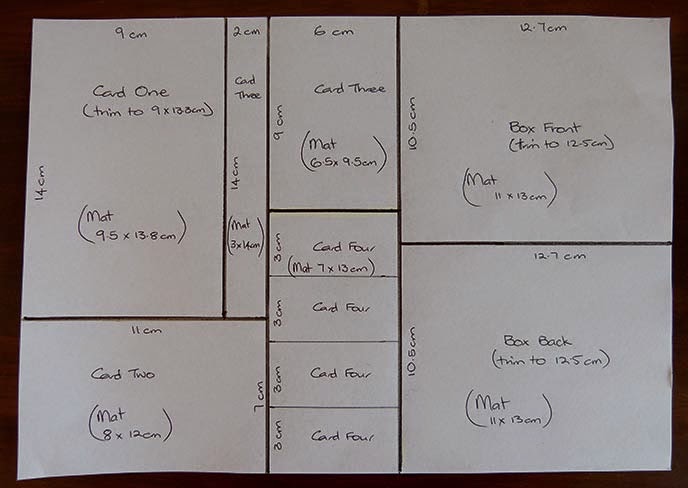
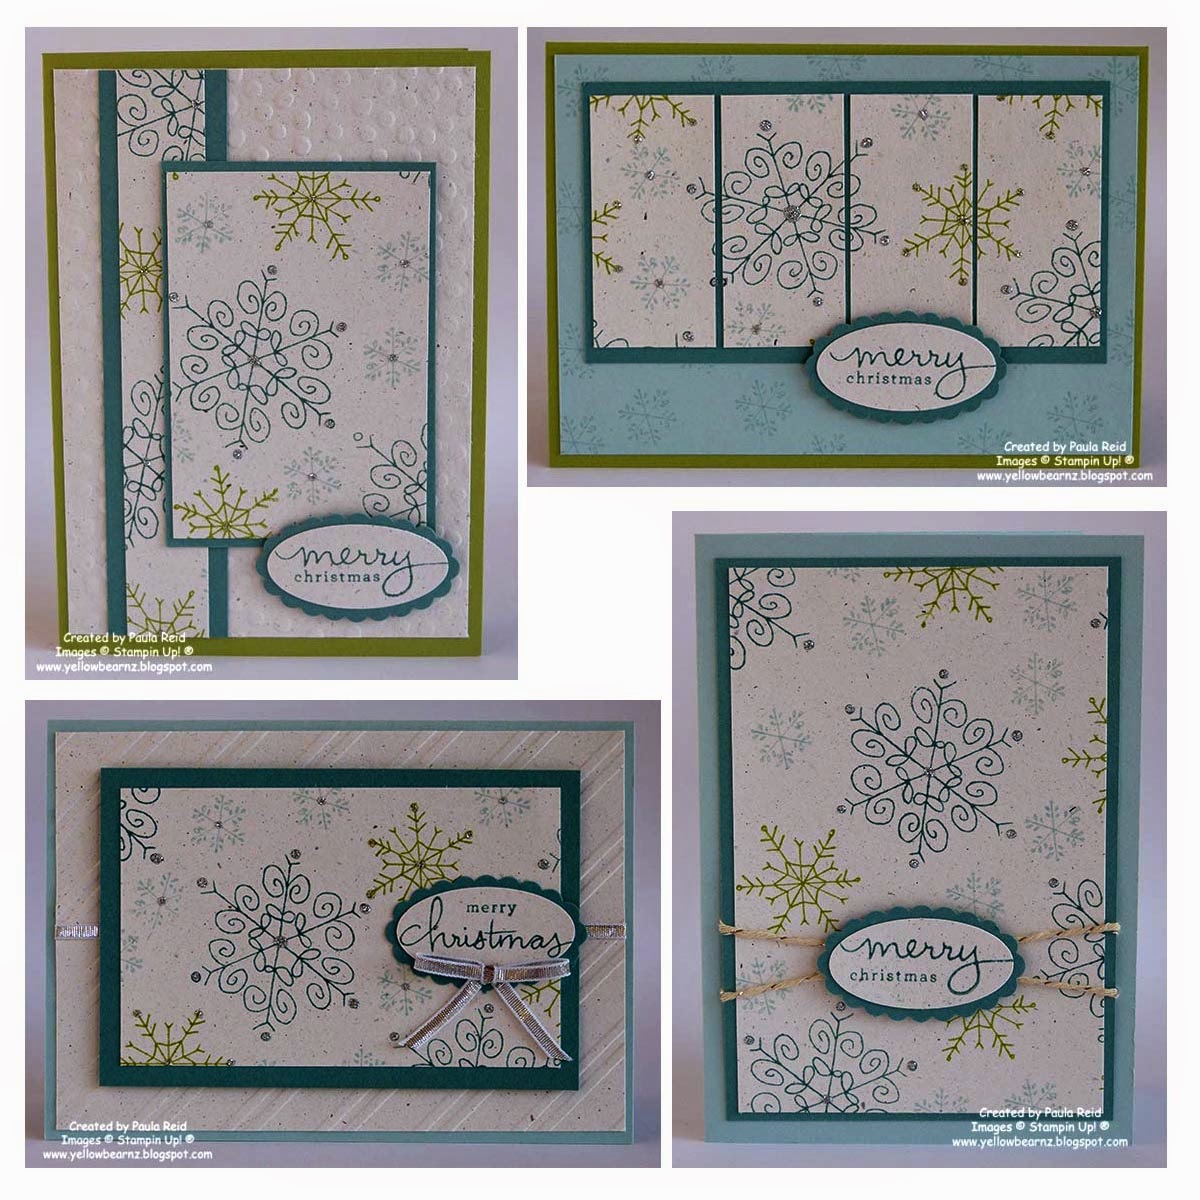
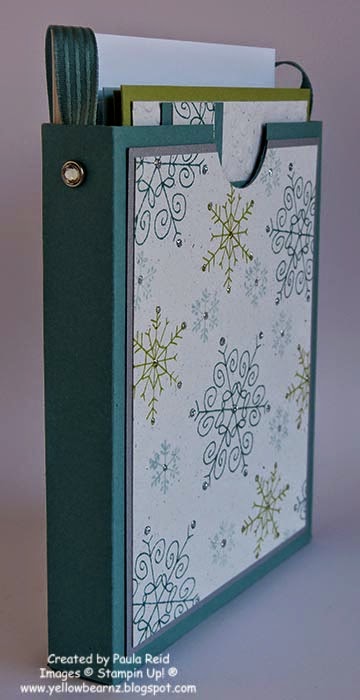
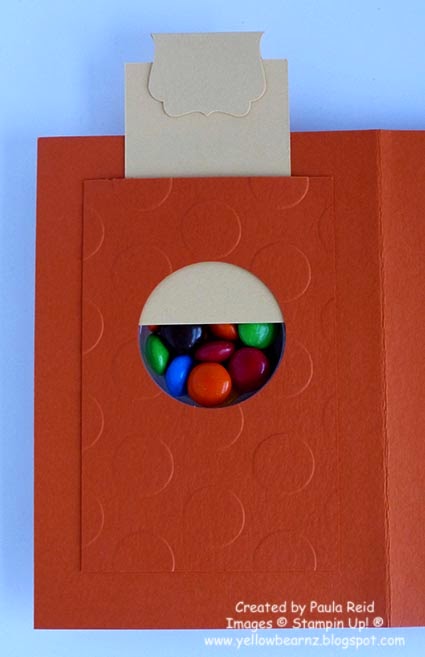
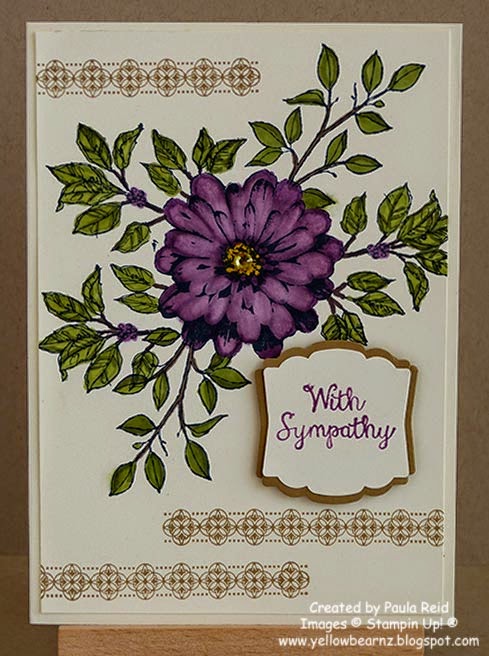
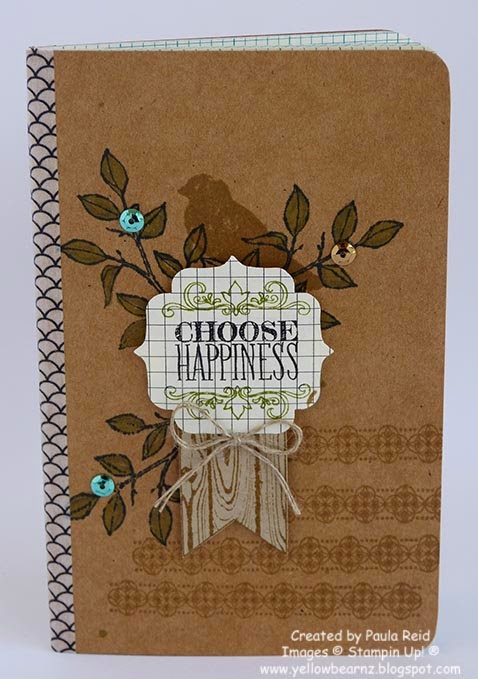
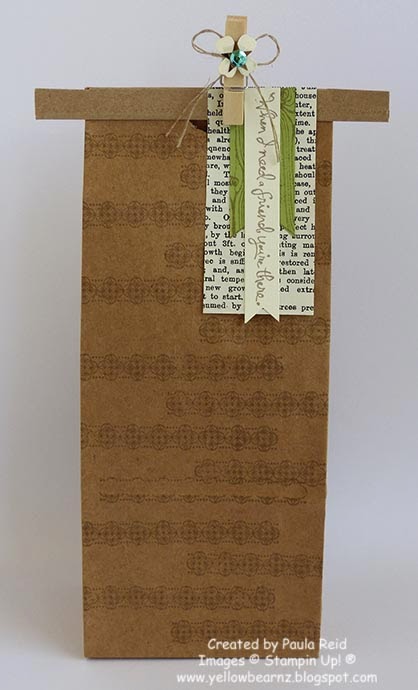
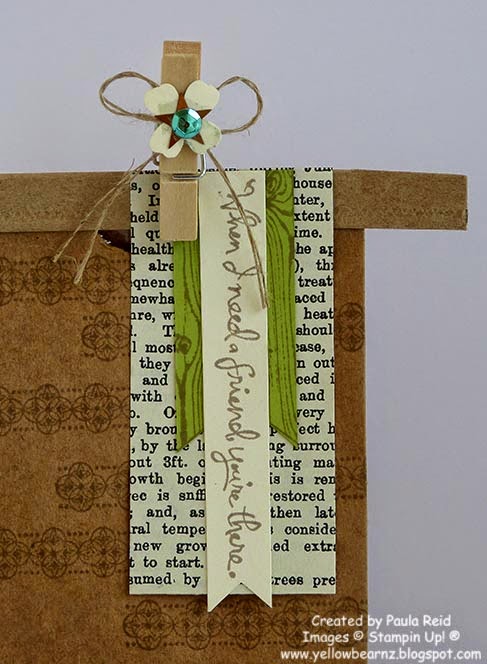
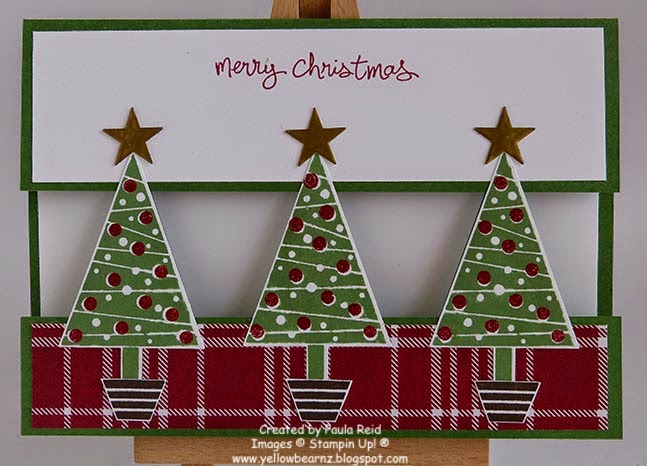
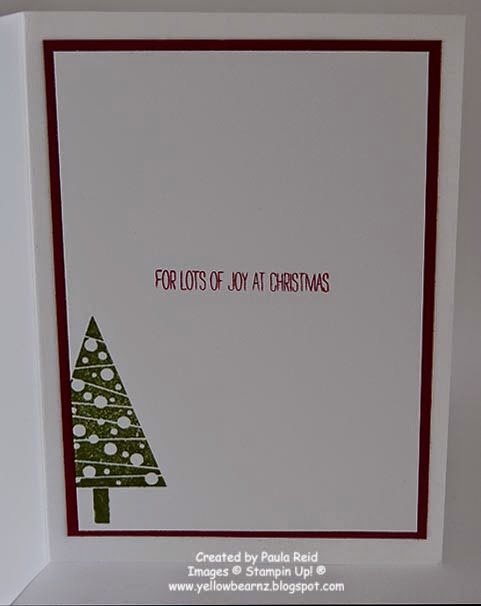
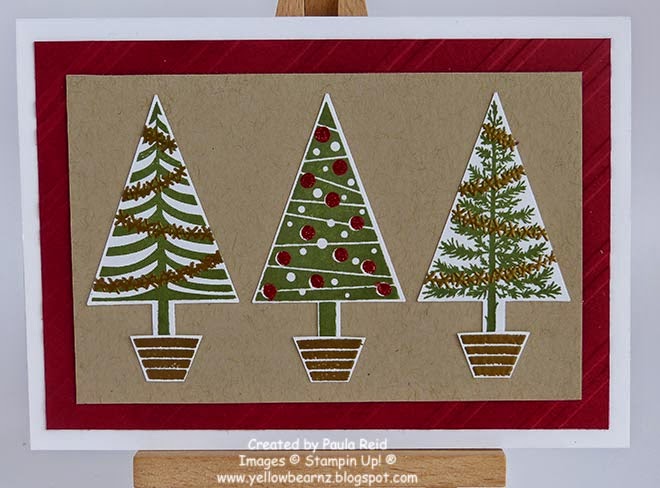
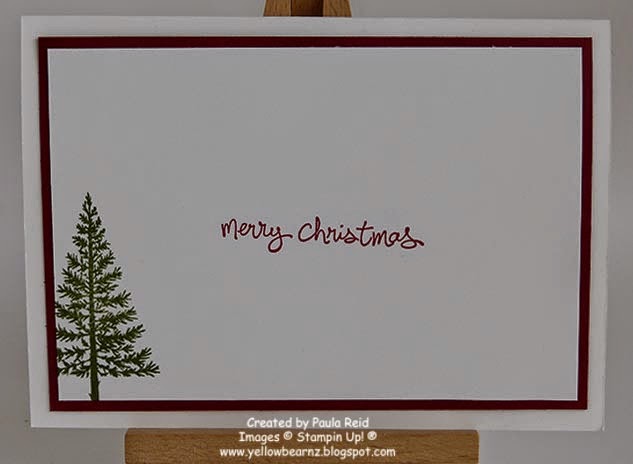
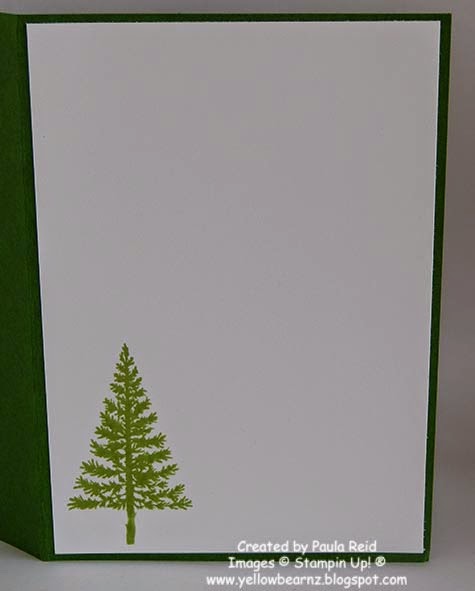
Now on with my project.  I wanted to use the Endless Wishes stamp set so I’ve created a One Sheet Wonder and turned it into four cards and a cool box to store them in ready to give away.  First of all I stampes an A4 sheet all over with your the images from Endless Wishes and then cut it up as per the template I created.


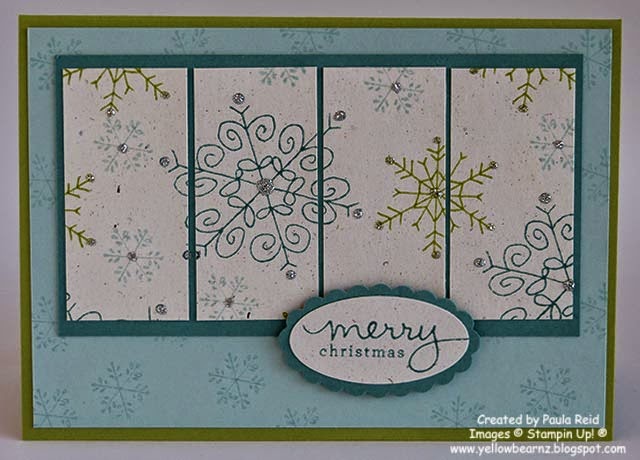
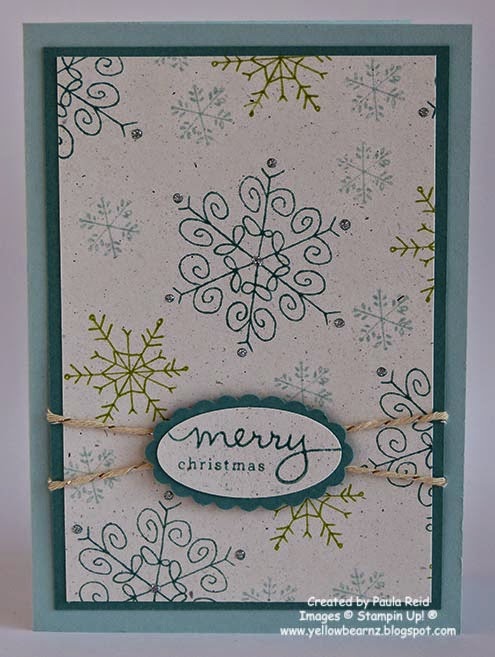
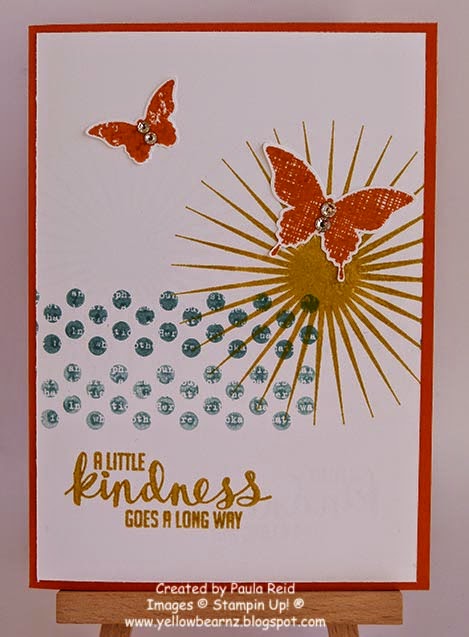
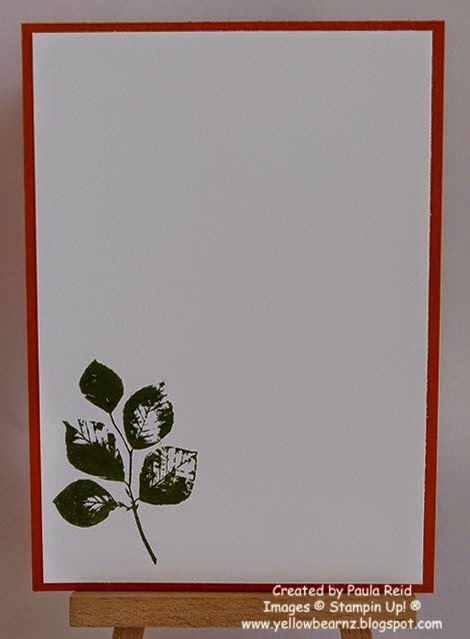
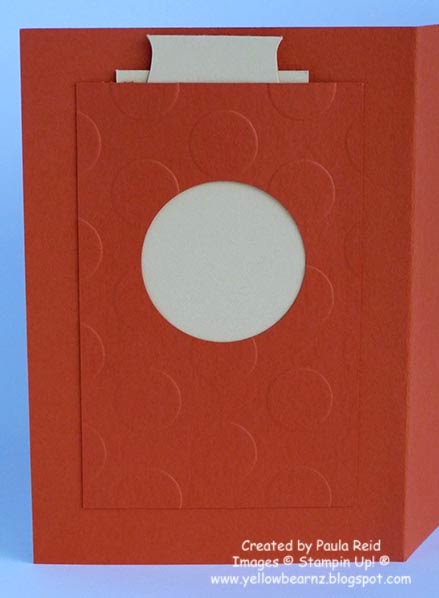
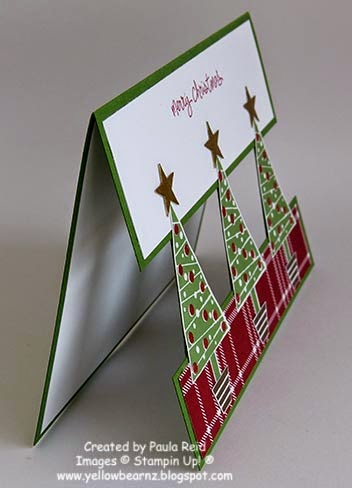
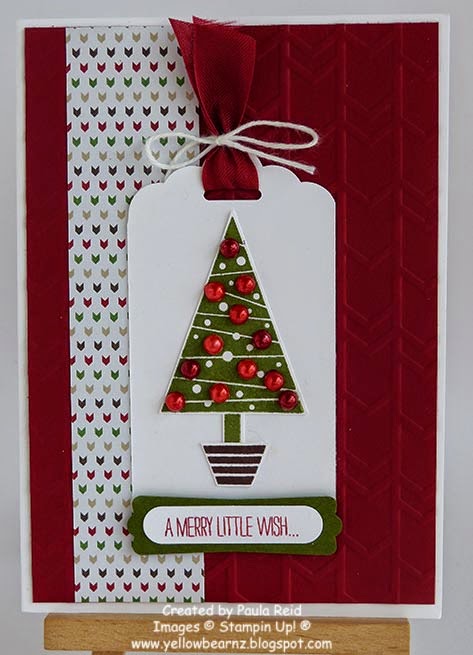
I then went about creating four cards using the pieces from the template:


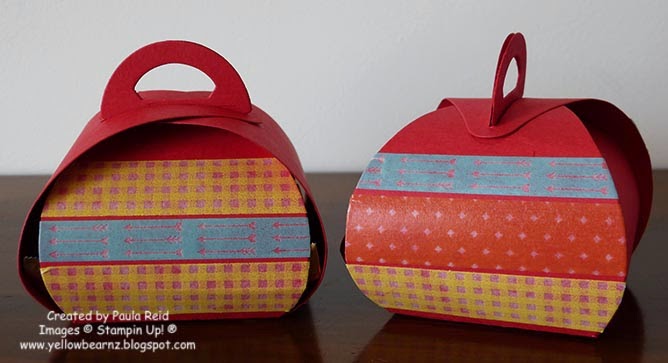
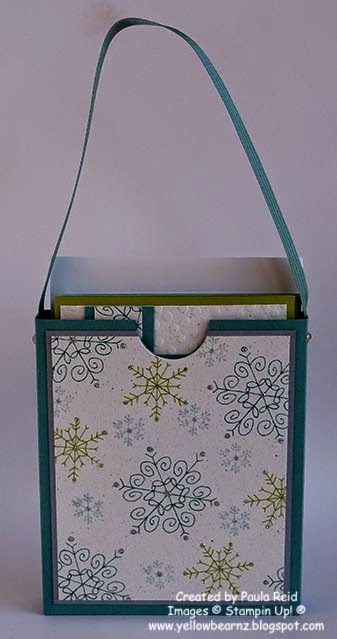
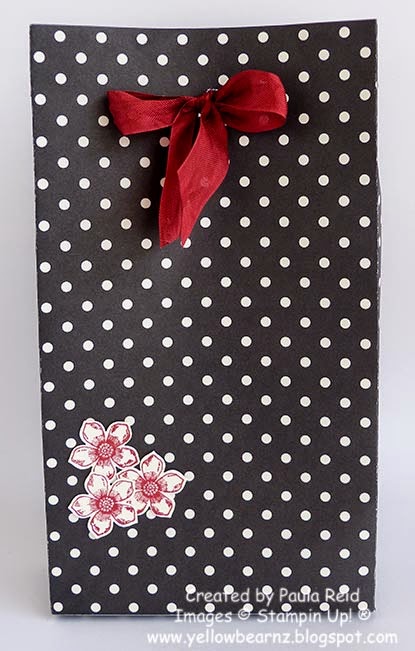
And here’s the box which also holds the envelopes.  The measurements for the box are 16cm x 29.7cm.  On the long side score at 2, 14, 16 and 28cm and on the short side score at 2cm.

After I made the cards and box I used Dazzling Details (my newest find) to add a bit of bling to my stamped images

Supplies:
Stamp Set:  Endless Wishes
Card Stock – Lost Lagoon, Pear Pizzaz, Soft Sky, Naturals White
Ink – Lost Lagoon, Pear Pizzaz, Soft Sky
Other – Lost Lagoon Stitched Satin Ribbon, Brad Bases, Rhinestones, Dazzking Details Silver Sparkle, LArge Oval Punch, Scallop Oval Punch. 1 1/4″ Circle Punch, Silver 1/8″ Ribbon, Silver Metallic Bakers Twine
I hope you’ve enjoyed your visit to my blog – now it’s time to hop on over to Amity’s blog


1.   Keryn Campbell
2.   Narelle Hoggard
3.   Gail Kirby
4.   Libby Dyson
5.   Emily Campbell
6.   Debra Spijers
7.   Kelly Kent
8.   Monique Fielder
9.   Andrea Buckland
10.  Debbie Lamb
11.  Sally Williams
12.  Christie Kunkel
13.   Paula Reid
14.   Amity Knight
15.   Ria Kaire
16.   Nerida Carter
17.  Rochelle Blok
18.  Tracy Speight
19.  Rachael Lewsley


Kinda Eclectic

By | September 23, 2014

Hi there

I’ve just been doing a ‘clean up’ of my computer and found a card I made a while ago and forgot to post – so here it is.

I’ve managed to use all the stamps from the set on this card and all but one of the new In Colours – Blackberry Bliss just didn’t seem to fit in with this layout.

I love how the butterflies co-ordinate with our two butterfly punches – so much easier and quicker than having to manually cut them out.

Supplies:
Stamp set – Kinda Eclectic
Card Stock – Tangelo Twist, Very Vanilla
Ink – Tangelo Twist, Hello Honey, Lost Lagoon, Mossy Meadow
Other – Elegant Butterfly Punch, Bitty Butterfly Punch, Rhinestones

Sweet Treat Cups

By | September 21, 2014

Hi there

I’m a bit late showing you this but this is the card I taught the other week at my card class.  The theme was ‘a card for a boy’.  This could actually be for anyone – just change the colours to suit.

I didn’t have any DSP that was appropriate for a boy so I decided to try using the new Decorative Masks to create my own DSP.  It worked a treat with daubers and we could arrange the colours in whatever pattern we wanted.

A ‘sweet treat cup’ card is great for all ages and I have a special way of getting to the ‘loot’ without damaging the card – a ‘trap door’ from the inside of the card.
Now you can get to the M and M’s without damaging the card 🙂
I took this card to work to show the ladies I work with – they like it so much I now have orders to make more of these 🙂
The other card I taught them was the one I did for my recent team swap here.

Supplies:
Stamp set – Hey You
Card Stock – Tangelo Twist, So Saffron, Whisper White
Ink – Tangelo Twist, Garden Green, So Saffron
Other – Decorative Mask – Dots, Chalk Talk Framelits, Circle Framelits, 1 3/4″ and 2 1/2 Circle Punch, Daubers, Dimensionals, Large Polka Dot Embossing Folder, Decorative Label Punch
Non SU – M and M’s

Choose Happiness Card

By | September 18, 2014

Hi there

Here’s the last Make & Take we made last Saturday.  We were shown how to create a mask so that the stalk of the branches didn’t stamp over the flower which was stamped first.  This also gives it a bit of a 3D effect.

To get the mask effect stamp the flower image first using Momento Ink then cut a circle out of scrap paper, place it over the flower and then stamp the leaves (again in Momento).  When I got home I added some more leaves as I had a bit of a gap.  I don’t have the ‘Choose Happiness’ set so I used ‘Bloom with Hope’ which is a Hostess only set.
The leaves and flower were coloured in with the Blendabilities Markers.  These markers do tend to ‘bleed’ on the back of the card stock so it is adhered to the card base rather than stamping directly onto the card base.
We were fortunate to have Sophie from the Australian office at our event and she gave a great session on using Blendabilities.  One tip she gave was to use the Colour Lifter to add highlights to you image.  I have done this with my flower and I’m pleased with the effect – thanks Sophie.
Supplies:
Stamp Set – Choose Happines, Bloom with Hope
Card Stock – Very Vanilla, Baked Brown Sugar
Ink – Baked Brown Sugar, Momento Ink
Markers – Old Olive, Rich Razzleberry, Daffodil Delight, Crumb Cake, Colour Lifter

Other – Artisan Punch, Rhinestone,, Dimensionals

Kraft Grid Journals

By | September 17, 2014

Hi there

Back again with the second Make & Take we made on Saturday.  This project uses the new Kraft Grid Journals on page 200 of the Annual Catalogue.  I was fortunate to be in one of the winning Prize Patrol groups and won six of these – thank you Stampin’ Up!

We have again used the set Choose Happiness to decorate the front cover.  The leaf images are stamped with Momento Ink and then coloured in with Blendabilities Markers.  The ‘bird’ and border image are stamped with Baked Brown Sugar.  I like the effect of stamping directly onto DSP – must remember this and do it a bit more myself!
Did you notice the spine of the Journal?  We added a strip of Washi Tape which covers up the page stitching and adds a cool look.
Supplies:
Stamp set – Choose Happines
DSP – Typeset
Ink – Momento Ink, Baked Brown Sugar, Old Olive Blendabilities
Markers – Old Olive, Basic Black
Other – Kraft Grid Journal, Label Bracket Punch,Sequins, Linen Thread, Dimensionals, Sweet Sadie Washi Tape

Well I’ve got one more project to show you – so check back soon to see what we made.

Petite Cafe Gift Bags

By | September 16, 2014

Hi there

I got busy last night doing baking and other domestics around the place that I forgot to do my blog post!  So without further ado here we go:

This was the first Make & Take that we completed at our Regional Training event last Saturday.

It uses the new Petite Cafe Gift Bag from the Holiday Catalogue (pg 10).  These come in a pack of 10 and are food-safe poly-lined treat bags with a tin tie closure – just the right size for gift giving this Christmas.
We stamped the front and made a cute banner that goes over the top – an easy way to ‘dress up’ a kraft paper bag.  You can find the pegs and sequins on page 208 and 209 of the main catalogue – guess what’s going on my list!  The sequins (available in the 2013-2015 In Colours) come in three shapes – stars, circles and hearts and were also used on our other two projects which I’ll show later this week.
Here’s a closeup of the banner


Supplies:

Stamp Set – Choose Hapiness
Card Stock – Pear Pizzaz, Very Vanilla
DSP- Typeset
Ink – Crumb Cake
Other – Petite Cafe Gift Bag, Clothespins, Sequins, Itty Bitty Accents Punch Pack, Linen Thread

Yellowbear Name Badge

By | September 14, 2014

Hi there

Yesterday we had our Regional Training Day here in Auckland.  It was lots of fun and great to catch up with my fellow demos (esp those from out of town).

We were asked to make name badges before we came so at 10:00pm on Friday night I started making mine!  And this is what I created:

Isn’t he cute?  I even took along the ‘real’ Yellowbear as he never misses a big event.
This bear has been created with seven different punches.  I used a dauber to go round the edge of each piece with Daffodil Delight before putting him together – the shading gives him a 3D look.  I found a badge pin (left over from a previous badge) sitting on my desk which was great so I attached this to the back of the Black Oval.
I’ll be back tomorrow with some of the projects we created.
Supplies:
Card Stock – Daffodil Delight, Whisper White, Basic Black
Ink – Daffodil Delight
Markers – Daffodil Delight, Basic Black, White Chalk
Punches – Small, Large and Extra Wide Oval Punches, 1/2″, 3/4″ and 1 3/8″ Circle Punch, Owl Builder Punch (Circle)
Other – Oval Framelits, Little Letters Thinlits

Festival of Trees – part six

By | September 12, 2014

Hi there

Here we are at the end of the week and the end of the showcase – I hope you’ve enjoyed seeing my creations.

Toady’s card is a CASE of my Christmas Wreath card I made for team swaps last month.  You could use all sorts of stamps with this style of card and it’s a really easy card to make but very effective.

My stars on top of the tree are gold embossed.  Stamp your VersaMarak ink pad on a scrap of Whisper White card stock, cover it with gold embossing powder and heat.  Then punch out three stars with the star punch from the  Itty Bitty Accents Punch Pack.

Supplies:
Festival of Trees, Good Greetings
Card Stock – Garden Green, Whisper White
DSP – Trim the Tree Paper Stack
Ink – Garden Green, Cherry Cobbler, Early Espresso
Other – Tree Punch, Itty Bitty Accents Punch Pack, Gold and Cherry Cobbler Embossing Powder, VersaMark

I hope you’ve enjoyed this past week and are inspired to get creating.

Festival of Trees – part five

By | September 11, 2014

Hi there

I hope you’re enjoying this showcase of ideas using the new Festival of Trees.

For this card I’ve used a layout from a recent creation and just changed the stamp set.

Instead of stamping the second layer on the tree I used the larger sized pearls and coloured them with the light, medium and dark shades of the Cherry Cobbler Blendabilities to give a contrast of colour.

Again with this card base being Whisper White I’ve added a couple of layers to the inside to give it a bit more strength so it can stand on it’s own.  The sentiments on this card are all from the Festival of Trees set.

Supplies:
Stamp set – Festival of Trees
Card Stock – Whisper White, Cherry Cobbler, Mossy Meadow
Ink – Cherry Cobbler, Mossy Meadow, Early Espresso
DSP – Trim the Tree Paper Stack
Punches – Tree Punch, Scallop Tag Topper Punch, Word Window Punch, Modern Label Punch
Other – Basic Pearls, Cherry Cobbler Blendabilities, Cherry Cobbler Seam Binding, White Bakers Twine, Arrows Embossing Folder, Dimensionals

Well tomorrow is the last day of my Festival of Trees showcase – and I’ve saved the best till last.

See you then.

Festival of Trees – part four

By | September 10, 2014

Hi there

Back again with another Festival of Trees card – this time with a silver theme.  I love how this set is so versatile.

Have you noticed the ‘red’ pearls appearing on the trees?  You can create whatever coloured pearls you want with our new alcohol based markers – Blendabilities.  Just colour them in and adhere to your project.  You can also colour in our rhinestones with the Blendabilities.
Supplies:
Stamps – Festival of Trees, Good Greetings
Card Stock – Real Red, Silver Glimmer Paper, Whisper White
Ink – Always Artichoke, Garden Green, Mossy Meadow, Early Espresso, Cherry Cobbler
Other – Basic Pearls, Cherry Cobbler Blendabilities, Apothecary Accents Framelits, Tree Punch
See you tomorrow

Festival of Trees – part three

By | September 9, 2014

Hi there

Today’s card is a CASE of a CASE (Copy And Share Everything).  I first cased this idea from Dawn Olchfske and recreated it myself back in 2012.  I’ve used the same basic layout and just changed the stamps – why reinvent the wheel!

I used the scallop circle framelit from the Circle Card Thinlits set to cut the shape out of my Whisper White overlay.  You could cut any shape or even add a piece of Christmas DSP behind for a different look – so many possibilities.

Supplies:
Stamp sets – Festival of Trees, Good Greetings
Card Stock – Mossy Meadow, Cherry Cobbler, Whisper White
Ink – Pear Pizzaz, Mossy Meadow, Garden Green, Cherry Cobbler, Early Espresso
Other – Gold and Cherry Cobbler Embossing Powder, Basic Pearls, Cherry Cobbler Blendabilities, Tree Punch, Circle Card Thinlits, Dimensionals

Festival of Trees – part two

By | September 8, 2014

Hi there

Today I’m going to share with you the first of five cards I’ve made using the Festival of Trees stamp set and punch.  I hope you enjoy these and are inspired to recreate them yourself.

First up – a touch of gold embossing.  This card had a few ‘iterations’ before I was finally happy with the layout and card base colour!  I think I have used the sentiment (which is from the Good Greetings set) on all but one of the cards.

As the Whisper White card stock is a bit lighter in weight than our coloured card stock I’ve added a few layers for strength and colour contrast.

Supplies:
Stamps – Festival of Trees, Good Greetings
Card Stock – Whisper White, Cherry Cobbler, Crumb Cake
Ink – Mossy Meadow, Cherry Cobbler
Other – Tree Punch, Gold and Cherry Cobbler Embossing Powder, VersaMark

Don’t forget to leave me some comments along the way this week – I do love hearing from you.

Gift Bag and Altered Notepad

By | September 7, 2014

Hi there

First of all ‘Happy Fathers’ Day’ to all the men out there – I hope you’ve all had a great day.  We had a lovely afternoon tea at my parents to celebrate the men in our family.  A special ‘Happy Father’s Day’ to my Dad – he’s the best and is such a rock in our lives.  Here is the card I made for him.

As promised here is the gift I gave to my hostess yesterday as a little ‘thank you’ for hosting the party.

I’ve CASED the bag from Pootles blog – check out her video if you would like to recreate it.  I love covering pads and filling the barrel of pens with matching DSP – they make such cool gifts.

Supplies:
Bag
Stamp – Petite Petals
Card Stock – Very Vanilla
Ink – Cherry Cobbler
DSP- Modern Medley (retired)
Other – Cherry Cobbler Seam Binding

Notepad
Stamp – Perfect Pennants
Card Stock – Cherry Cobbler, Very Vanila
Ink – Cherry Cobbler
DSP – Modern Medley (retired)
Other – Banner Framelits, Cherry Cobbler Seam Binding, Glue Dots, Dimensionals

Don’t forget to check my blog daily this week as I showcase 5 designs using the Festival of Trees stamp set.

Festival of Trees – part one

By | September 6, 2014

Hi there

This afternoon I had a workshop with a lovely group of ladies and this is the card I taught them.

It uses the Festival of Trees Stamp Set and coordinating Tree Punch.  You can purchase these as a bundle and save 15%

I love how we can now make our Basic Pearls any colour we want using our Blendability Markers – I can see I’ll need to buy more pearls!

The greeting is from a new set called Good Greetings which is a FREE set you can earn if you have a workshop/party during September and October and your sales reach NZ$350.  If you are interested in hosting a party please contact me.

Supplies:
Stamp set – Festival of Trees, Good Greetings
Card Stock – Garden Green, Whisper White
Ink – Wild Wasabi, Garden Green, Always Artichoke, Early Espresso, Cherry Cobbler
Other – Tree Punch, Silver and Cherry Cobbler Embossing Powder, VersaMark, Basic Pearls, Daffodil Delight and Cherry Cobbler Blendabilites

For the next week I’ll be featuring five cards I’ve made using this set so you’ll get plenty of ideas ready to create your Christmas cards.

Check back tomorrow for the gift I made for today’s hostess 🙂