Work Easter Treats

By | April 7, 2014

Hi there

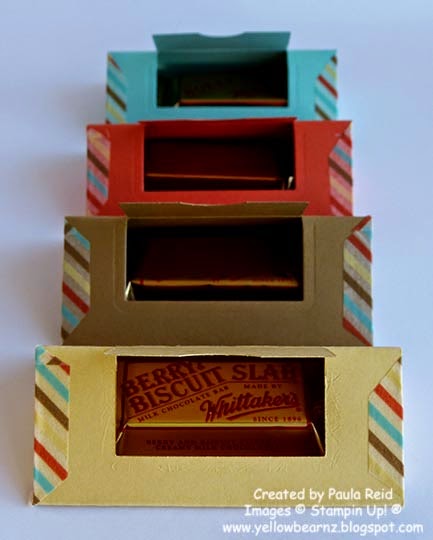
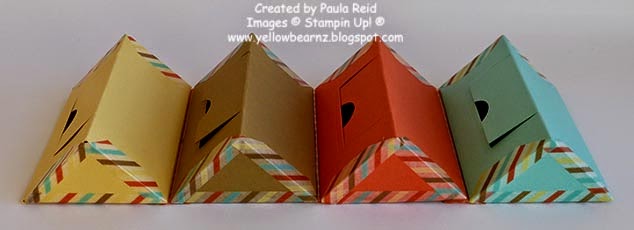
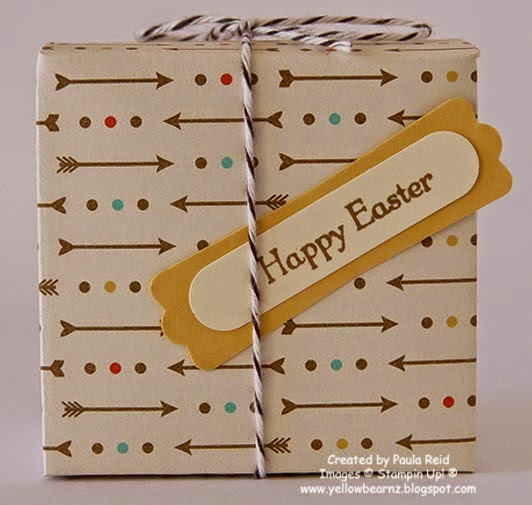
With Easter not far off I thought I’d better make a start on making the Easter treats for work.  I’ve chosen the Retro Fresh DSP and will make a variety of treat boxes and fill them with mini eggs.

Here’s the first one I made.

It’s called a “Bag in a Box” and is made using the Envelope Punch Board.  I got the idea from Pootles – I love her blog.

This little bag holds eight mini Easter eggs and is perfect to give to staff at work.  Check back tomorrow for another treat creation.

Supplies:
Stamp Set – Teeny Tiny Sentiments
Card Stock – Baked Brown Sugar, Very Vanilla
DSP – Retro Fresh
Ink – Baked Brown Sugar
Other – Envelope Punch Board, Word Window Punch, Modern Label Punch, Small Oval Punch, Early Espresso Bakers Twin

Thank You cards

By | April 6, 2014

Hi there

What a beautiful weekend we’ve had.  This afternoon Phil and I went for a long walk in Cornwall Park/One Tree Hill (or No Tree Hill as some call it).  It was so lovely and warm it felt like summer.  There were so many people up there – having picnics, BBQ’s, walking the dog, kids on bikes – it’s great to see the park being used.

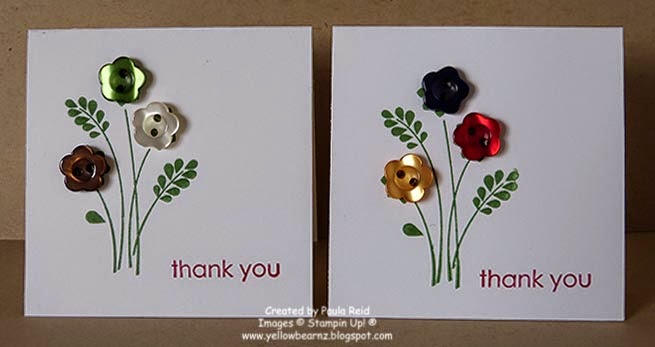
Today’s cards are little 3 X 3″ ‘thank you’ cards I made to go in with my customers orders.

I wanted the card to have some sort of dimension as I’ve only used one layer of card stock – to achieve this I’ve adhered buttons as the flowers.  Another way to get height is to use Crystal Effects on part of the image – maybe I’ll do that next time round 🙂
Supplies:
Stamp Set – Embellished Events
Card Stock – Whisper White
Ink – Garden Green, Cherry Cobbler
Other – Buttons (retired)

I hope you all have a good week.

Artisan Punch

By | April 5, 2014

Hi there

I hope you’ve had a good day.  Mine started out with a ladies breakfast at Church and then I’ve been sanding walls and window frames in our rental property so I haven’t had a chance to do any crafting today.  So I thought I’d share with you a little trick I’ve learnt to create a mat to go with the Artisan Punch.

I taught this at the recent Tauranga Extravaganza and the ladies loved it.

Stamp your sentiment and punch it out with the Artisan Punch.  Choose a coordinating colour for the mat.  Cut two side pieces and one top and bottom as per below,  I just used scraps of card stock for this.  I’ve found that it’s easier to adhere the top and bottom first then the side pieces.  Make sure you check the front that you have an even edge around your punched sentiment.  You’re now ready to attach it to your project.

And here is the final product

You can also use this technique with the Decorative Label Punch.

Wedding Card – April Card Class

By | April 4, 2014

Hi there

Here’s the second card we made at card class this week.  The request was for a wedding card.  I don’t have any wedding stamp sets so used tone-on-tone, texture and punches for this one.  It’s based on this card but with my own take added in.

I decided to stamp the card with the ‘flecks’ stamp from Gorgeous Grunge.  I’ve stamped it in Crumb Cake and it’s come out looking like gold flecks which is perfect.  The card base and front are Naturals White – my favourite card stock at the moment.  Instead of linen thread I’ve used the new gold baker’s twine.
Supplies:
Stamp set – Gorgeous Grunge, Teeny Tiny Sentiments
Card Stock – Naturals White, Gold Foil
Ink – Crumb Cake
Other – Gold Embossing Powder, Gold Bakers Twine, Heart Punch, Word Window Punch, Modern Label Punch, Square Lattice Embossing Folder, Glue Dots, Dimensionals

It’s been a long week so I’m going to head to bed shortly – have a great weekend.

Card in a Box

By | April 3, 2014

Hi there

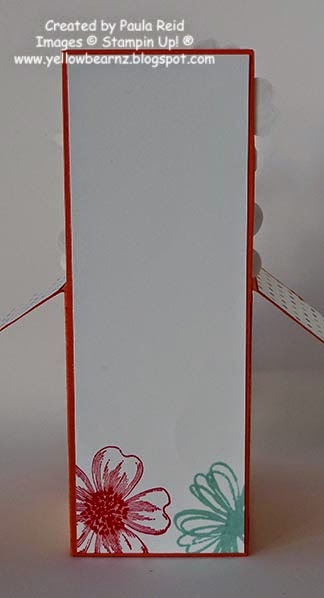
I have finally succumbed to making a ‘card in a box’.  I think I may have to make some more of these.  You may have seen these in ‘blog land’ – there are some amazing creations using this style of card.

My card class ladies requested a card for a ‘big’ birthday as within the group we needed to make a 60th, 70th and 80th birthday card this month.  The card in a box was the perfect answer and can be tailored for any birthday or occasion.

I’m using mine for my MIL who has a big birthday later this month.  I’ve used paper from the I am Me series with matching colours of Calypso Coral, Real Red, So Saffron and Pool Party.  Now to think of a gift for her – at least I have a couple of weeks to come up with something.

Supplies:
Stamp Set – Flower Shop, Memorable Moments, Papillon Potpouri
Card Stock – Calypso Coral, Whisper White
Ink – Calypso Coral, Real Red, So Saffron, Pool Party, Basic Gray
DSP – I am Me
Other – Pansy Punch, Bitty Butterfly Punch, Labels Framelits, Pool Party Seam Binding, Acetate, Glue Dots

Check back tomorrow for the second card we made.

Best of …Snow

By | April 2, 2014

Hi there

Here is the last in our series of “Best of” stamp sets.  I think this one is really cute and I may just have to buy it myself.

I really like the images – great for colouring in.

Weekly Deals – 2nd to 8th April

By | April 2, 2014

Hi there

Here are this weeks ‘Weekly Deals’

The best way to order any of these products is via my online store – click on the button at the top left of my blog.

Check back later for the ‘Best of … April’

Weekly Deals Are Coming!

By | April 1, 2014

Starting Wednesday 2nd April, Stampin’ Up! will be offering new deals every week for the month of April!

These deals won’t be preannounced, so the best way to check them out is via my Online Store and I’ll also put them up here on my blog.

See you tomorrow to see what the deals of the week are 🙂

A natural creation

By | March 31, 2014

Hi there

My cousin and his daughter are over from Australia at the moment and last night we went for a lovely walk around Ambury Farm.  It’s so nice having this farm on our door step in a big city.  If you live in Auckland and haven’t been there it’s a great place to visit – especially with the kids.

It was a beautiful evening and the sunset was amazing so I thought I’d share some ‘natural creation’ instead of one of my ‘craft creations’ 🙂

 This first one is looking back to Mangere Mountain and seeing the start of the sunset reflected in the East.

And here is the sunset reflecting in the Maunkau Harbour

These were taken with my phone camera and turned out not too bad.

I wonder if we’ll get another beautiful sunset tonight – don’t forget to check outside.  Have a great evening.

Whale of a card

By | March 30, 2014

Hi there

We’ve had another beautiful day here in Auckland – it’s been lovely and warm and we are about to head out for a walk and enjoy the last of the day.

One of the guys at work became a dad for the second time – a little boy this time.  Here is the card I made for work to give.

I was a bit stuck to begin with and then I found I had some off cuts from the Sunshine & Sprinkles DSP from last years summer mini catalogue.  The card then came together rather quickly.  It uses products that were available in that catalogue but I don’t think the new baby (yet to find out his name) will mind!

Supplies:
Stamp Set – Baby Prints
Card Stock – Marina Mist, Whisper White
Ink – Marina Mist
DSP – Sunshine & Sprinkles
Other – Happy Whale Clearlits Die, Word Bubble Framelits

Well tomorrow is the last day of March so make the most of it 🙂

Happy Birthday Deb

By | March 29, 2014

Hi there

What a beautiful day we’ve had here in Auckland.  Phil and I have just got back from a lovely 45 minute walk in the park.  It’s so nice to be able to get outdoors as I’m sure the ‘not so nice’ weather is not that far off!

Yesterday was my friend Debs birthday.  She recently found out she had Coeliac disease which means she has to be gluten free for the rest of her life.  So I thought I’d do up a parcel with some GF goodies snacks.  Of course you can’t just ‘wrap’ them up – you need to make a special wrapping or bag for them.  So here’s what I made to match the card we gave her.

I’ve had these white bags for ages so I thought I’d decorate the front and back so they’re not just plain white.  I had some spare panels from my attempt at brayering that were OK so I matted them, then adhered them to a larger piece of card stock that covered the front (and back).

 And here it is with the matching card (which I showed here).

Well we’re off babysitting tonight – I hope you enjoy your evening.

More Note Cards

By | March 28, 2014

Hi there

Here we are at the end of another week and almost a quarter of the way through the year!  I’m looking forward to a relaxing weekend as the last couple have been rather full on.

Today’s cards are part of my Christmas gift from my upline Jacque.  Our task for March was to finish three more cards and send them out – who will receive one in the post in the next couple of days?

These would be great to give as a gift to somebody.  You could stamp your images and then add a variety of sentiments to be added later along with some other embellishments for them to choose from.  How easy is that.

I hope you enjoy your weekend.

New desk accessories

By | March 27, 2014

Hi there

As promised here are the new components for my desk at work.  My previous tissue box cover used to be in direct sunlight at our old office and it faded 🙁 so I thought it was about time for a new one – especially after I’d made 5 for the ladies at work I was feeling left out.  I’ve gone with the Kaleidoscope range of papers – my favourite from the new seasonal catalogue.

First off is my business card holder

my new tissue box cover – which will be kept away from sunlight!

And lastly my Post-It note holder – now I’ll never loose them on my desk

Business Card Holders

By | March 26, 2014

Hi there

I’ve been wanting to make one of these business card holders for ages and I finally got round to it over the weekend!  They’re from Sam Donald – a very talented UK demo.

The first one is for my Stampin’ Up! business cards to sit in on my desk – I can also take it with me to workshops etc.

Isn’t it cute – so much better than the perspex container they come in.  I enjoyed making it so much I made one for one of the ladies at work to match her tissue box cover I made earlier in the year.

Check back tomorrow for the one I made for my work desk along with a new tissue box cover.

Auckland Extravaganza Projects – part two

By | March 25, 2014

Hi there

Here are the last of the projects from Saturday.

This project was taught by Rachael and her team.  It’s a cute box that holds four tags and a book mark.  They’re all made using the Tag Topper Punches.  There are two styles of punches – the angled tag and the scallop tag which is my favourite.  These colours look so good together – very crisp.

The next project was taught by Sally and Heather – it’s a 3D card but can be posted flat and then the recipient just ties it together.  Here’s a view from the front

from the back 

ready to post
inside
and outside – I love this Sweet Sorbet paper. 

Remember you only have until Monday 31st March to place an order of $110 to get this paper (or other products) FREE.  So email me if you have an order to place.