FREE Pass to give away

By | July 3, 2011

Hi there

As a designer for Stampin Fun and Friends I have a FREE pass to give away to somebody for the next session which starts on 25th July.  This session is called Special Occasions and we have a great selection of projects for you.  If you would like to go in the draw for this FREE pass here is what you need to do.

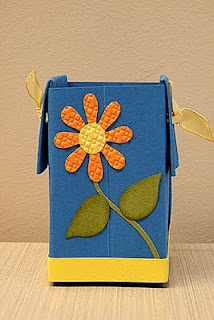
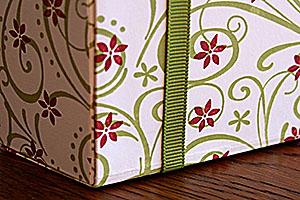
Post a comment on my blog stating the various products (all from Stampin Up) I have used.  Here is a sneak peak at my project:

There are eleven items used.  To get you started I’ll give you four of them – Cutter, scorer, bone folder & adhesive! So you only need to come up with another seven – good luck.

Please make sure that you have posted your comment by Wednesday 13 July (NZT).  I will draw the prize on Thurday 14 July.

All the best.
Paula

Try Stampin on Tuesday #21

By | July 2, 2011

Hi there

It’s a beautiful day here in Auckland – cool but the sun is shinning :).  No sign of rain which is fantastic and the washing has made it outside for the first time in weeks!

I love Try Stampin on Tuesday – the challenges that CherylAnn comes up with are great.  If you haven’t tried one yet why don’t you hop on over & give it a go.  Just click here.

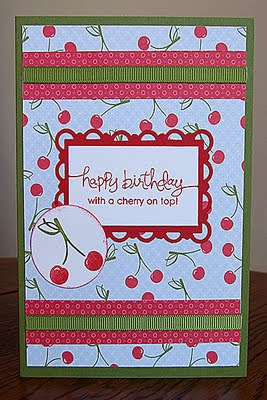
I tried a few options for this weeks layout before finally going with this:


I’m still trying to use up my retired DSP before the new catalogue arrives in less than two months.  I was able to match up two stamp sets with my paper for this card.  I’ve used both sides of this DSP – don’t you love that.

This was the layout I was working from:

Supplies:
Stamp Set – Tart and Tangy, A Word for You
Card Stock – Old Olive, Real Red, Whisper White
DSP – Summer Picnic
Markers – Real Red, Old Olive
Punches – 1 3/8″ Circle, Scallop Trim Corner, Scallop Trim Border
Other – Old Olive 1/4″ Grossgrain Ribbon

Check back later for details to win a FREE pass to the next round of Stampin Fun and Friends!

I hope you enjoy the rest of your weekend
Paula

SENZ

By | June 26, 2011

Hi

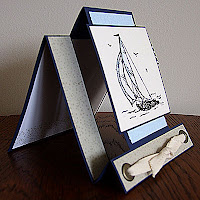
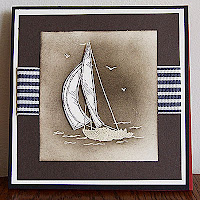
As promised here are the cards I made at SENZ on Saturday.  I attended two classes – the first was with Bron Heslop and we made two cards using the a la carte stamp Sail Away.  The first card was a fancy fold and the second was a twisted easel.


The second class was with Jacque Pedersen.  We used Upsy Daisy which is another of my favourite sets.  We inked the stamp in Baja Breeze then used the edge of Old Olive to ink across the stamp.  It was meant to be in a criss cross pattern but mine didn’t quite turn out that way.

The second card involved brayering.  I was pleased with how this turned out but still need to practice.

Thanks ladies for showing us these neat cards.
Don’t forget to check out CherylAnn’s blog to get more details on the next round of Stampin Fun and Friends which starts on 25th July.
Have a good week.
Paula

Try Stampin on Tuesday #20

By | June 26, 2011

Hi

I have finally got round to photographing this weeks challenge.

Here is the layout:

And here is my finished card:

I sat at my crafting desk the other night looking at my stamp sets trying to work out which set would go well with this layout.  After a few ‘off the shelf, back on the shelf’ attempts I settled with Totally Tools.
I’ve turned the layout around to so that I could ‘hang’ my tools.  I’ve used the Woodgrain stamp (which goes perfectly with Totally Tools) for my background.  I stamped the images in Versamark, embossed them, cut them out & coloured them with markers.  I stamped the Screwdriver on the inside of the card.
Supplies:
Stamp set – Totally Tools, Woodgrain
Card stock – Cajun Craze, Sahara Sand, Whisper White
Ink – Crumb Cake, Cajun Craze
Other – VersaMark, White Embossing Powder, Brads, 1/2″ Circle Punch, 3/16 Corner Small
Check back later for the cards I made at SENZ.
Paula

Stampin Fun and Friends – Sketch Challenge

By | June 20, 2011

Hi

I thought I’d posted this card but found it was still sitting in ‘draft’!  Never mind – over at Stampin Fun and Friends we were given the following sketch challenge.

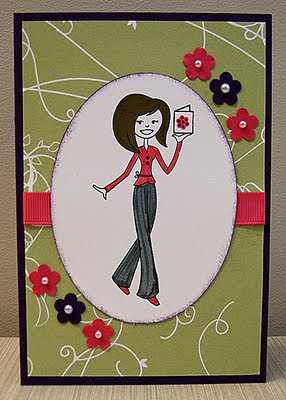
I’ve done mine using one of my favourite stamp sets – Totally Tess.

I’ve coloured Tess’s trousers in with a downward stroke to give a textured effect.  For more depth in her hair colour I’ve coloured it in twice.

Supplies:
Stamp – Totally Tess
Card Stock – Elegant Eggplant, Whisper White, Melon Mambo
DSP – Cottage Garden
Markers – Melon Mambo, Basic Gray, Soft Suede, Elegant Eggplant
Ink – Elegant Eggplant
Other – Oval Die, Trio Flower Punch, Melon Mambo ribbon, Basic Pearls

Watch this space for more info regarding the next round of Stampin Fun and Friends

Paula

Try Stampin on Tuesday #19

By | June 19, 2011

Hi

Well another wet weekend is almost over.

I have finally got round to making this weeks challenge.  It was great – last week 10 people participated in the challenge.

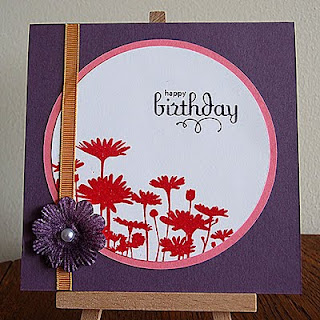
I struggled with deciding which stamp set to use and then in the early hours of Saturday morning (while trying to get to sleep after being woken by the rain) it came to me!   I love this stamp set – there is so much you can do with it.  This time I’ve clear embossed and inked at the same time.  It’s a great way to make sure you don’t get a shadow.  First of all ink the stamp with Versamark & then your chosen colour – I’ve used Rose Red.  Stamp the image onto card stock and then add embossing powder & heat.  I’ve sponged a white flower with Elegant Eggplant ink – a great way to get the colour you want.

Supplies:
Stamp – Upsy Daisy, Perfect Punches
Card Stock – Perfect Plum, Regal Rose, Whisper White
Ink – Rose Red, Perfect Plum, Elegant Eggplant
Other – Circle Sissor, More Mustard Ribbon, Paper Daisy, Basic Pearls

Thanks CherylAnn for another great challenge.  If you haven’t particpated in a challenge yet I encourage you to join – it’s heaps of fun.

Have a great week
Paula

Stampin Fun & Friends – Project 4

By | June 13, 2011

Hi

I made two of this project as I needed two wedding anniversary cards this month.  The first is for Phil’s aunt & uncle in the US.  They are going to be celebrating their 50th wedding anniversary and the second is for my sister & her husband who are up to anniversary number 28.  Best wishes to both couples.

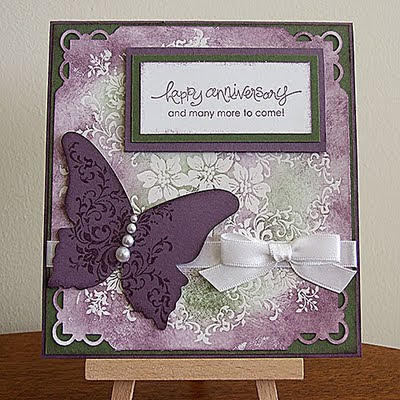
This project was created by Laurie.  It is so lovely.  In the US they have supplies that we don’t – Presto Patterns Paper.  But that didn’t matter, I created my own.  I was really pleased with how this turned out and will use this effect again.  Without further ado – here is the card I made for Phil’s anut & uncle (my sister’s one is the same except no 50)

The photo doesn’t really do it justice.  To be honest I wasn’t really a fan of Always Artichoke but have used it a couple of times lately and it’s starting to grow on me.  I love the combination here with Perfect Plum.  I had started this project last weekend and was able to finish it on Friday when I received my Butterfly die :)
Don’t you just love this – it’s still not too late to join up.  Click on over to CherylAnn’s blog.  Watch this space as there will be more info soon about the next Stampin Fun and Friends event.
Supplies:
Stamp – Bliss, A Word for You
Cardstock – Perfect Plum, Always Artichoke, Whisper White
Ink – Perfect Plum, Always Artichoke
Other – Clear Embossing Powder, Beautiful Butterlies Die, White Ribbon, Pearls, Scallop Trim Corner, Timeless Type Junior Alphabet Die

Stampin Fun & Friends – Project 3

By | June 12, 2011

Hi

I hope you’ve had a good weekend.  The weather here in Auckland has been lovely today.  We have just got back from a long walk along Takapuna Beach.  It was so lovely to get outside.

Well here is the third project I’ve completed.  This one was provided by Maria

There is no stamping in this project – but lots of bits using the Big Shot 🙂  The flower is put together using the easel technique.  I haven’t put a greeting on it as I wasn’t sure what I’d end up using the card for.
Supplies:
Cardstock – So Saffron, Wild Wasabi, Rose Red
DSP – Tea Party
Dies – Blossom Flower, Beautiful Wings Embosslit
Embossing Folders – Square Lattice, Polka Dot, Vintage Wallpaper
Other – Eyelet Border Punch, Brad, Dimensionals
Check back tomorrow for the next project.
Paula

Inspiration Challenge

By | June 10, 2011

Hi there

During the week we got given an Inspiration Challenge to do over at Stampin Fun and Friends.  This is the picture we were given:

I have wanted to make flowers using the sweet treats cups for ages so thought I’d give it a go for this challenge.  It took me awhile to sort out how to put it all together but after a couple of false starts I made it and here is how it turned out.

I was really pleased with this and I’m sure I’ll make it again.  At least next time it won’t take so long.  This would be a great ‘get well’ gift for a guy – flowers but not flowers!

To make the hole for the cup I cut a 4″x 4″ piece of card stock and put it through the Bigshot with the Movers & Shapers die with the circle.  This allows you to then stamp the petals around the hole.  I stamped a petal with my stamp-a-ma-jig first and then used this to position my six petals.  You need to overlap the petals a bit.  Once I’d cut the flower out I traced around it again to create the backing.  To make it easier to get to the contents I cut a small ‘X’ on the back.  I found that the flowers weren’t standing up in the box so I put a bit of polystyrene in the bottom and then poked the bamboo skewers into it.  Every gift should include chocolate so I put some ‘Favourites’ on top to hide the polystyrene.

If you like this or any of the other projects I’ve shown (and there’s more to come) from Stampin Fun and Friends it’s not too late to join and get the instructions for the projects.  Just click here to join.

Supplies:
Stamp – A Little Treat, Bugs and Kisses
Card Stock – YoYo Yellow, Cameo Coral, Gable Green
Ink – Real Red, Only Orange, YoYo Yellow, Glorious Green, Brilliant Blue, Chocolate Chip
Other – Sweet Treat Cups, Fancy Favour Box, Movers and Shapers, Bamboo Skewers

Have a good weekend and if you are in NZ keep warm and dry.

Paula

Try Stampin on Tuesday #18

By | June 10, 2011

I’m getting a bit behind in blogging my recent creations.  Here is this weeks challenge.

I’ve used watercolour paper to stamp my image so that I can use my blender pens and ink pads.  I’ve just started to use this method rather than always using the markers (which I love).  This method allows you to graduate the colour and intensity of the colour.  I think I will have to practise this a bit more though.

I was really pleased with this and am going to send it to Phil’s aunt in the US for her birthday next month.
Supplies:
Stamp – Fifth Avenue
Cardstock – Riding Hood Red, Watercolour Paper
DSP – Candy Lane
Ink – So Saffron, Riding Hood Red, Early Espresso
Don’t forget to check out CherylAnn’s blog and join in the fun over at Stampin Fun and Friends.  I’ll try and do another post tonight with some more projects I’ve made.
TFL and have a great weekend.
Paula

Stampin Fun and Friends – Colour Challenge

By | June 8, 2011
Hi
Over at Stampin Fun and Friends we had a colour challenge over the weekend.  We had to create a card using So Saffron, Rose Red & Wild Wasabi – a combination straight from the Colour Coach.  I’ve wanted to try using the flower stamp from Inspired by Nature and ink it up using markers so this was a great opportunity to trial this technique.  This was my first attempt and I was pleased with how it turned out.  I need to improve a few things but that’s OK.

Supplies:
Stamp – Inspired By Nature
Cardstock – Wild Wasabi, So Saffron, Whisper White
Markers – So Saffron, Rose Red, Wild Wasabi
Check back tomorrow for the next project.  If you want to join in the next challenge click here to sign up.
TFL
Paula

Stampin Fun & Friends – Project Two

By | June 7, 2011

Hi there

As promised here is my take on the second project which was created by Amy – another Kiwi.  This was fun to make and I will definitely be making this again especially once I found out it holds 6 Whittakers long chocolates!  This would make a great gift to give away.  On Sunday we had a family lunch to celebrate Phil & my birthday plus my brothers which is next week.  When my nephew saw this project he immediately said he’d like one for his birthday (which is not until November).  I think the chocolates may have been the inspiration for the comment!

Supplies:
Stamp – Flight of the Butterfly
Cardstock – Chocolate Chip, Pink Pirouette, Very Vanilla
DSP – Candy Lane (retired)
Ink – Riding Hood Red, Chocolate Chip
Other – Chocolate Chip Ribbon, Subtles Brads, Brown Cotton
Check back tomorrow for the Colour Challenge and don’t forget it’s not too late to join us – click here for more details.
Catch you later
Paula

Stampin Fun and Friends – Project One

By | June 6, 2011

Hi there

What a great weekend it’s been.  I’ve been able to do heaps of crafting so thought it was time to post some of my creations.

I’ve been asked to be a designer over at Stampin Fun & Friends which kicked off on Wednesday 1 June – it’s not too late to join – check out more details on CherylAnn’s blog.

So far we’ve had 5 projects posted plus we had a colour challenge over the weekend.  There are also regular ‘chat’ sessions.  We had one today which was heaps of fun – plus there are prizes during the chat sessions.  I’ve recreated the first 4 projects and will post them over the coming days.

The first project was from Tracey Old – a Kiwi.  It was a great project & very timely for me.  My brother’s birthday is next week and I needed to do a card and some type of voucher – he is wanting to buy a sausage making machine!!!  This project is an all in one.  Here is what I recreated: 

Supplies:
Stamp -On Your Birthday, Whimsical Words, Bring on the Cake
Cardstock – Bashful Blue, Pumpkin Pie, So Saffron, Early Espresso, Whisper White
DSP – Washington Apple (retired)
Ink – Pumpkin Pie, Early Espresso
Punch – Build A Cupcake, Scallop Edge Border, 2 3/8″ Scallop Circle, 1 3/4 Circle
Other – Pumpkin Pie Ribbon, Top Note Die, Crimper
The instructions were easy to follow and include step by step photos.  I’m really enjoying using the Build A Cupcake punch which goes well with this stamp from the set ‘Bring on the Cake’ in the current mini.
Wait till you see tomorrow’s post which is also from a Kiwi.  We’d love you to join us at Stampin Fun and Friends so jump over to CherylAnn’s site here.
Catch you back tomorrow.
Paula

Friend to Friend Swaps – UStamp with Dawn & Friends

By | June 5, 2011

Hi
I have finally got round to posting what I sent for my Friend to Friend swap for the latest round of UStamp with Dawn & Friends.  This was my first time for joining in on the swaps.  It was heaps of fun & I’ll do it agian next round.  It’s a great way of gaining ideas and seeing what others create.  We had to make a card with envelope and a matching 3D gift.  Here is what I made.


I’ve wanted to make one of these note pads for ages so it was a good excuse to trial it.  I bought the small pen (Paper Mate Sport Mini) from PaperPlus.  I also used one in my stationary box here.  It’s a great size for these types of projects.  I must now make one for me!
Supplies:
Cardstock – Old Olive, Elegant Eggplant, Melon Mambo, Daffodil Delight, Whisper White
Markers – Elegant Eggplant, Melon Mambo, Old Olive
DSP – Brights DSP Patterns Stack
Punches – Scallop Trim Corner, Scallop Trim Border, Word Window, Modern Label
Other – Big Shot, Blossom Party Die, Little Leaves Die, Square Lattice Embossing Folder, Old Olive Ribbon
TFL
Paula