


Hi there
We had a ‘fun’ morning here in Auckland – a storm passed through with amazing thunder, lightning and rain. I was glad I’d already reached the office before the heavens opened. And what a transformation by the evening – sunny and warm. Now that’s Auckland weather for you.
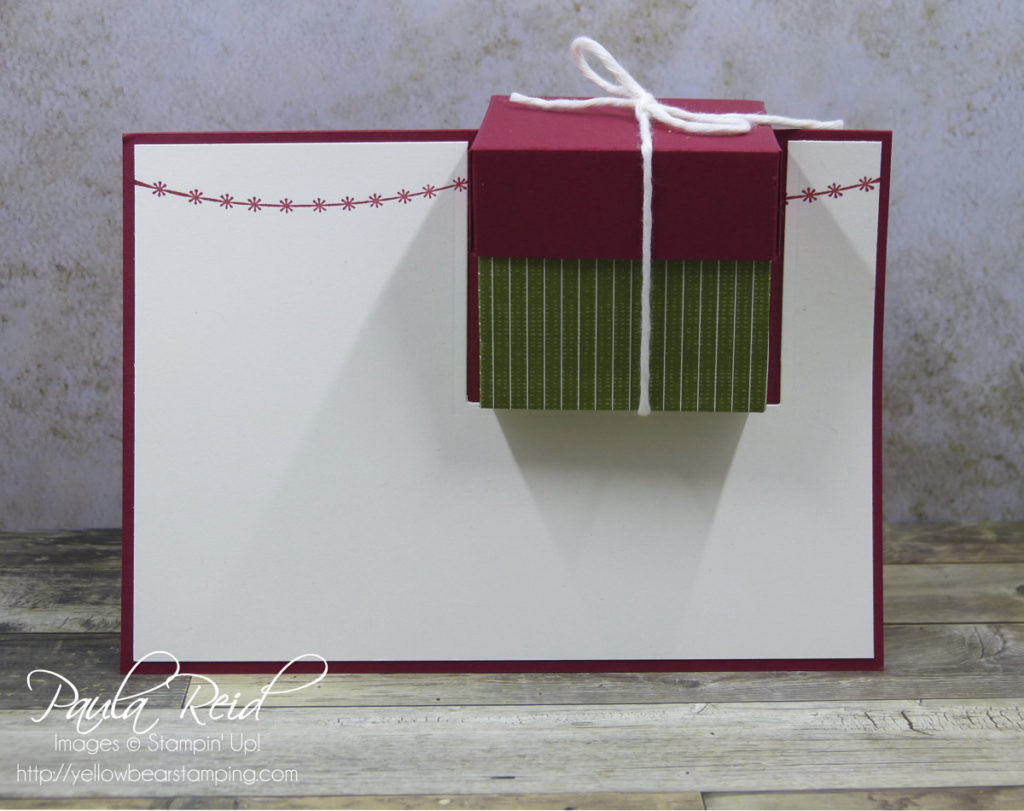
Today’s post is a project I’ve wanted to make for ages. It’s called a Box in a Card because that is what it is. You make a box and then put it into a card base.
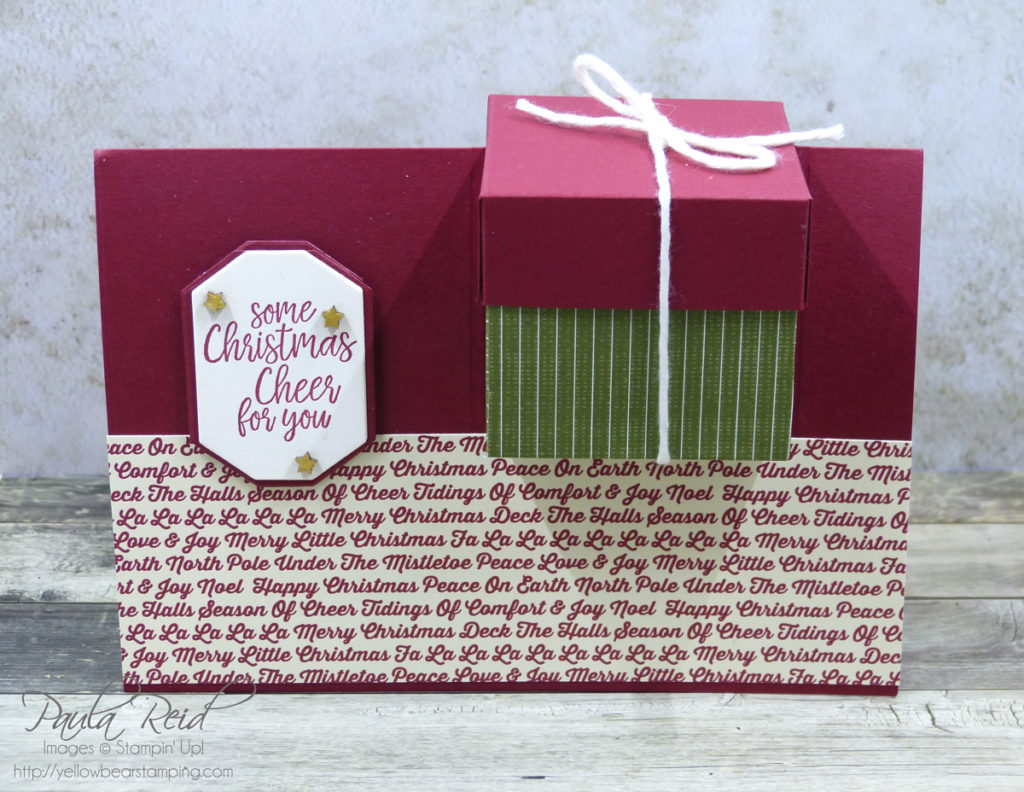
The original design I saw got you to cut the ‘hole’ in the card base with your paper trimmer but I have found an easier way to do this using the Layering Square Framelits. I used the 6th largest Square die to cut through both layers of the base and it worked a treat.
For the insert I did the same thing but used the 7th largest die. To make sure I had the correct positioning I placed the insert on the back of the card base and made pencil marks where the ‘hole’ was. I then placed the die on the outside of the pencil marks and ran the insert through the Big Shot – you get a nice mat of the card base showing through.

The measurements (mix of inches and centimetres) for my box are:
Lid – 9.5cm x 9.5cm card stock, scored at 2cm on all sides
Base – 6″ x 6″ DSP, scored at 5cm on all sides
I’ve used the Festive Farmhouse Suite for these cards – Festive Farmhouse DSP, Elements and Twine and coordinated it with the Takeout Treats Bundle – stamp set and dies. The card base and box lid are Cherry Cobbler.
This would be a great card/gift holder to give at any time of the year – just change your DSP and sentiment to suit the occasion.
Unitl next time …
