Hi there
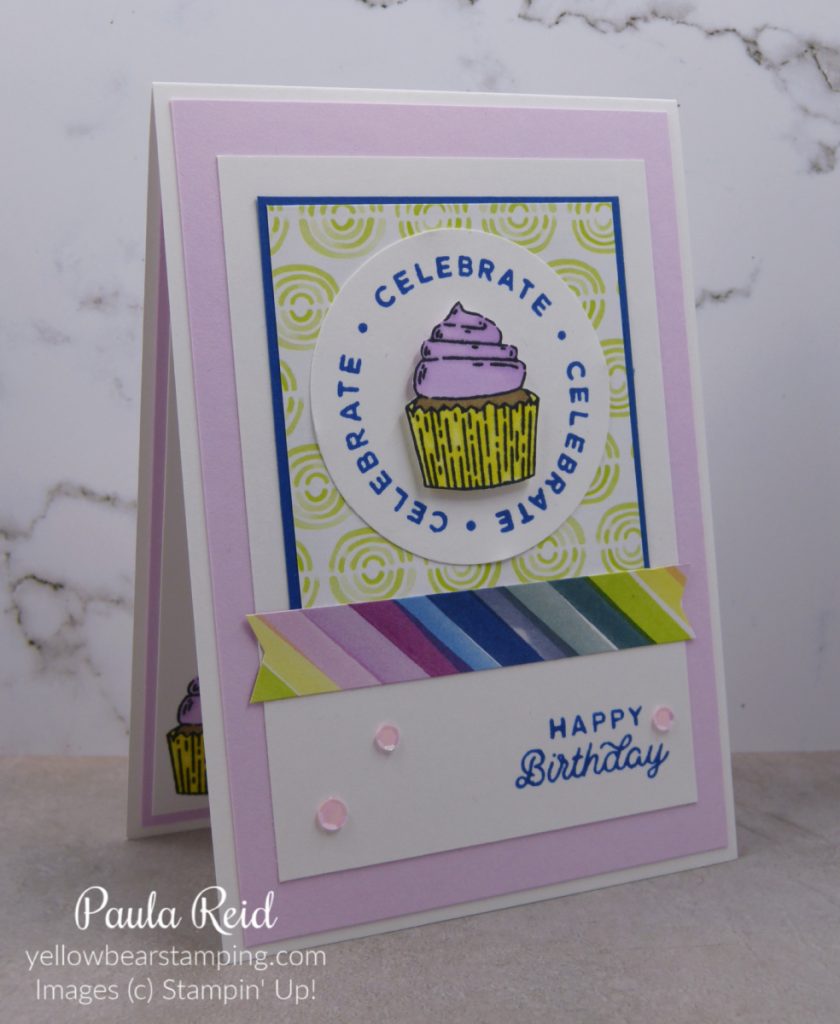
As promised here is the second project we made at my recent workshop. This project features the Circle Sayings Bundle and the Bright & Beautiful 6″x6″ DSP. I’m loving this paper pack and have almost gone through a whole pack since the beginning of May. Don’t forget you have until 30 June to get 15% off selected Designer Series Paper – click here for more info.
I CASE’d this card from Denise Cox – why reinvent the wheel when you see something you like – thanks Denise for your inspiration. I did make a few measurement changes so that the design would fit on a Notecard and used a different colour combo.
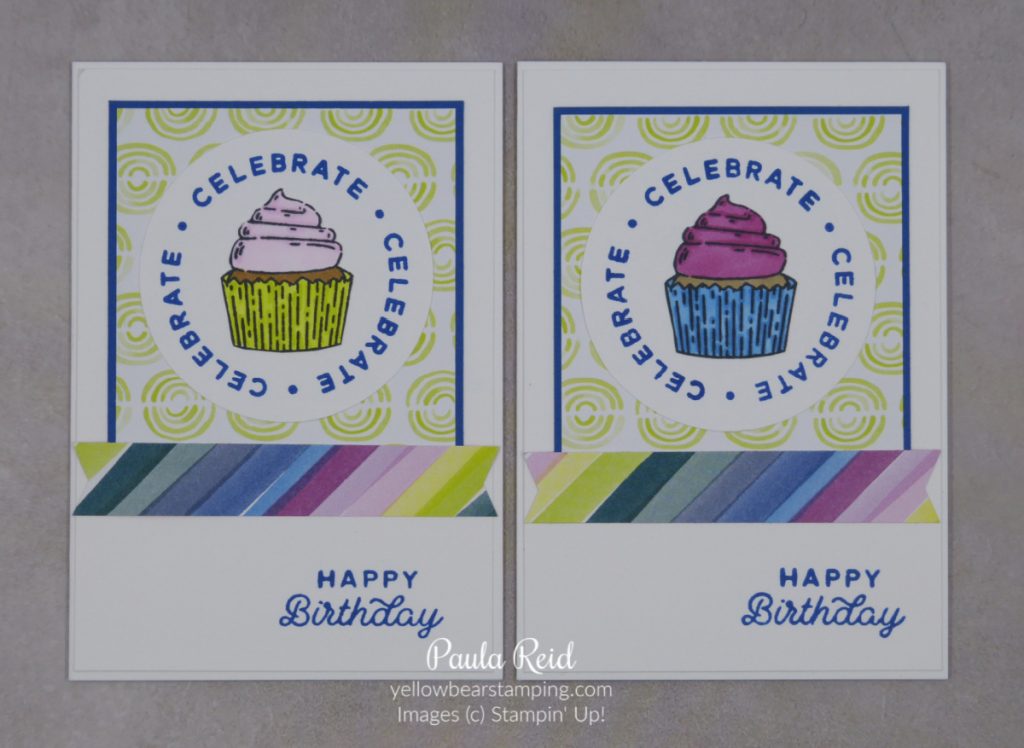
Aren’t these cool? The Bright & Beautiful DSP uses all the new and returning core colours bar Pecan Pie. You really can’t go wrong with this paper pack. There are so many colours and designs and there really isn’t a design/colour combo I haven’t used.
The measurements for this card are – mat is 2 7/8″ square of Blueberry Bushel; DSP is 2 3/4″ square and a 3 3/8″ x 4 7/8″ piece of Basic White. I find it’s best to stamp your sentiment before adhering your project together. The sentiment is from Circle Sayings and is stamped in Blueberry Bushel – I do love this blue.
With Photopolymer stamps being ‘see through’ I’ve found it’s easier to punch the circle then stamp. You can then line your image/greeting up to fit inside the circle or shape your stamping on. To get a good image when using photopolymer stamps I recommend placing a Stampin’ Pierce Mat (page 151) under your cardstock before stamping. There are so many image and sentiment combinations in this set – I can see it being a favourite.
On a scrap piece of Basic White we stamped our cupcake image in Memento Black then coloured it in with a range of Stampin Blends. These are alcohol markers and tend to ‘bleed’ through the cardstock so it’s good to have it as a separate image to be adhered. To create the DSP banner we used the Banners Pick A Punch.
As with the previous project this design can be quickly transferred to a full size card by adding a mat. I also stepped it up by adhering the cupcake with dimensionals and adding some embellishments. When using Notecards you can’t have them to0 raised as they fit snuggly in the envelope.
If you would like to recreate this project click on the links above which will take you to my online store or you can message me directly.
Until next time …