Hi there
When I make a fun fold card I like to be able to start with a standard card base so that you can get two of the design from one sheet of A4 cardstock. The Centre Step card fits into this category. Centre step cards require two cuts and four score lines to create.

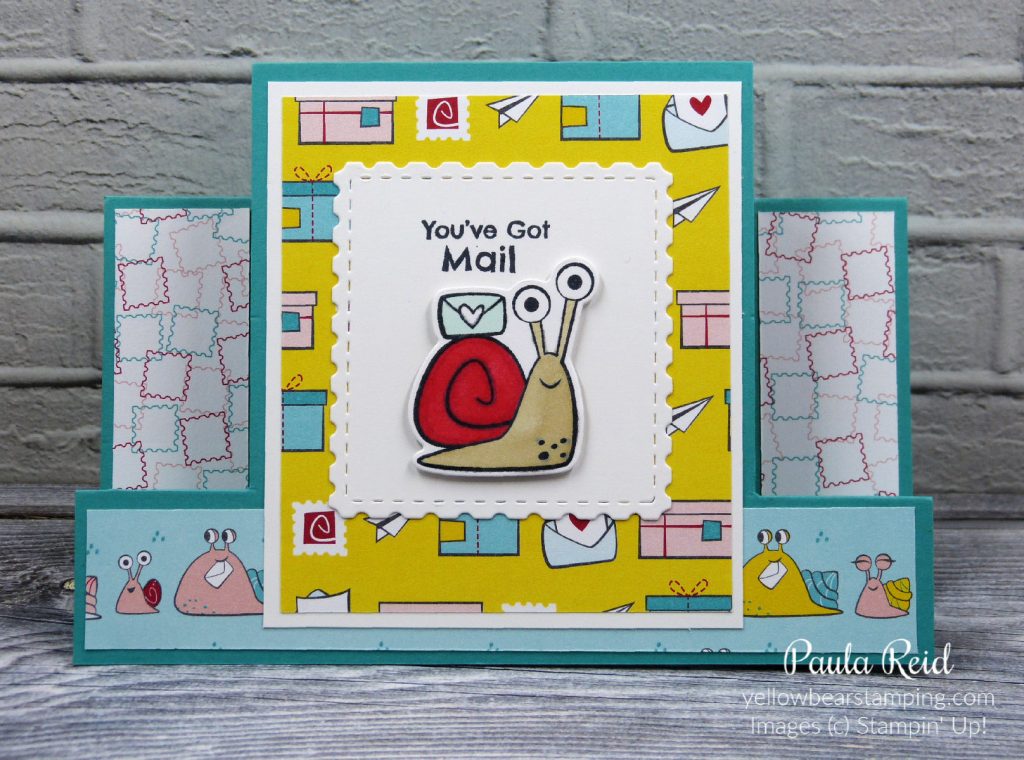
I’ve kept the stamping to a minimum on this card, and let the fold and Designer Series Paper (DSP) do the talking. The Snail It Suite is perfect for this fold. I’ve been able to combine three different designs on the one card.

I stamped the image with Memento Black on a piece of Basic White then die cut it using the Postage die from the Snail Dies. I then stamped it again on a scrap piece of cardstock and coloured it in using the Stampin’ Blends. The coordinating die cuts only the image which was then adhered with dimensionals on top of the original image.

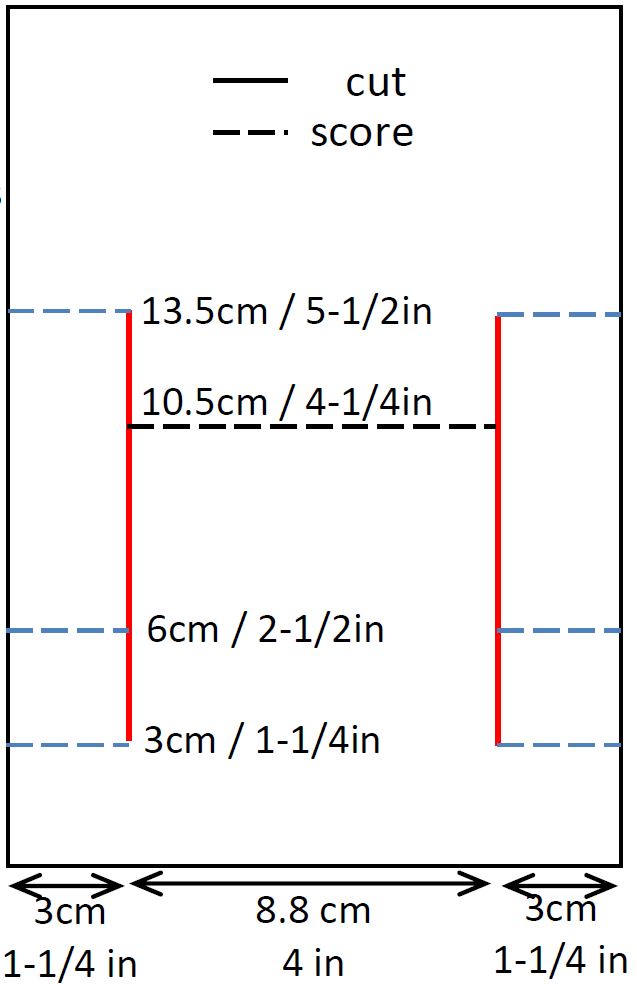
Using the diagram above as a guide place your cardstock in the trimmer with the short end at the top and lined up at 3cm. Cut a vertical slit from 3cm down to 13.5cm (red line). Rotate the cardstock around and repeat for the other side. With the long edge at the top (and cutting blade well out of the way) score three lines from the edge to the slits at 3cm, 6 cm and 13.5cm (blue line). Repeat on the other side. The final score line to do is the black line. With the long edge still at the top score at 10.5cm between the two slits. Now to fold the card on the score lines. Starting with a ‘Mountain’ fold at the 3cm, ‘Valley’ at 6cm and ‘Mountain’ at the 13.5cm. The 10.5cm is also a ‘Mountain’ fold and creates the centre of the card. Make sure you use your bone folder on all score lines to give your card crisp folds. (Thanks to Di Barnes for the diagram).

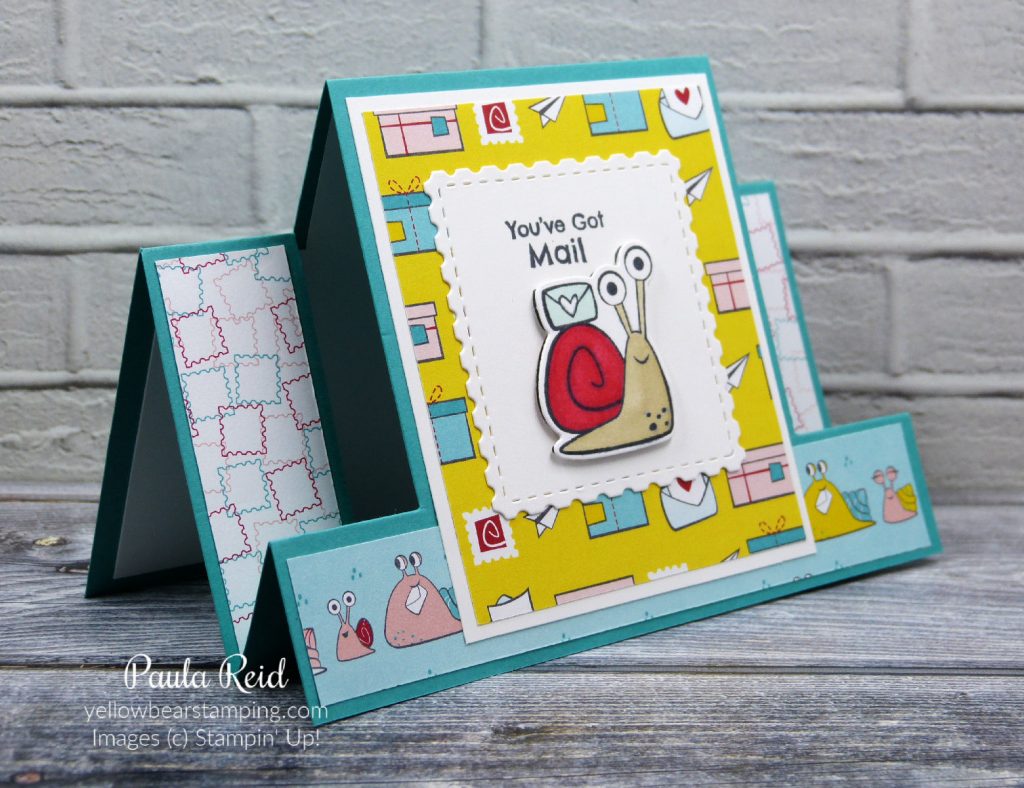
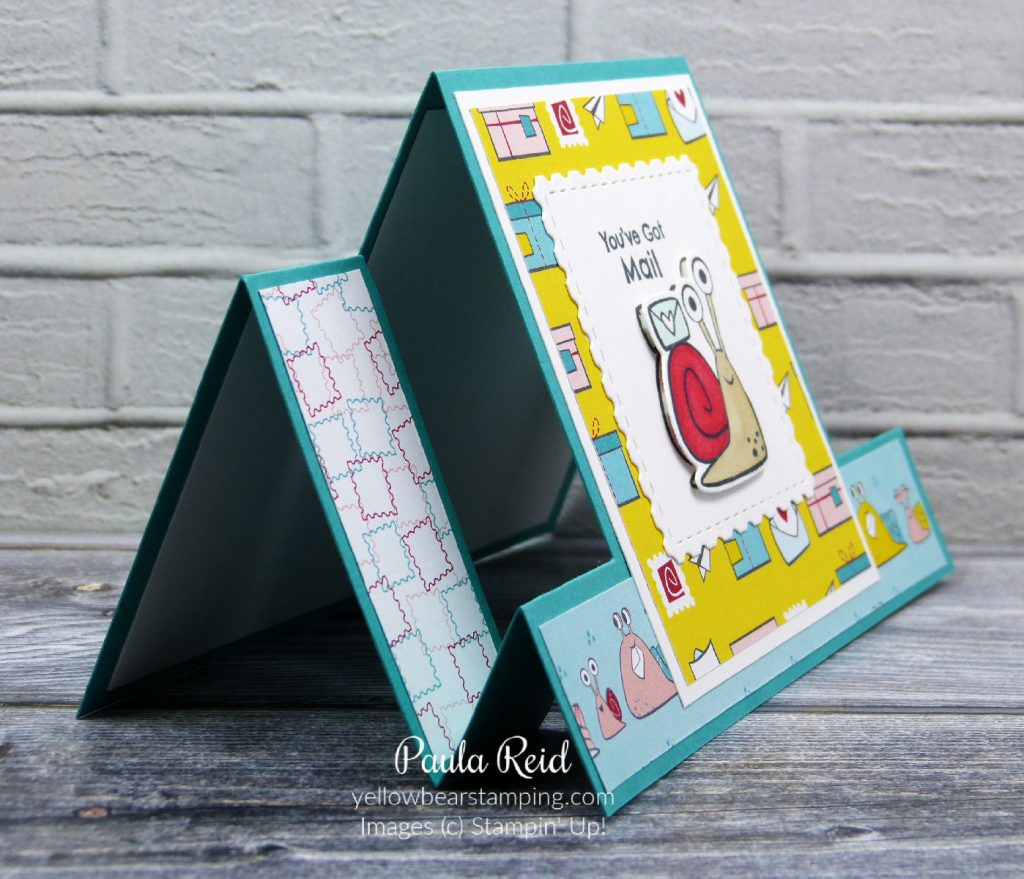
From this view you can can see how the fold works. My DSP measurements are: for the 2 sides 2.5cm x 7cm, the bottom panel 2.5cm x 14.3 and the centre panel 7.8cm x 9.5cm and the mat is 8.3cm x 10cm.
This was a fun card to make.
Until next time …

