Technique Tuesday – Rock ‘n’ Roll with Daubers

By | February 2, 2021

Hi there

What picture do you get when you read the title of today’s post? Daubers doing Rock ‘n’ Roll moves in the craft room? Sorry to disappoint you but it’s not that exciting 🙂

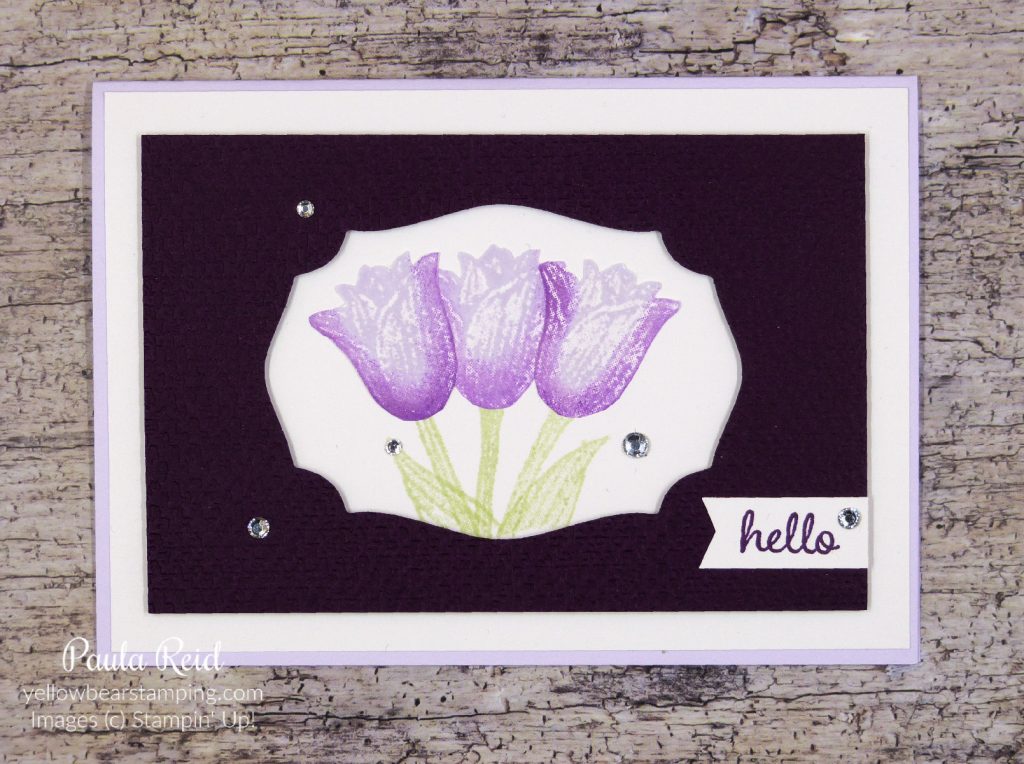
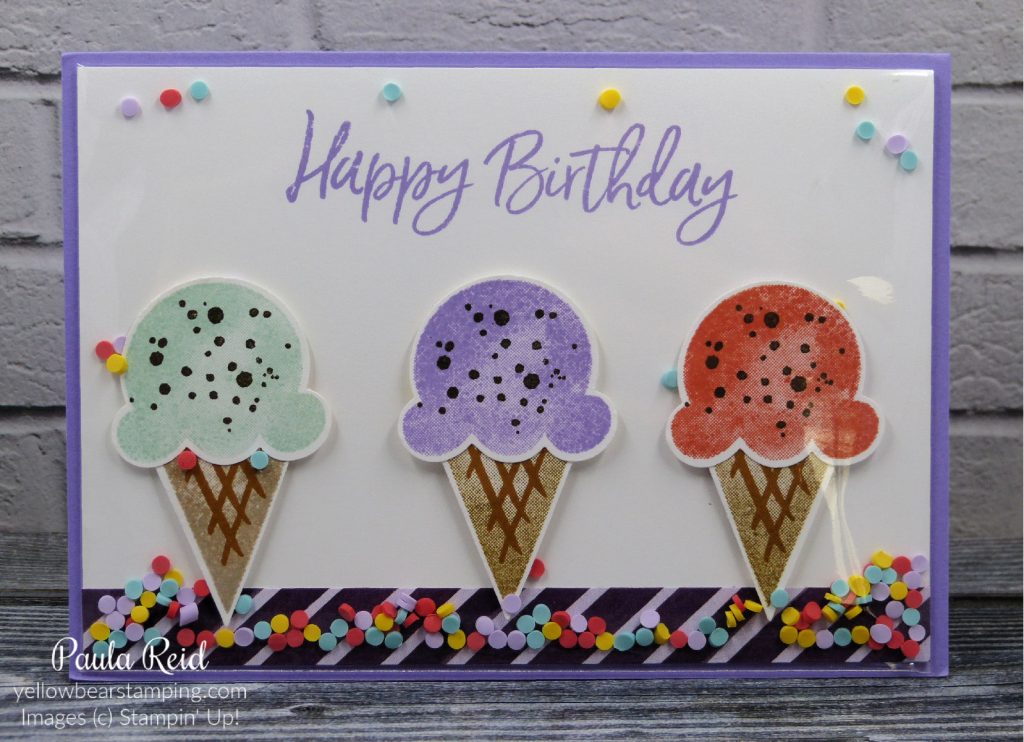
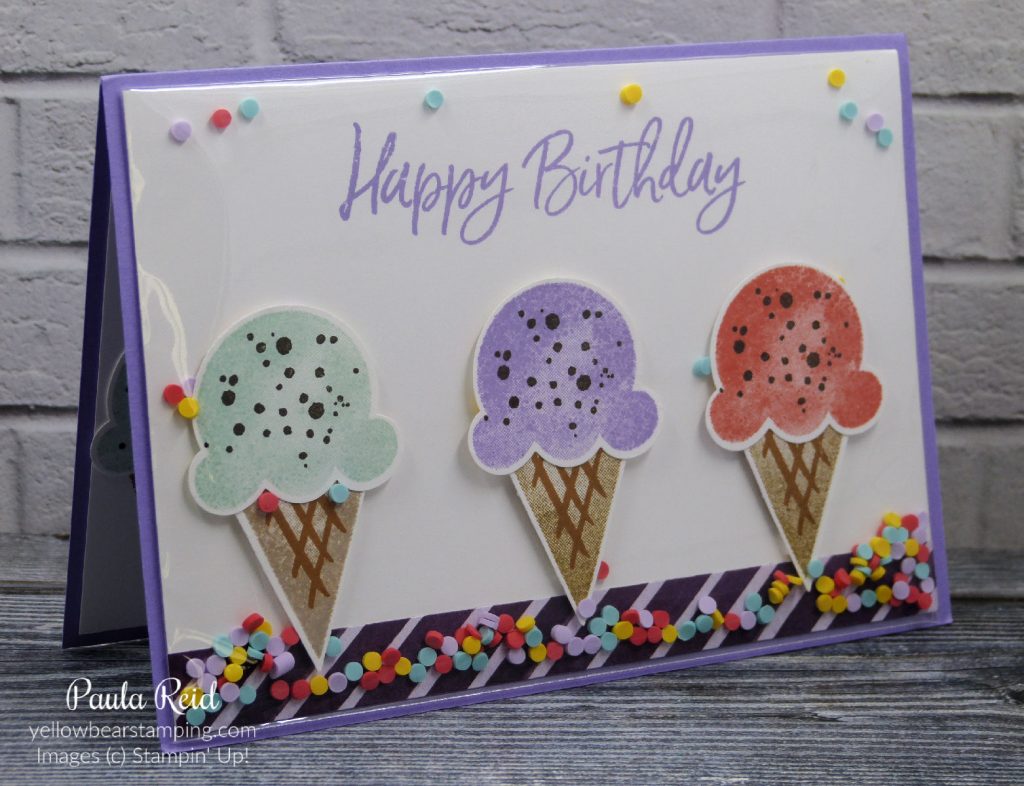
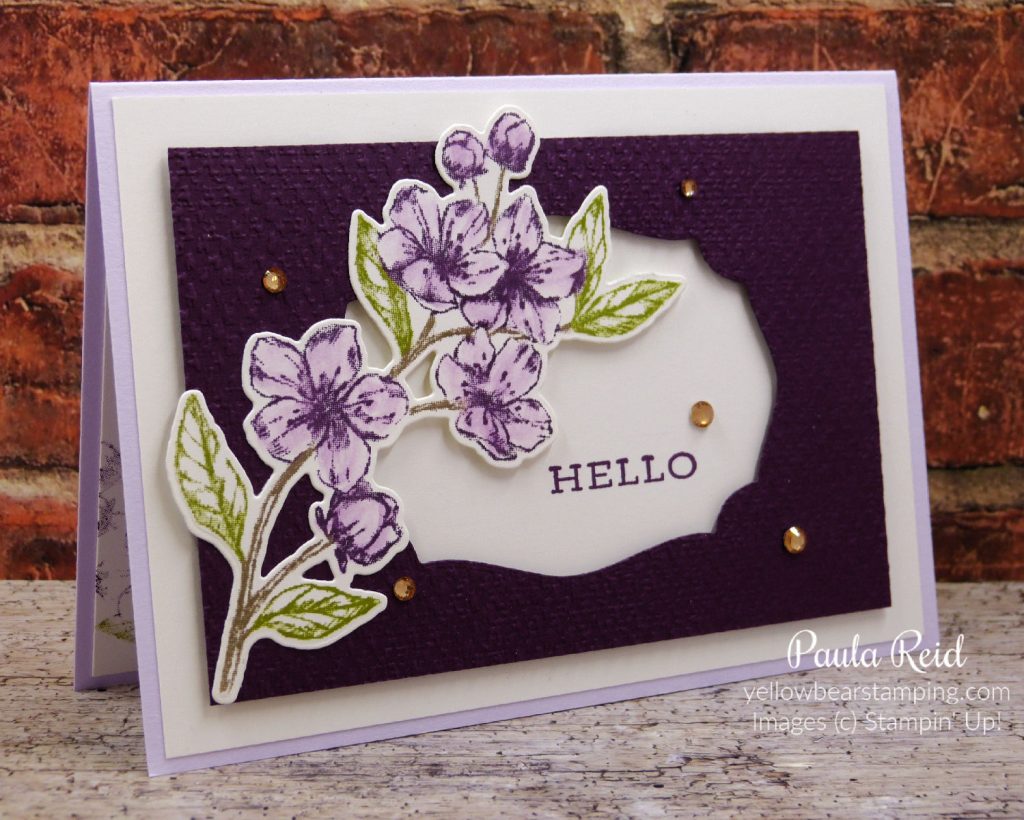
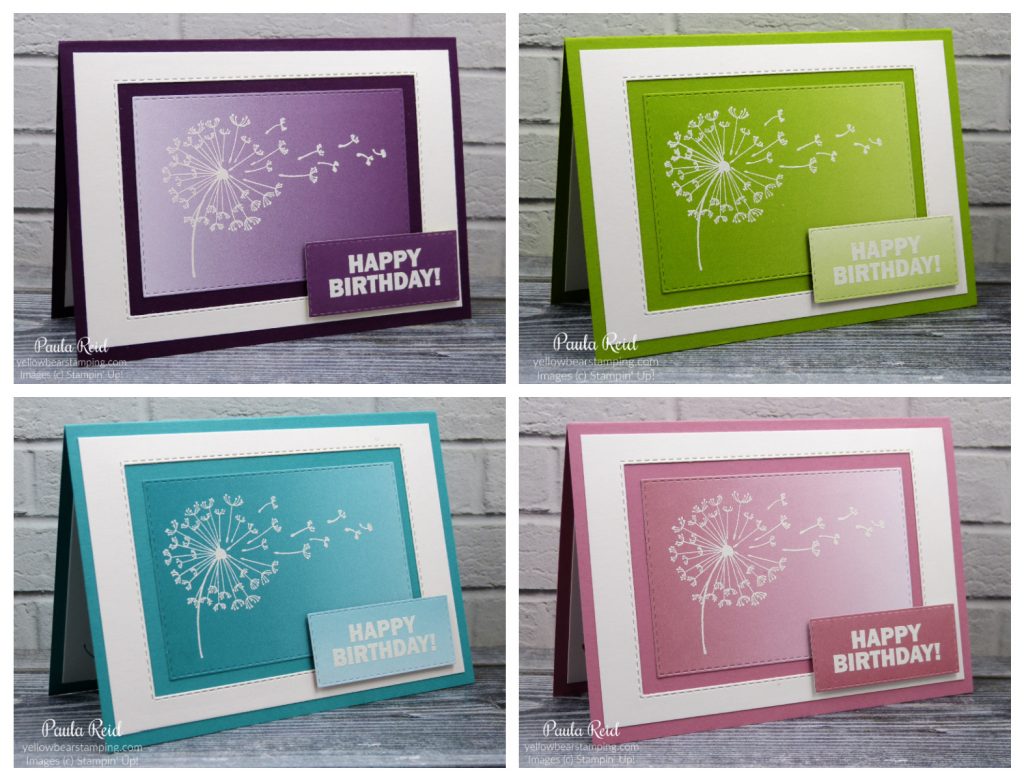
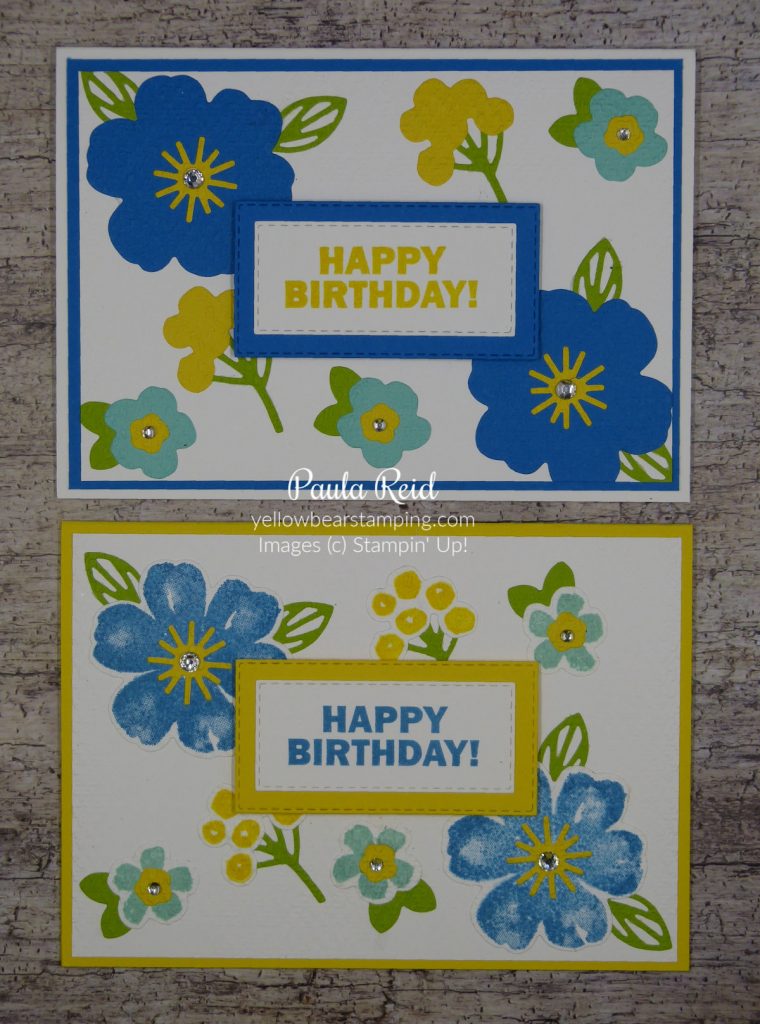
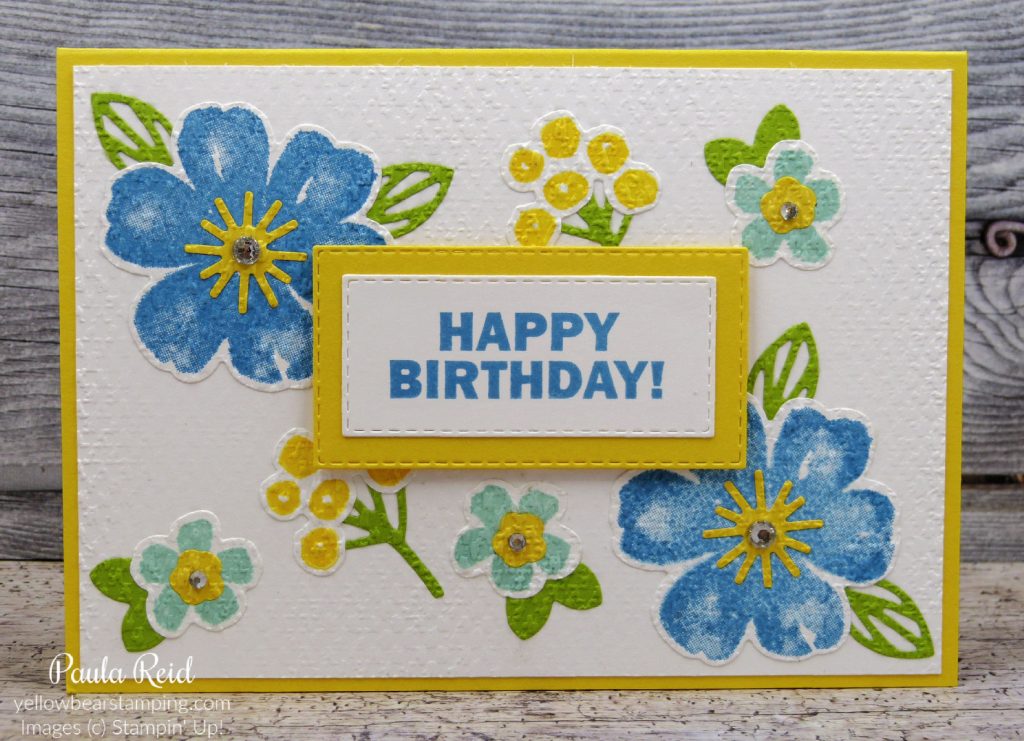
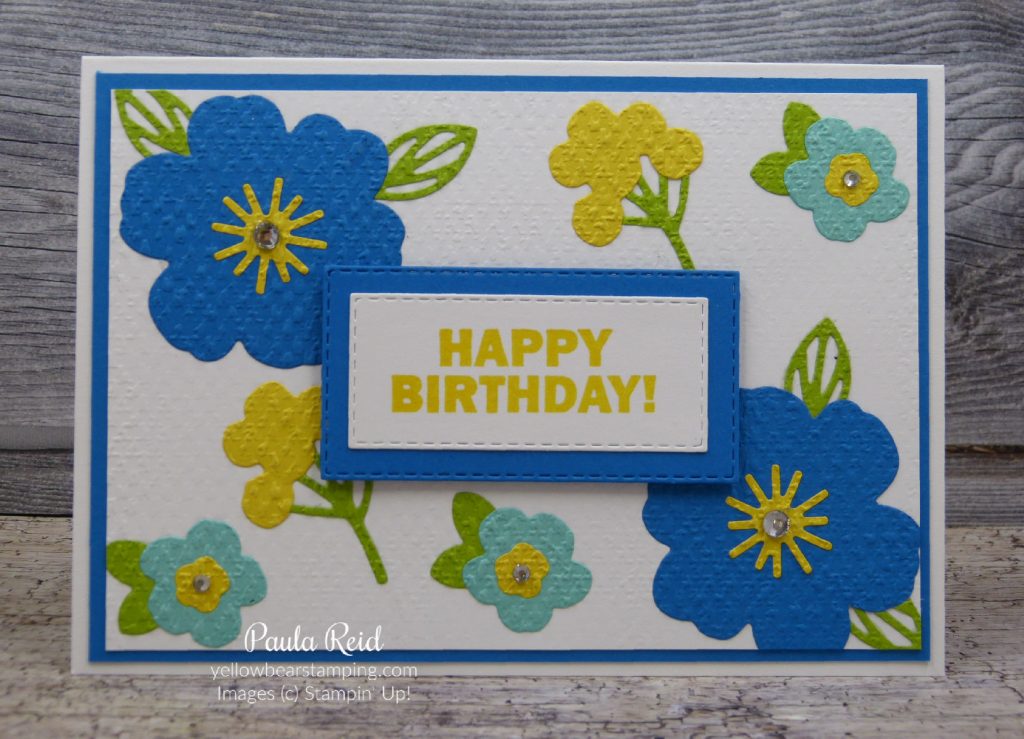
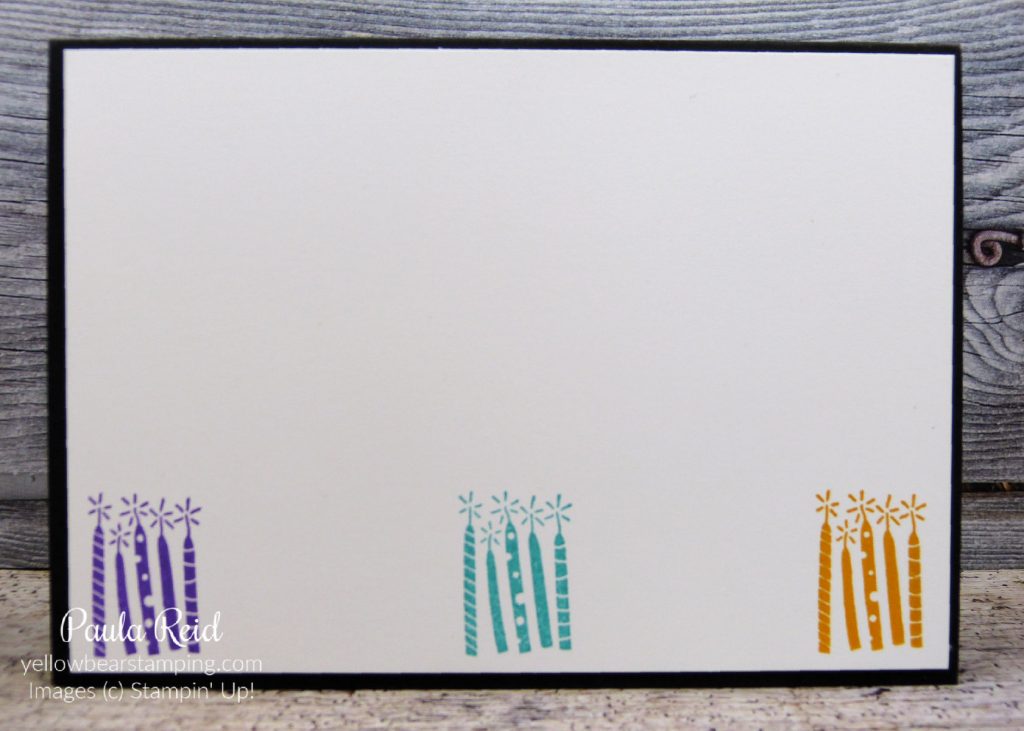
The Rock ‘n’ Roll technique allows you to get two different colours onto the one stamp so that when you stamp the image it comes out with the two colours blended together. You can use inks pads to create this effect although I’ve chosen to use daubers to add my second colour as you get better control.

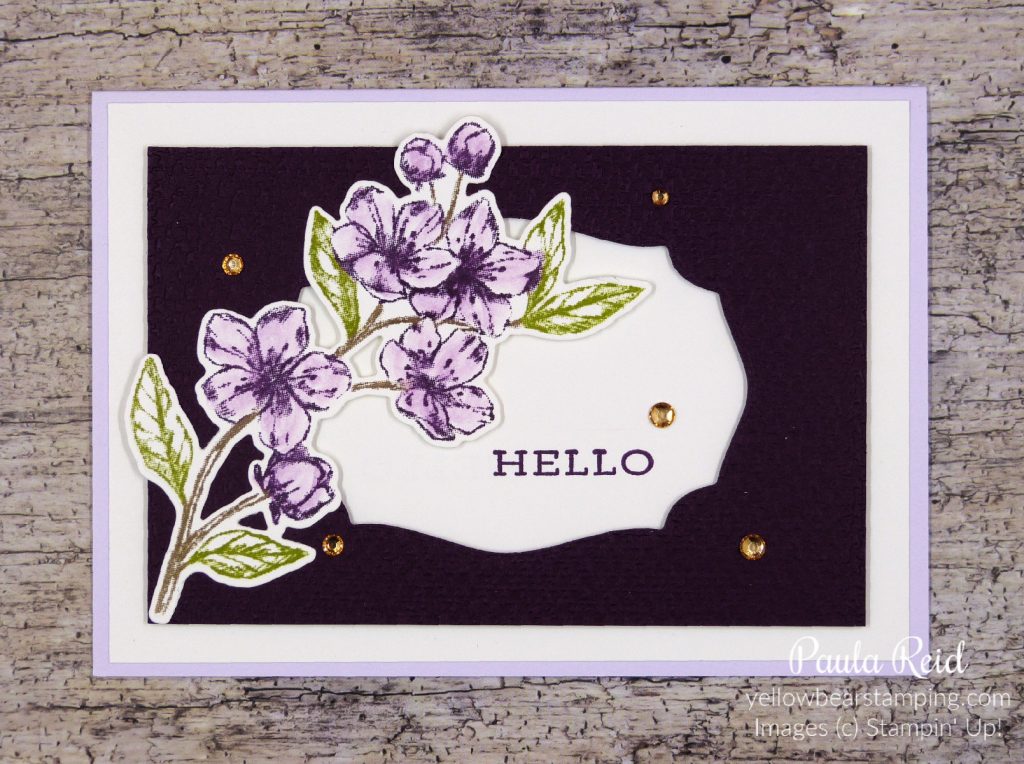
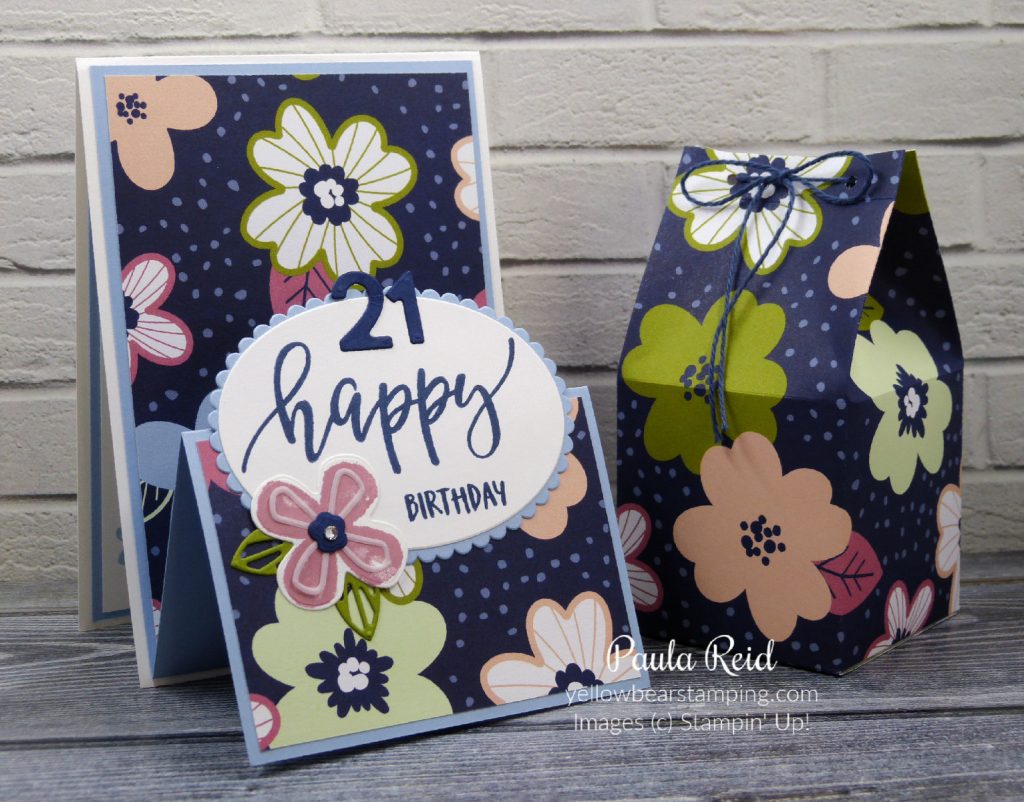
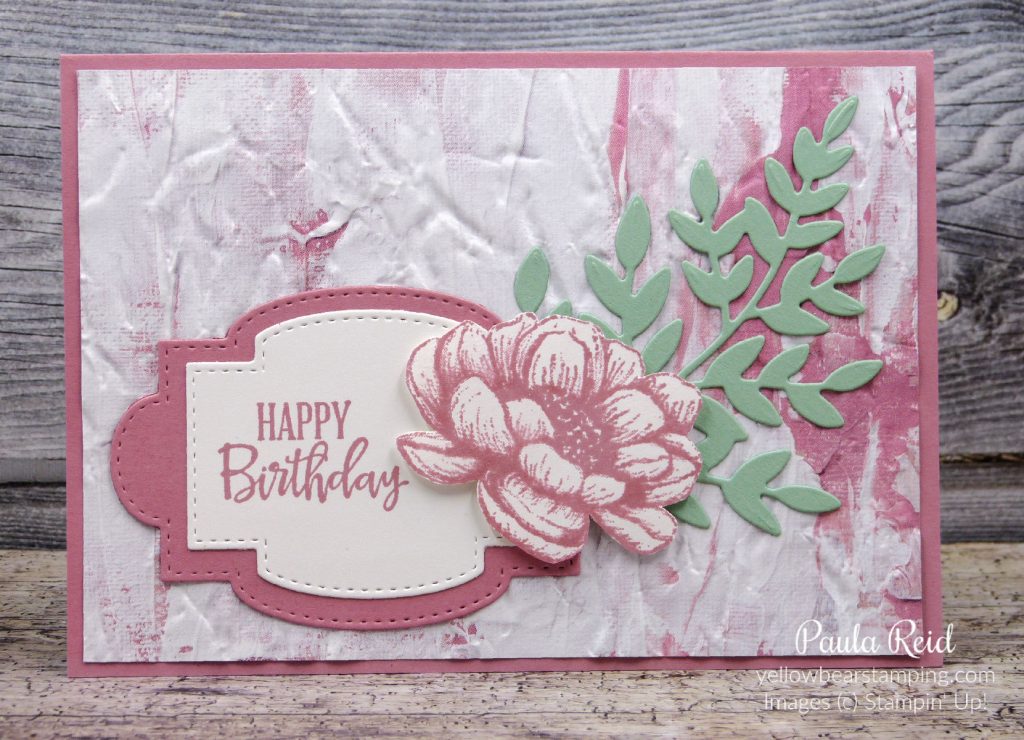
For my sample I’ve used the Timeless Tulips set. The stems have been inked with Soft Sea Foam a colour I don’t use much (not sure why that is). The Tulips have then been stamped with Purple Posy and then using a dauber inked in Blackberry Bliss I’ve lightly ‘tapped’ the edge of the stamp making sure I didn’t go too far into the stamp. You just want to get the second ‘coat’ of ink on the edge. The tulips were stamped on scrap Whisper White then ‘fussy cut’ out. Each image has slightly different colouring just like real flowers.

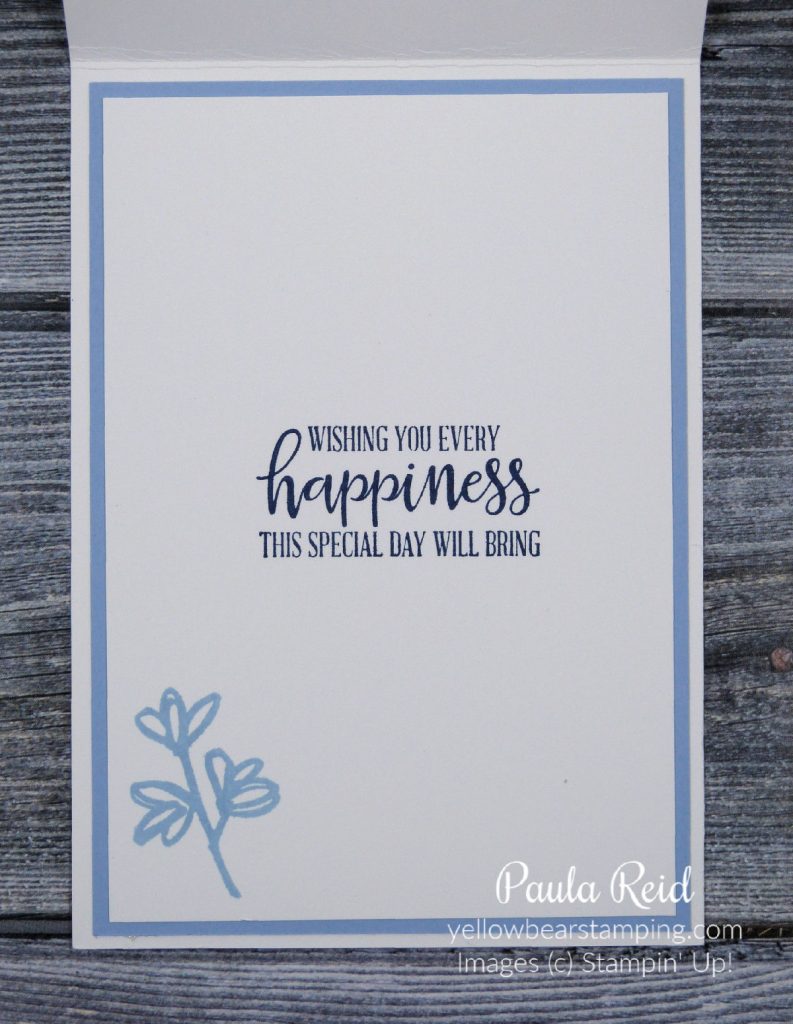
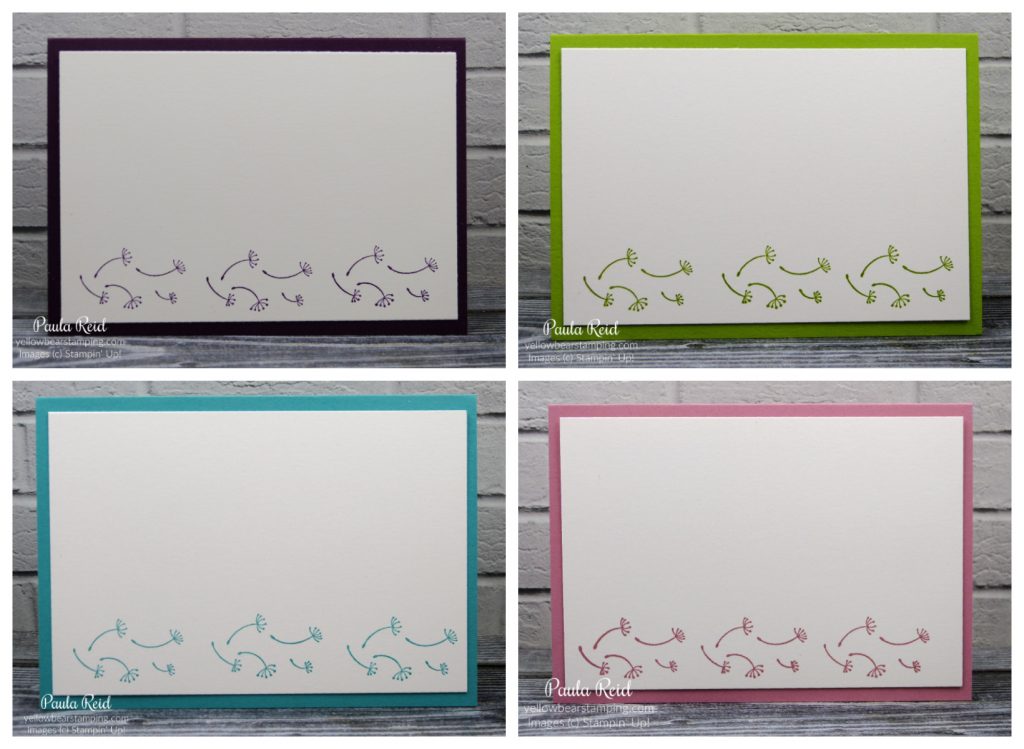
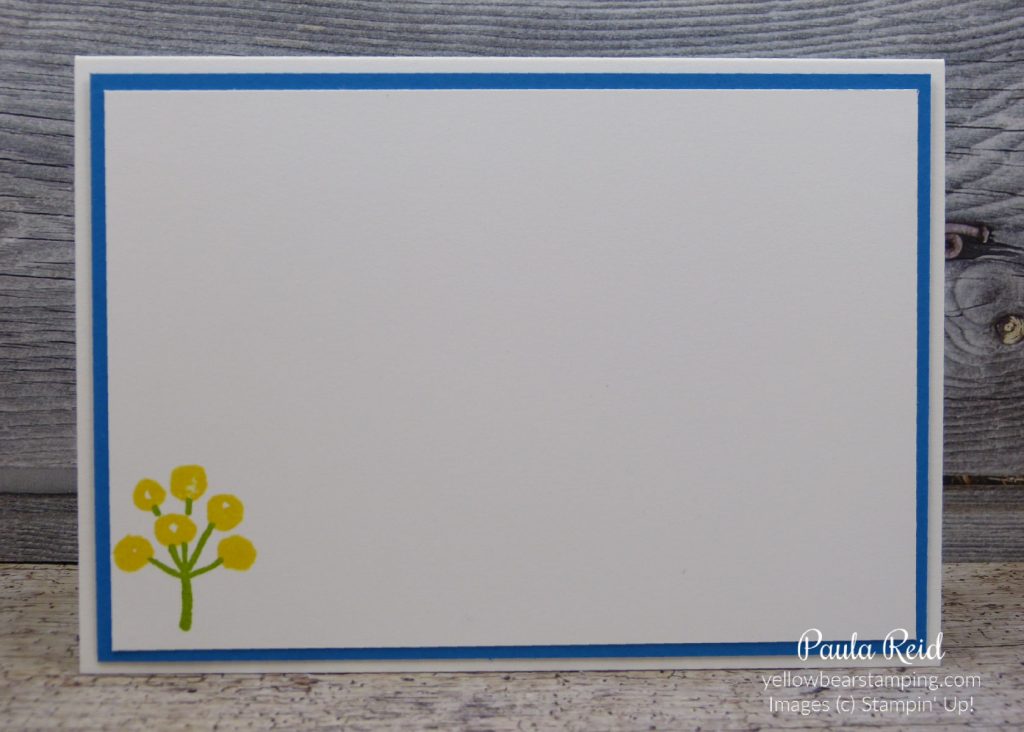
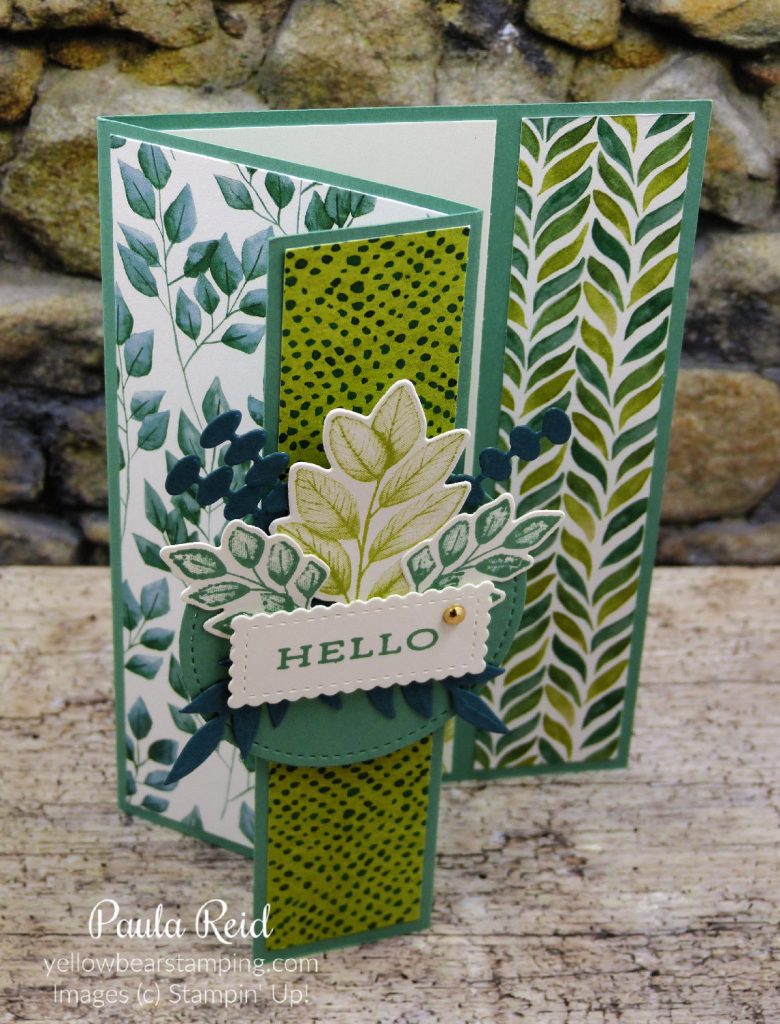
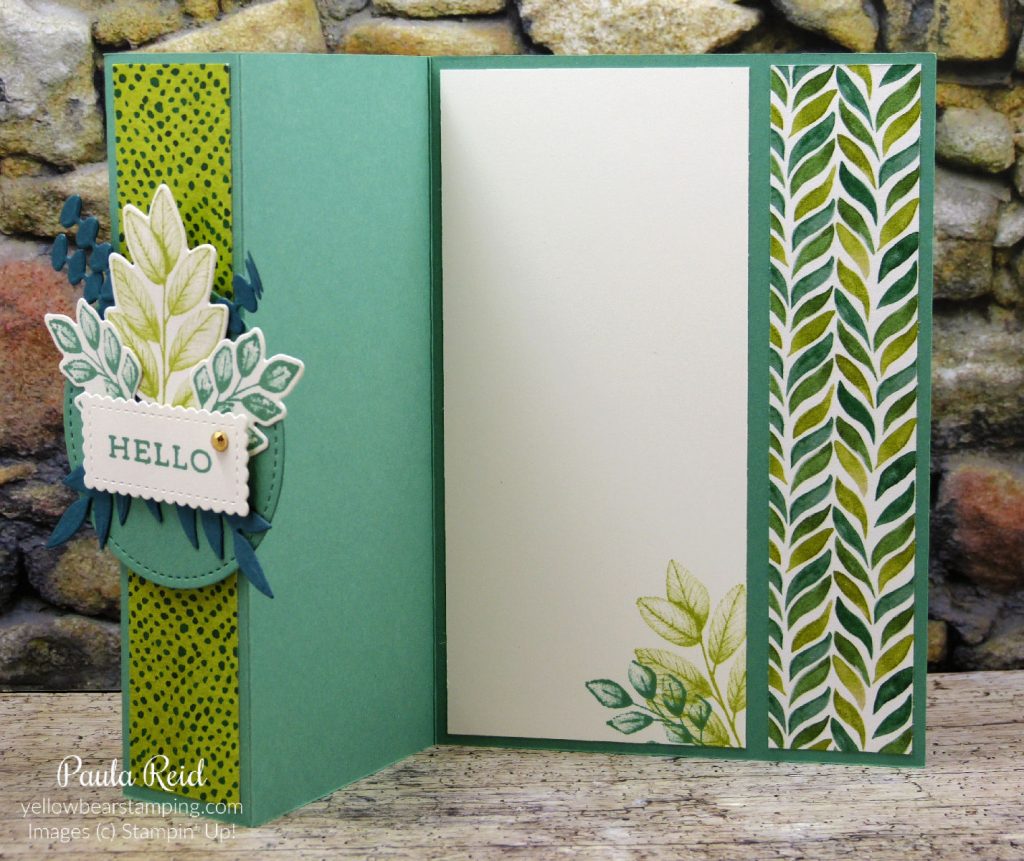
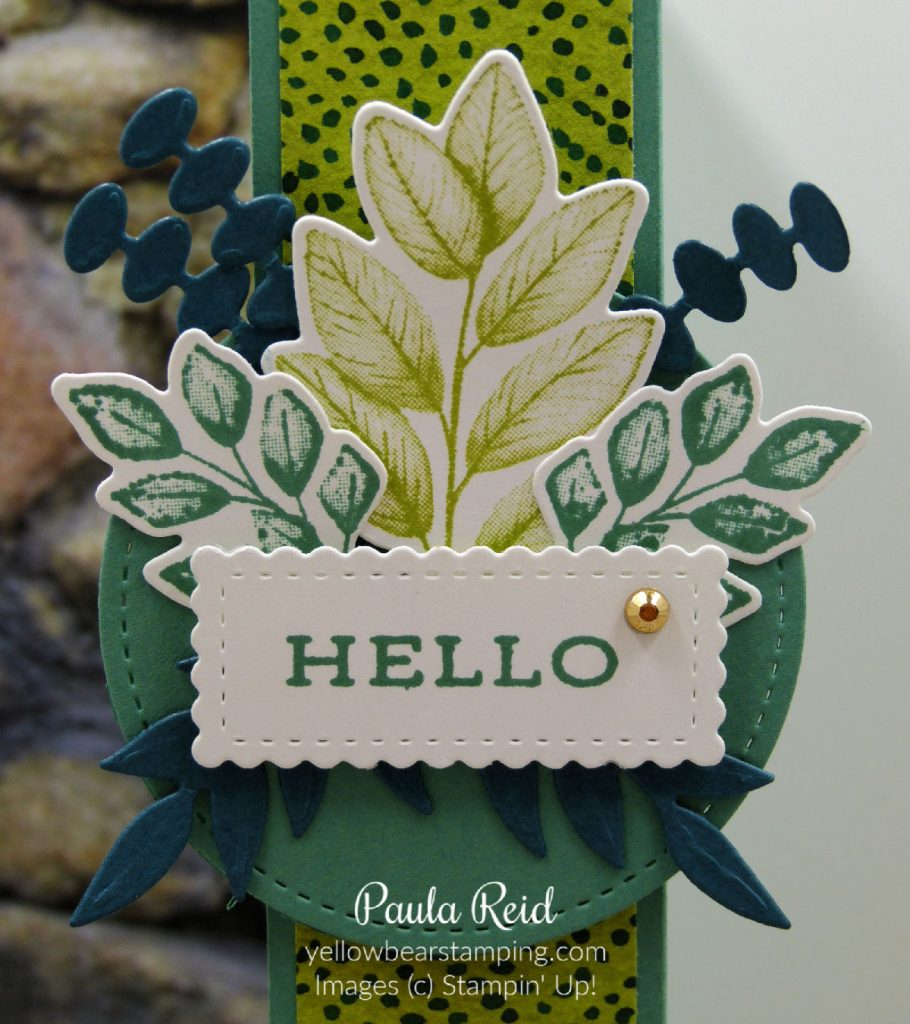
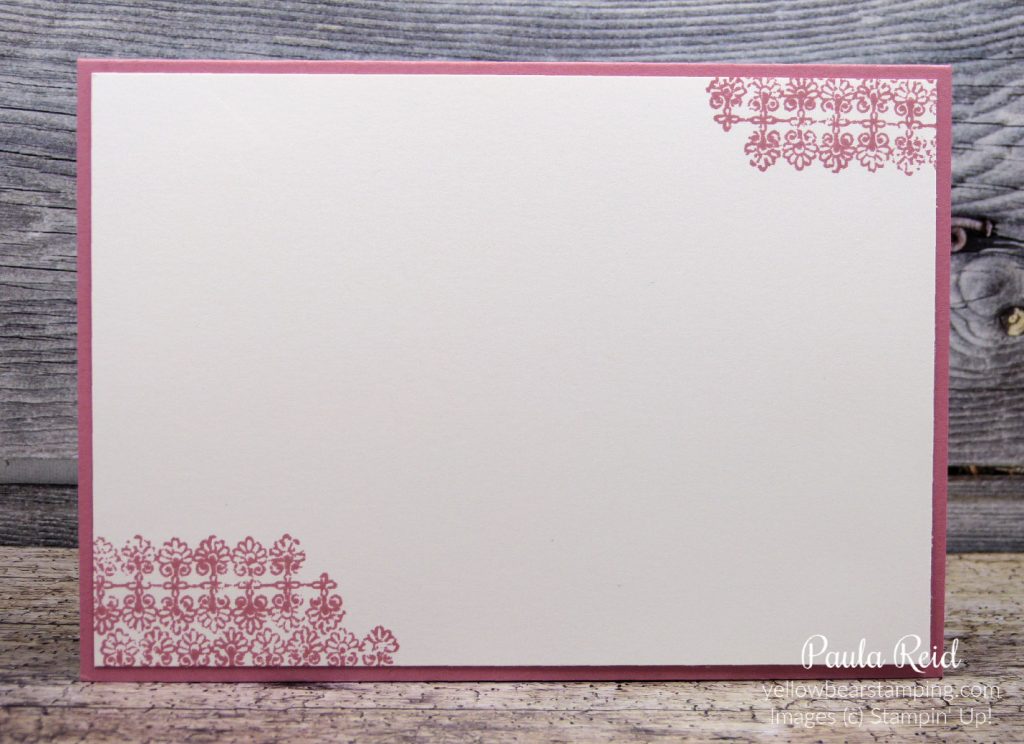
The card base is Purple Posy with a Whisper White mat which the stems were stamped on and then the tulips adhered directly. The top mat has been die cut with the Tasteful Lables die and then dry embossed with the Tasteful Textile 3D Embossing Folder. I had a few of these left over from a swap I did so you might see a few pop up in posts :). I didn’t take a photo of the inside of the card but I stamped a longer stem with a couple of leaves and the tulip was stamped in Blackberry Bliss.

Well that’s all for now. I hope you give this technique a try – either with ink pads or daubers.

Until next time …

Friday Fun Card – Ice Cream Corner Shaker Card

By | January 29, 2021

Hi there

It’s summer here in the southern hemisphere and there’s nothing better than a yummy ice cream on a hot summers day. The Ice Cream Corner Suite in the January-June Mini is the perfect suite of products to use for summer projects. My first project with this suite is a new style of shaker card that uses our clear envelopes (page 153 AC). To see another style of shaker card check out an earlier post here.

To construct this card first I added a 1/2″ strip of the Ice Cream Corner Designer Series Paper to the bottom of a standard card front (10cm x 14.3cm) and stamped my sentiment in Highland Heather. I then stamped my ice cream cones in Soft Suede then Cinnamon Cider for the ‘hash’ stamp. The ice creams are stamped in Pool Party, Highland Heather and Calypso Coral with Early Espresso for the chocolate sprinkles. The stamp set is called Sweet Ice Cream and has a coordinating punch – Ice Cream Cone Builder Punch. You can purchase these as a bundle or part of the suite. The cones and ice cream are punched separately, adhered together then adhered to the card front with mini dimensionals. Then the fun begins.

Slide the card front into the clear envelope and pour some of the Ice Cream Corner Sprinkles in. You don’t need too many otherwise they won’t ‘shake’ around easily. These sprinkles are kind of like a foam and made up of Daffodil Delight, Pool Party, Purple Posy and Terracotta Tile. Once you are happy with the number of sprinkles remove the backing tape and seal the envelope. You will need to fold the excess of the long side of the envelope to the back. I taped it down with Tear and Tape. I then ran Tear and Tape on the back around the edge and adhered it to my card base. So simple but really effective.

I also made a portrait version to show the versatility of this style of card.

You could use this style of card with all sorts suites using our DSP or stamped backgrounds. For the ‘shaker’ you could use sequins – check out pages 157 and 158 of the AC for the Woven Threads and Whale of a Time sequins or the Flowers for Every Season Gems. Make sure you add a packet of Clear Envelopes to you next order.

Until next time …

Technique Tuesday – Direct to Rubber with Stampin’ Write Markers

By | January 26, 2021

Hi there

After some ‘technical issues’ I’ve finally managed to get here.

Today’s technique uses our Stampin’ Write Markers to ‘ink’ up stamps. These markers are water based compared to the Stampin’ Blends which are alcohol based. Markers are great to use when you have an image that requires multiple colours and is too hard to ink up using ink pads. By applying the markers directly to the rubber you can achieve multiple colours on the one stamp before stamping it onto your cardstock.

Here I’ve used the large floral image from Forever Blossoms (page 68 AC) which has three components – stem, leaves and flowers. This would be too hard to ink up with three different coloured ink pads and not get the colours overlapped.

Stampin’ Write Markers are dual tipped – they have a broad brush tip for colouring and a fine tip for writing. For the direct to rubber technique you want to use the broad tip. Always your the side of the tip to apply the ink to the rubber. This will help keep the tip from breaking down.

I started by colouring in the leaves with Old Olive then the flowers with Blackberry Bliss and finally the stems with Soft Suede. Now don’t laugh at this next tip – it’s an important step in this technique. Before you stamping your image onto your cardstock you need to ‘huff’ on the stamp to remoisten the colours – this will give you a good image.

The floral image has been die cut with the coordinating Cherry Blossoms die. The Blackberry mat has been die cut with the Tasteful Labels die and then dry embossed with the Tasteful Textile 3D embossing folder. The sentiment is from the Forever Fern stamp set (page 110 AC) . I wanted the flowers to have a bit of a ‘sparkle’ so I applied some Wink of Stella which actually drew some of the colour of the outline giving the flowers a light colour. The final set was to add some ‘bling’ – here I’ve used the Champagne Rhinestones.

Well I hope this has shown you a new way to use your markers – they’re not just from colouring directly onto cardstock.

Well that’s all for now. Until next time …

Friday Fun Fold – Double Easel Card

By | January 22, 2021

Hi there

I’ve had fun making Double Easel Fold cards of late – a great way to show our beautiful Designer Series Paper (DSP). For these cards I’ve used the Paper Blooms DSP which is available for you to select as your FREE purchase with every NZD$110 order placed between now and 28 February. The Paper Blooms pack is a 12×12 pack of paper and you get 2 sheets of each design – there are 6 double sided designs. Check out my Catalogues page to view the Sale-A-Bration brochure.

The Pretty Perennials Bundle from page 31 of the Jan-June Mini coordinates beautifully with this DSP. The card base is Thick Whisper White and the mat is Night of Navy. The flower has been stamped with Seaside Spray then die cut from the Perennial Petals dies.

The overlay on the flower has been die cut from Vellum Cardstock (page 153 AC). It’s been ages since I used Vellum on my projects and it really goes well with this set. Do you have products you’ve purchased then forget to use?

To make this card you need one piece of cardstock (Thick Whisper White) measuring 10.5cm x 29.7cm and scored at 14.8cm, a second piece of cardstock (Night of Navy) measuring 10cm x 28.8cm and scored at 7.2cm and 14.4cm and then folded in a ‘mountain’, ‘valley’ formation and two pieces of DSP measuring 9.5cm x 13.8cm and 9.5cm x 6.7cm. Adhere the larger section of the Night of Navy to the Thick Whisper White then adhere you pieces of DSP. The final step is to decorate the front – I used the Layering Ovals and Pretty Perennials Bundle.

My cousins daughter turns 21 shortly and as I was on a roll with the Double Easel card I made one for her and a Milk Carton filled with chocolates to match the card (she also got another gift from us but you always have to have a chocolate gift)

For the inside I’ve added a mat of Seaside Spray and a stamped insert of Whisper White. The sentiment is from one of my ‘go to’ sentiment sets – Peaceful Moments (Page 19 AC). Every stamper should have this set in their stash.

I hope you give this card style a go – fun fold cards are always well received.

Until next time …

Technique Tuesday – Heat Embossing

By | January 19, 2021

Hi there

Today’s technique is heat embossing. This has got to be one of my favourite techniques. I never get sick of seeing the transformation of the embossing powder once heat is applied to it – it’s so cool.

In my earlier post I used clear embossing powder added on top of an already inked image whereas these projects use coloured embossing powder – white in this case.

White embossing creates a very striking image don’t you think?

Top Left – Blackberry Bliss, Top Right – Granny Apple Green, Bottom Left – Bermuda Bay, Bottom Right – Rococo Rose

These images from the Dandelion Wishes set have been inked in VersaMark then stamped on the Oh So Ombre Designer Series Paper (DSP) then White Embossing Powder has been added on top before being heated with the Heat Tool. By applying heat to the image the powder melts and gives a raised effect. A simple technique but very effective. The sentiment is from Approaching Perfection another FREE Sale-A-Bration item.

After the heat embossing I die cut the image using the Rectangle Stitched dies – these are one of my most used die sets. If you don’t own this set I would highly recommend you adding it to your next order – they are very versatile. I also used these dies to create my Whisper White border mat. The mat measures 10cm x 14.3cm and then I die cut the third largest die from the middle. The sentiment has also been heat embossed on a scrap of the DSP.

And finally the inside – this image is also from the Dandelion Wishes set and just finishes of the card.

I had fun making these cards – what images do you have that you could use with this technique?

Until next time …

Happy Anniversary

By | January 19, 2021

Hi there

Today Phil and I are celebrating our 19th Wedding Anniversary :). I thought I’d share the card I made for him now as I have some more projects to share with you later today. He decided we’d do our card exchange at dinner so he has to wait a bit till he gets to see it.

When I saw the Darling Donkeys set in the Sale-A-Bration brochure I knew exactly what their first inking would be :). I’ve teamed it with the Oh So Ombre paper – also from the Sale-A-Bration brochure. The sentiment is from Many Mates – a great ‘go to’ sentiment set.

The donkey has been heat embossed then coloured in with our Smoky Slate Stampin’ Blends. To heat emboss I inked up the image with VersaMark then Basic Grey ink and stamped him on Whisper White and added Clear Embossing Powder before heating. This method allows you to have an embossed image in whatever colour you want. Check back later today for more projects using this technique.

Here’s a closeup – hopefully you can see that the image has been heat embossed. Once I’d coloured him in I used the Color Lifter blend to lighten the body and the hooves. By doing this it gives you more colour options.

And no card is complete without stamping on the inside. Again this little donkey has been heat embossed in the same way as the front image was. The sentiment – which is perfect for my card – is from Dandelion Wishes.

Well that’s all from Mrs Reid :). Until next time …

Have a great day.

Friday Fun Card – Stitched Triangle Recess Card

By | January 15, 2021

Hi there

Rather than sharing a fun fold card today I thought I’d share a fun card instead. This card doesn’t require any stamping – just your dies and an embossing machine.

I placed three different shaped triangles on a piece of Whisper White measuring 9.5cm x 13.8cm and die cut them then repeated the cutting. Using the Playful Alphabet dies and Foam Adhesive Sheets I die cut the letters from Pacific Point, Daffodil Delight, Poppy Parade and Granny Apple Green.

The card base is Bermuda Bay and has a Basic Black mat (10cm x 14.3cm) adhered directly to it. The Whisper White card front has been adhered to the Basic Black using the Foam Adhesive Strips (page 162 of the AC). Make sure you place strips on the thin strips between the triangles so that they don’t sag. Once the card base is together then add your letters. The coloured ‘sprinkles’ in the two end triangles are from the long edge die that is included in the Stitched Triangle dies.

I also used the die for the inside of the card and stuck the coloured bits in the gap. It took a bit of die cutting using scraps to create this edge but looks very effective.

Another friends daughter had a birthday around the same time so I made this lovely feminine coloured card but changed the end triangle to make the card a ‘shaker’ card.

This time I put the cut outs from the Whisper White back in their space but adhered them directly to the Purple Posy mat before adding the letters which are cut out in Rococo Rose, Purple Posy, Pretty Peacock, Pool Party and Seaside Spray.

To make the last triangle a ‘shaker’ I cut a piece of Window Sheet and covered the hole then added the Foam Adhesive Strips to the edge and filled it with some Woven Threads Sequins. To keep the sequins in I then added a Whisper White backing before adhering it to the Purple Posy mat and Pool Party card base. The ‘Happy Birthday’ has been die cut from Well Written dies. Before I cut the words out I adhered the Adhesive Sheets to the back of the card stock – this makes it way easier to stick the words down once cut.

And here’s the same design for the inside – a nice way to finish off the card. I kept finding white card stock triangle on the floor for ages after die cutting these two inserts :).

These were fun cards to make and very effective. Lots of possibilities for this design – it doesn’t need to be letters that fill the gaps.

Until next time …

Technique Tuesday – Inlaid Embossing

By | January 12, 2021

Hi there

Today’s technique carry’s on from last weeks Dry Embossing technique. I’ve combined dry embossing with dies cuts and stamped images to create a technique known as Inlaid Embossing. The colour combo comes from this months SU! Colour Challenge – head on over and see the various creations made with the below colours and while you’re there why not join in the fun.

Image may contain: plant and text

When I’ve made cards in the past with the Inlaid Embossing technique I’ve gone with circles cut from cardstock but thought I’d try adding die cut images and stamped images – and they work really well.

If you’ve checked out the new January-June Mini catalogue you may recognise the above – it’s the Pretty Perennial bundle from page 31.

Here I’ve stamped the images on Whisper White in Pacific Point, Coastal Cabana and Daffodil Delight then die cut them with the coordinating die. The centres and leaves have been die cut from cardstock. I placed my images on the Whisper White cardstock (10cm x 14.3cm) moving them around until I was happy with the placement then adhered them with liquid glue. Allow it to dry a bit before running it through the embossing machine with your chosen embossing folder. I’ve gone with the Tasteful Textile folder. The embossing merges the two layers together to create a cool effect. Add your sentiment and some bling and your creation is complete. How easy but effective is that?

My next card uses the same principle but this time it’s done with just the die cuts – no stamping (other than the sentiment)

You get two different looking cards from the same technique. The measurements for this card are Whisper White mat – 9.5cm x 13.8cm, Pacific Point mat – 10cm x 14.3cm which has been adhered to a Thick Whisper White base.

The sentiment is from the Approaching Perfection Sale-A-Bration set which you can select as your FREE item when you place an order with me of NZD$110 or more between now and the 28th February. One of my most used die sets is the Rectangle Stitched dies – if you don’t own this set yet I would highly recommend you adding it to your shopping list.

Well that’s all for now – check back again soon for more crafting creations.

Until then …

Colour INKspiration Challenge – CI#91

By | January 10, 2021

Hi there

It’s ages since I participated in a challenge – colour or sketch – and this weekend I’ve created cards for two different colour challenges. My first card is for the Colour INKspiration challenge. I needed two boy (15 year olds) cards so this combo was perfect.

No photo description available.

I chose Mango Melody, Granny Apple Green, Bermuda Bay, Pretty Peacock and Gorgeous Grape for my colours and then I found a layout on Pinterest so married the two together and this is what I created.

Using scraps of cardstock I die cut three different styles of triangles from the Stitched Triangle dies. The ‘Happy’ has been die cut using the Playful Alphabet dies and the Foam Adhesive Sheets.

I wanted a solid image for the ‘Birthday’ so went with one of the Sale-A-Bration sets ‘Approaching Perfection’. The stamp actually has ‘Happy Birthday!’ so I used a Post It note to cover the bits I didn’t want before inking it up with VersaMark and then heat embossing in White. I then die cut it using the Tasteful Touches dies

And for the inside you need some candles so the ‘Approaching Perfection’ set was used again.

Seeing the ‘boys’ are turning fifteen I stamped the image three times using Gorgeous Grape, Bermuda Bay and Mango Melody.

Check back on Tuesday night for the second colour challenge card which also has a technique.

Until then …

Fun Fold Friday – Fold Back Card

By | January 8, 2021

Hi There

Are you ready for another easy fun fold card. This card is similar to last weeks Fun Fold but instead of folding the front back on itself in half this week we fold back 1/3 of the card front so that when the card is closed you get to see three different designs of paper.

The additional score line is scored at 3.5cm. You will need to cut 3 pieces of DSP – 2 of 3cm x 14.3cm and 1 of 6.5cm x 14.3cm. You will also need a piece of Whisper White measuring 6.5cm x 14.3cm for the inside of the card. Last up you will need scraps for your sentiment and floral arrangement.

Hopefully from this photo you can see where all the pieces get adhered.

The card base for the card is Just Jade and the images have been stamped in Just Jade and Pear Pizzazz.

For the front decorative piece I used the Forever Fern Bundle stamp set and the dies (page 110 AC). There are 14 dies in this set 6 of which coordinate with stamps. The ‘greenery’ pieces have bee die cut from Pretty Peacock. When I first got the new Gilded Gems (page 157 AC) I thought they were too high but now that I’ve used them on a number of projects I like them :). I die cut the second largest Stitched Circle to adhere all my components too which was adhered with dimensionals to the card front.

I created a second card in this style but instead of adding the sentiment and greenery to the card I created a bellyband and used elements from the Forever Gold Laser-Cut Specialty Paper (page 152 AC).

And here’s what the card looks like without the bellyband on.

I hope you’re inspired to give this fold a go and come up with your own creations for decorating the front.

Until next time …

Technique Tuesday – Dry Embossing Designer Series Paper

By | January 5, 2021

Hi there

Warning – this is a longer than usual post. For ages I’ve wanted to create a Techniques Folder of the many techniques we use on our cards with a short explanation and sample of the technique. So my plan is to share a different technique every Tuesday – I may need your help to keep me accountable on this :). I’m sure this will be an invaluable resource to have on hand. My plan is to use our 6″ x 8″ album (144203) along with the Variety Pack 6″ x 8″ Photo Pocket Pages (144205) – you can find both of these products on page 154 of the Annual Catalogue.

So my first technique to share with you is dry embossing. Dry embossing is a great way to add dimension and texture to your projects. It requires the use of an embossing machine – like our Stampin’ Cut & Emboss Machine on page 170 and an embossing folder. We have a range of embossing folders on pages 184 and 185 of the Annual Catalogue. When we talk of dry embossing we usually think of embossing cardstock but we can also emboss our Designer Series Paper. Here are a couple of examples.

Dry Embossing Designer Series Paper
Left – Brick & Mortar 3D, Top – Tasteful Textile 3D, Bottom – Hammered Metal 3D

The left and top images show the paper before and after embossing so you can see the effect the embossing folder has on the paper.

I decided to mix and match these papers and created four masculine cards using the A Good Man stamps set and Stampin Blends.

Dry Embossing DSP – Tasteful Textiles and Hammered Metal
Dry Embossing DSP – Brick & Mortar and Hammered Metal

I used a range of Stampin Blends – Card #1 – Night of Navy, Cinnamon Cider, Poppy Parade, Soft Suede, Crumb Cake and Ivory. Card # 2 – Daffodil Delight, Night of Navy, Shaded Spruce, Cinnamon Cider, Crumb Cake and Ivory. Card # 3 – Mango Melody, Night of Navy, Cinnamon Cider, Seaside Spray, Crumb Cake and Ivory. Card #4 – Seaside Spray, Cinnamon Cider, Just Jade, Crumb Cake and Ivory. The embellishments are from the In Good Taste Elements.

For the inside of each of the cards I used the words from Pretty Perennials – page 31 of the Jan-June Mini.

I was having so much fun I did a feminine version using the Old World Paper Embossing Folder and Tasteful Touches stamp set.

Old World Paper Embossing Folder

The sentiment is from Peaceful Moments and has been stamped in Rococo Rose on die cuts from Stitched So Sweetly. The flower has been stamped in Rococo Rose and been ‘fussy cut’. This image and the ones used for the inside of the card are from Tasteful Touches. The greenery has been die cut in Mint Macaron using the Forever Flourishing dies.

I hope you give this technique a go – it adds extra texture to your papers and projects.

The new January to June mini is live as of today. If you haven’t received a copy please let me know and I can send one to you or you can hop on over to my Catalogues page to download the pdf version. During January and February for every order you place of NZD$110 you get to pick a FREE product from the Sale-A-Bration brochure.

Well that’s all for now – remember to check back again next Tuesday for another technique.

Until next time …

Fun Fold Friday – Sneak Peak – Flower & Fields DSP

By | January 1, 2021

Hi there and Happy New Year 🙂

This afternoon I sat down and managed to make 5 fun fold cards – that’s because I couldn’t decide which pattern paper I liked best from the upcoming Flower & Field Designer Series Paper featured in the January – February Sale-A-Bration brochure.

I’ve paired this paper with one of the cool sentiments from the ‘Ridiculously Awesome’ stamp set which was inspired by Million Sales Achiever Ronda Wade. Check out this stamp set on page 90 of the Annual Catalogue.

I have chosen a coordinating colour from the paper for the mat which teams up really well with a Basic Black base.

Poppy Parade

The card base is a standard 14.8cm x 21cm scored at 10.5cm then the front is folded back on itself to create the fun fold. The coloured mat is 10cm x 14.4cm and the DSP (Designer Series Paper) is 9.5cm x 13.8cm. Only the lefthand half of the coloured mat has been adhered to the fold back portion of the card base – hopefully you can see from the photo above how the righthand side is not attached.

On the inside of the card I stamped three ‘stars’ (also included in this stamp set) in the same colour as the mat. The sentiment has been die cut using the Layering Ovals and adhered with Mini Dimensionals. You can’t wrong with a little ‘bling’ so I’ve randomly added some Rhinestones to each card front.

Here are the rest of my cards

Granny Apple Green
Flirty Flamingo
So Saffron
Just Jade

I think the Just Jade one is my favourite. Leave me a comment and let me know which one is your favourite.

The new January to June Mini Catalogue will be ‘Live’ from Tuesday 5 January. For every NZD$110 that you spend between 5 January and 28 February 2021 you will be able to choose a FREE Sale-A-Bration product from the brochure. I’ll have more details on this promotion in the coming days. If you haven’t got a copy of the new Mini Catalogue then please contact me and I can get one to you.

Until next time …

Farewell to 2020

By | December 31, 2020

Hi there

Well we have finally made it to the end of 2020. It’s certainly been a trying year for us all – adjusting to life with COVID-19. On top of COVID we’ve had some major family health issues to deal with hence not many blog posts from me of late. My MIL (86) ended up in hospital for 7 weeks and then needed to be moved to a rest home after having been living independently – a big adjustment for her. We came up for air after that only to have hubby diagnosed with cancer. He is recovering well from surgery with a positive outlook ahead.

I am hoping to get back into posting regularly now that life is settling back into routine. We have a new mini catalogue due out on the 5th January. If you haven’t received a copy please let me know and I’ll get one to you.

I hope that you had a wonderful Christmas – here’s to a brighter 2021.

Happy New Year everyone

Giant Year-End Closeout

By | December 8, 2020

If you love great deals, our Giant Year-End Closeout event is the perfect time to shop. There are fabulous discounts on some of your favorite August–December 2020 Mini Catalog items. The Year-End Closeout happens only once a year, so don’t delay—items are ‘while stocks last’. Hop on over to my online store to check out the deals.