Petal Passion Designer Series Paper

By | January 22, 2018

Hi there

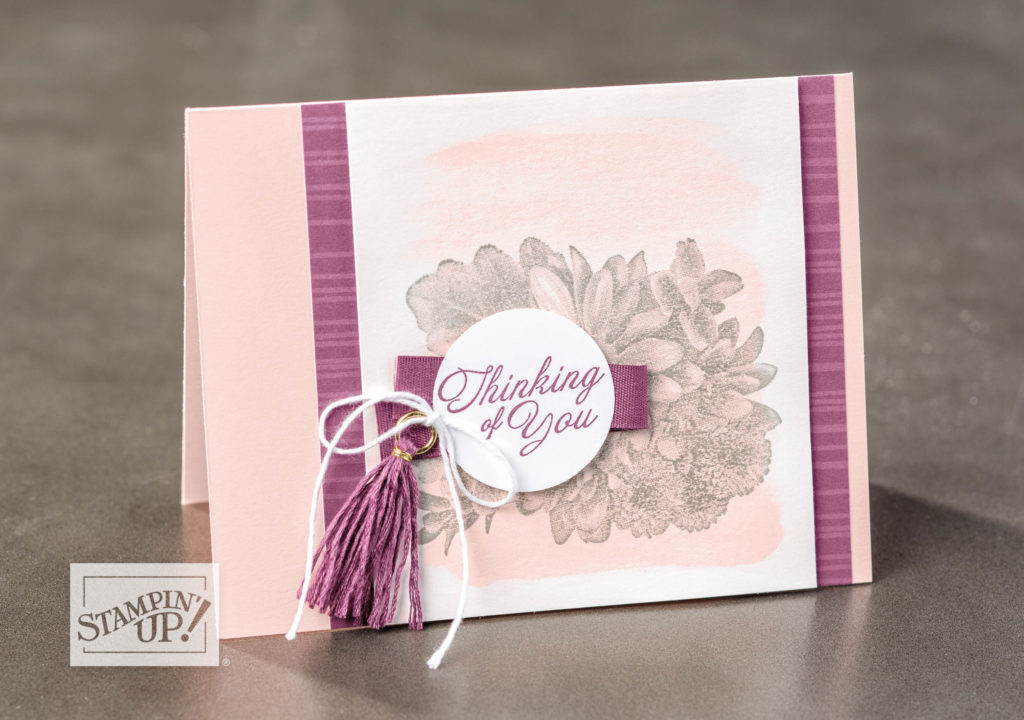
At our OnStage event in November last year I asked to be a Display Stamper.  I received a box of new products including some items from the Petal Passion Suite with which to create projects.  These projects were displayed on the day so demonstrators could see different ways to use the products.  Over the next couple of days I’ll share with you my samples using the Petal Passion Suite of products.  First up is Petal Passion Designer Series Paper (DSP).  The papers in this pack are handpainted watercolour designs in shades of black and white.

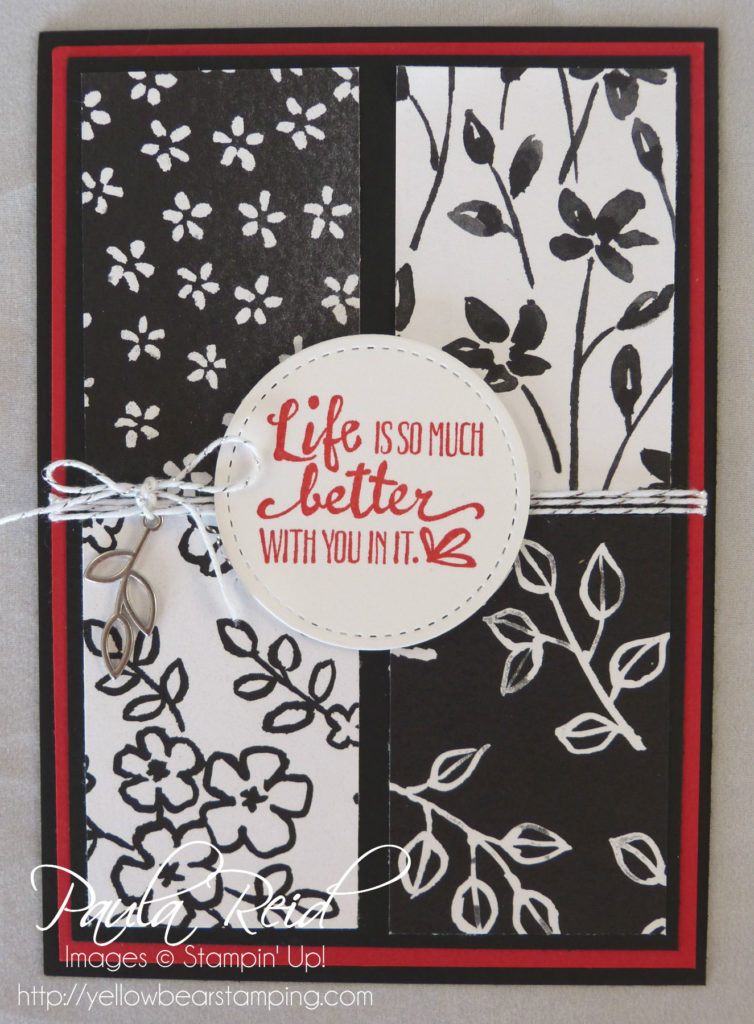
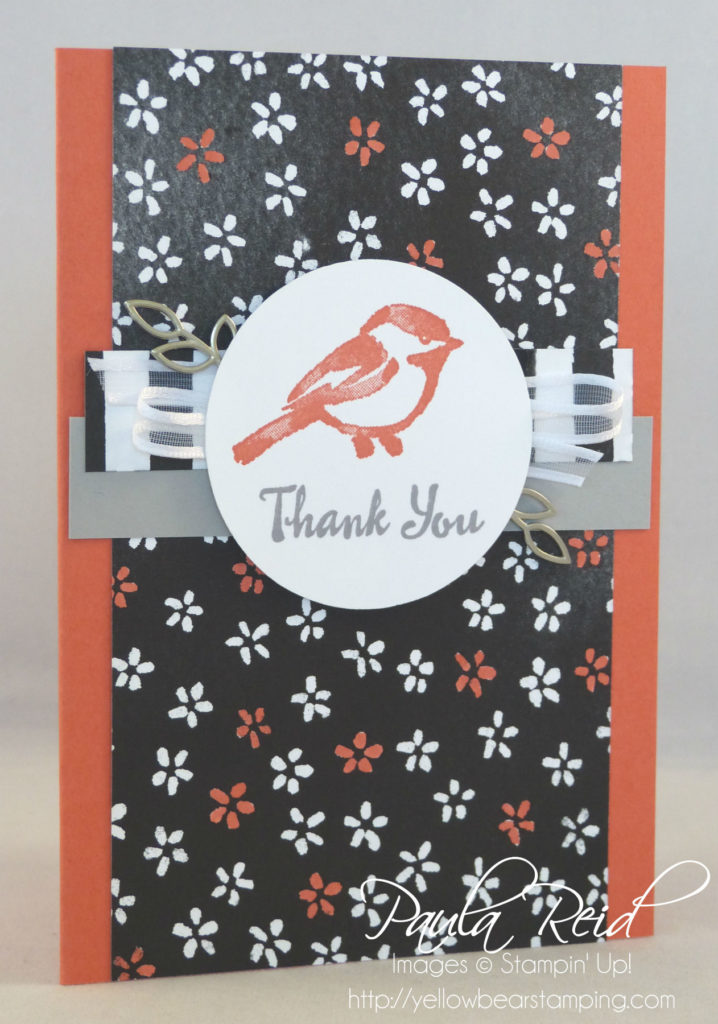
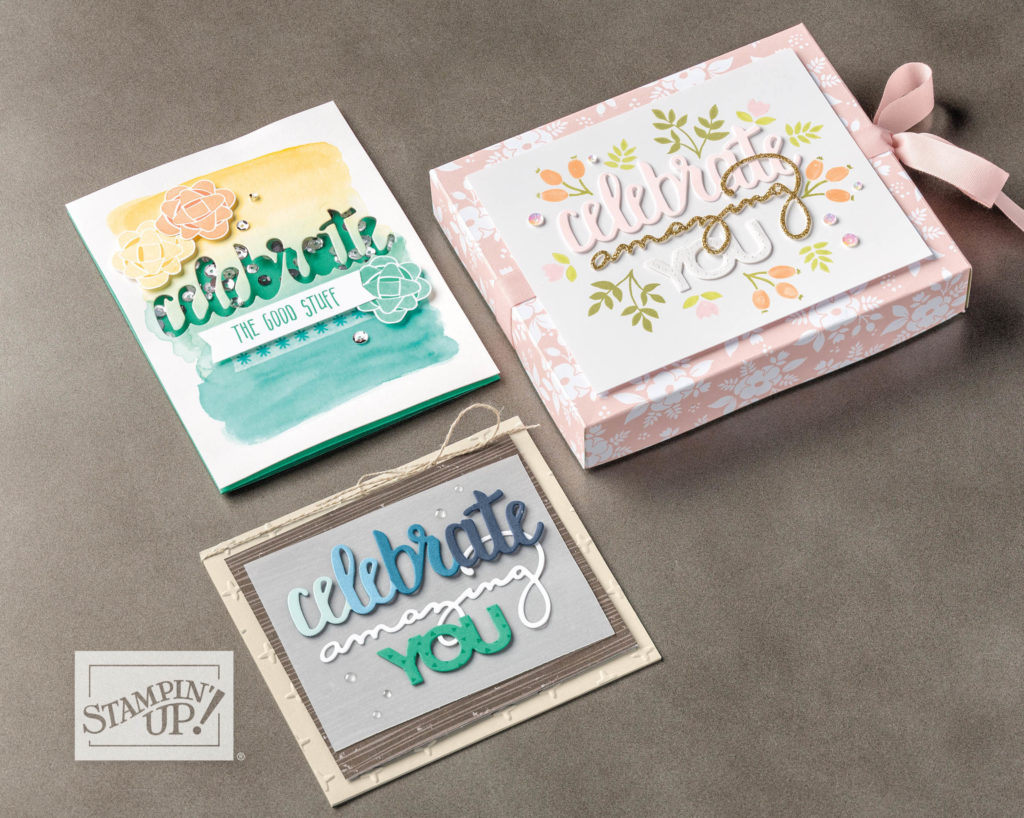
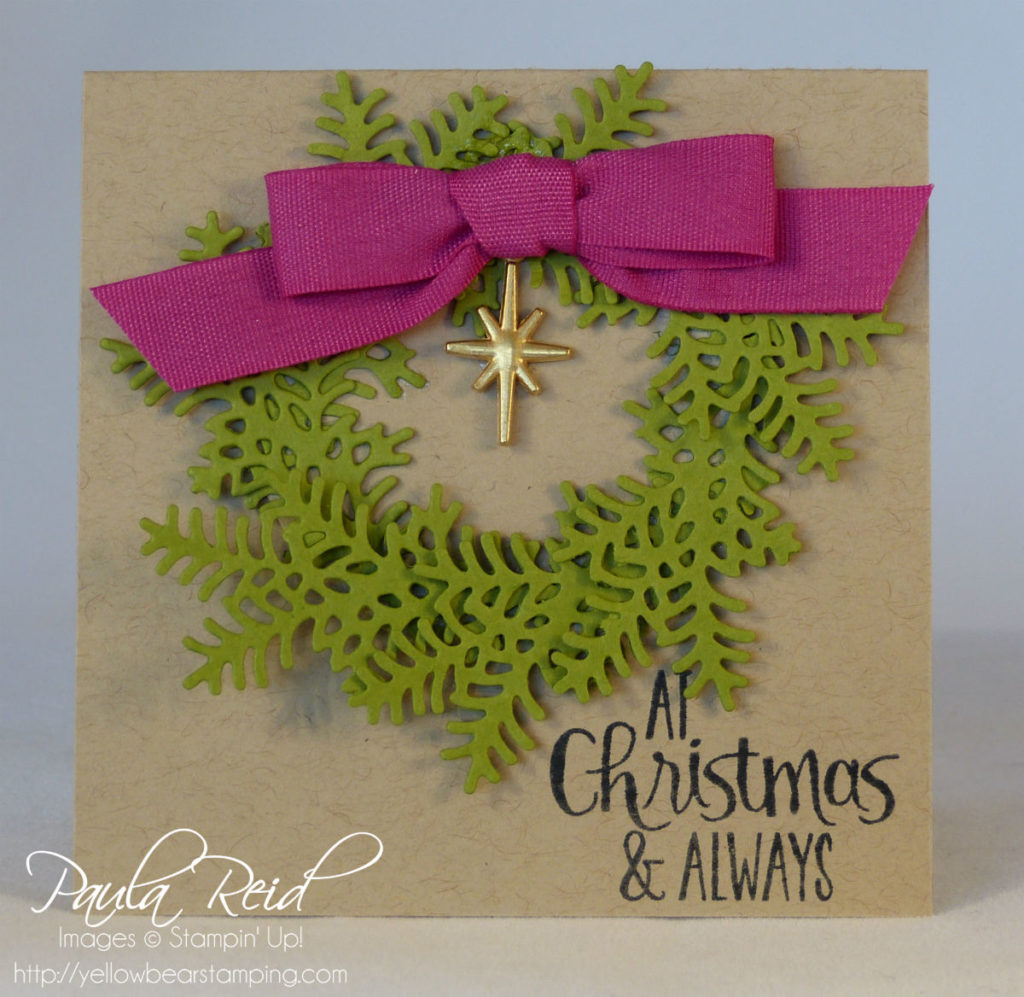
My pieces of DSP measure 4.3cm x 6.5cm and are matted on Basic Black then Real Red and adhered to a Basic Black card base.  The sentiments used on these four cards all come from the coordinating stamp set – Petal Palette.  The metal embellishment is from the Petal Passion Embellishments and the Silver Bakers Twine is from the Sweet Soiree Suite.  There are two designs in the embellishment pack – a leaf and a flower – so check right to the end of this post to see the flower.


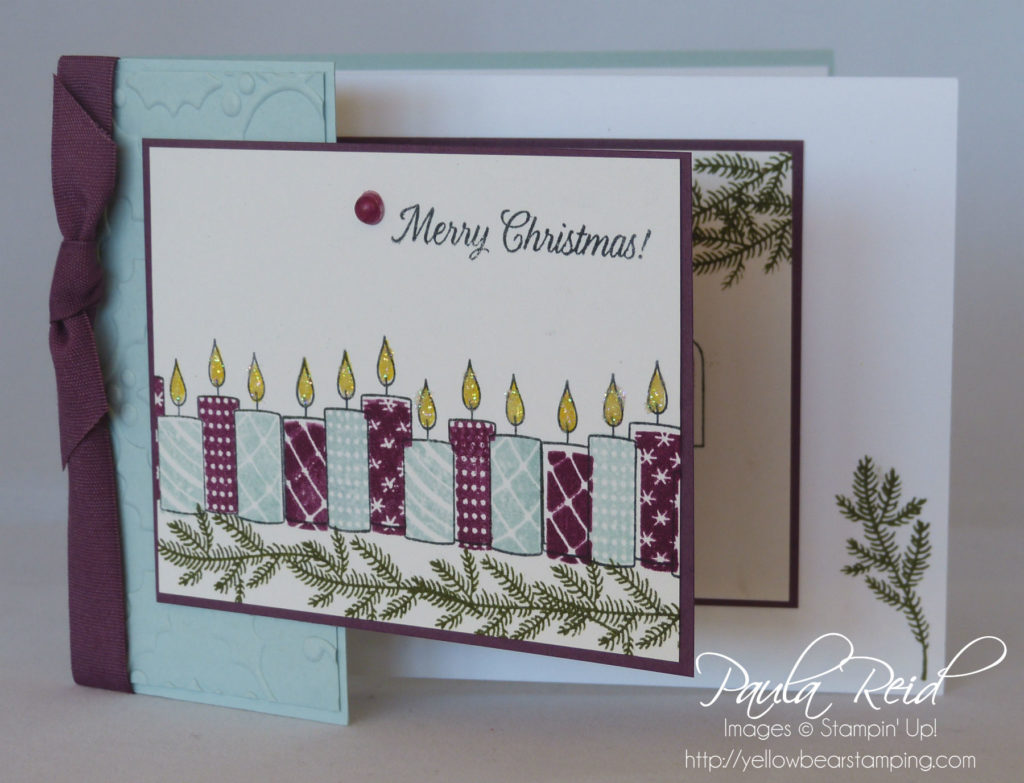
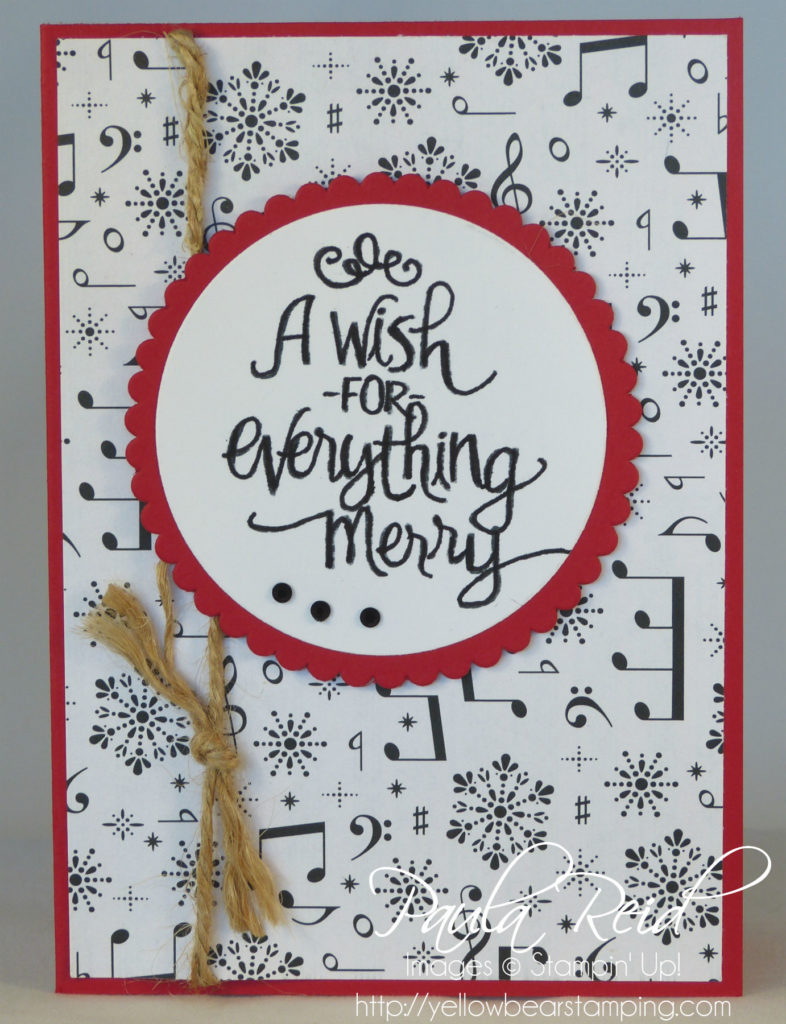
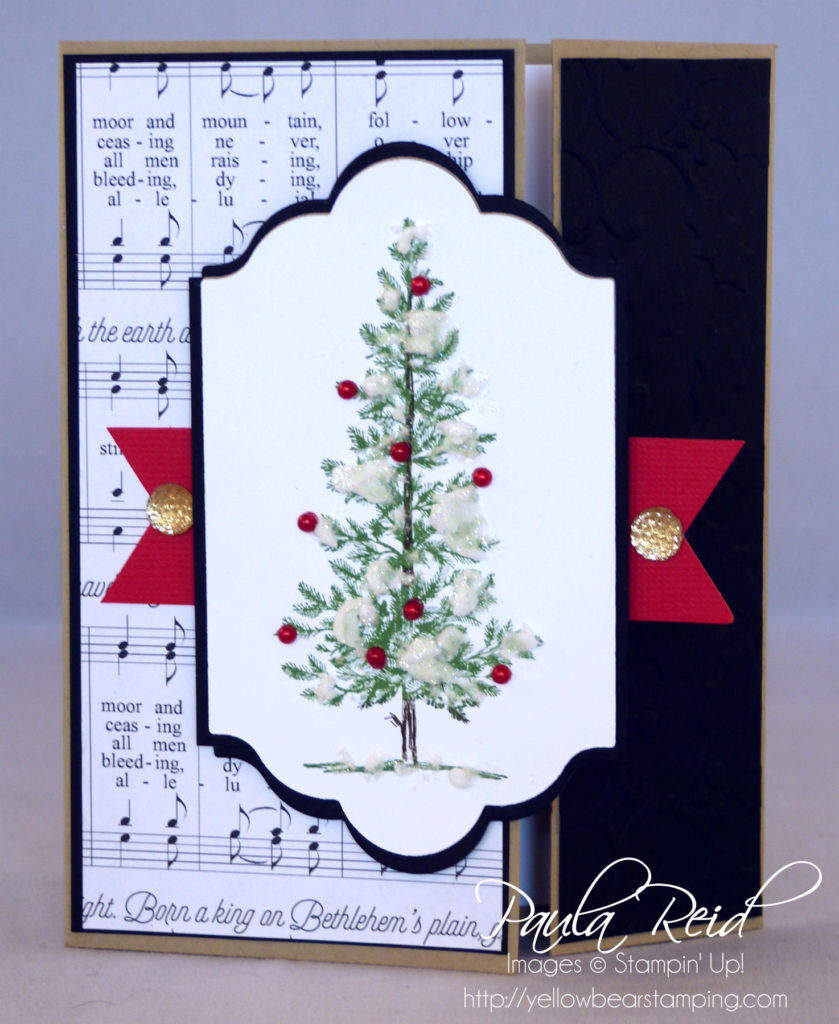
This card uses four more designs from the DSP pack.  The measurements for this card are Top L-R: 3cm x 4.7 cm, 6cm x 7.5cm; Bottom L-R:  3cm x 8.5cm, 6cm x 5.7cm.  Again this card is matted on Basic Black, then Blushing Bride and then a Basic Black card base.  The sentiment is stamped in Blushing Bride then die cut using the Layering Circle Framelits.


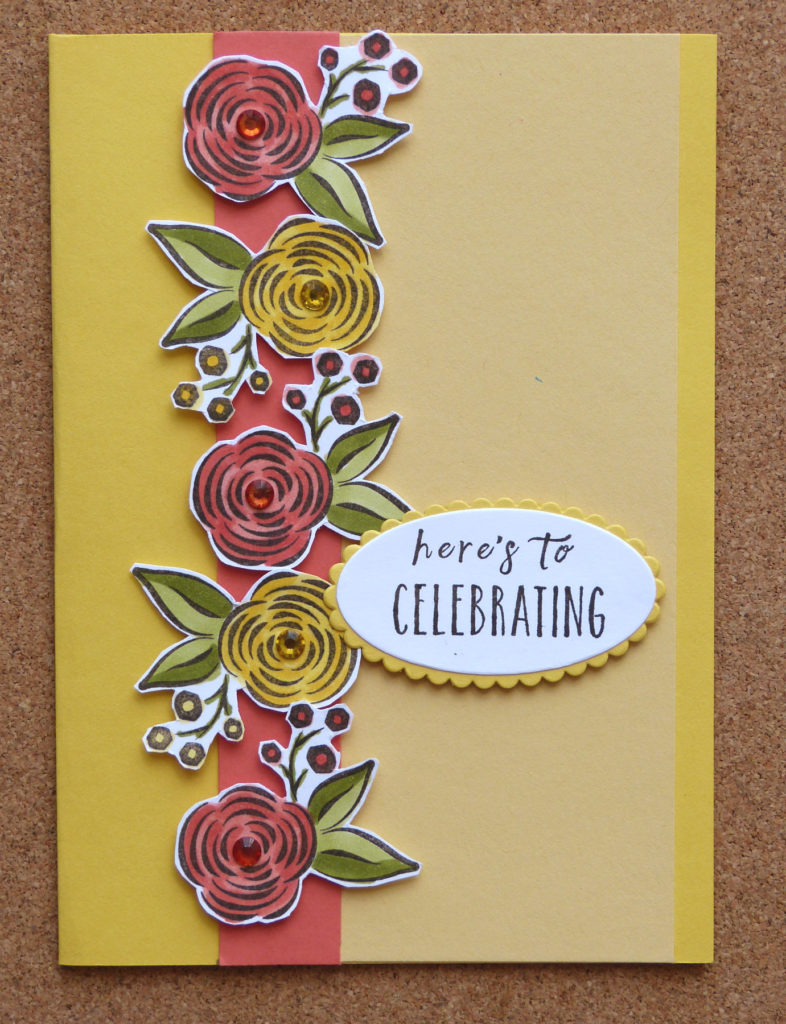
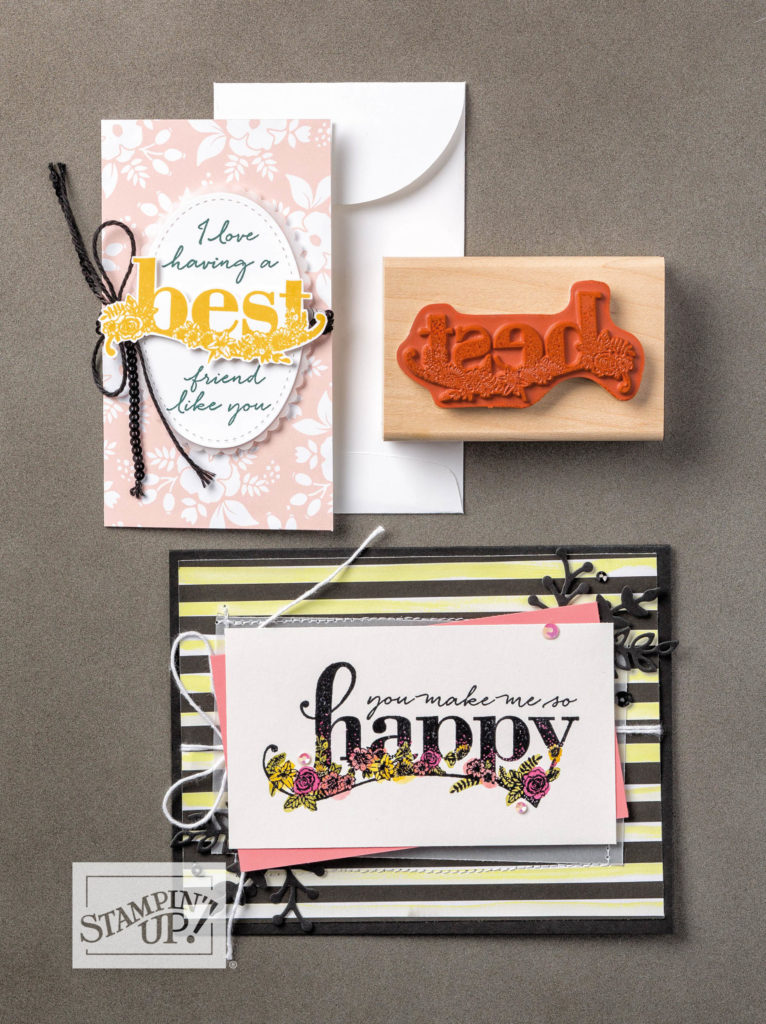
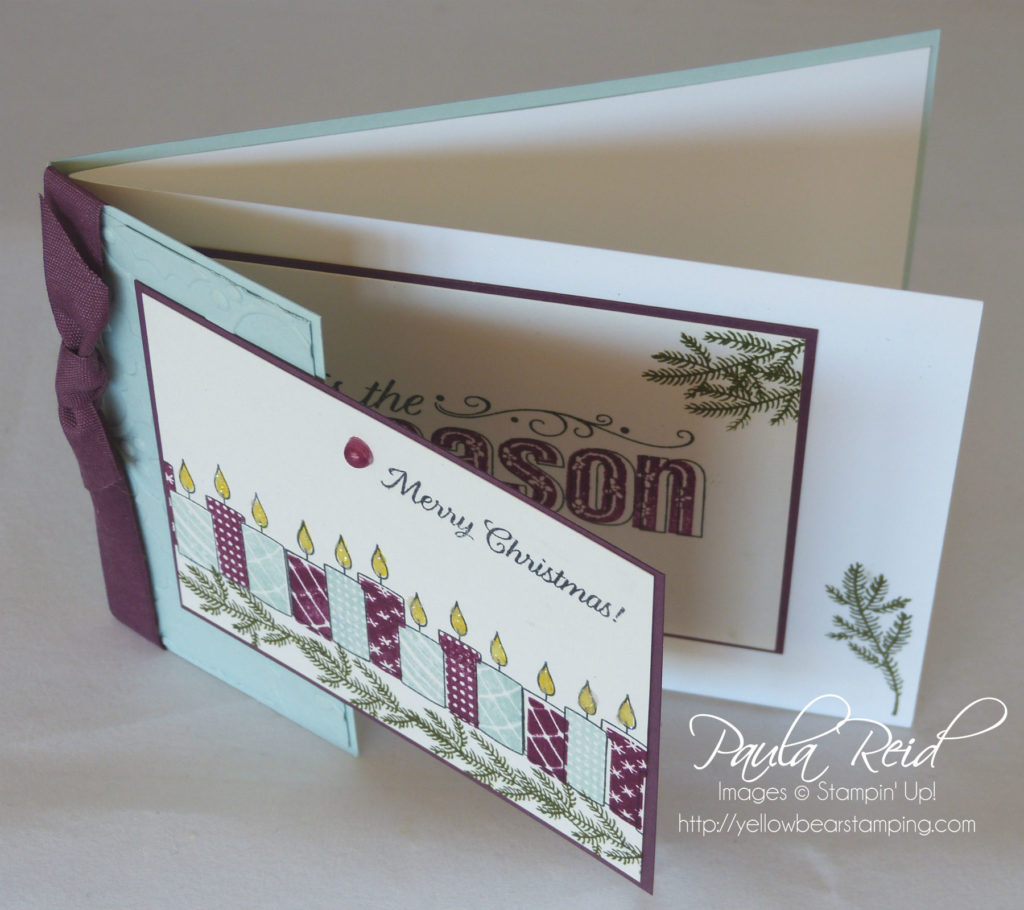
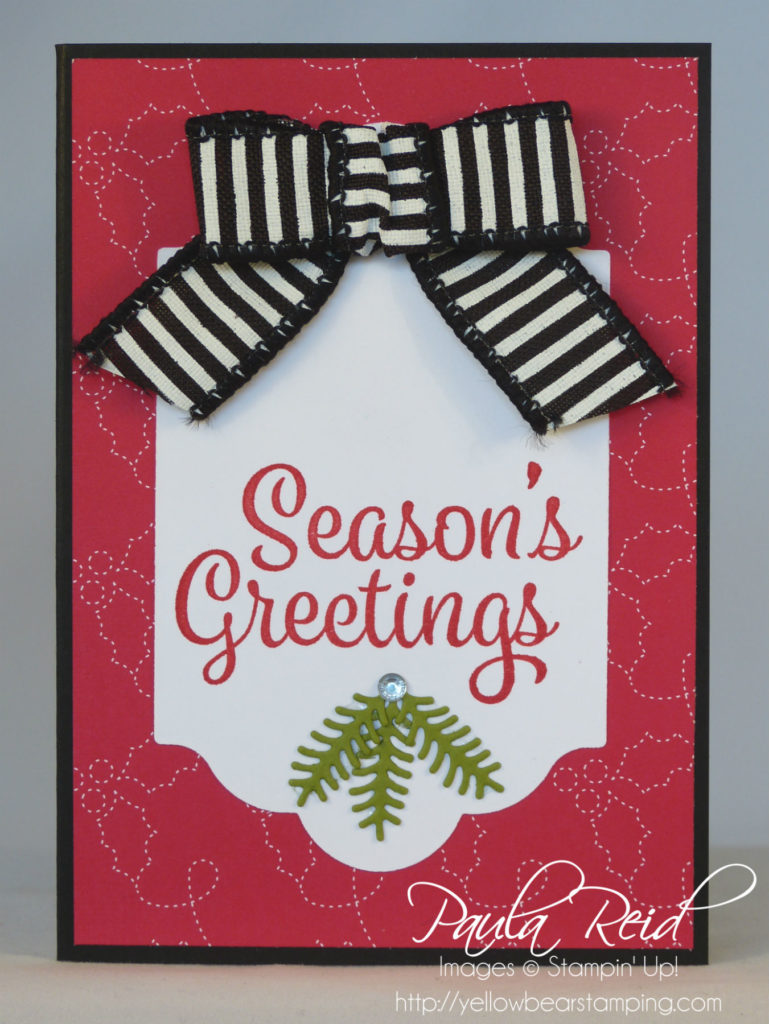
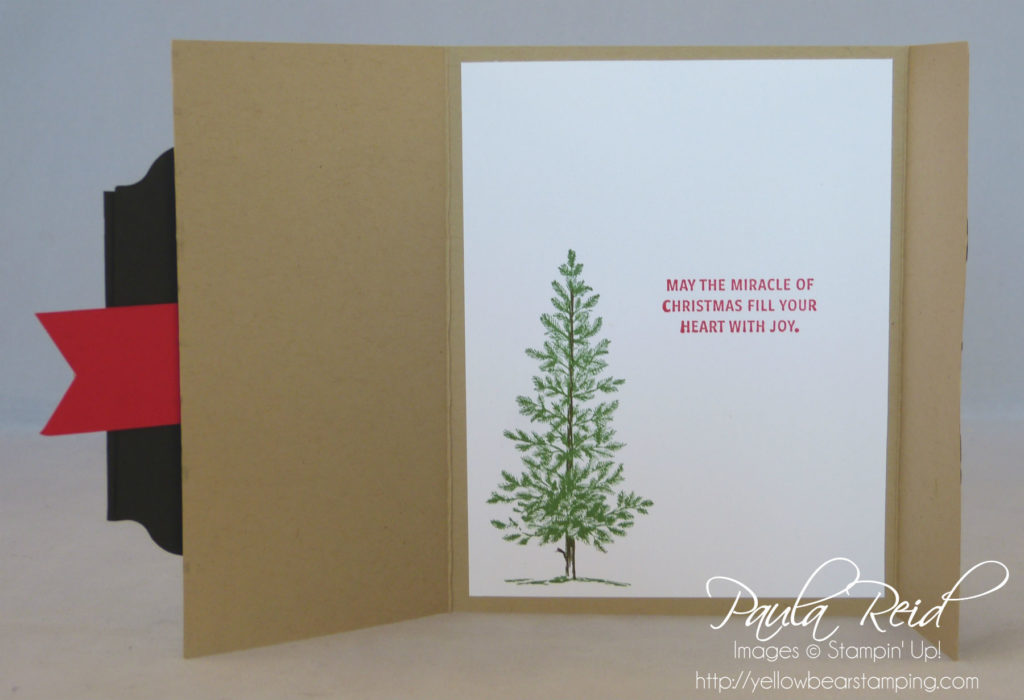
Here’s another of the designs which I matted onto Calypso Coral then onto a Basic Black card base.  The image is from the Petal Palette stamp set and coloured in using the new Stampin’ Blends.  This embellishment has an eye loop which is great for threading twine or ribbon to adhere to your card.


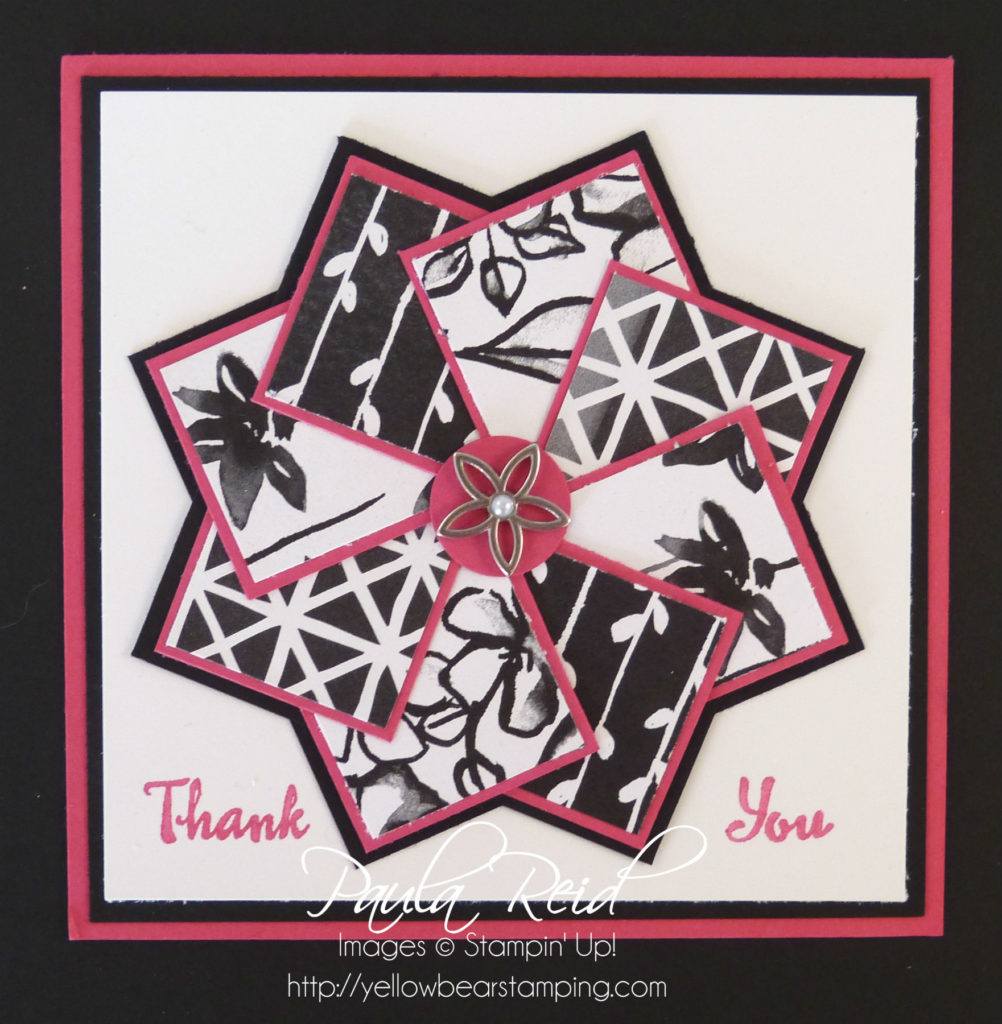
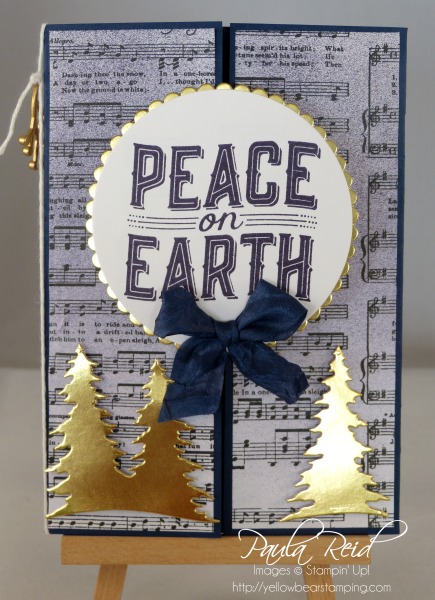
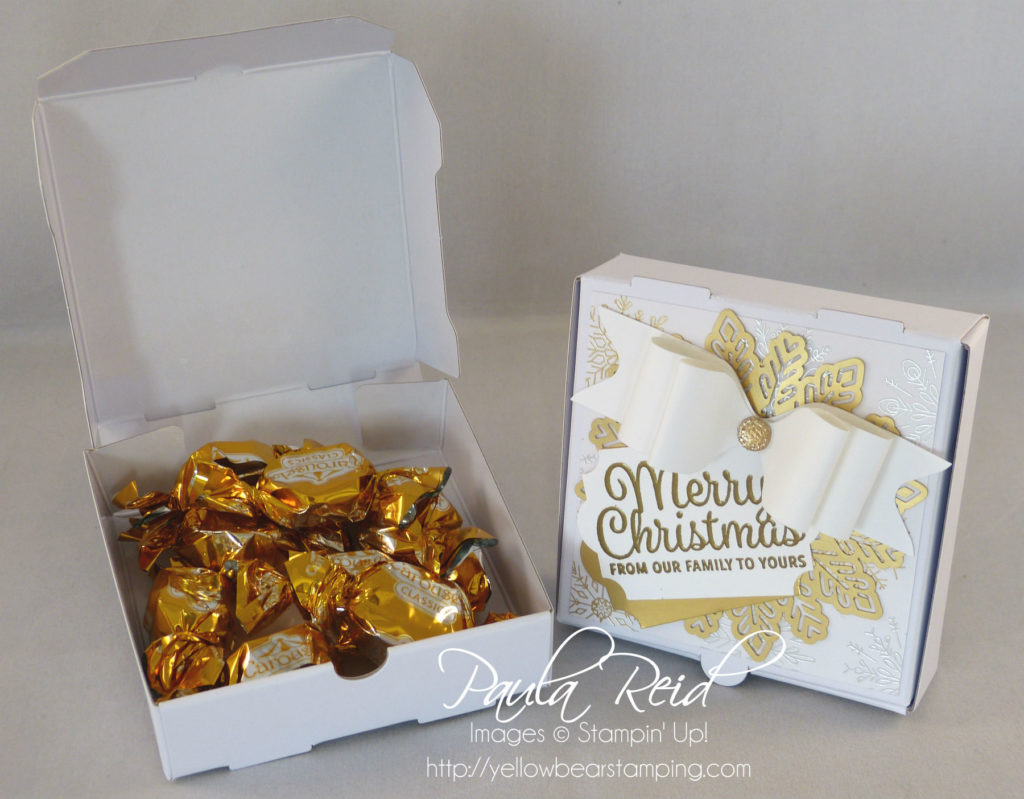
I love this Pinwheel design – its a great way to showcase the different designs in a paper pack.  My DSP squares are 1 1/4″ square and there are 8 of them.  They are matted onto 1 3/8″ squares of Melon Mambo which in turn are adhered in an overlapping method onto two 3″ squares of Basic Black which have been adhered off centre to create the 8 points.  The circle is punched from Melon Mambo using a 1/2″ punch with the metal flower embellishment adhered on top.  The flower comes with a pearl in the centre.

Well I hope you’ve enjoyed seeing some different ways to use your DSP.  In the next installment I’ll share some more samples of the DSP but this time coloured in.

Garden Girl 5th Birthday Card

By | January 21, 2018

Hi there

Taking a quick break from sharing projects from the Occasions Catalogue to share I card I made last month for a friends youngest who turned 5.  She has three older brothers so wanted to make a really ‘girlie’ card.

I don’t own any kids stamps as my nieces and nephews are older but I really wanted to use this stamp set – so thanks to my fellow demo Patrice for coming to my rescue 🙂

I’ve coloured the images in using the new Stampin’ Blends which are alcohol markers.  These are available in the Occasions  Catalogue (page 30 – 31).  The Stampin’ Blends come in 12 colours – with a light and a dark in each colour.  There are also three other colours – Ivory, Bronze and a Colour Lifter.

For this card I’ve used a combination of all the colours – some light, some dark.  The Ivory was used for her skin.  The card base is Sweet Sugarplum and the number is cut out using the Large Numbers Framelits.

I must admit I am enjoying using the Stampin’ Blends for colouring in – it’s very relaxing.  Always stamp your outline image in Black Memento Ink – page 200 of the Annual Catalogue.

I’ll be back tomorrow to share some projects I made as a Display Stamper for OnStage using products from the Petal Passion Suite.  See you then.

Happy Wedding Anniversary

By | January 19, 2018

Hi there

Today is my 16th wedding anniversary :).  I am so blessed to be married to a wonderful caring man.  We have spent the day together (I never work my wedding anniversary) celebrating this very special day in our lives.

Here is the card I made for Phil.

I used the card on page 20 of the Occasions Catalogue for my inspiration and made a few changes to make it ‘mine’.

I dry embossed a piece of Lemon Lime Twist with the new Simple Stripes Textured Impressions Embossing Folder – wrapped a piece of linen thread around it then added a bow and adhered it to the card base of Thick Whisper White.

For my coloured heart image I stamped it in VersaMark then added White Embossing Powder and applied the colour (Lemon Lime Twist, Sweet Sugarplum, Berry Burst, Fresh Fig & Pink Pirouette) with our Stampin’ Markers.  The sentiment is from the Beautiful Bouquet set.

The wooden hearts are applied with Tombow Liquid Glue – I’ve found this is the best method to adhere these to card projects.

We have a rule in our house that no store bought cards are to be given for birthdays, Christmas or Wedding Anniversaries – this is easy for me but a bit harder for Phil.  This year he contacted one of my downlines and asked her if she would make him a card that he could give me – very sneaky – and this is the wonderful card she created for him.  I love the colours and design of this card.  I don’t have this set so it’s lovely to receive a card using it.

The images and sentiment are from the Perennial Birthday set – page 17 of the Occasions Catalogue.  This set coordinates with the Perennial Birthday Project Kit which makes 16 cards.  Check out the video below to see what’s included in the kit and the cards you can make.  This kit also comes with a cute box to store you cards in ready to be sent.  If you purchase the kit, stamp set and some glue dots you will be able to choose a FREE product from the Sale-A-Bration catalogue.  If you are interested in purchasing this kit or anything else please contact me.

Petal Passion Suite

By | January 18, 2018

Hi there

Well this is the final project we made at OnStage last year.  This project features products from the Petal Passion Suite on pages 22 – 23 of the Occasions Catalogue.   This card uses four different products from the suite – Petal Palette stamp set, Petal Passion Designer Series Paper (DSP), Whisper White 1/4″ Organza Ribbon and the Petal Passion Embellishments.

The papers in the Petal Passion DSP are handpainted watercolour designs in shades of black and white and by adding various colouring techniques you can create your own designs.  For this card we used our Stampin’ Markers to randomly colour in some of the white images.  Check out the video below which shows you some other techniques to use to colour in your paper.  The card base is Cajun Craze and this is also the colour used to stamp the image and colour in the DSP.

The stamp set also has coordinating Thinlits.  There are 10 dies – some of which cut out the stamp ed images and others that can add dimension and layers to your projects.

Check out the video below to see more about the Petal Passion Suite and also see some samples made with this suite.

I was a ‘Display Stamper’ at the OnStage event last year so next week I’ll share with you the samples I made using the Petal Passion Suite.

Well tomorrow is my 16th wedding anniversary am I’m having the day off to spend with my husband :).  I’ll try and find some time to jump on here and share the card I’ve made for him with you.

Bubble Over Bundle

By | January 17, 2018

Hi there

The next project I have to share with you uses products from the Bubble Over bundle on page 32 of the Occasions Catalogue.  This bundle includes a photopolymer stamp set (Bubble Over) and Frameltits dies (Bottles & Bubbles).

In addition to the bundle we used the Bubbles & Fizz Designer Series Paper which is one of the FREE products you can earn from the Sale-A-Bration brochure when you place an order of NZD110.00 or more.

Did you notice the Epoxy ‘bubbles’ on the card?  These are a new product in the Occasions Catalogue on page 33.  They work perfectly with this card design.

If you purchase the bundle (stamp set and dies), Glitter & Clear Epoxy Shapes and some Gluedots you would be able redeem the Bubbles & Fizz paper and recreate this project.

Here’s a video to watch showcasing the Bubble Over Bundle.

I’ll be back tomorrow with the final project we made at OnStage so don’t forget to pop back to check it out.

I’m hosting a card class this Saturday – 20 January – at 2:00pm and still have some seats available.  If you are interested in coming along to make two birthday cards with products from the new Occasions Catalogue please contact me by tomorrow night to reserve your seat.

Also if you are interested in hosting a party/workshop with your friends I’d love to help you organise this.  There are some wonderful benefits for you (an additional NZD45.00 in Hostess Rewards when your sales are NZD450.00 or more) if you host a party/workshop between now and 31 March – check out my post here or contact me for more details.

Tutti- Frutti Fruit Basket Tags

By | January 14, 2018

Hi there

Wow – another amazing weekend has flown by.  On Saturday The Crafty Bears got together for our first team training of the year.  It was great to spend time with my wonderful team.  We made two cards, had some discussion and then Phil prepared us a wonderful lunch.  I think he has become an ‘honourary’ team member.  Have you ever thought of becoming a Stampin’ Up! demo?  If so now is a great time to join as you get lots of FREE product if you sign up between now and 31 March.  I’d love to have you as part of my team.  Check out my post here for more details or contact me directly.

Today’s post carries on from last week’s with another project from OnStage.  This one uses products from the Tutti Frutti Suite

These tags are made using the Tutti-frutti 6″ x 6″ DSP stack, the Itty Bitty Fruit Punch pack and images from the Fruit Basket stamp set.  The tag on the left uses the Starburst punch from the Annual Catalogue.  To create the banner end on the right tag we manually cut that but you could also use the Triple Banner Punch.  The Fruit Basket stamp set is a two step set which allows you to get the two different colours for the fruit.  Once the images are stamped they can easily be cut out with the coordinating punch – they are very cute.

Here’s another video for you to watch that showcases the Fruit Basket Bundle.

I’ve got two more projects to share with you so check back soon for these.

Sweet Soiree Silver Mini Gable Box

By | January 11, 2018

Hi there

It’s been another beautiful day here in Auckland and tomorrow promises to be another stunner.

Back in November we had our national Stampin’ Up! training event called OnStage.  Demonstrators from around the country (plus some overseas demos joined us from the UK and Australia) meet for a day of training, seeing new product and getting to play with it too.  Over the next couple of days I’ll share with you the projects we made.

First up are products from the Sweet Soiree Suite on pages 10 to 13.  The Designer Series Paper is just beautiful and we used some of it here on our Silver Mini Gable Box.

The stamp and sentiment are from the Cake Soiree stamp set.  There are 18 stamps in this set – 5 sentiments and 13 images.  This set also has a coordinating Framelit Die set that includes 16 dies.  The stamps and dies can be bought individually or as a bundle.  If you buy the bundle you save 10% on the total price.

There are two ‘ribbons’ in this suite:  the gorgeous Berry Burst 3/8″ (1cm) Metallic-Edge satin ribbon – it’s so lovely to handle and as you can see ties a beautiful bow.  The other ‘ribbon’ is the Silver Baker’s Twine which has been used to tie the sentiment onto the box.

The cute gable box is already precut and scored and you get 12 of these boxes in a pack.  They are also food safe.

Here’s a video showcasing the Cake Soiree Bundle.

There are heaps of products in this Suite so make sure you check out pages 10 to 13 of the Occasions Catalogue.

Don’t forget if you would like to host a party between now and 31 March and be in to win FREE products contact me to book a time – I’d love to come and show you some of the amazing products we have in the Occasions Catalogue.

Lots of Lavender – Wedding Anniversary

By | January 9, 2018

Hi there

For those of you still on holiday I hope you’re enjoying this beautiful summer weather.  I must admit it’s a bit hard getting out of bed when the alarm goes off at 6:00am!  Three more days till the weekend :).

Today’s project features the Sale-A-Bration set Lots of Lavender.  I think this is my favourite Sale-A-Bration set – have you seen it on page 8 of the brochure?

I was able to order this back at the beginning of December – one of the perks of being a demonstrator – so used this for a wedding anniversary for friends of ours.

Isn’t it a lovely image?  The outline image is stamped in Memento Black then filled in with Sweet Sugarplum, Pear Pizzazz and Soft Sky was used for the bow.  As the image is narrow I used multiple layers of coloured cardstock to mat the image – these all correspond with the colours used in the image.

I like the crispness that a white background gives but I also wanted some texture to it.  The Softly Falling Embossing Folder was just the look I was after.  After the addition of the sentiment (from Beautiful Bouquet) I was all done.

Don’t forget to check out my post about Sale-A-Bration here.

To help us get back into the swing of 2018 I’m having a card class on Saturday 20 January at 2:00pm.  If you are interested in attending please contact me for more details.  We will be making two cards using products from the new Occasions Catalogue.

Till next time

Welcome to 2018 – Occasions and Sale-A-Bration time

By | January 5, 2018

Hi there

Welcome to 2018 – I hope you all have had a wonderful Christmas and New Year.  I have had a very relaxing holiday break and I’m back to work on Monday.

With the start of a new year comes the release of the Occasions Catalogue and Sale-A-Bration brochure.  It’s always exciting getting a new catalogue and on top of that we have on offer FREE Sale-A-Bration products with every NZD110.00 that you spend between 3 January and 31 March.  If you don’t have a copy of the Occasions Catalogue or Sale-A-Bration Brochure please contact me and I’ll get one sent to you.  In the meantime you can download a copy from my Catalogues page.

WHAT IS SALE-A-Bration?

It’s the biggest sale of the year!  You can earn FREE, exclusive products with every qualifying order.  There are three different ways to earn FREE products – shop, host and join.

Shop

For every NZD110.00 that you spend (before shipping and handling) you get to choose a FREE level one product from the Sale-A-Bration brochure.  Plus, new this year – earn even bigger rewards when you spend NZD220.00 (before shipping and handling) – you can choose a FREE level two product or two level one products.  Look out for the the reward icons throughout the brochure.

Host

Host a stamping event and share your passion with your friends.  Plus, when you host a qualifying party with total sales of NZD450.00 or more during Sale-A-Bration you’ll get an additional NZD45.00 in Stampin’ Rewards.  That means you’ll receive up to 4 Sale-A-Bration products, and at least NZD90.00 in Stampin’ Rewards.  You can even put your Stampin’ Rewards towards the cost of your Starter Kit (if you decide to join).  Contact me now to book a time if you’d like to host a party with some of your friends.

Join

Join Stampin’ Up! during Sale-A-Bration and get even more rewards.  You get to choose NZD285.00 worth of product for just NZD189.00 and if you thought that was great – wait there’s more.  You also get to choose TWO additional stamp sets FREE (you may choose any stamp set from the Annual or Occasions catalogues.  Bundles, kits and Sale-A-Bration items cannot be selected as free stamp sets for this promotion).  That’s up to NZD214.00 in extra value!  So if you’re interested in joining my team please contact me for more details.

Here are some projects that use some of the new products from the Sale-A-Bration brochure:

Amazing You Stamp Set (Level One) and the Celebrate You Thinlits Dies (Level Two)


Happy Wishes Stamp Set (Level Two) plus the new Whisper White Narrow Note Cards and Envelopes from the Occasions Catalogue


Heartfelt Blooms Stamp Set (Level One)


Don’t forget if you’d like to host a party between now and 31 March contact me to book a time that suits you.

I’ll be back soon with more projects featuring new products from the Occasions Catalogue and Sale-A-Bration brochure.


Merry Christmas

By | December 24, 2017

Hi there

Well all the presents are wrapped and it’s almost time for bed but before I head off I have one last Christmas card to share with you.  This is a card we made at our last team training session at Jacque’s.  It uses the set Merry Patterns that was a promotional set.

The colour combo is Fresh Fig and Soft Sky – these colours look great together.  The pine boughs are stamped in Always Artichoke – this isn’t a colour I use often.  The side front panel is embossed with the Holly Embossing Folder.

As you can see there are a few ‘layers’ to this card with ample writing space on the inside.  The pearl was coloured using the new Stampin’ Blends.  You can see in the top photo the ‘flames’ have a bit of a sparkle.  To create this we applied some glue form the Fine Tip Glue Pen then sprinkled some Dazzling Diamonds to the glue.

Well that’s me done and now I’m off to bed.

Peace on Earth

By | December 21, 2017

Hi there

When we have our wider team meetings not only do we have our ‘product playground’ to get creative we also have fellow demos teaching us new techniques, styles of card and alternative ways to use products.  We then get to make a sample that we can share with you.

This card has a few fancy folding moves and is called a Jacob’s Ladder or Hidden Panel Card.  It features products from the Carols Of Christmas bundle along with the Merry Music Specialty DSP which we sponged lightly with Elegant Eggplant ink.  The trees are cut from Gold Foil and the ribbon is the lovely Night of Navy 5/8″ Crinkled Seam Binding.

First of all when you open the card you see this as your inside.  The images are stamped in VersaMark then heat embossed with Gold Embossing Powder.  If you then part the centre fold it opens to reveal:

A new scene and more panels :).  To create this card you start with a normal base (Night of Navy) then make some cuts and weave some strips of Elegant Eggplant through the slits to create the folds.

The card stock we used is Night of Navy and Elegant Eggplant.  The sentiment on the front is stamped in Night of Navy on a Whisper White Scalloped Circle which has been cut with the Layering Circles Dies.

Well that’s all the cards from our wider team training.  I have one more Christmas card to share with you – another fancy fold one so check back soon.

Tomorrow is my last day of work for 2017 and then I’m on holiday 🙂

A Wish for Everything

By | December 20, 2017

Hi there

Here’s the last of my ‘product playground’ Christmas cards – another card with a Black and White base

The paper for this card is from the Merry Music Specialty DSP pack – it’s rather cool and could be used for other occasions.  The sentiment is from the Ready for Christmas stamp set and the black ‘dots’ at the bottom are the Black Rhinestone Jewels.  I inked the sentiment with my ‘go to’ black ink – Memento Black.  The Layering Circle dies come in real handy as they include circles and scallop circles which are great for matting.

The Jute Twine is thicker than the linen thread and gives a bit more depth to a project.  I frayed the ends of the jute for extra effect.

This was a quick card to complete and this style would be a good one if you need to make multiple cards.

Tomorrows card is one that we were by one of our fellow demos at the training day.

Season’s Greetings

By | December 19, 2017

Hi there

Following on from yesterday’s post here is another card I got to create at the ‘product playground’.

All the products on this card – bar the Lots of Labels Framelits – are from the Holiday Catalogue and from different product suites.

The paper is from the Quilted Christmas 6″ x 6″ paper stack, the sentiment is from Snowflake Sentiments, the ‘greenery’ is from the Christmas Staircase Thinlits and the ribbon is 7/8″ Striped Ribbon.  This ribbon has wire on the outside edges which really helps with getting a great shape for your bow – it does require a bit of work though to get it looking right.

I’ve really liked the black theme in this years Christmas products – it goes really well with Real Red and Old Olive.

Check back again tomorrow night for another Christmas creation.


At Christmas and Always

By | December 18, 2017

Hi there

At one of our team training days we had a ‘product playground’ where a whole range of products are out on a table for us to try and create our own projects.  Over the next few days I’ll share with you the cards I made.

This is a cute 4″ card that uses a sentiment from the Ready for Christmas stamp set, the wreath is created using one of the dies from the Christmas Staircase Thinlits and the embellishment is from the Year of Cheer Embellishments.  The bow uses the lovely Berry Burst 1/2″ Finely Woven Ribbon.

To create the wreath I cut out a 2 1/4″ circle from Crumb Cake then placed the Old Olive ‘greenery’ to the outer edge.  This helped to get the wreath the right shape – once I was happy with the look I then adhered them in place.  I stamped the sentiment in Memento Black then placed the wreath onto the base.  I had to turn it around a couple of times to get it in the right place so that it didn’t cover up the sentiment.  The final touch was to add the embellishment and the bow.

It took a bit to cut out all the greenery but I was pleased with the finished card.

Catch you back here tomorrow.


December Card Class Projects

By | December 17, 2017

Hi there

This time next week and I’m sure there will be lots of very excited children around the world waiting for Santa to arrive.  Now that I’ve outgrown Santa I’m looking forward to spending the day with family and friends and celebrating the birth of Christ.  What will you be celebrating this Christmas?

Last week I held my last card class for 2017.  I have really enjoyed teaching my ladies this year and look forward to 2018 and doing it all again :).  If you would like to join one of my card classes let me know.  I’m planning on running an additional class next year on a Saturday so watch this space for more details.

Each class we do two projects – this month I taught a card and a 3D box.  The card was based on one that was taught at the recent Creative Inkers Extravaganza.  I didn’t have the stamp set that had originally been used so I changed it for a good old favourite – Lovely as a Tree.  This card style is known as a ‘Gate Fold’.

The original stamp set that was used was Season Like Christmas which is a two step stamp allowing for two tones in the tree and a different colour to be used for the trunk.  As Lovely as a Tree is just one stamp I worked out a way to still get the trunk a different colour :).  First up we stamped the image in Garden Green then using the Early Espresso Marker coloured over the top of the stamped image and voila our tree has a different coloured trunk.

Even though we don’t get snow in New Zealand I liked the idea that the tree had snow.  As a kid we used to add cotton wool for our ‘snow’ effect.  Here we used our Embossing Paste in dabs to create snow then applied some Dazzling Diamonds.  To get the paste to dry we applied a little bit of heat with the heat tool.

Now that we have the new Stampin’ Blends our pearls can become any colour you want – we used the dark Cherry Cobbler marker to colour our small pearls and then added them to the tree as ornaments.

We used the same method as the front for colouring our tree on the inside.  The sentiment is from Snowflake Sentiments and is inked in Real Red.

Other products used on this card are: Merry Music Specialty DSP, Gold Faceted Gems, Holly Embossing Folder, Lots of Labels Framelits.  To mat the image on the front we started with a square measuring 6.6cm x 7.3cm then added a frame (the same as the Whisper White one) cut in half to the top and bottom.

The second project we made was the one I taught at Extravaganza – the decorated pizza box.  The ladies loved learning how to make a bow with the Envelope Punch Board.  Check out the details for the box project here.

Have a great week – I’m off to tidy my craft desk 🙂