Try Stampin on Tuesday #123

By | June 19, 2013

Hi there

I hope you week is going well.

We have another great sketch this week.

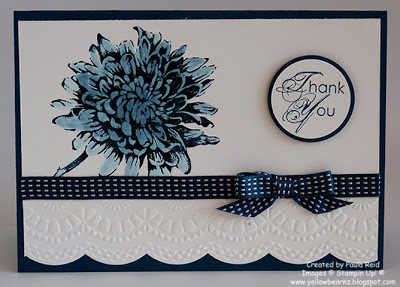
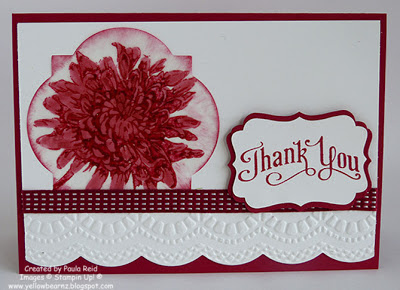
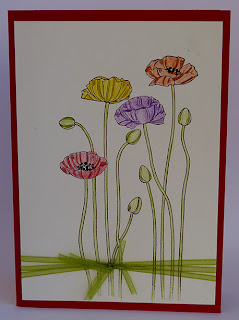
I decided to use a stamp set that hasn’t seen ink for awhile.  Do you have a few of ‘those’ sets?  I know I do.

I heat embossed the image then used my blender pens to ‘colour’ in.  Very relaxing.  It’s great having a ribbon ‘left over’ box – you never know what you’ll find in there that just finishes off a project.
Supplies:
Stamp – Apothecary Art, Best Dad Ever
Card Stock – Rose Red, Wild Wasabi, Watercolour Paper
Ink – Rose Red, Wild Wasabi
Other – Wild Wasabi Embossing Powder, Blender Pens, Dauber, Labels Collection Framelits, Basic Pearls, Large Pearls, Dimesionals, So Saffron Grosgrain Ribbon (retired)

Have a great rest of your week and if you’re in New Zealand – keep dry and warm 🙂

By | June 14, 2013

Hi there

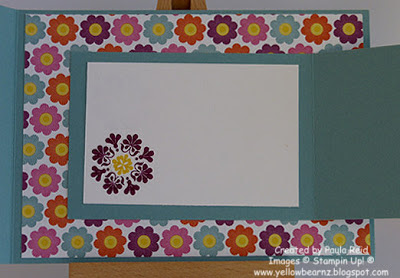
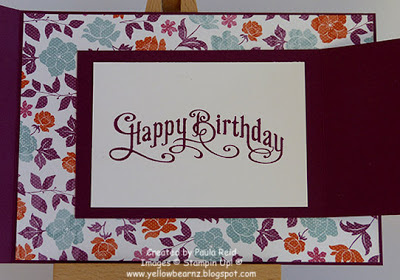
One of the ladies I work with and one that I used to work with have their birthday’s a couple of days before mine and I like to give them a card.  This year I made the same style of card – a joy fold – but used different papers and stamp.

I also used this style of card for a workshop I held last month and it was great to see the different variations the ladies came up with.

Supplies:
Top Card
Stamp – Madison Avenue, Perfectly Penned, Quint-Essential Flower
Card Stock – Baja Breeze, Whisper White
DSP – Floral District
Ink – Rich Razzleberry, Daffodil Delight
Other – 3/4″ Circle Punch, 7/8″ Scallop Circle Punch, Dimensionals

Bottom Card
Stamp – You Are Loved, Perfectly Penned, Quint-Essential Flower
Card Stock – Rich Razzleberry, Whisper White
DSP – Floral District
Ink – Rich Razzleberry
Other – 3/4″ Circle Punch, 7/8″ Scallop Circle Punch, Dimensionals, Dazzling Diamonds

Try Stmpin on Tuesday #122

By | June 12, 2013

Hi there

This weeks sketch over at  Try Stampin on Tuesday has been designed by Paula Laird – thanks for another great layout.

I’ve used one of my favourite sets for this card – Clockworks.  It’s a great masculine stamp and my ‘go to’ one at present.  (That may change as I’ve had a sneak peek at the new catalogue)

I’ve teamed this set up with Old Olive and Certainly Celery which is retiring at the end of this month along with the greeting set I’ve used – A Word for You.
Supplies:
Stamps – Clockworks, A Word for You
Card Stock – Old Olive, Certainly Celery, Whisper White
Ink – Old Olive, Sahara Sand, Basic Gray
DSP – Old Olive Designer Series Paper Stack
Other – Old Olive Brads, 1/8″ Silver Mini Brads
I’ll be back soon with some birthday cards I made from last month.

Mother’s Day Cards

By | June 10, 2013

Hi there

In New Zealand we celebrate Mother’s Day in May.  Here are the two cards I made – one for my Mum and one for Phil’s Mum.

I don’t have any Mother’s Day greeting stamps so I created my own in MDS – how cool is that!  I am loving MDS and can’t wait to get more time to have a play with it.

Supplies:
Mum’s Card
Stamp – Blooming with Kindness, All Holidays (MDS)
Card Stock – Baja Breeze, Not Quite Navy
Ink – Baja Breeze, Not Quite Navy
Other – Clear Embossing Powder, Decorative Label, Delicate Designs Embossing Folder, Not Quite Navy Taffeta Ribbon, Blender Pen

Jean’s Card
Stamp – Wonderful Mother (MDS)
Card Stock – Crumb Cake, Lucky Limeade, Island Indigo
DSP – Tea for Two
Ink – Calypso Coral
Other – Paper Doilies, 5/8″ Flower Trim, Dauber, Tasteful Trim Die, Ovals Collection Framelits

Mother’s Day was spent having lunch with my family (which the ‘boys’ put on) then the afternoon with Phil’s Mum.

Belated Happy Birthday …

By | June 9, 2013

To Phil and me 🙂

Hi there

I know – I’ve been slack!  Here it is two weeks since our birthday and I’m only just now putting up my cards.  I say better late than never 🙂

Here’s the card I made for Phil

It’s a case from one that my upline Jacque did for our masculine team swap in April.
Now the rule in our house is that Phil isn’t allowed to give me a bought card – so – he gets my girlfriend to make him cards lol.  And here’s the card Deb made for Phil to give me – thanks Deb I love it.
And here are some of the other cards I received:
From my Mum and Dad
From my friends Deb and Dave
And from my good ‘crafty’ friend Julia – how cool is this card 🙂
We had a lovely day together starting with breakfast out, then a trip down to Robina (on the Gold Coast) for lunch and some shopping then back to Brisbane and out for dinner to a Thai restaurant.
Have a great week.

Try Stampin on Tuesday #121

By | June 5, 2013

Hi there

Sorry for the lack of posts but I’ve been on holiday and didn’t have internet connection.

While we were on holiday in Australia we were fortunate enough to be able to attend my cousins sons wedding.  It was great to be party of the celebration.  Here is the card I made for the lovely couple using this weeks sketch.

This is one of my all time favourite stamp sets – it’s so versatile.

Supplies:
Stamp – Loads of Love, Loads of Accessories, A Word for You
Card Stock – Basic Black, Real Red, Watercolour Paper, Naturals White
Ink – Black Stazon, Tempting Turquoise, Real Red, Basic Black, Chocolate Chip
Other – Elegant Bouquet Embossing Folder, 1 1/4″ and 1 3/8″ Circle Punch, 1 1/4″ Striped Grosgrain Ribbon (retired), Dimensionals, Blender Pens

I’ll try and get more posts done this week as I have got behind with being on holiday.
Catch you back here soon.

Try Stampin on Tuesday – #120

By | May 29, 2013

Hi there

A couple of weeks ago I mentioned that we had has two baby additions to work.  Here is the first card I made and here is the second one.

This weeks sketch layout was landscape but the stamp I wanted to use went better with a portrait orientation.  That’s the great thing with sketches – it gives you the base then you add your interpretation to it.
Supplies:
Stamp – Baby Prints
Card Stock – Rose Red, Pink Pirouette, Naturals White
Ink – Rose Red, Pink Pirouette
Other – 1 1/4″ Pink Pirouette Two-Tone Ribbon, Tasteful Trim Die, Clear Embossing Powder, VersaMark

Have a great day.

Try Stampin on Tuesday #119

By | May 23, 2013

Hi there from Brisbane!

I am attending my first Stampin’ Up! convention and it is AMAZING.  There are about 700 demos here and it is buzzing.

More about that later – here is my card for this weeks sketch.

I have the best courier driver in Auckland.  Last week he delivered me a ‘brown box’ but we noticed that on the side it said ‘1 of 2’ but he only had one box.  He took the bar code so he could track down box #2.  At 4:45pm he called me to say he had located it and would drop it off on his way home – now that’s service.  He knows how excited I get when I see brown boxes :).  I also made him a gift box and filled it with chocolates.
Supplies:
Stamp – Oh, Hello
Card Stock – Island Indigo, Lucky Limeade, Whisper White
DSP – Summer Smooches
Ink – Lucky Limeade
Other – Oval Frames Framelits, Chevron Embossing Folder, Dimensionals

Catch you back later with some photos from Convention.

Try Stampin on Tuesday #117

By | May 8, 2013

Hi there

It’s time for another sketch from Try Stampin on Tuesday.  I’ve used this weeks sketch for a baby card.  In the past week two of our staff members have become parents for the first time – and both had girls 🙂

The design of this paper from Tea for Two worked well being cut in half and flipped around. I joined it together again with a piece of Taffeta ribbon.  I like my sentiments to be matted but decided for this one I would sponge around the edge to give it a ‘false’ mat.  Using the button on the rattle gives the card some height.
Supplies:
Stamp – Button Buddies, Embellished Events, Fabulous Phrases
Card Stock – Pink Pirouette, Pretty in Pink, Naturals White
Ink – Pretty in Pink
DSP – Tea for Two
Other – Pretty in Pink Taffeta Ribbon, Pretty in Pink Button, Crystal Effects, Ticket Duo Punch
Well now to design the second baby card.
Have a good week.

This and That Journal

By | May 5, 2013

This month Stampin’ Up! are offering the fabulous new product line called This and That Journal along with four other products available as a bundle.  This bundle is only available until 31 May. These items will then be in our 2013/2014 catalogue in July but will not be sold as a bundle.  You can purchase the products separately or as a bundle.  When you purchase the bundle you save 15%.

Watch this video to see how much fun you can have putting your own This and That journal together


Item Description Price
131268 Epic Day This and That Journal $22.95
130814 Epic Day This and That Designer Series Paper $22.95
131463 Remember This and That Rotary Stamp $11.95
131271 Epic Day This and That Designer Stickers $10.95
131269 Epic Day This and That Designer Washi Tape $10.95
133905 Epic Day This and That Bundle
Includes the five This and That products listed above. Only available in a bundle until 31 May.
$67.78
15% Off Retail Value!


The Start of the May Birthdays

By | May 5, 2013

Hi there

I’m not sure what was going on 9 months prior to May but it seems to be the month to have a birthday!!  At work there are about 12 of us with birthdays this month plus I know of another 7 people (including my husband) so it’s a busy card making month for me.

This is for one of the ladies I work with.  She has a gluten intolerance so I always like to get her some goodies that she can eat.  We have a great shop just up the road that has a big selection of gluten free products.

This bag uses a sheet of DSP and is perfect for holding special little birthday treats – this must be one of my favourite bags to make.
Supplies:
Stamp – Memorable Moments, Bring on the Cake
Card Stock – Lucky Limeade, Island Indigo, Very Vanilla
DSP – Tea for Two
Ink – Island Indigo
Other – Labels Framelits, Basic Pearls, Top Note Die, Eyelet Border Punch (retired), 1 1/4″ Striped Black Grosgrain Ribbon (retired), Eyelets, Crop-A-Dile (retired)

Well I’d better a get a move on and make the other birthday cards before the birthdays arrive.  Catch you back here soon.

Try Stampin on Tuesday #116

By | May 1, 2013

Hi there

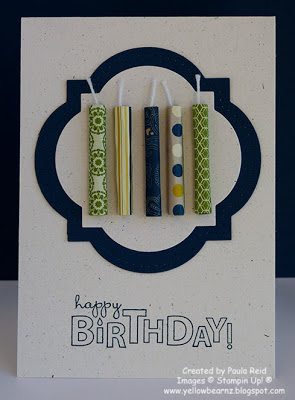
Are you proud of me?  For the last month I’ve been using my accessories and today’s card is no exception.  This is a great layout for a masculine card and came together very quickly.  I’ve used it for a 50th birthday card.

The combination of black and grey work really well and I think are quite striking – great for a masculine card.    I like using embossing powder instead of ink as it gives a clearer image and also adds a 3D effect.  I’ve used two sizes of silver brads – one on the tie to represent a tie pin and the other smaller ones in the top left corner.
I’ve carried the tie to the inside along with the birthday sentiment.  Sometime you just need your card front to  be blank:

Supplies:
Stamp – Best Dad Ever, Memorable Moments
Card Stock – Basic Black, Basic Grey, Real Red and Whisper White
DSP – Real Red Polka Dots
Ink – Real Red
Other – Black Embossing Powder, VersaMark, Silver Brads, 2 1/2″ Circle Punch, Dimensionals

Masculine Cards

By | April 28, 2013

Hi there

Well it’s a beautiful sunny day here in Auckland – it feels as though summer hasn’t left us yet!

As promised here are some masculine cards I’ve made recently using the set ‘Best Dad Ever’.  I first stamped the image in black ink but wasn’t happy as it didn’t seem definite enough so I’ve moved to heat embossing the image – it really makes it stand out and gives it a 3D look.

Supplies:
Stamp – Best Dad Ever
Card Stock – Basic Black, Basic Grey, Real Red, Daffodil Delight, Whisper White
DSP – Basic Grey
Other – Mini Brads, Daffodil Delight Brads, Basic Black Grosgrain Ribbon (retired), Daffodil Delight Stitched Grosgrain Ribbon, Black Embossing Powder

Well I’m off to sit outside and enjoy the sunshine while its here.

NZSU MDS Challenge 1

By | April 27, 2013

Hi there

Over at the NZSU blog Callena has given us a challenge to use Melon Mambo, Daffodil Delight and Tempting Turquoise on a page or card.  The twist with this challenge is that we must use MDS (the new digital programme from Stampin Up) to create our project.  I have combined this challenge with one we have on our demo forum to create a page saying how many more sleeps it is till Convention.  Today was my day with only 25 more sleeps to go – I can’t wait as this will be my first convention (very exciting).  So what do you think of my second attempt at MDS?  I’ve gone with a fun layout.

I really enjoyed creating this page and learnt a few things like:
– the ‘bubble’ had the pointy bit (not sure what it’s really called!) on the other side so used the mirror function to get it on the side I wanted.
– how to group the scallop circle and the photo of Yellowbear together as one image so that when I moved it around it stayed as a whole
– creating the banner I used a square punch which I elongated to the size I wanted then added the Dotted Scallop Border Punch top and bottom but only showing one row of the ‘dots’.  To do this you send it to the back of the image and then group so that it also moves as one
I am loving MDS and can’t wait to try more things.
Hope the rest of you weekend goes well.  I’ll try and get back tomorrow to show some masculine cards I’ve made recently using the Best Dad Ever set.

Try Stampin on Tuesday #115

By | April 24, 2013

Hi there

I’ll be honest with you – I struggled with this weeks sketch until I turned it 90 degrees.

My first attempt was the above orientation but I wasn’t happy with the finished card – it just didn’t do anything for me.  I sat and looked at it trying to figure out how I could make it better – I even added some Dazzling Diamonds but that made it worse!  So I started again looking at the sketch and thinking what stamp set could I use.  No light bulb came on so I checked Google for some inspiration and saw something that was a similar layout out but turned 90 degrees.  When I turned the sketch the light bulb came on and so I got creating and this is my finished card.

What do you think?  What a difference turning 90 degrees can make.
Supplies:
Stamp – Summer Silhouettes and Blooming with Kindness
Card Stock – Wisteria Wonder, Elegant Eggplant, Lucky Limeade and Whisper White
Ink – Lucky Limeade and Elegant Eggplant
Other – Honeycomb Embossing Folder, Wisteria Wonder Designer Printed Brads

The only bit from the original card that I kept was the greeting which I used on the inside of the card:

Thanks for looking