


Hi there
Here we are at the last card project from my presentation at Stamp Camp last month. This project was the one that my fellow demos got to make.
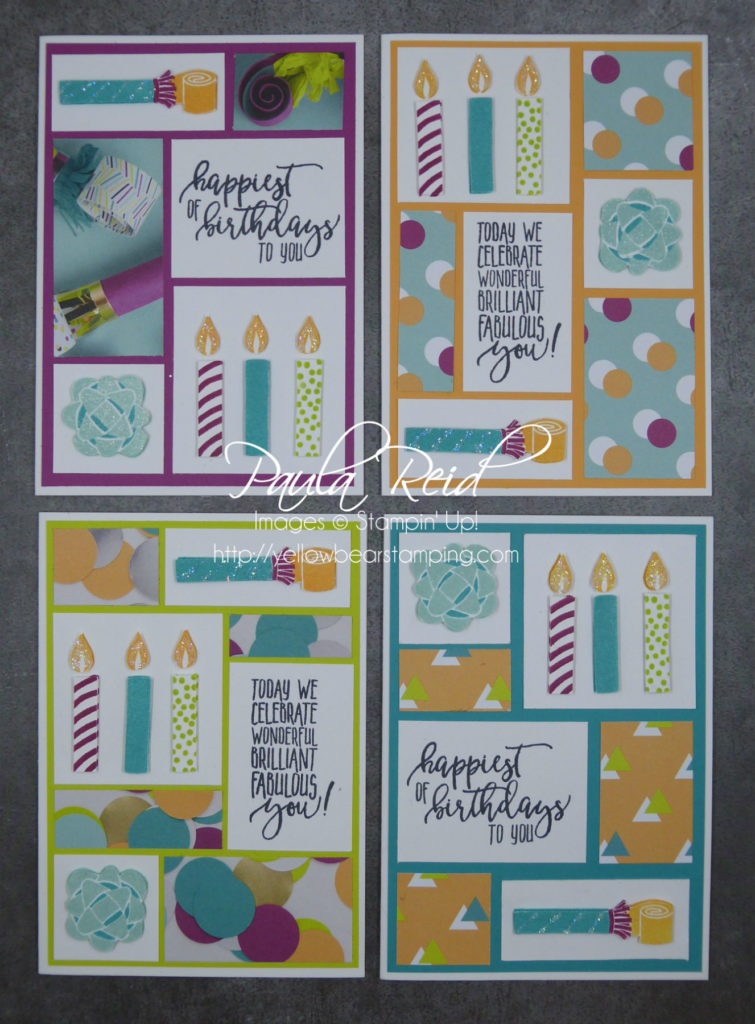
I made four samples to show them the different ways to lay out the card front. I love doing jigsaws and this design is like a jigsaw :). Once I’d stamped all the components I lay them out on the coloured card mat. I then used my offcuts of DSP to fill in the gaps. The pieces with the sentiments are the same size just different orientations. Keep reading to find the surprise I had for them on the inside of the card and where the DSP scraps come from.
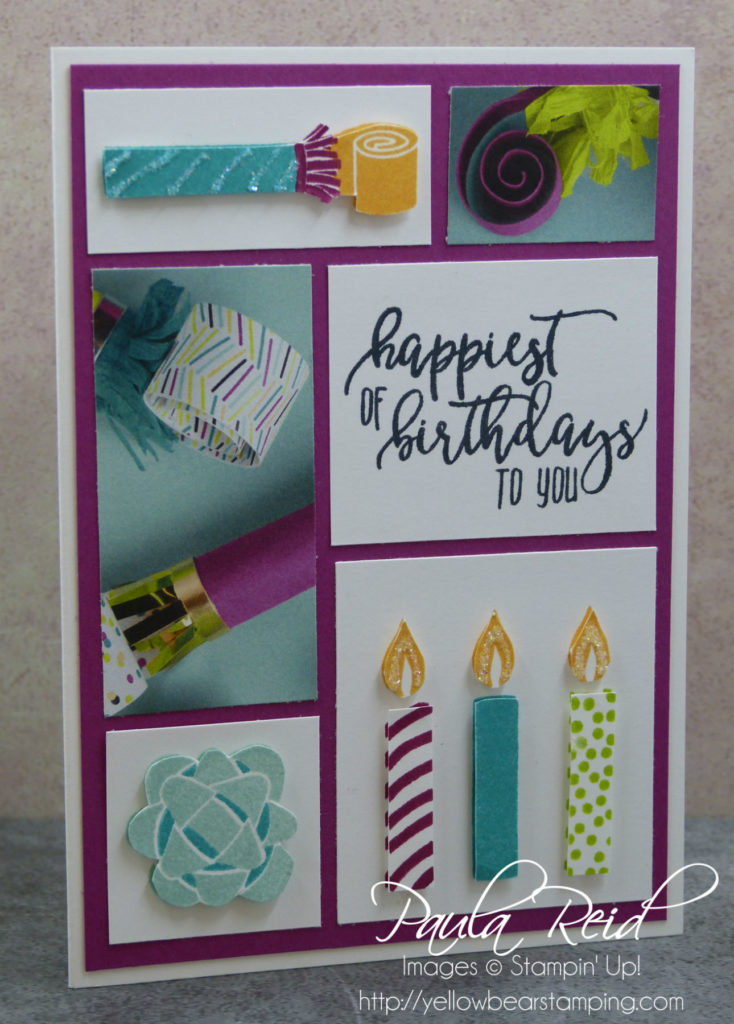
I stamped all the images on a scrap piece of card stock then ‘fussy cut’ them out. I added some Dazzling Diamonds to the flames and the noise maker before I cut them out.
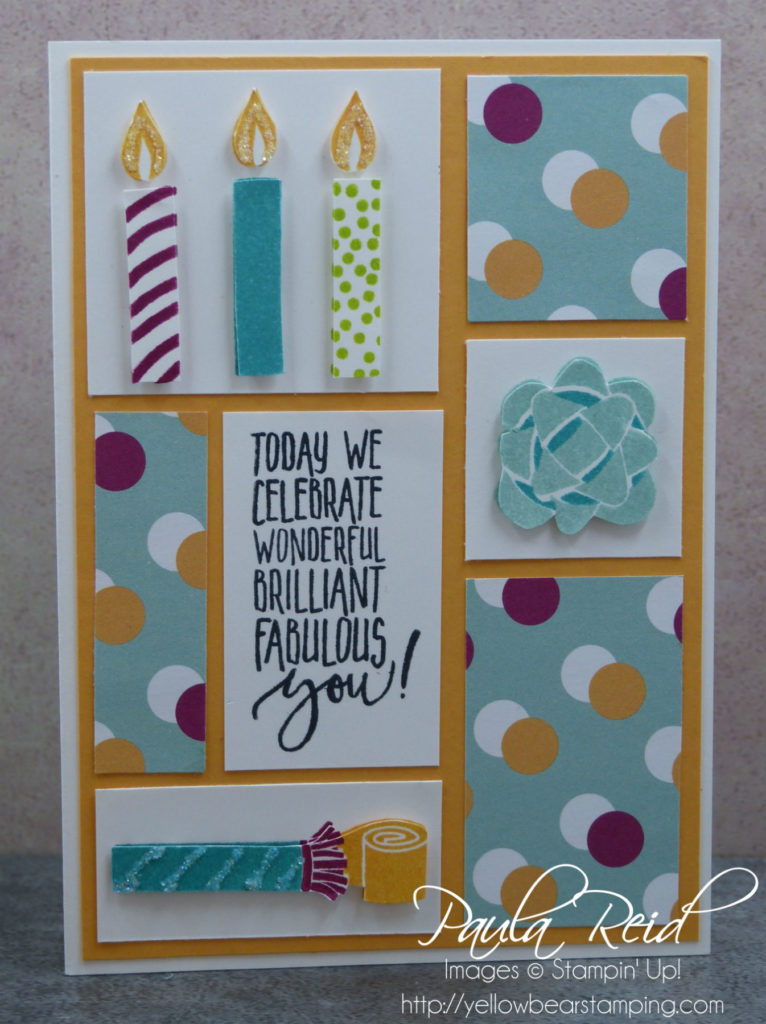
I also stamped the images on the pieces of Whisper White then adhered the fussy cut pieces out on top of the stamped image with dimensionals.
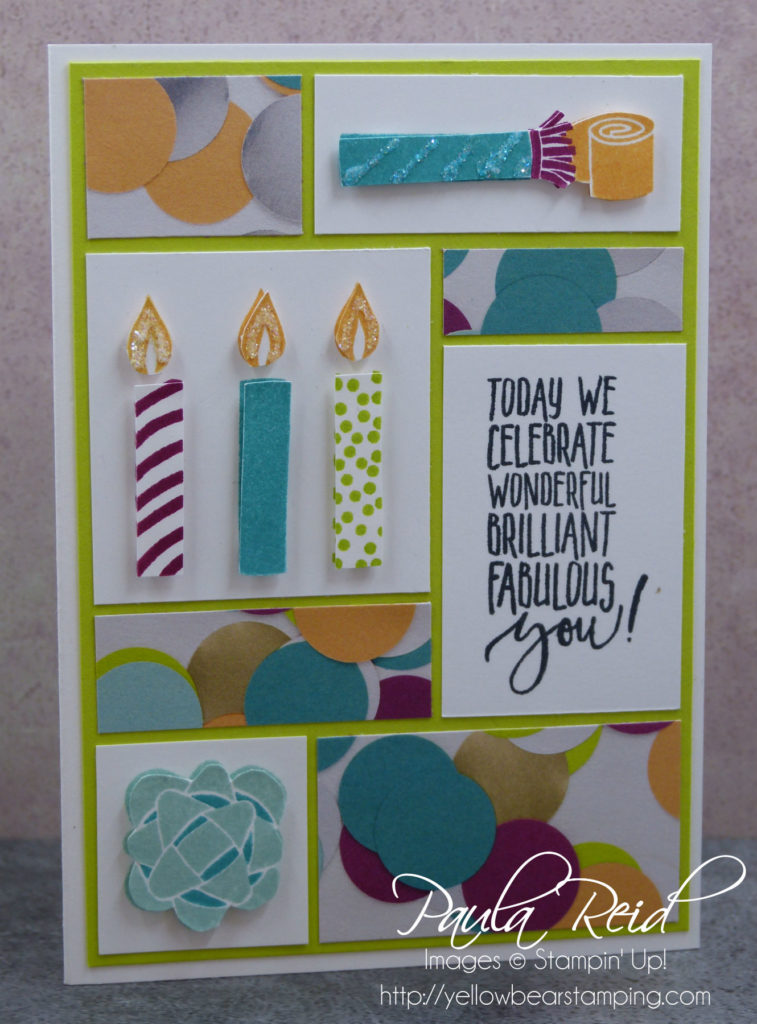
The sentiment is stamped with Memento Black and then adhered directly to the card mat.
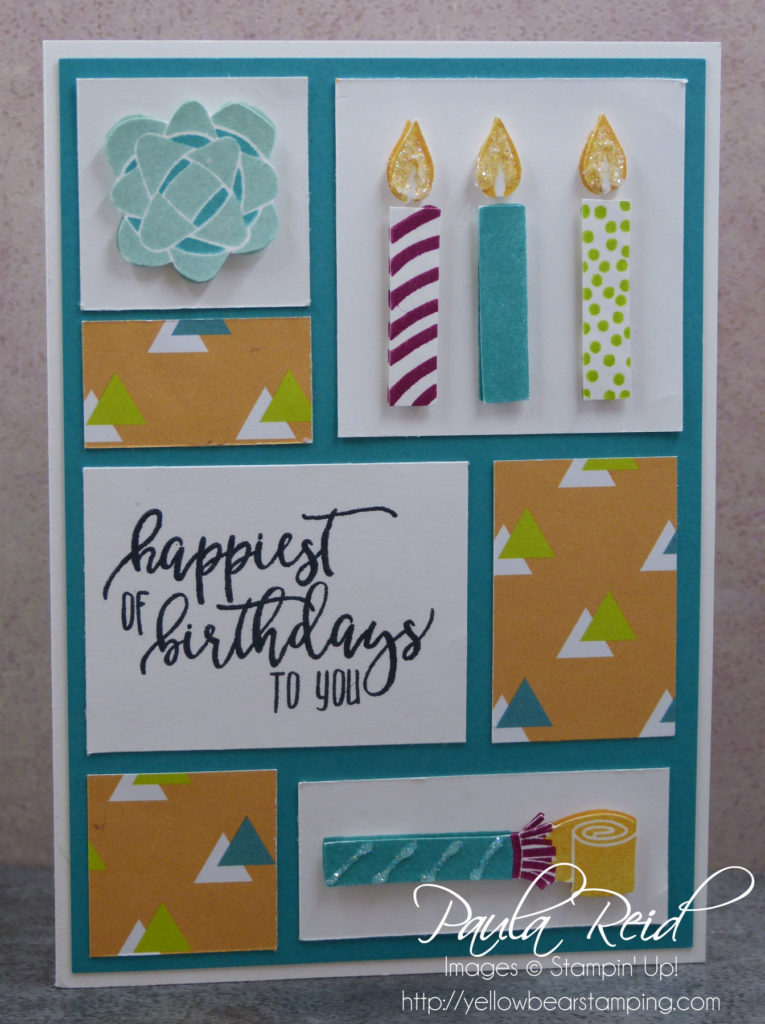
Once I had everything in place I then cut up my DSP to fill the gaps. These are just adhered directly to the card mat.
You may have noticed that the title of my blog post says “Gift Card Holder”. Well I really love the Lots to Love Box Framelits die (I also incorporated this die into my presentation for camp) and wanted to use it in my project. So I created a little gift card ‘bag’ for the inside of the card. I used the 6″ x 6″ DSP and cut it at 10cm so that it would fit inside the card. The die is longer than 6″ but it doesn’t matter – when you fold the cut out die in half it will still hold a credit card sized gift card or you can make your own card. The remainder of the DSP – about 5cm wide – was used for the front of the card.
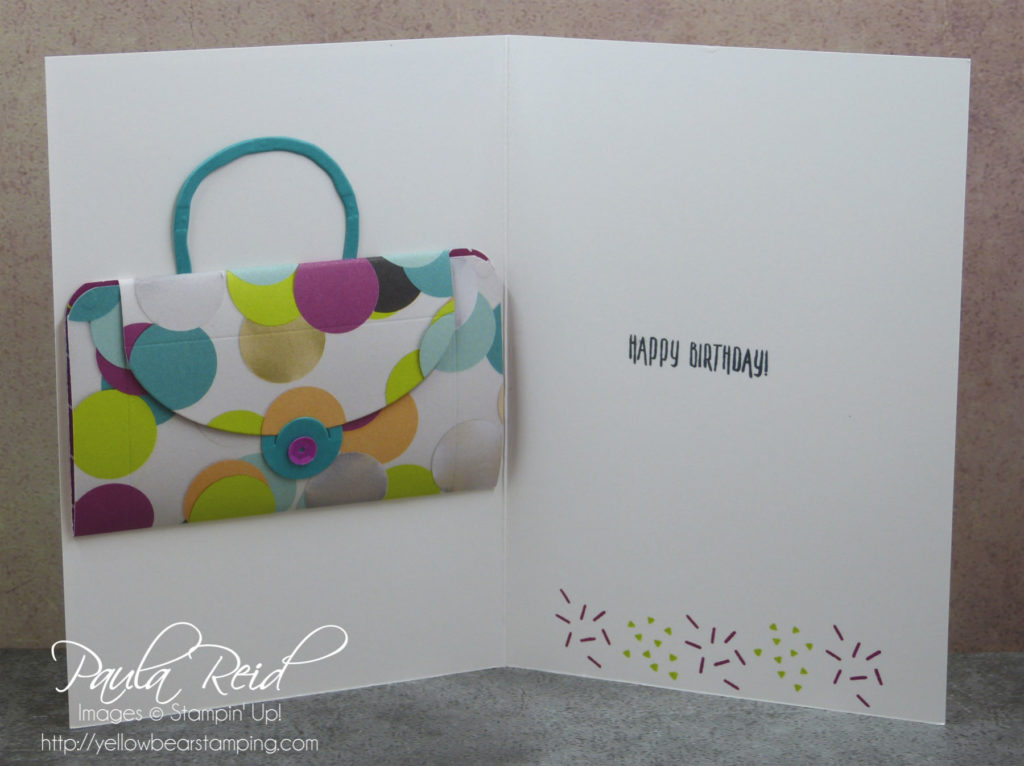
The handle is cut from one of the dies in the Everyday Jars Framelits set and adhered to the back of the bag before adhering to the card base. The card base is Thick Whisper White. I cut the top ‘flaps’ off and rounded the corners using the Envelope Punch Board. The closure for the bag is made using one of the die pieces from the set that I used to create the notches to hold the gift card in place. One I had cut this I then punched it out with a 3/4″ circle punch, adhered just the top and bottom edge then adhere it to the bag. The final touch for the bag is a Tutti-frutti Adhesive Backed Sequin.
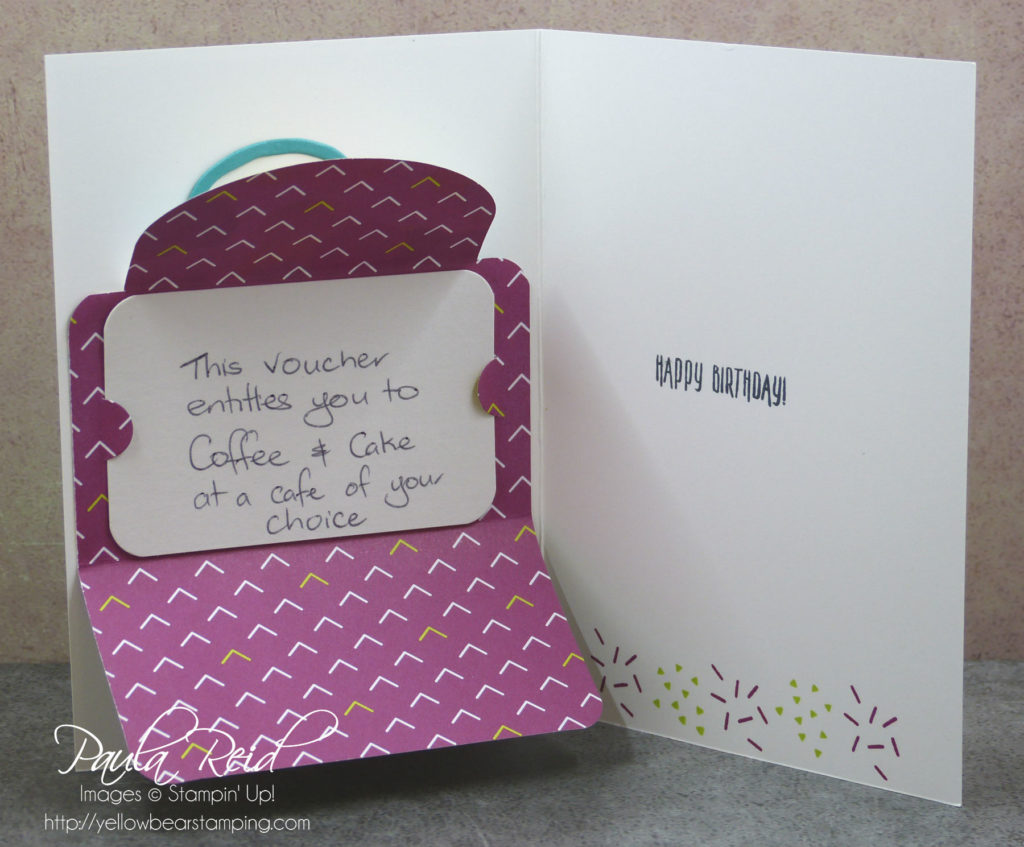
And here’s my handmade gift card – I used the backing sheets that come with the 12″ x 12″ DSP for my gift card. The notches that hold the gift card in place are create with dies that come as part of the set from the Lots to Love Box Framelits. I found the easiest way to create these is to place the gift card on the DSP and then put pencil marks down the side. Remove the gift card and place the two dies just outside the pencil line. To keep the dies in place while I run it through the Big Shot I use some Washi Tape to hold them in place – otherwise you are chasing them around the plate :).
I wonder which cafe the recipient will choose?
Well that’s it for card projects using the Picture Perfect Party Suite. I still have some 3D projects but I’ll take a break from this suite and share them soon.
Until next time …
