


Hi there
Today’s card is the second card we made at my recent workshop – you can see the Pansy Card we made here. This card uses a number of new products from the 2021-2022 Annual Catalogue. The base product is the Beauty of Friendship Bundle from pages 10 and 11. I really love the versatility of the images in the Beauty of Friendship stamp set. This is a ‘two-step’ stamp set with two styles of tree canopies that coordinate with the one trunk image. By changing the colour of your tree canopy you get trees for all seasons.
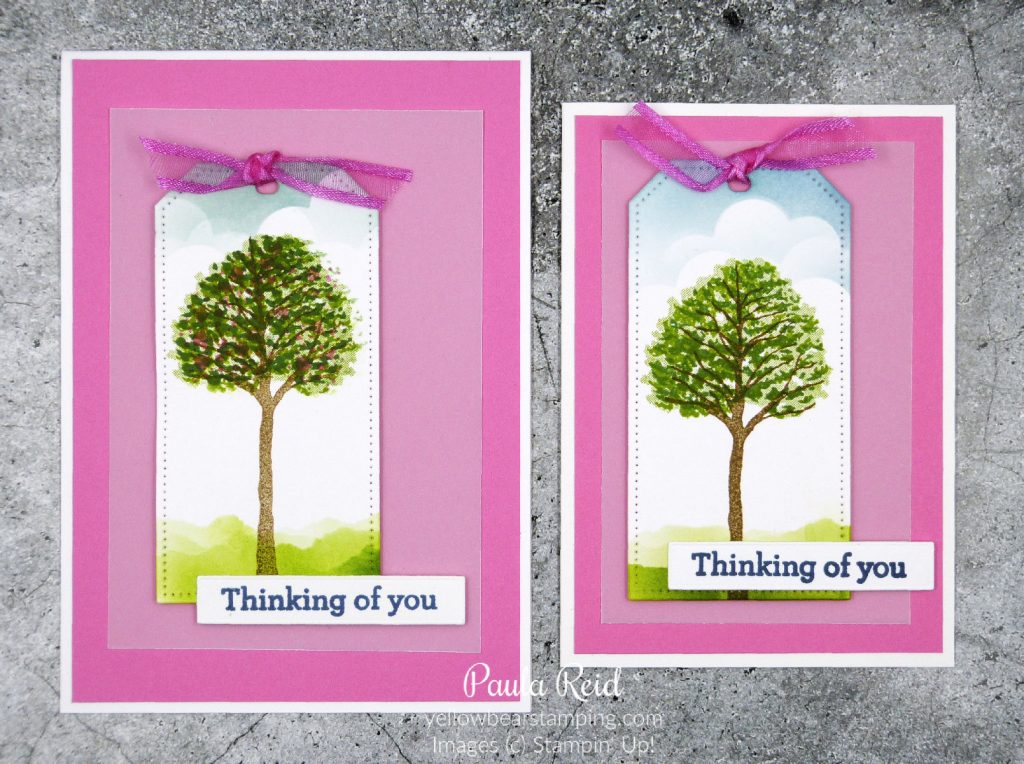
I made two samples – the one on the right uses the Notecards & Envelops and then the one on the left is a full sized card. By changing the size of the mat you can use the same design for both card sizes.
The mat is Polished Pink – one of the new 2021-2023 In Colors – with a layer of Vellum Cardstock. My tag has been die cut using the largest tag from the new Tailor Made Tags dies. I stamped my tree first before adding the clouds and grass at the bottom. The trunk is stamped in Soft Suede and the canopy is stamped in Granny Apple Green and Garden Green. The sentiment has been stamped in Misty Moonlight and die cut from one of the dies in the Beautiful Trees dies.
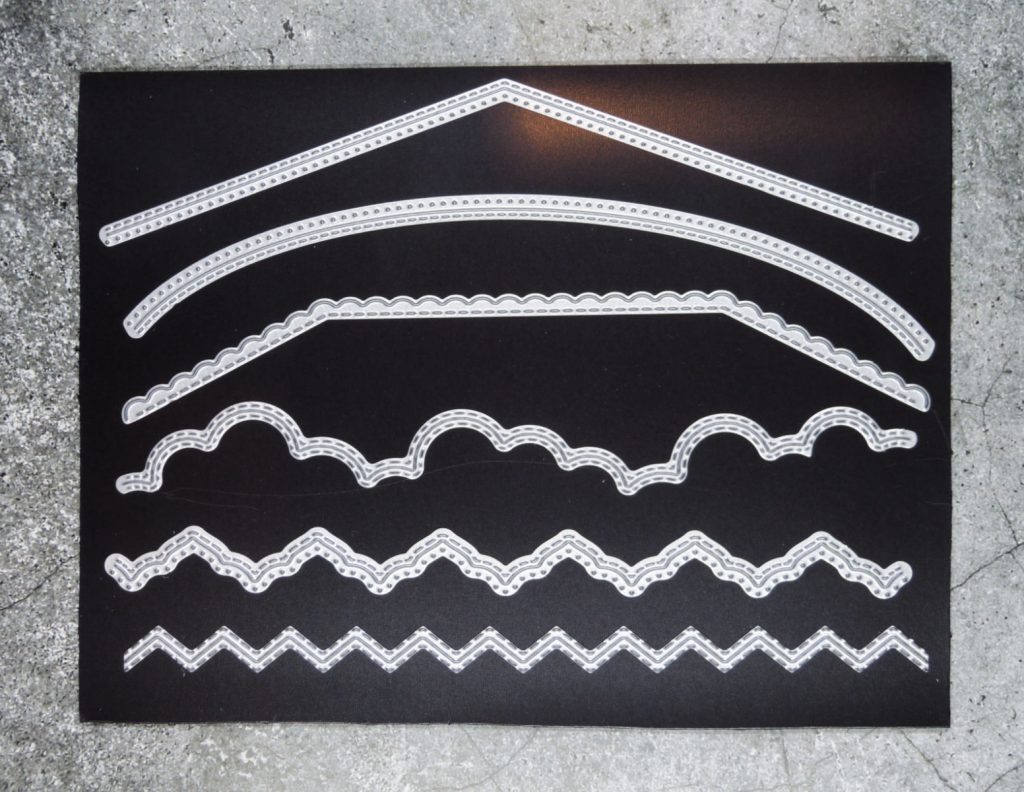
The technique I want to share from this card is how I created the ‘clouds’. Have you seen the new Basic Borders dies on page 162? There are six different designs in this set that can be used for edges and also to create a ‘cloud’ template.
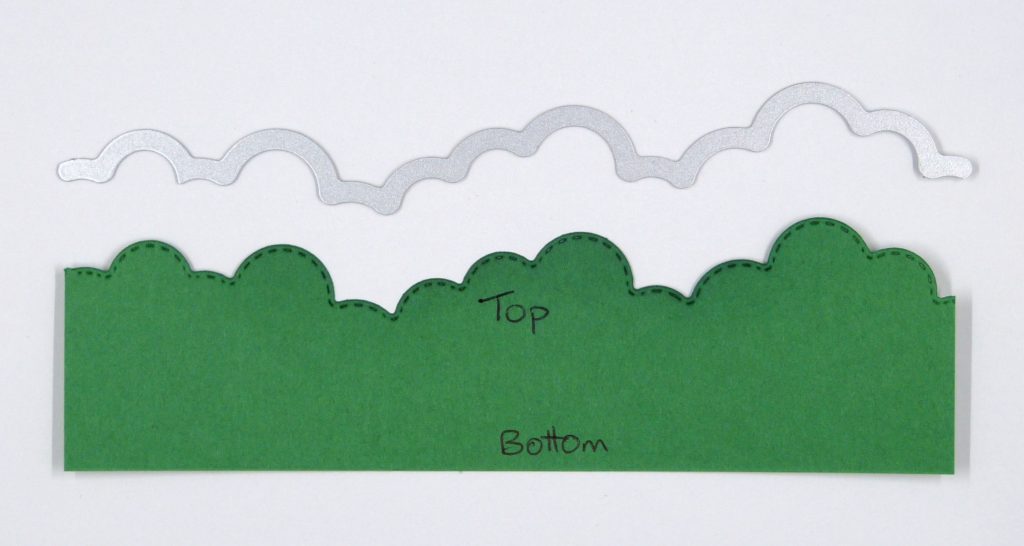
Using a scrap piece of cardstock (or a piece of window sheet) I die cut the ‘scallop’ die out keeping the ‘stitched’ edged piece. I wrote ‘Top’ and ‘Bottom’ to help with my sponging.
For my sample I used another new set of dies from page 166 – the Tailor Made Tags.
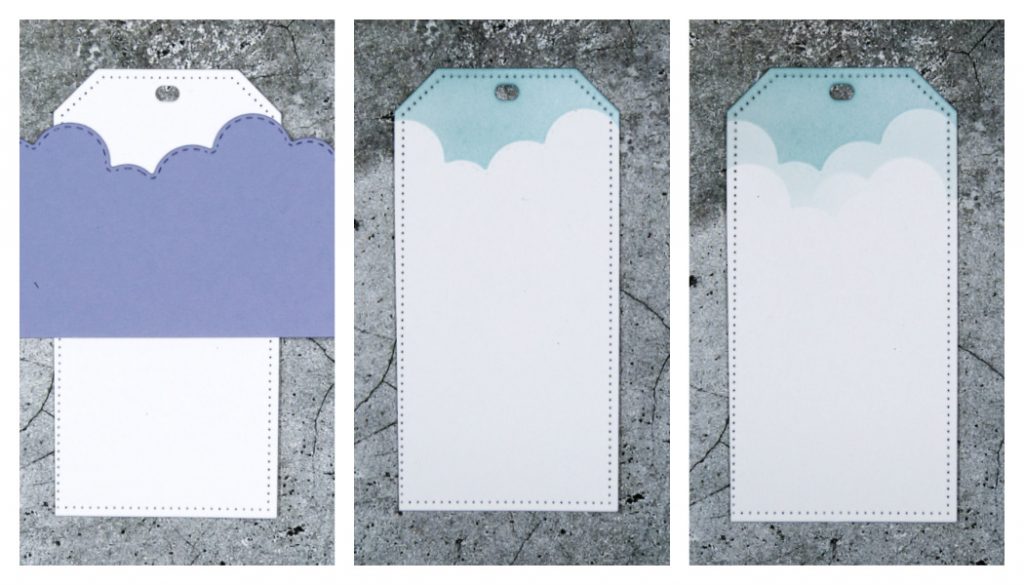
Place your ‘cloud’ template on top of your cardstock – you are going to be sponging above the die cut so make sure you have it going in the correct direction. Using your Blending Blushes and desired ink – I went with Balmy Blue – sponge above the edge of the template to the top of your cardstock. To get another ‘layer’ of clouds move your template down. I didn’t reink my Blending Brush but used the ink that was already on the brush to apply colour – I wanted it a bit light than the original brushing. And there you have your clouds.

To create my ‘grass/hills’ at the bottom of the card I took a piece of scrap cardstock and gently ripped it to create the contours of the land. This time you want to put your template the opposite way from the clouds (with the ripped edge to the bottom) so that you sponge below the edge to create your hills. Sponge in different shades to give depth.
I hope you give these two techniques a go to create a ‘scene’ for your projects – either a card or scrapbook page.
Well that’s it for now. Until next time …
