


Hi there
We are now only four weeks away from Christmas so I’d better get sharing my Christmas projects with you before it’s too late. The Brightly Gleaming Suite on pages 30-32 will feature heavily over the coming weeks – I hope you’ve fallen in love with this suite I like I have.
For this card I’ve used the Gleaming Ornaments punch and the gorgeous Brightly Gleaming DSP – I love the hint of copper throughout this suite. This was an easy card to make and there’s no stamping on the card front – the sentiment comes as part of the 1/2″ Classic Weave Ribbon.
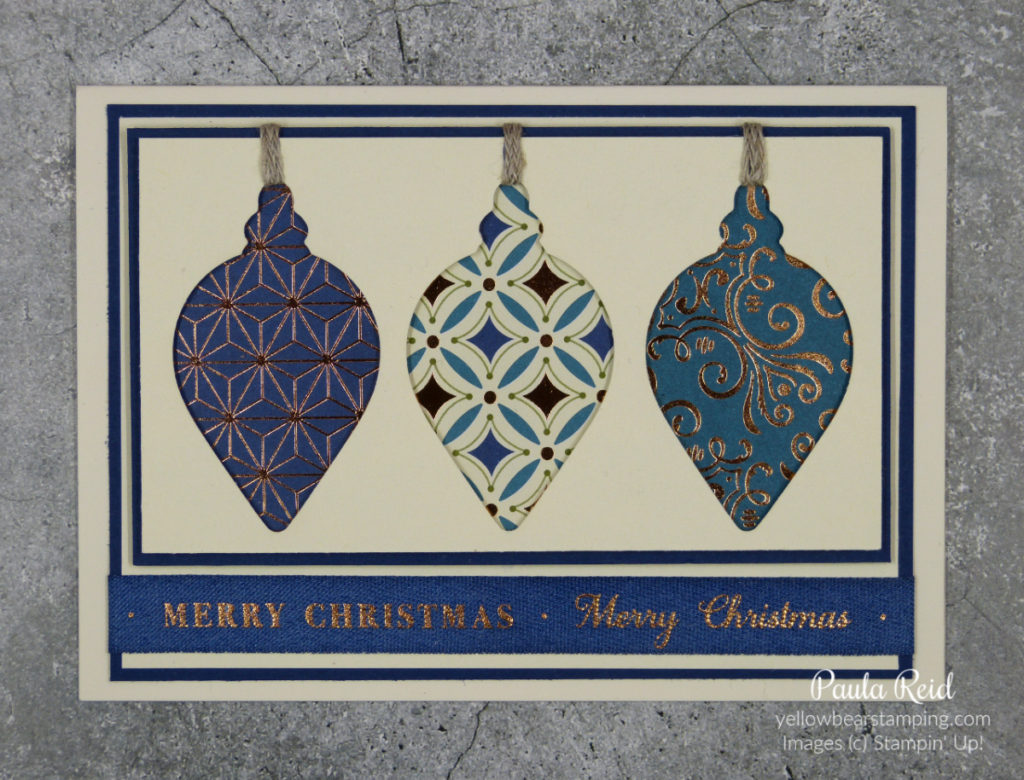
There are a few layers of cardstock in this card so if you want to recreate it here are the measurements: standard card base – Thick Very Vanilla; Night of Navy – 9.8 x 13.8cm; Very Vanilla – 9.4 x 13.4cm; Night of Navy – 7.4 x 12.8cm; Very Vanilla – 7 x 12.4cm.

Before assembling this card I coloured the ribbon in with my Night of Navy Stampin’ Blend. The original colour of the ribbon is Very Vanilla but I’d seen somebody else use it coloured so thought I’d give it a try. It was really easy to do – I just left it for a bit to make sure it was fully dry. Next up is cutting out the ornaments. I made a pencil mark for the centre of the cardstock – punched the middle one out then used the cut out to work out the position of the other two so that they were equally spaced on either side.
I cut three pieces of Braided Linen Trim and adhered one end to the back of the Very Vanilla cut out leaving one end loose for the time being. The different pieces of DSP are adhered to the smaller piece of Night of Navy with the ‘cutout’ adhered with dimensionals. The loose end of the trim is wrapped over the top and adhered to the back. Next up I adhered the remaining Night of Navy and Very Vanilla together. Adhere the ribbon trim to the bottom then adhere the ‘ornaments’ to the matt with dimensionals (I used the mini dimensionals for this project as they are not as thick as the standard dimensionals.) Final step adhere to card base.
You may be able to see a glimpse of the inside where I stamped the holly image.
Well that’s all for now – until next time …
