


Hi there
We are now in the final week of Sale-A-Bration so I thought I’d better share with you some projects I’ve made using some of the FREE Sale-A-Bration items. This year Stampin’ Up! have introduced a two tier reward for choosing your FREE items – there are certain products you can choose if your order is NZD110 and then there are some bigger items if your order is over NZD220.
Today’s project uses the Happy Wishes stamp set which is on offer for those orders over NZD220.
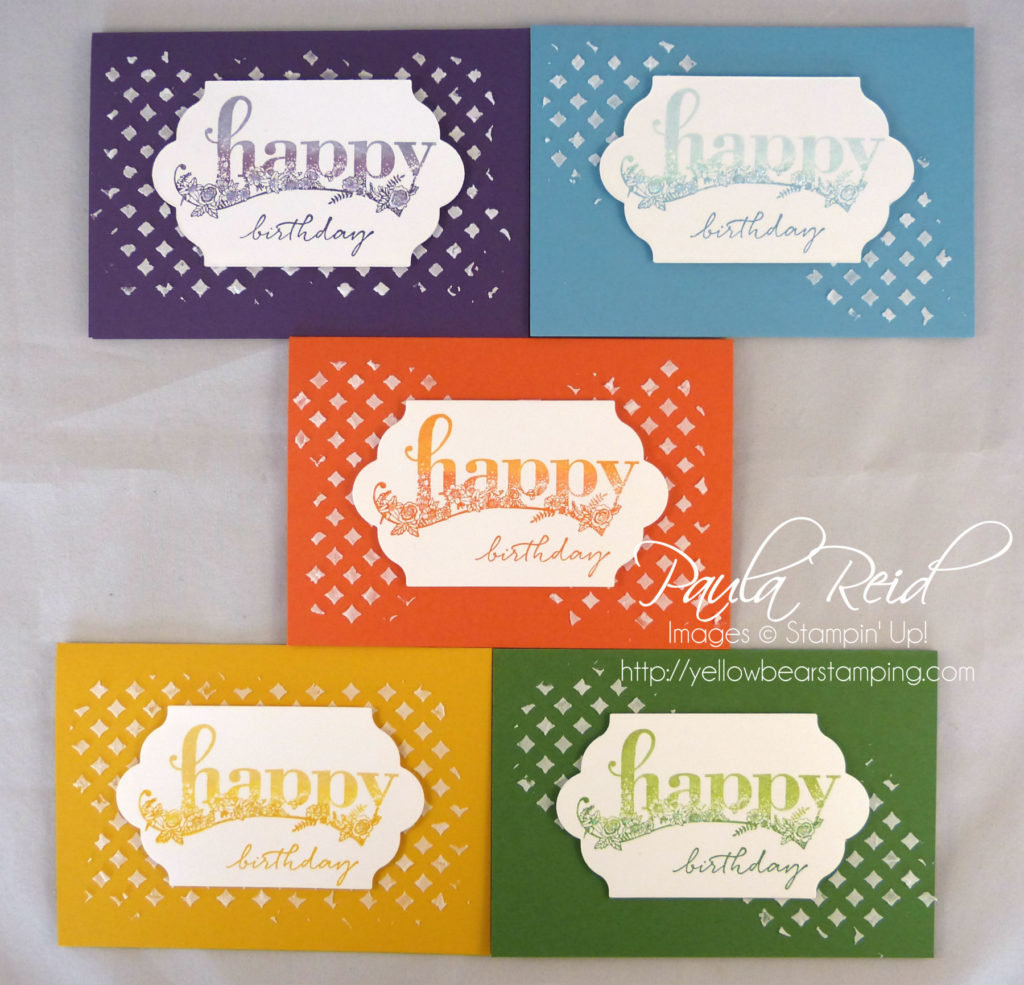
This stamp set has two ‘big’ words – happy and best – and then there are 14 options of words to be added before or after the main words.
The first card I made was the Marina Mist one – and then I got carried away!
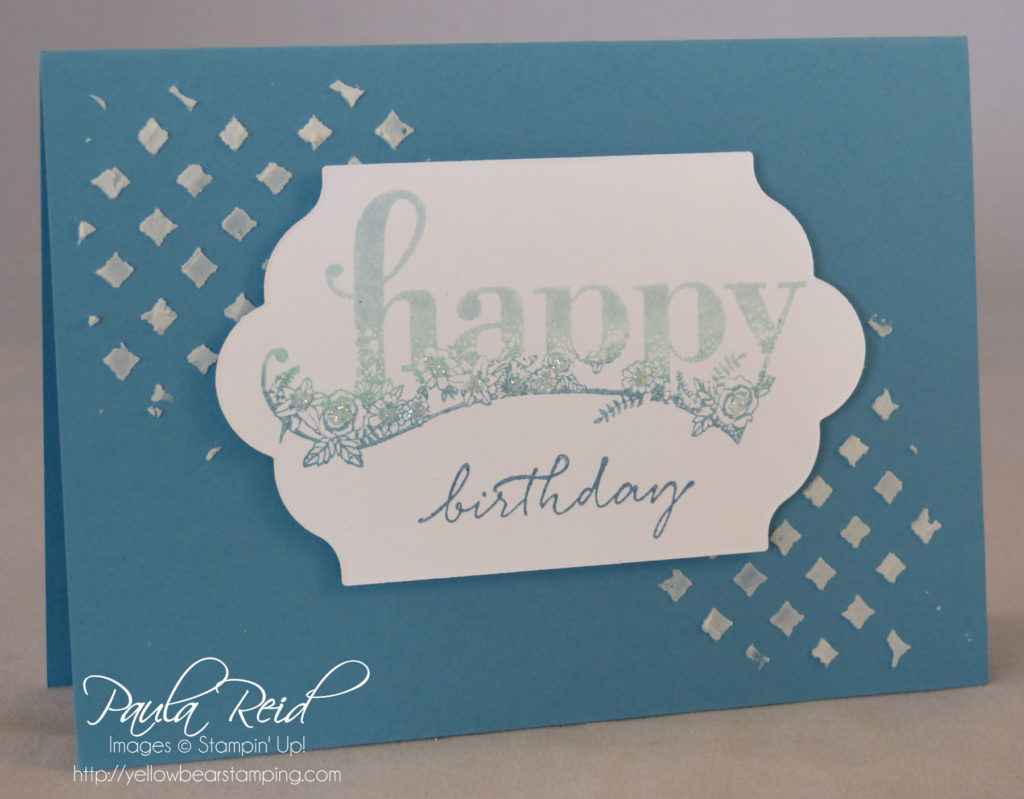
To create the ombre look for this card I inked the ‘happy’ stamp with Soft Sky then applied Pool Party with a sponge to the bottom three quarters then applied Marina Mist with a dauber to the bottom quarter. I then ‘huffed’ on the stamp and stamped my image on a piece of Whisper White card stock. The ‘birthday’ is stamped in Marina Mist. Once I’d done my stamping I then cut it out with the Lots of Labels Framelits. The card base is Marina Mist.
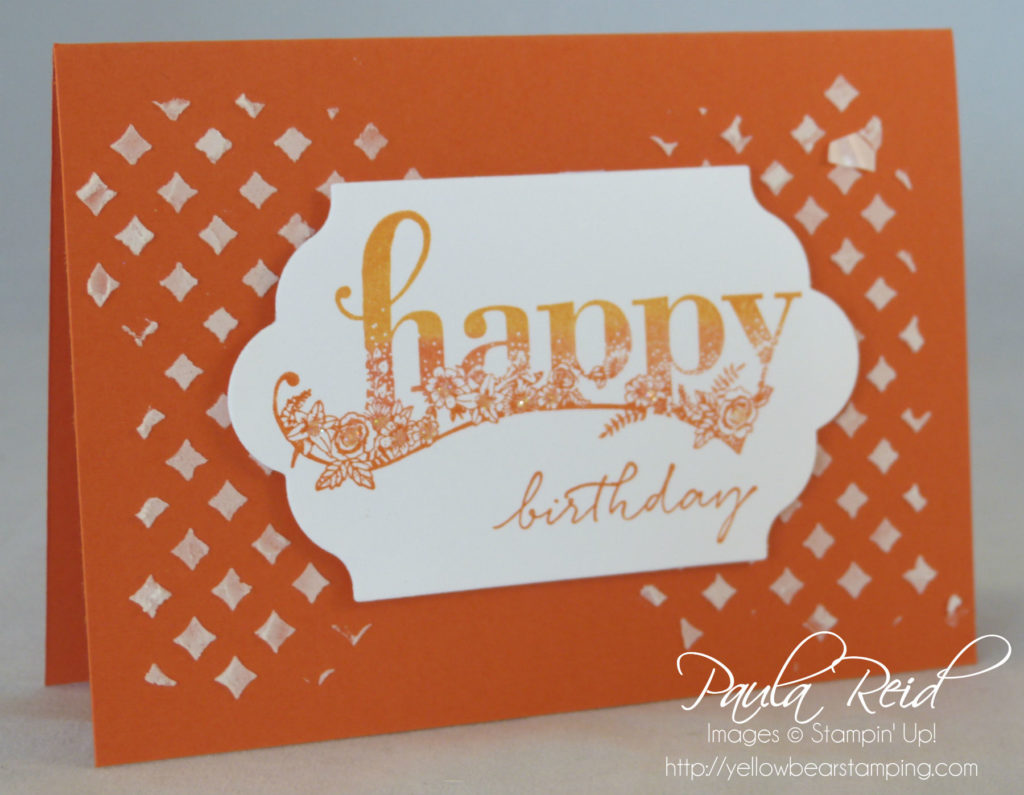
The colours for this card are Peekaboo Peach then Calypso Coral and then Tangerine Tango. The card base is Tangerine Tango. I also added some Dazzling Diamonds to each card on the flowers.
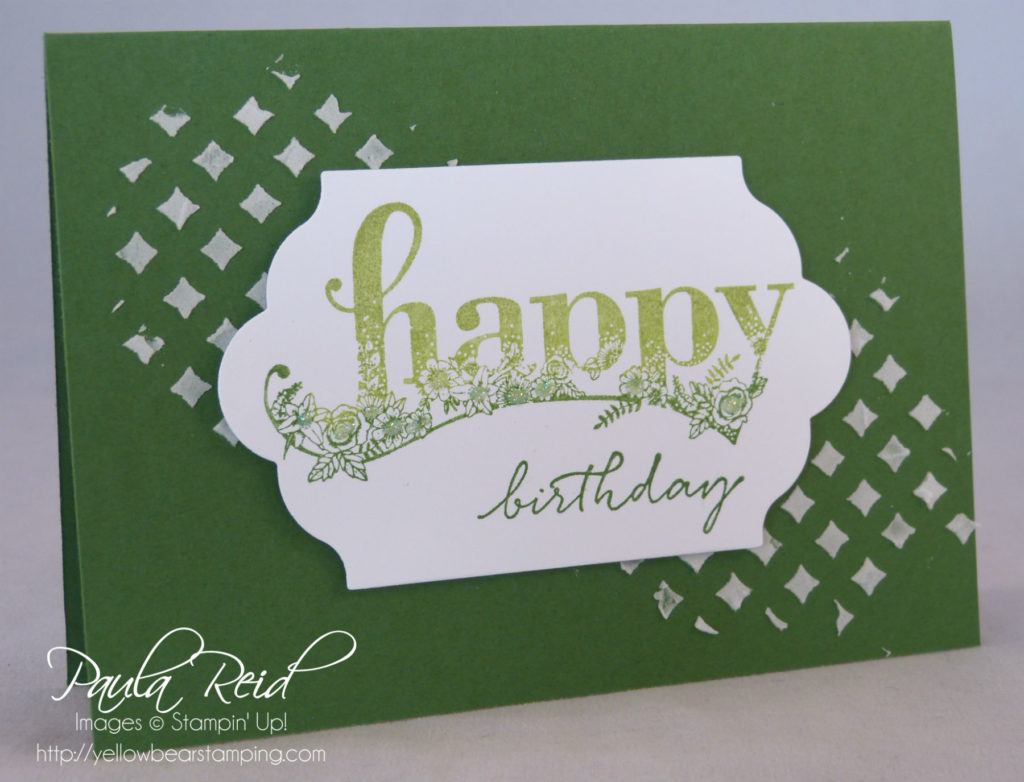
Garden Green is not a colour I use that much – it’s not feeling the love from me so I decided to give it some love :). The card base is Garden Green and the inks are Pear Pizzazz, Wild Wasabi and Garden Green.
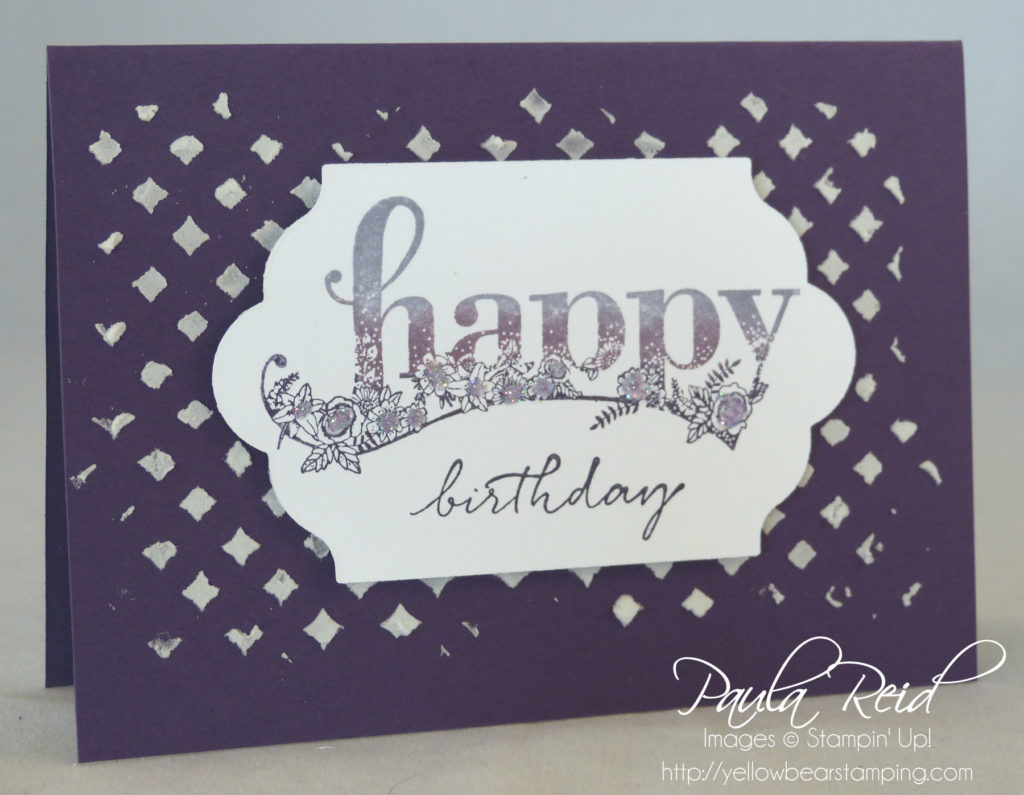
Purples don’t feature that often in my cards so they get an outing too. Wisteria Wonder, Perfect Plum and Elegant Eggplant were used here and the card base is Elegant Eggplant. The sentiment is adhered with dimensionals so as not to damage the embossed part.
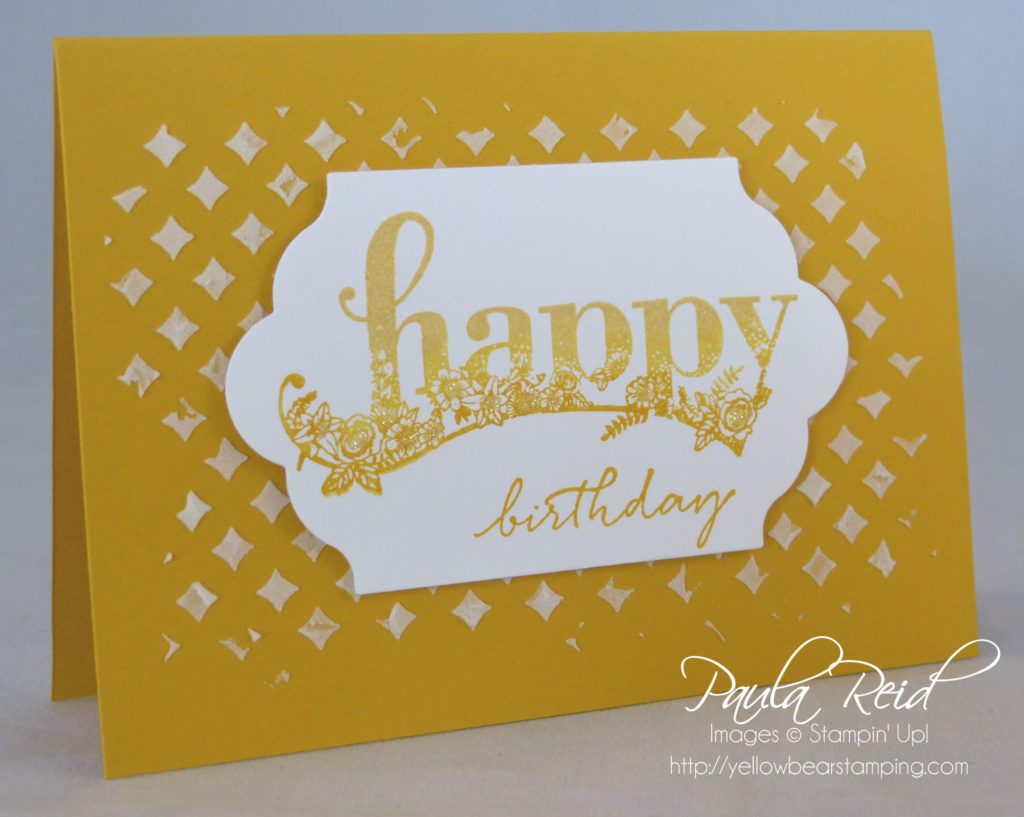
And of course I can’t forget my favourite colour – yellow. This one is So Saffron, Daffodil Delight and Crushed Curry on a Crushed Curry card base.
The background on the card base is created using the White Embossing Paste and the Pattern Party Decorative Masks. I had fun creating the different placements of the pattern with the same mask.
Check back soon for more projects.
Until then …
