Picture Perfect Fancy Fold Card – Pop Out Swing

By | March 16, 2018

Hi there

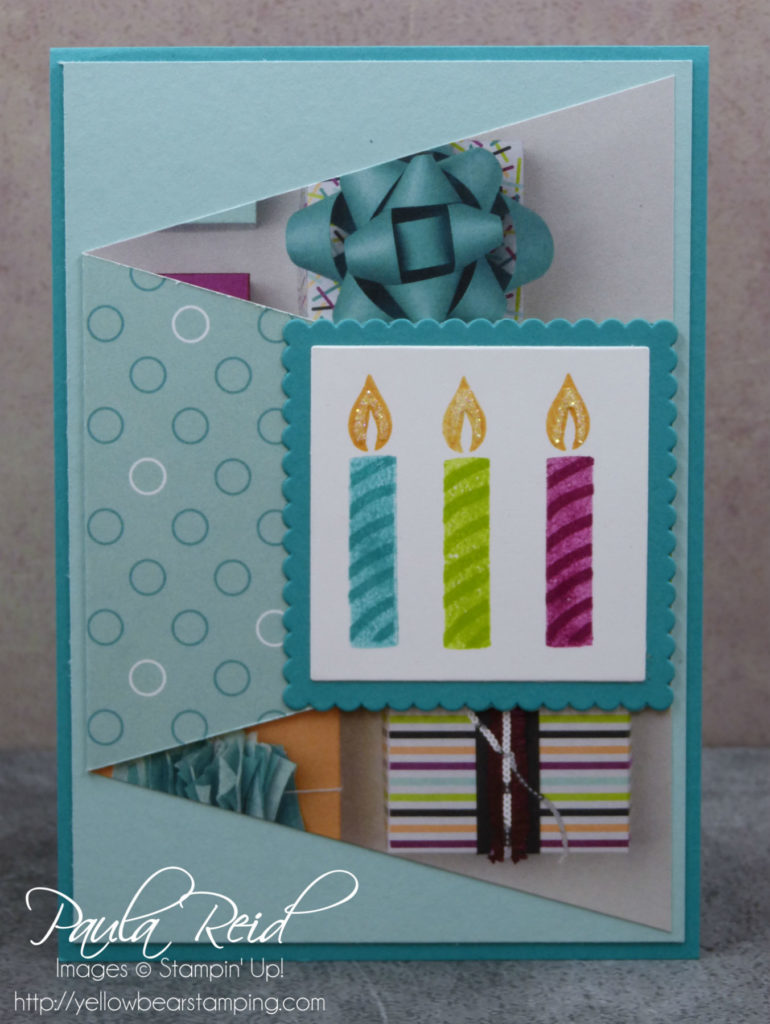
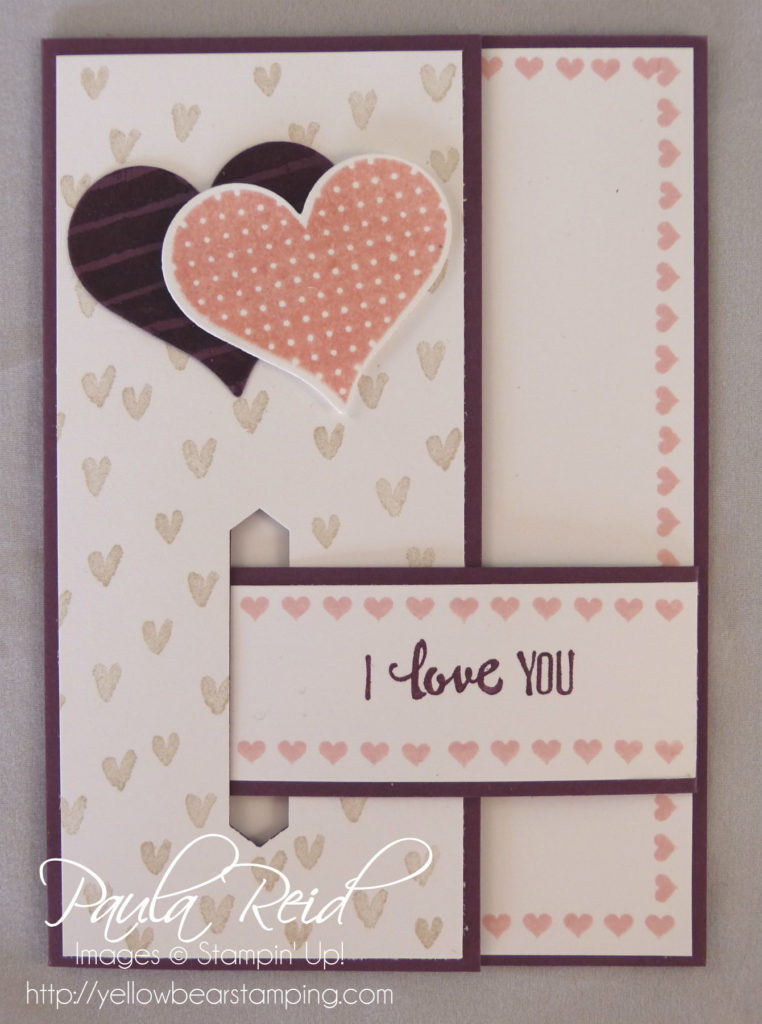
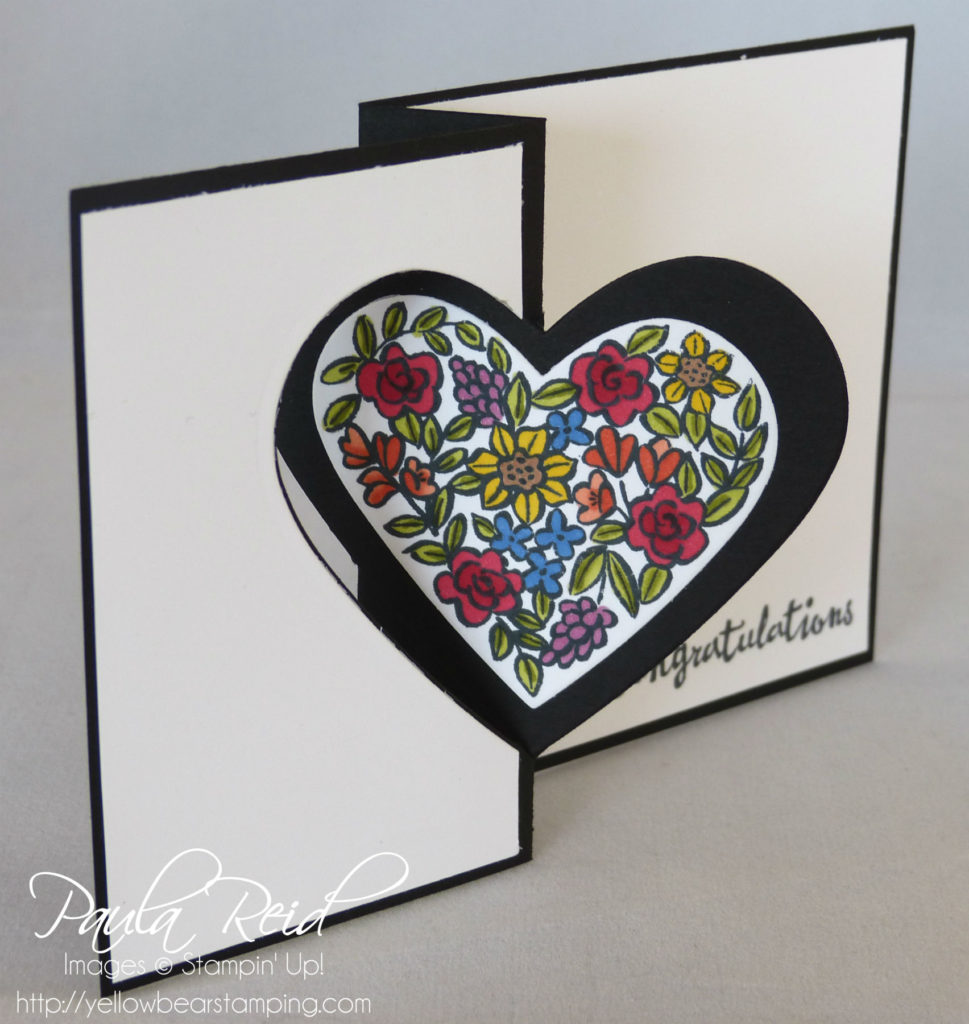
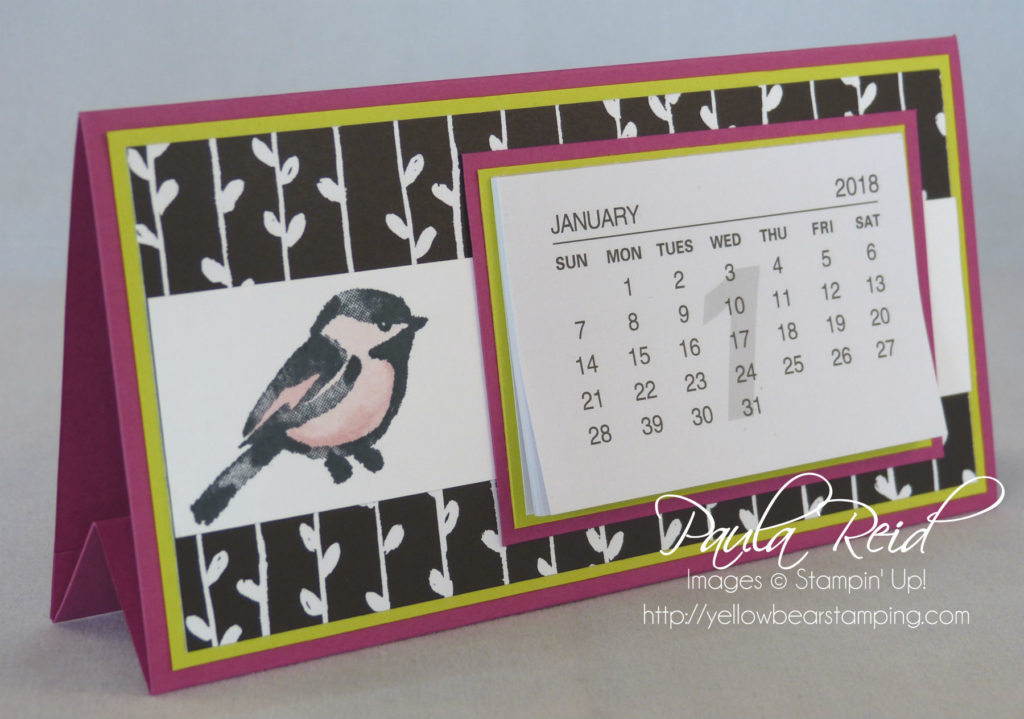
Here’s my final fancy fold card for this suite.  This card style is called a Pop Out Swing Card

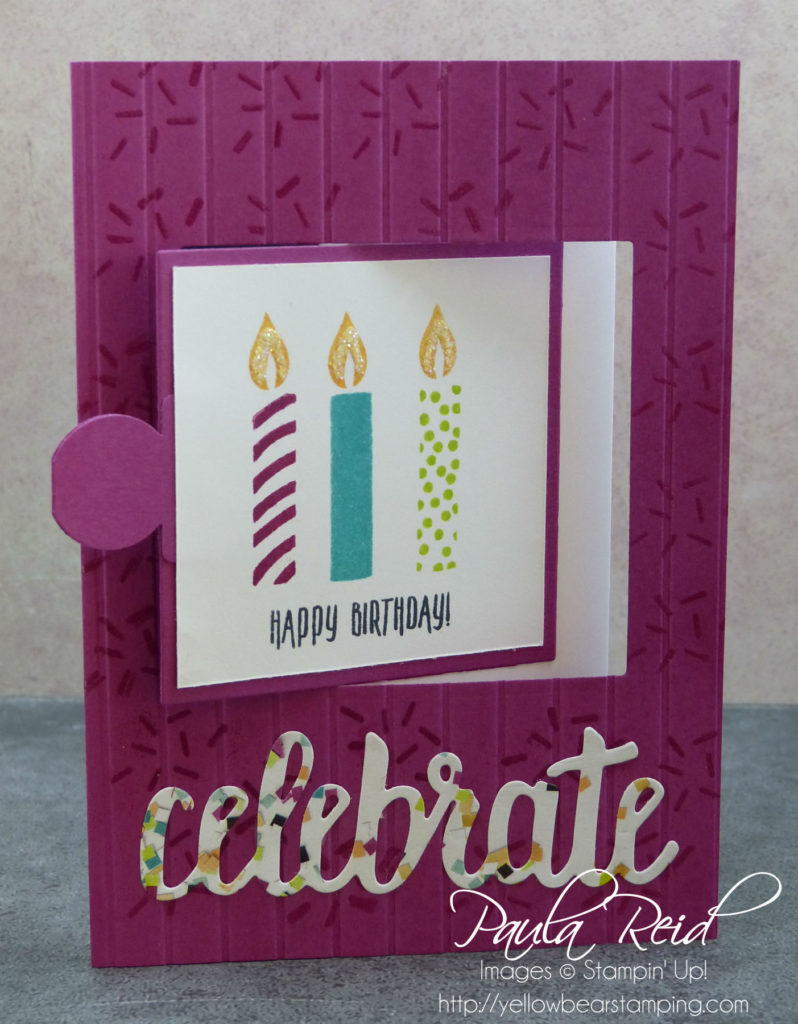
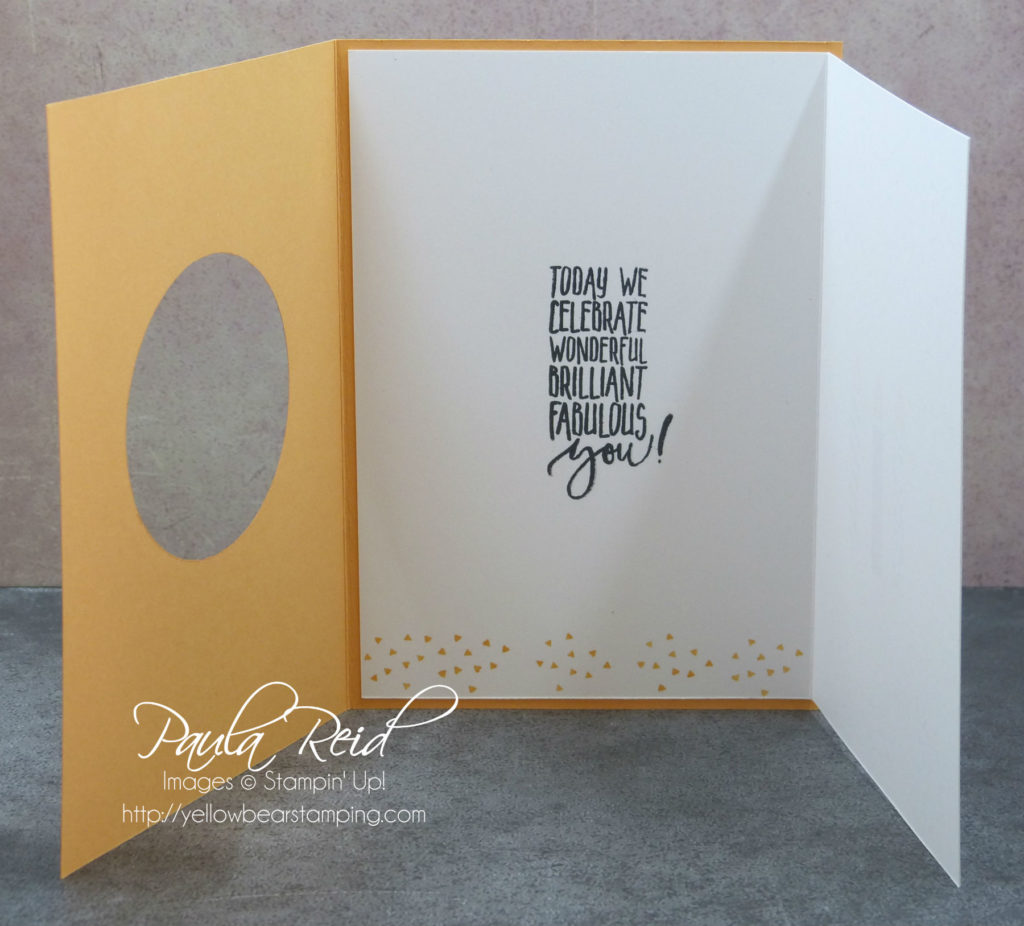
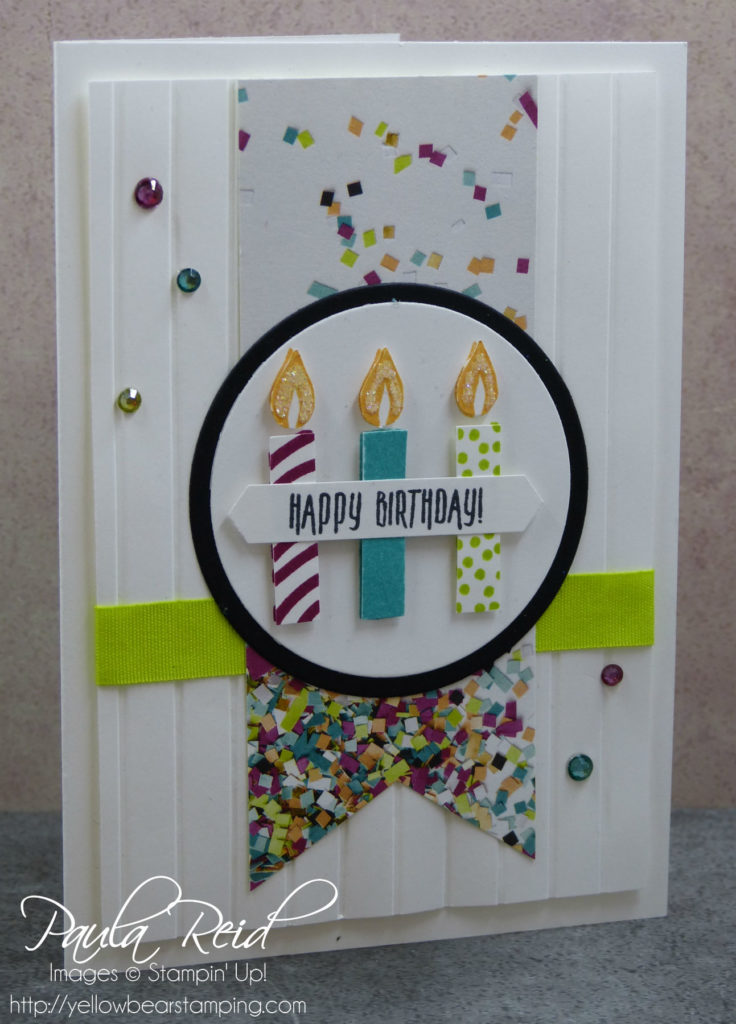
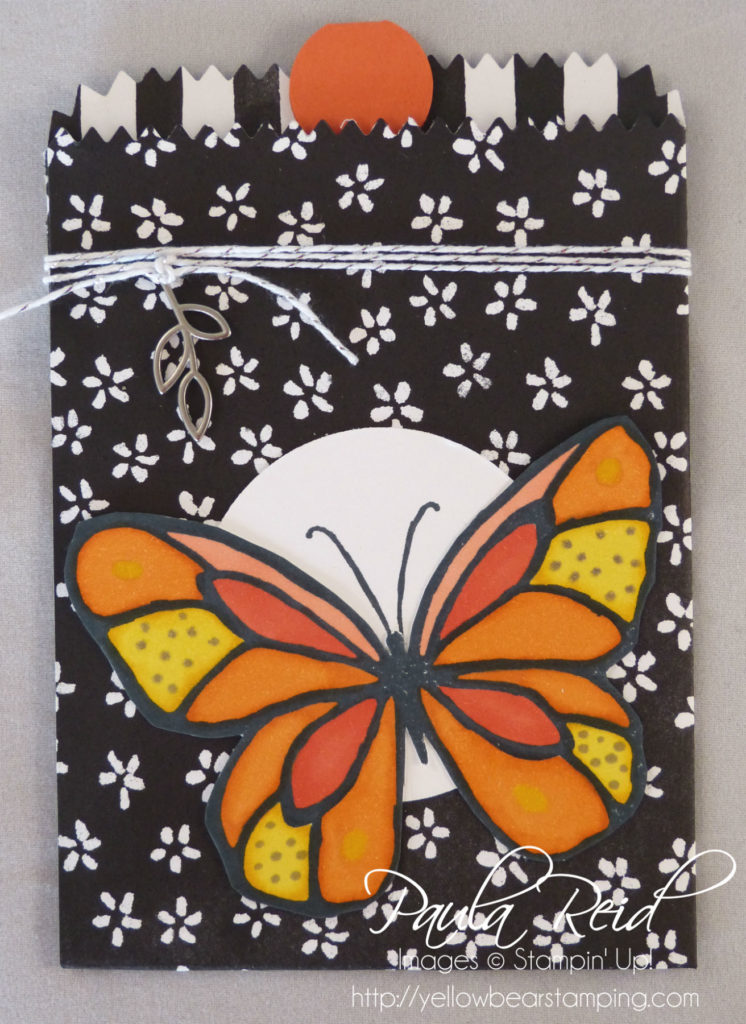
This card looks harder to make than it is.  From the card base I cut out a square using the largest square framelit.  I then embossed just the front of the card with the Simple Stripes Embossing Folder.  Punch out a tab out using the Circle Tab punch, fold it in half and adhered it to the mat then adhere the stamped image which has been cut out using the 2nd biggest square framelit.  I used the ‘sprinkles’ image and stamped it in VersaMark and added clear embossing powder.  The ‘Celebrate’ is from the Celebrate You Thinlits (a Sale-A-Bration item which is carrying over to the new Annual Catalogue out 1 June) and cut from a scrap of the Picture Perfect DSP.

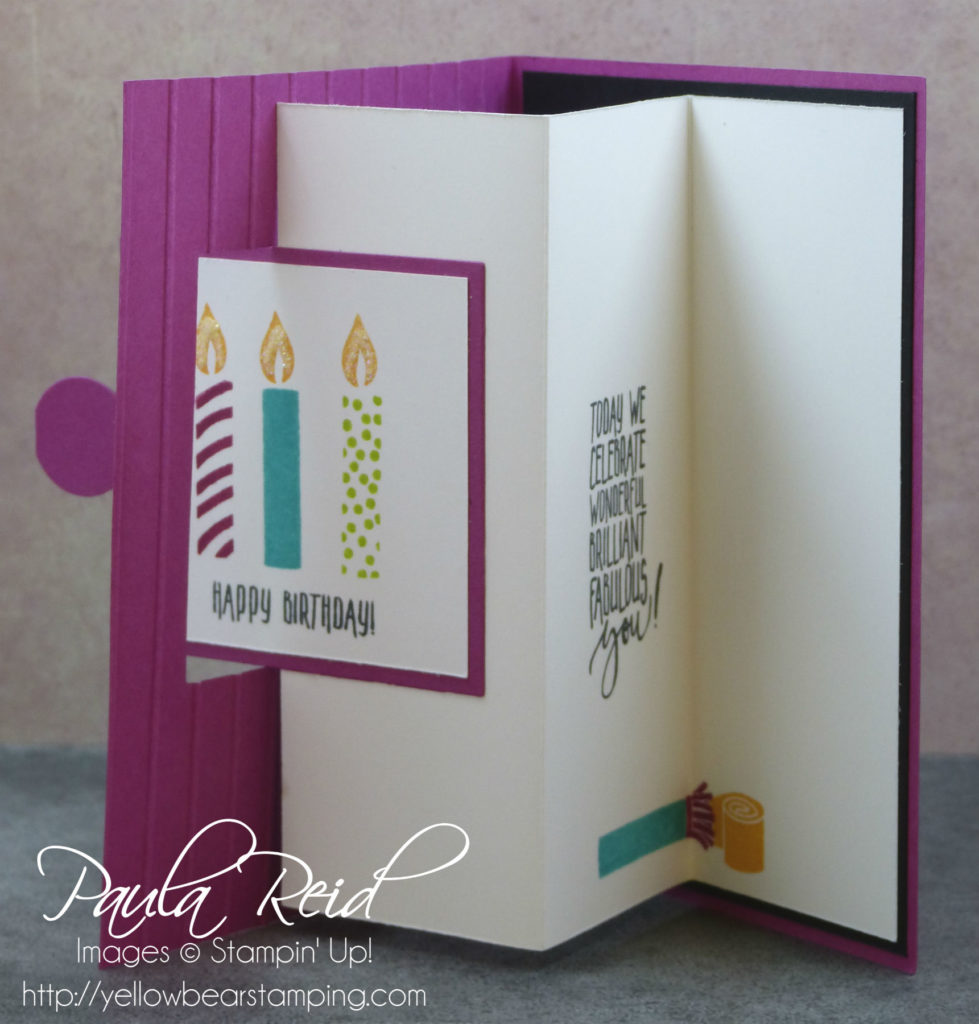
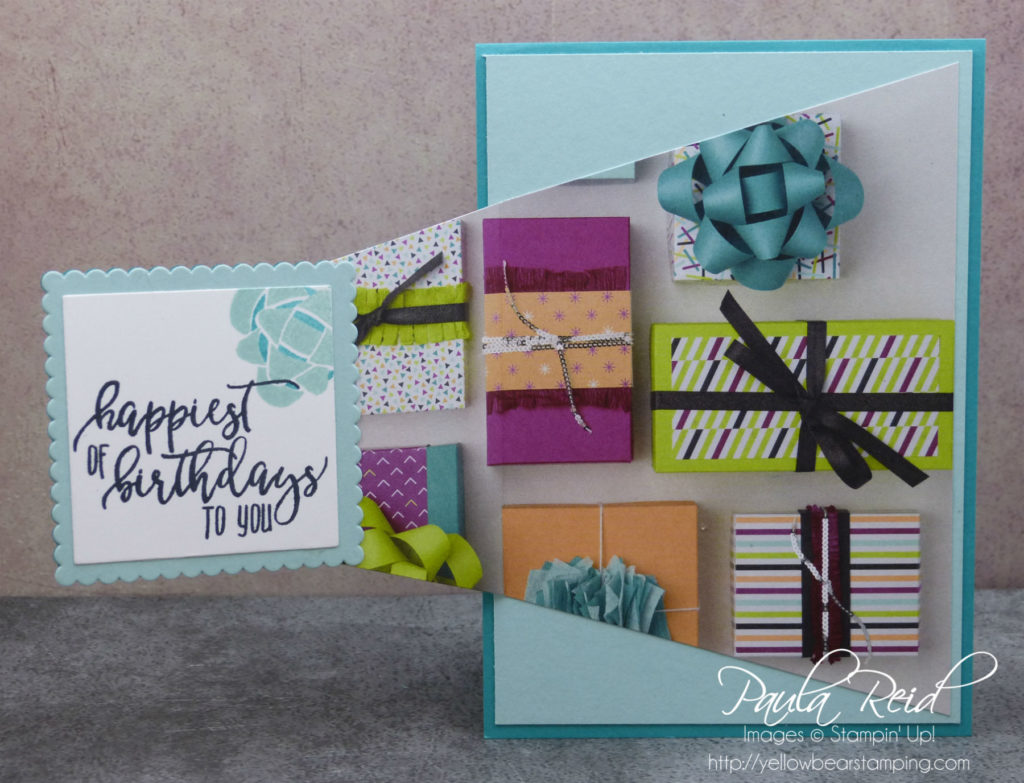
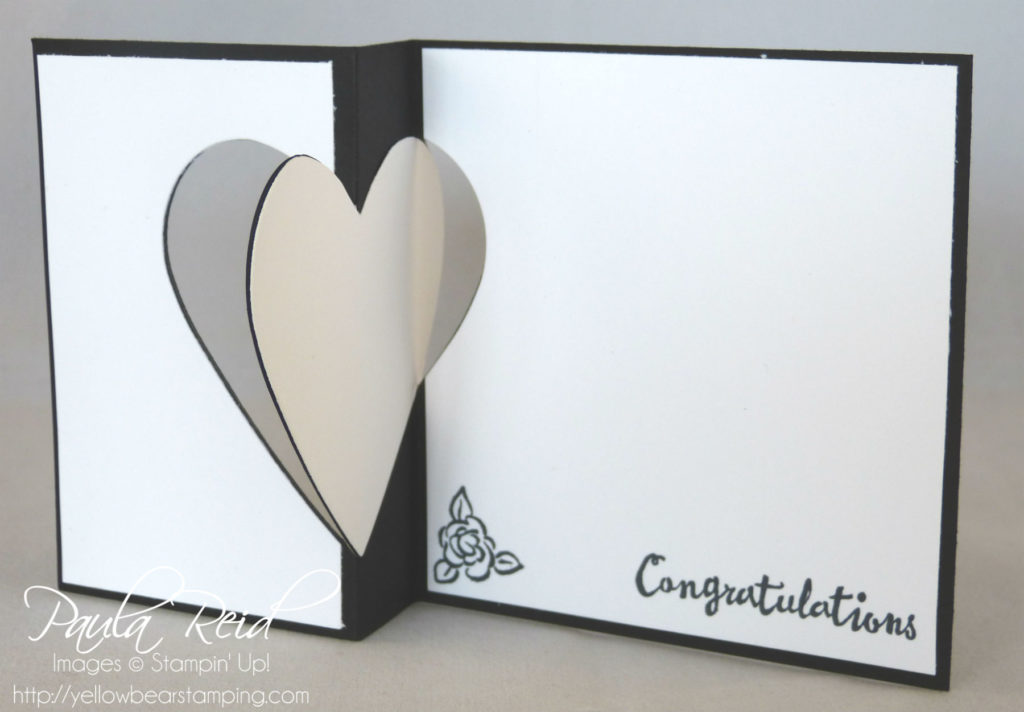
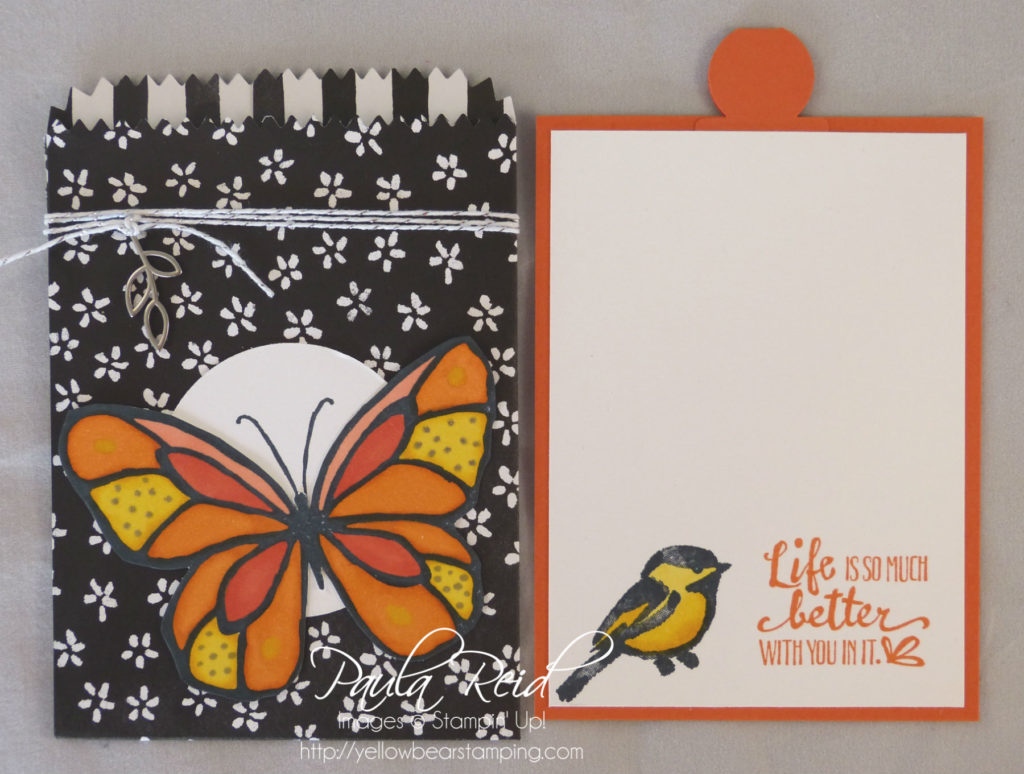
Cut a piece of Whisper White card stock (6″ x 13.8cm – mixed measurements are often the only way to go!) and score it at 2″ and 4″.  Stamp your sentiment or image and fold the card stock in a M – mountain, V – valley formation.

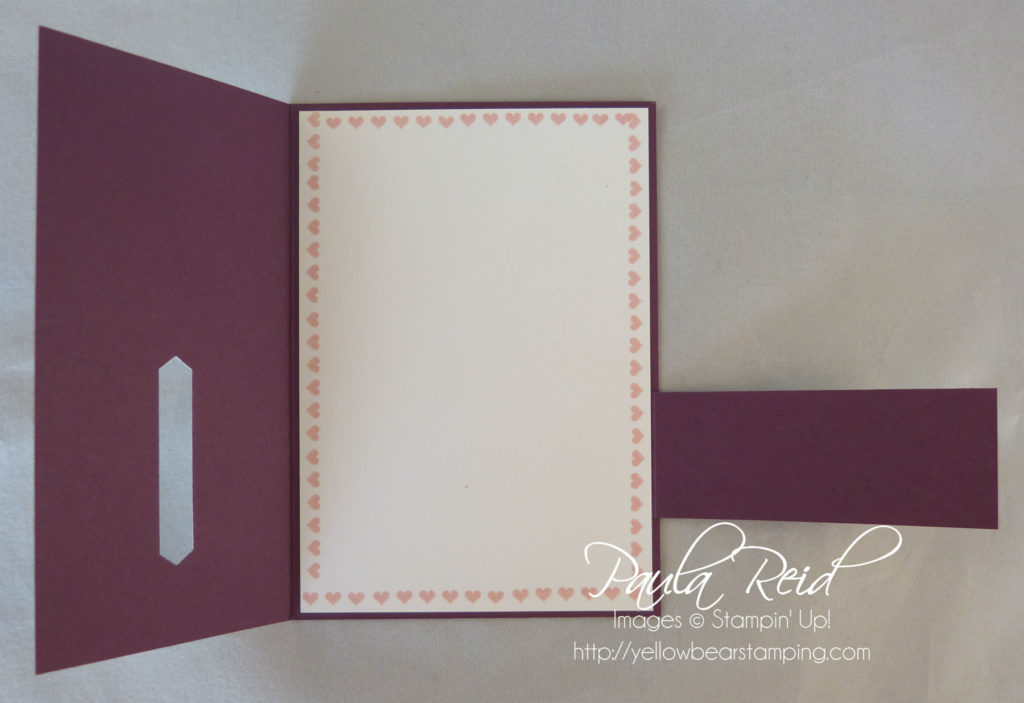
Adhere your card mat (Basic Black – 10cm x 14.8cm) to the card base then adhere just the right hand panel of the Whisper White to the mat.  Fold the Whisper White on top of itself and close the card base.  Apply adhesive to the left hand side of the matted image and adhere it to the folded Whisper White so that it fits inside the square cut out.

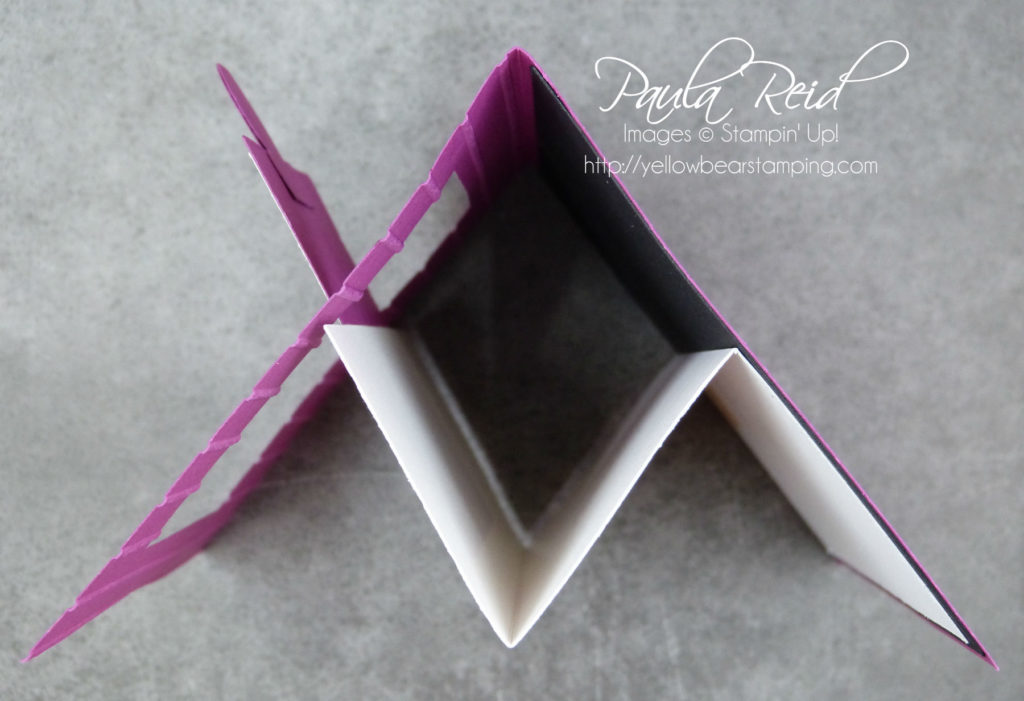
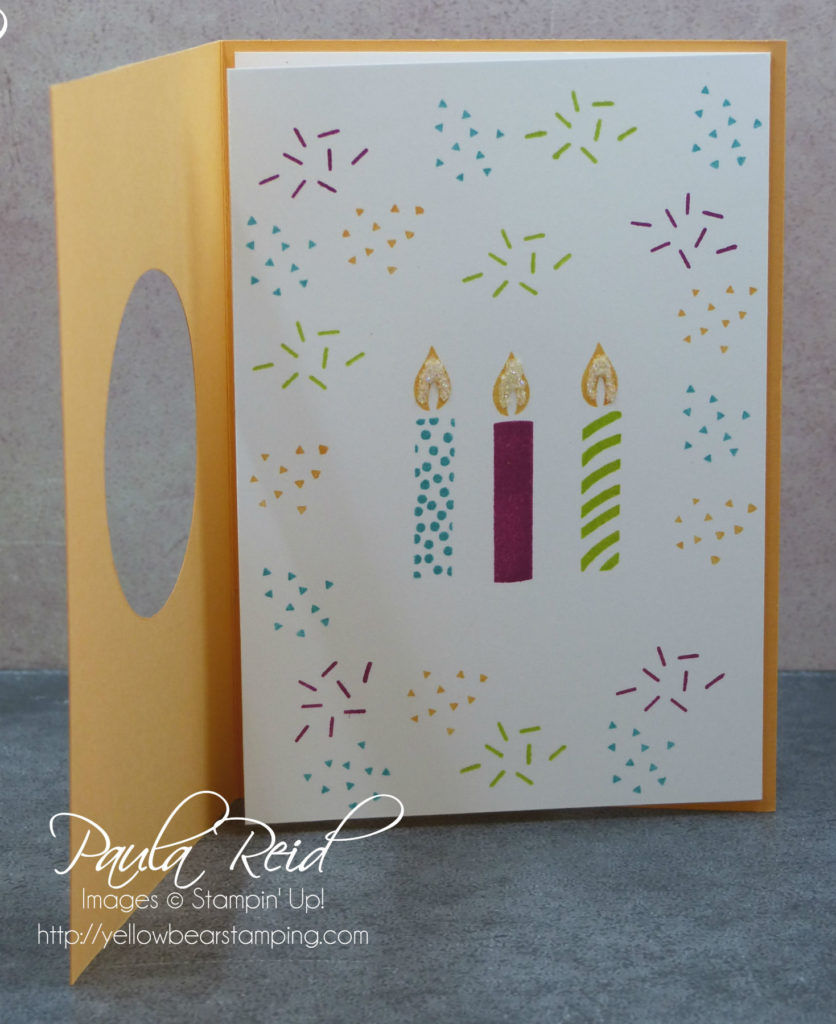
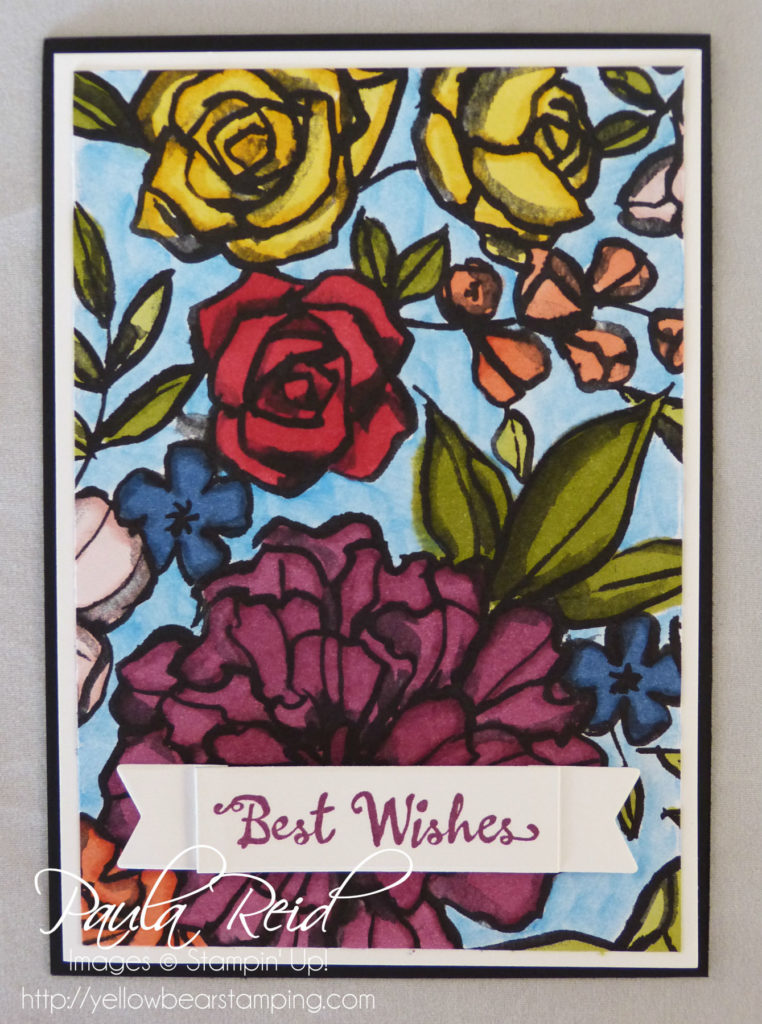
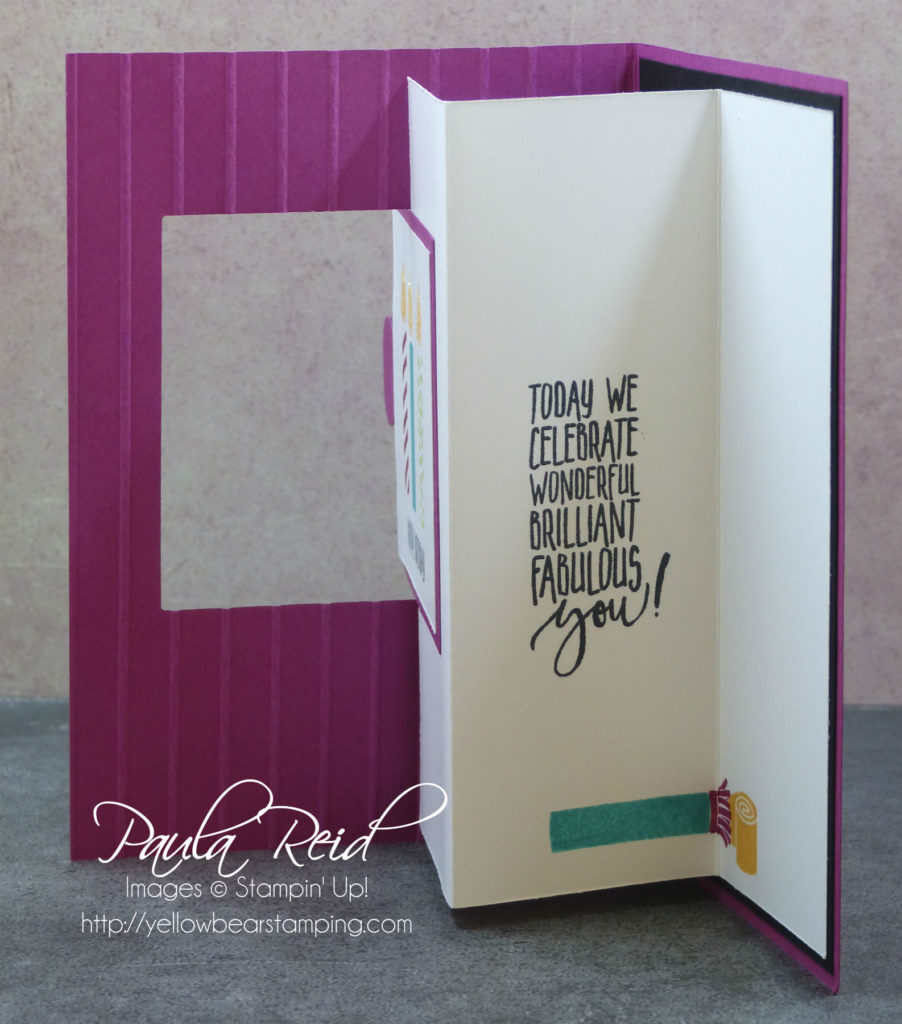
This is what it looks like from a ‘top’ view.

I hope you’ve enjoyed these fancy fold cards.  There are so many cool fancy fold cards techniques so give them a try.

Tomorrow I’ll share my last card samples from this suite.  It’s the card that I taught at Stamp Camp as my ‘make and take’ from my presentation.

Until then …

Picture Perfect Fancy Fold – Pendant Fold

By | March 15, 2018

Hi there

Today’s card is a CASE from a Christmas card I was given by one of my team members.  I’ve done a slight modification so that I could get it out of a 6″ x 6″ piece of paper.  I’m not sure what the name of this fold is but she called it a ‘Pendant Fold’ card so that’s what I’m calling it.

I trimmed  1/2″ off the height of the DSP so that it measures 5 1/2″ x 6″.  I then decided with side of the paper I wanted showing  on the inside and made a pencil mark on the left hand side 1 3/4″ from the top and 1 3/4″ from the  bottom.  With your paper trimmer line the pencil mark and the top right hand corner in the cutting groove and trim.  Repeat lining up the other pencil mark and bottom right corner.  Then score vertically 10cm from the right to create the folding flap.

The candles are stamped in  Bermuda Bay, Lemon Lime Twist and Berry Burst. The candle was ‘stamped off’ and then the overlay was stamped in full strength colour.  The flames are stamped in Peekaboo Peach then I added some Dazzling Diamonds.

Using the 4th largest square framelit and the 3rd largest scallop square framelit cut two of each for the image/sentiment and mat.  Stamp your image and sentiment and adhered them to the scalloped squares.  My front scalloped square is cut out of Bermuda Bay and the inside one is Pool Party.  To put the card together I adhered the mat to the card base (which is ‘hinged’ at the top and not the side) then added the  DSP.  I then folded the flap back onto the card front so I could get the correct placement of the image.  Apply adhesive to the back of the front mat on the right hand side only and then adhere it to the DSP.  Apply adhesive to the inside mat and adhered it to the back of the front mat.  You may want to use TomBow for this one so that you have a bit of ‘give’ to line up your edges.  And there you have it.

This is a great way to use you DSP – especially the 6″ x 6″ packs.

I have one more fancy fold to share with you so check back tomorrow.

Until then …

Picture Perfect Fancy Fold Card – Double Fold

By | March 14, 2018

Hi there

I’m a bit late posting tonight as we’ve been out to Piha.  One of the guys from our US office is over at the moment so we went for a drive to show him the beautiful West Coast and the black sandy beach.  Piha is one of my favourite spots in Auckland.

As part of my presentation at Stamp Camp last month I created some fancy fold cards.  I’m calling this card a Double Fold card – not sure if that’s the correct name or not.

First up I cut a circle in the centre of the card front using the Circle Framelits die.  Just choose one that is a bit bigger than the image you are wanting to use.  As I wasn’t adding DSP to the front of my card I used the Tutti-frutti  Adhesive Backed Sequins for some additional colour and dimension.  The sentiment is stamped in Memento Black.

On the first ‘page’ of the card I’ve stamped the candle image which shows through to the front when the card is closed.  To make sure I go my image in the right place I placed my folder piece of Whisper White inside the card base and traced the circle onto the Whisper White.  I then stamped my image and rubbed the pencil line off.  I used the ‘sprinkle’ images in the coordinating colours – Bermuda Bay, Peekaboo Peach, Lemon Lime Twist and Berry Burst.

This card uses the same amount of card stock as you would use for a normal card except this time your Whisper White piece (20cm x 14.3cm – scored at 10cm) is not cut into two piece but kept as a whole.

I have two more fancy fold cards to share with you and then the final project with be the card I got all the demos at camp to make.

Until tomorrow’s post …


Picture Perfect meets Birthday Wit

By | March 13, 2018

Hi there

These next cards use the ‘donut’ paper with a fun sentiment stamp set – Birthday Wit – from the Occasions Catalogue.  This photographic design is perfect with the words of the stamp.  I got a bit carried away and ended up making four cards!

I stamped the sentiment four times – Bermuda Bay, Lemon Lime Twist, Peekaboo Peach and Berry Burst – on scrap card stock then cut out each set of  ‘free’ words.

I then cut my banners out – Whisper White  4.5cm x 13.5cm and coloured card stock 5cm x 14cm and punched the ends using the Triple Banner Punch

Next step was to stamp the words in Memento Black.  I found it was easier to stamp the ‘This is your’ and ‘Birthday Card’ dark and the rest just lightly so that when you place the cut out words over the top you don’t see any of the black.

I then matted the banner and adhered it with dimensionals.

By stamping the sentiment in four different colours that match the DSP I was able to mix and match the words for each card.

The inside of each card has the ‘Happy Birthday’ stamped in the coordinating card base colour.

Well that’s it for the quick and easy photograpic images cards.  Next up are some fancy fold cards still using this suite.

Until then …

Picture Perfect – Happy Birthday – two for one

By | March 12, 2018

Hi there

I’ve had heaps of fun creating cards using the photographic image papers in the Picture Perfect DSP pack.  Today’s cards use the ‘candles’ paper.  With one sheet of the DSP I was able to create two cards.

The first card uses a piece of DSP 9.5cm x 13.8cm.  I adhered a piece of Multipurpose Adhesive Sheet the size of the ‘Happy Birthday’ Thinlit to the back of the DSP where I wanted to cut out the words.  I then ran the Die and DSP through the Big Shot.  One thing to remember when making a card like this is don’t throw away any of the cut-out pieces 🙂  You’ll need them for later.  The ‘words’ will be used for the second card so put that to one side.

I then adhered the DSP onto a mat of Basic Balck (10cm x 14.3cm).  Now the fun begins to place all the cut-out pieces of DSP onto the black to form the ‘Happy Birthday’.  To make this easier I had another ‘Happy Birthday’ that I’d cut out so I placed it on the card so I knew where to put the bits.

Hopefully you can see in the photo above that the ‘Happy Birthday’ is actually created by the mat and not words cut out in Black adhered to the DSP.  It gives an indented effect rather than a raised effect.

Now you get to use the words that are cut out of DSP :).   I already had a cut out of Basic Black on my desk so used that to ‘shadow’ the DSP words.  The words are then adhered to a piece of Berry Burst (10cm x 14.3cm) that has been run through the Big Shot with the new Simple Stripes Embossing Folder.

As I mentioned in a previous post I’ve found that a number of other products in the Occasions Catalogue coordinate with the Picture Perfect Party Suite – here I’ve used the Tutti-frutti Adhesive-Backed Sequins for a ‘pop’ of colour and dimension.  Theses sequins come in a pack of five colours – Berry Burst, Lemon Lime Twist, Pool Party, Pumpkin Pie and Yellow.  You get 50 of each colour – check out page 29 of the Occasions Catalogue.

I’ve got one more design to share with you before I move onto some fancy fold cards 🙂

Until then …

Picture Perfect – Party DSP Cards

By | March 11, 2018

Hi there

As mentioned in yesterday’s post here are some cards using the really cool photographic side of the DSP pack.  This DSP pack makes it quick and easy to create a card – the DSP does all the work for you 🙂

This first card uses the fun balloon paper.  The DSP started out with the balloons being plain colours – I decided they needed some ‘texture’ to them so used two of the images from the Picture Perfect Birthday to create the ‘new look’ DSP – don’t be afraid to stamp on your DSP.  The centre balloon has the sentiment which is also from the same stamp set.

So that I didn’t go over the edge of the balloon I create a negative mask.  I placed a piece of Vellum over the balloons and traced around the edge then cut the balloon out and put that aside – it was the remainder of the Vellum that I used.  I then placed this over the paper to cover where I didn’t want ink and stamped away.  My DSP measures 9.5cm x 14.8cm, my Basic Black mat is 10cm x 14.8cn and these are adhered to a Peekaboo Peach base with dimensionals.

Next up is the Party Hat DSP – another brightly coloured paper.

The sentiment comes from the Celebrate You Thinlits Dies in the Sale-A-Bration brochure.  The neat thing with these Thinlits is that they are carrying over to the next Annual Catalogue (due out 1 June 2018).  You can earn these Thinlits up until 31 March if you place an order of NZD220 or more.

I’ve cut two of these out – one in Berry Burst and the other in Lemon Lime Twist and placed on one top of the other to create a shadow  before adhering to the card.  An easy way to adhere cut outs like this is to use the Multipurpose Adhesive sheets.  I adhere these sheets to the back of the card stock before I run it through the Big Shot – you may need to run it through an extra ‘roll’ or two to make sure it cuts through the adhesive sheet as well as the card stock.

The DSP for this card is 9.5cm x 13.8cm and the Basic Black mat is 10cm x 14.3cm.  The base is Lemon Lime Twist.

Check back again tomorrow as I have some more samples to show using the photographic images.

Until then …

Picture Perfect Banner Card

By | March 10, 2018

Hi there

The Picture Perfect DSP is rather cool – one side of the paper is a photograph image and the other side is a design image.  The cards I’m going to share with you all use the design side of the paper.

I’ve created three cards in the same design but each one has a slight change as we move through them.

The front panel has been embossed using the Simple Stripes Embossing Folder and adhered straight to the card base.  This embossing folder can be used either way – the grooves down or up – I’ve gone with the ‘down’ for this card.  To make my ‘flames’ shimmer I’ve used the Fine Tip Glue Pen and then added some Dazzling Diamonds.  Stampin’ Blends come in handy to colour your Rhinestones to match your card – here I’ve used Rich Razzleberry, Bermuda Bay and Old Olive.

The second card looks the same but this time I’ve adhered the embossed cardstock to the Thick Whisper White card base using dimensionals for a bit of extra height.  The centre image has been adhered with dimensionals on both cards.

The third card also has the front panel adhered with dimensionals and this time the candles have been stamped again on scrap card stock, fussy cut and adhered with mini dimensionals.  The ‘Happy Birthday’ was stamped and punched out using the Classic Label Punch and adhered across the candles.

After making these cards (and some kits for my team) I ended up with a number of narrow strips which I couldn’t let go to waste so I created a Herringbone card using the DSP.  I find it’s easier to adhere the stripes of DSP to a piece of copy paper cut to the right size (9.5cm x 13.8cm) and then adhere it to your coloured card mat and then to the card base.  This way you don’t end up with too thick a card front.  The card base is Thick Whisper White.  The stamped image is cut out with the Stitched Circle Framelits and adhered with dimensionals over a piece of Berry Burst ribbon and then finally the felt bow is attached.

Well I’m to bed for an ‘early’ night.  Check back tomorrow for some more projects using the photographic images on the DSP.

Until then …

Picture Perfect 21st Birthday Card

By | March 9, 2018

Hi there

One of my favourite suites in the current Occasions Catalogue is the Picture Perfect Party Suite.  This suite consists of the Picture Perfect Birthday stamp set, Picture Perfect Party DSP, Simple Stripes Textured Embossing Folder, Birthday Mini Binder Clips, Picture Perfect Party Classic Stampin Spots and Picture Perfect Party Cardstock Pack.  The colours featured in the suite are Peekaboo Peach, Pool Party Bermuda Bay, Berry Burst and Lemon Lime Twist.  In using these products I’ve found they coordinate well with a lot of the other suites and products on offer in this catalogue.

For my card I’ve used the Picture Perfect Birthday stamp set and most of the colours to create a fun 21st birthday card.  I’m sure we’ve all used this method to count at some stage.

I must admit it took a bit to get my stamping done for this card but I love how it turned out.  The candles are stamped in Berry Burst, Bermuda Bay and Lemon Lime Twist.  The flame of the candles are stamped in Peekaboo Peach then I’ve applied some glue using the Fine Tip Glue Pen and added some Dazzling Diamonds.  The sentiment is stamped in Memento Black – my ‘go to’ black ink.

We are now in our last month of Sale-A-Bration so if you have some items on your shopping list be sure to place an order before 31 March to receive a FREE item when your order is NZD110 or more.

I have more projects to share using the Picture Perfect Party Suite so check back tomorrow for more inspiration using this suite.

Tonight I’m off to a Bollywood event which should be fun – enjoy your evening whatever you have planned.

BBQ Box Card – Happy 60th

By | February 28, 2018

Hi there

A couple of weeks ago a family friend of ours celebrated his 60th birthday. ‘0’ birthdays are special ones and therefore require a special card.  I’d seen a card created by Jackie Aitken (an Australian Demo) and I just had to CASE it.  It uses the new Apron  of Love Builder Framelits from the Occasions Catalogue.

Now isn’t that a cool card?  I was really pleased with how this turned out – I must admit it took me a bit of time to create but the recipient is worth it.

The base of the card is box card similar to the one made here.  This card can be flattened and put into an envelope.  I made a special envelope with my Envelope Punch Board as the numbers and words were a bit too big to fit into an ordinary envelope.

The box is made out of Basic Black with silver foil used for the doors and accessories.  I cut two of all the utensils and glove and double sided them for extra strength.  I changed a few things from the original design – I punched a hole in the glove and utensils and also the BBQ box then threaded Basic Black Bakers Twine through the holes allowing the items to ‘hang from the BBQ.

I also double backed the words and numbers so that the window sheet could be stuck between – again giving extra strength.

I’ve just purchased a new photo box to take my photos and it comes with a range of backdrops.  The brick and stone sheets were perfect and add to my creation.

It’s hard to believe that today is the last day of February – that means we only have one more month of Sale-A-Bration.  Check out my Catalogues page to see the second release of FREE products you can earn with every order that is over NZD110.00.  If you would like to place an order for product you can do this via my online store or by contacting me on paula@yellowbearstamping.com

Until next time …

Heart Happiness Cards

By | February 18, 2018

Hi there

I’m not sure where last week went – I got rather busy and forgot to post the last of my OnStage creations that  feature the Heart Happiness stamp set.  So without further ado – here are the cards I created for my OnStage display.

The Heart Happiness stamp set has 15 images and some of these images coordinate with the Lots to Love Box Framelits and the Sweet & Sassy Framelits Dies.

This first card uses three different stamped images – the solid single heart is stamped in Pool Party, the horizontal striped heart is stamped in Bermuda Bay and the multiple hearts are stamped in Berry Burst.  The sentiment is from Petal Palette and stamped on heart which has been die cut from the Sweet & Sassy Framelits.  The Silver Bakers Twine has been wrapped around the base then I adhered the bow with a Glue Dot.  I find it’s easier to the the bow separately then adhere.

Next up is a Buckle Card – I haven’t made one of these cards for ages.  My colour combo here is Fresh Fig, Blushing Bride and Crumb Cake.  The heart at the back was stamped with the large stripped image then I cut a smaller heart from the centre of the stamped image using the Sweet & Sassy dies.  The front image has also been heat embossed using clear embossing powder.

Previously when I made this card I would have used the Word Window punch but now that it has retired I used the Classic Label Punch to create the ‘hole’ for the belt to go through.

My final card is a Swing Card.  This card took a bit of ‘brain power’ to get right – but I got there in the end 🙂  The image is stamped in Memento Black then coloured in using the Stampin’ Blends – Light & Dark Old Olive, Cherry Cobbler, Calypso Coral, Dark Daffodil Delight, Light Rich Razzleberry and Night of Navy.

To create the swinging ‘heart’ I only partially cut the image out which means I didn’t run it all the way through the Big Shot.  The inside image is part of the Heart Happiness stamp set and the sentiment is from Petal Palette.

To see another card I made using the Heart Happiness set check out this post here

Well that’s all the projects I made as a Display Stamper for OnStage – I hope you’ve enjoyed seeing these projects and been inspired by the great products on offer in the Occasions Catalogue.

Till next time …

Beautiful Day

By | February 8, 2018

Hi there

Today I’m going to share with you two projects I made using the new set Beautiful Day from page 26 of the Occasions Catalogue.  This set has two lovely big line art images that lend themselves to a variety of colouring techniques.  For these two I’ve used the Stampin Blends.  It also has two sentiments and a background image.

The image and sentiment are stamped in Memento Black ink and then I’ve coloured in the butterfly using the light and dark shades of Bermuda Bay.  The background image has been stamped in Bermuda Bay.  I stamped the butterfly image on a scrap piece of cardstock then once I’d coloured it in fussy cut it out and adhered it to the card with dimensionals.

For this card I stamped the image in Memento Black on a scrap piece of cardstock and coloured the flower in using the light and dark shades of Pumpkin Pie for the petals, Bronze for the centre and then light and dark Old Olive for the leaves.  I then fussy cut the flower and the leaf out.  On another piece of scrap I stamped the leave another two times and the centre of the flower.  After colouring these in I also fussy cut them out.  Now the assembly of my image.  I adhered the left leave and lower right leave to the back of the main flower and then adhered this to my piece of Pool Party cardstock.  Then the centre layer of the flower was adhered with dimensionals to give the flower more height.

Both card bases are Basic Black and I’ve used Thick Whisper White instead of ordinary Whisper White as the thicker cardstock is better to use with the Stampin Blends.

For an earlier 3D project I created using the Butterfly image check out my post here.

The next lot of projects I’ll share with you use the Heart Happiness stamp set on page 20 – these will give you some ideas for cards if you are into Valentines or they can be used for wedding anniversaries.

Until then …

Petal Passion Thank You Cards

By | February 4, 2018

Hi there

We’ve now come to the end of my Petal Passion Suite projects from OnStage.  First up are some 3″ x 3″ Thank You cards I made using some of the other images from the Petal Palette stamp set.

The top left card uses ink – Pear Pizzazz and Blushing Bride while the other cards were all coloured in using the Stampin’ Blends.  The sentiments were all stamped in Pool Party and the card base is also Pool Party.

For the last project I stamped the image on watercolour paper then used an aqua painter and Berry Burst ink to colour the flowers.

The card mats are Berry Burst and Pear Pizzazz on a Basic Black base.  The ribbon is Berry Burst 5/8″ Crinkled Seam Binding – this is really lovely to use to tie a bow.

Well I hope you’ve enjoyed seeing my creations using the Petal Passion Suite.

Next up will be some projects using the Beautiful Day stamp set.

Have a great week.

Petal Palette – Memories and More

By | February 1, 2018

Hi there

My first love in the paper crafting space is card making so to do a scrapbook page was getting me out of my comfort zone.  In my box of supplies I received the Petal Passion Memories and More Card Pack so my first task was to do a 12″ x 12″ page.  I didn’t want to use photos of people so went with some of the wild life we met while on holiday in Te Anau last year.  One of my favourite birds is the South Island Robin – they are so cute and followed us around as we walked through the bush.

I have since filled in the journalling cards with info about the birds and scenery.  The central card has the little bird already printed on the card which ties in with my photos.

The Memories & More Card Pack contains 72 double sided cards (2 each of 10 designs measuring 10.2cm x 15.2cm; 2 each of 26 designs measuring 7.6cm x 10.2cm), 2 accent sheets, 2 cardstock sticker sheets and 2 accetate card overlays with white print.

Next up I made card fronts using the smaller designs.

I’ve used a range of colouring techniques for these cards – Watercolour Pencils, Stampin’ Blends, Aqua Painter and ink and the Stampin Write Markers.

These are just card fronts as they were easier for my display but I would then mount these onto Basic Black card bases to create a super quick card.

Watch this quick video to give you some ideas on ways to use the Petal Passion Memories & More Card Pack.  You can also check it out on page 24 of the Occasions Catalogue.

I have two more projects to share from the Petal Passion Suite and then I’ll move onto some of the other products I received.


Petal Passion – 3D projects

By | January 29, 2018

Hi there

I hope you have been surviving the heat – I can’t remember it being this hot in January.

Today share includes a couple of 3D projects.

These little desk calendars are easy to make and you can get two bases out of one sheet of A4 card stock.  The base is Berry Burst with a mat of Lemon Lime Twist (this combination is one of my favourites at the moment).  The DSP is from the Petal Passion pack and the little bird is from the Petal Palette stamp set – he is coloured in using the Pink Pirouette Stampin’ Blends.  I’ve made a number of these calendars for customers and I have one on my desk at work.

This project uses a couple of products that aren’t in the Petal Passion Suite – the butterfly image is from the Beautiful Day stamp set on page 26 of the Occasions Catalogue and the bag is made using the Mini Treat Bag Thinlits die on page 212 of the Annual Catalogue.

As you may have guessed I love the new Stampin’ Blends.  This project uses Pumpkin Pie, Calypso Coral and Daffodil Delight.

The ‘tab’ on the top of the card is made using the Circle Tab punch on page 207 of the Annual Catalogue.

To attach the Petal Passion embellishment I wrapped a length of Silver Baker’s Twine (page 13 of the Occasions Catalogue) around the bag and then tied the twine through the eye loop.

The bird and sentiment are from the Petal Palette stamp set.

I still have a couple of Petal Passion projects to share – this time using the Petal Passion Memories & More Card Pack.

So check back soon.

Petal Passion meets Stampin Blends

By | January 24, 2018

Hi there

It sure has been hot here in Auckland – doesn’t help when the air con at work isn’t working!

Today’s post has two more projects using the Petal Passion DSP that I shared in my last post except these ones include a bit more colour thanks to our new Stampin’ Blends.

The Petal Passion DSP can be used as is (Black and White) or you can colour in the images using your favourite colouring in technique.  I’ve chosen to use the Stampin’ Blends and Watercolour Pencils for this first card.

The images on the DSP already have some shading which helps with colouring in.  Once I’d coloured in the images I felt it still needed more so in came the Watercolour Pencils.

At the time of making the card I didn’t have the coordinating Thinlits Dies so I used the banner die from the Cupcake Cutouts Framelits.  The sentiment is stamped in Rich Razzleberry.  The colours used for the flowers/leaves are – Cherry Cobbler, Night of Navy, Old Olive, Pink Pirouette and Calypso Coral.  The background is coloured in using the Pacific Point Watercolour pencil then I applied a Blender Pen over it.

For the second card I left the background white so that the coloured images stand out more.

The Stampin’ Blends come in 12 colours – a light and dark shade of each colour.  For this card I only used the light shades – Night of Navy, Old Olive, Calypso Coral, Daffodil Delight, Bermuda Bay and Cherry Cobbler.  I love these new Petal Passion metal flower embellishments  – I just adhered it with a Glue Dot – and with the pearl already added they look great on your projects.

There’s lots of different products available within this suite so check out pages 22 and 23 of the Occasions Catalogue.

My next installment in the Petal Passion showcase will be a couple of 3D items using DSP and stamps.

Don’t forget the specials we have on offer at the moment – you can check them out here

Well now that it’s cooled down a bit I think I’ll go for a walk in the park 🙂