


Hi there
As we have the Designer Series Paper sale on during July I thought I’d share another technique using one of the Designer Series Paper (DSP) that is part of the sale – In Good Taste. I’m so glad that this paper carried over from last years catalogue. It’s great for masculine cards and I love the selection of textures within the pack.
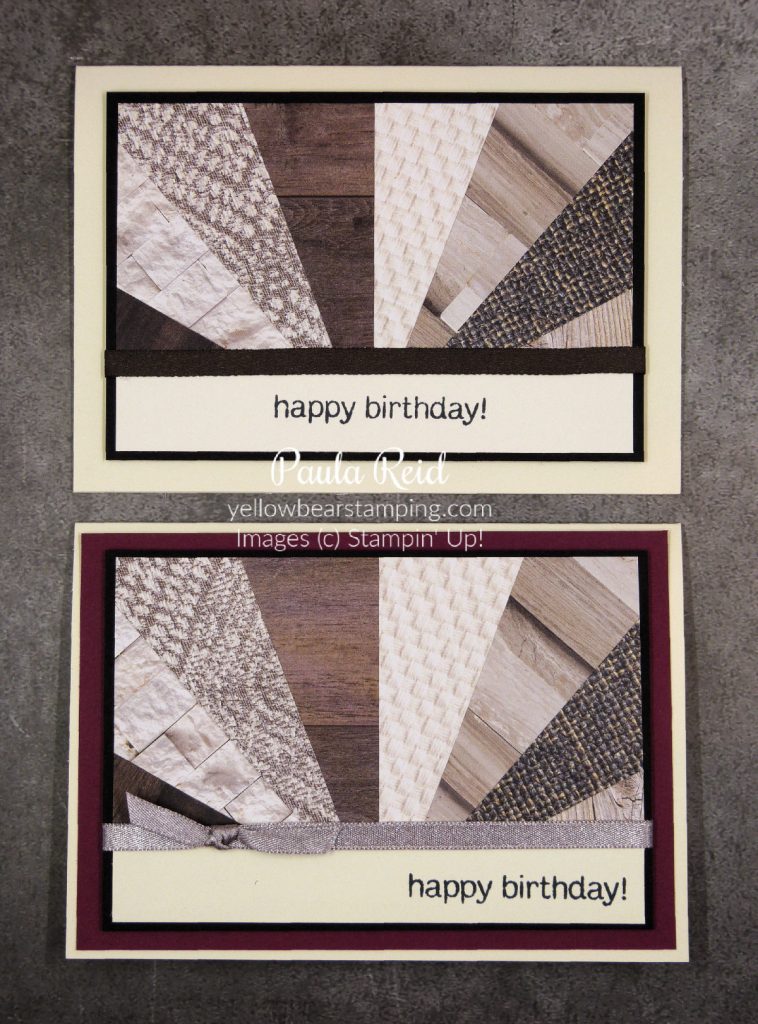
Here are the finished cards – you get two samples for this technique as I created a quick tutorial to show you how I made this.
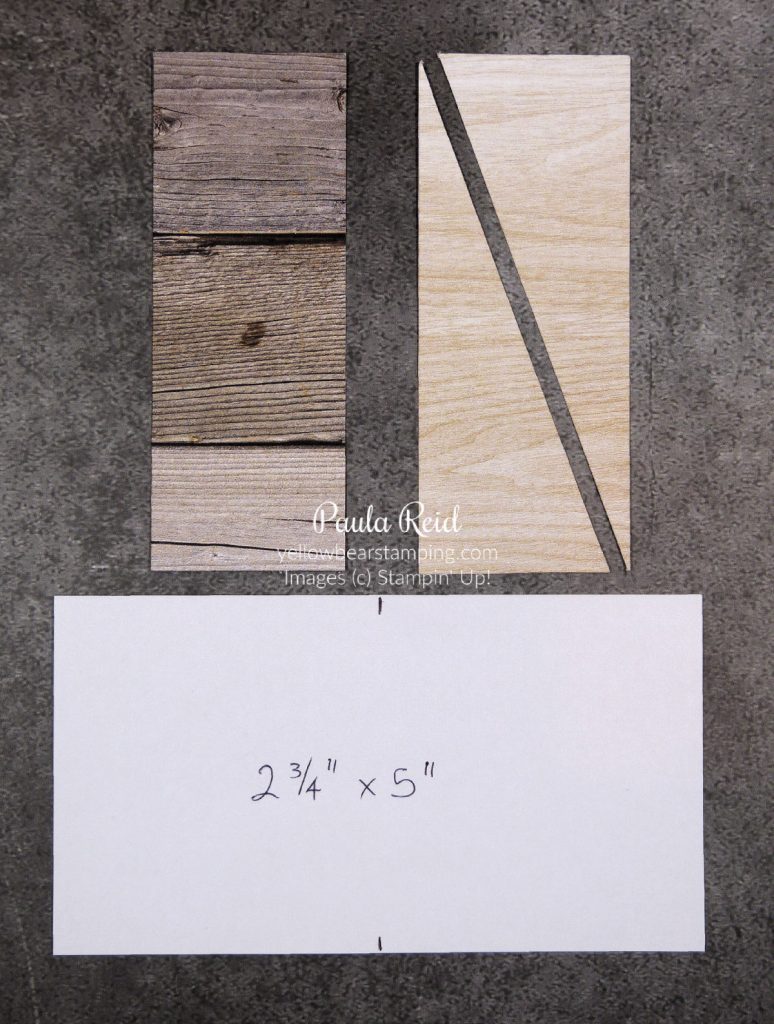
Cut four pieces of DSP that measure 1 1/2″ x 4″ and then cut them on the angle as shown (I’ve made a few cards lately with this cut) either top left to bottom right or top right to bottom left. It doesn’t matter. This will give you eight pieces. You will also need a piece of copy paper or scrap cardstock – make a pencil mark at the halfway mark along the long side as shown above. For my design my copy paper measures 2 3/4″ x 5″. If you make this bigger you may need to cut five or six pieces of DSP instead of my four.
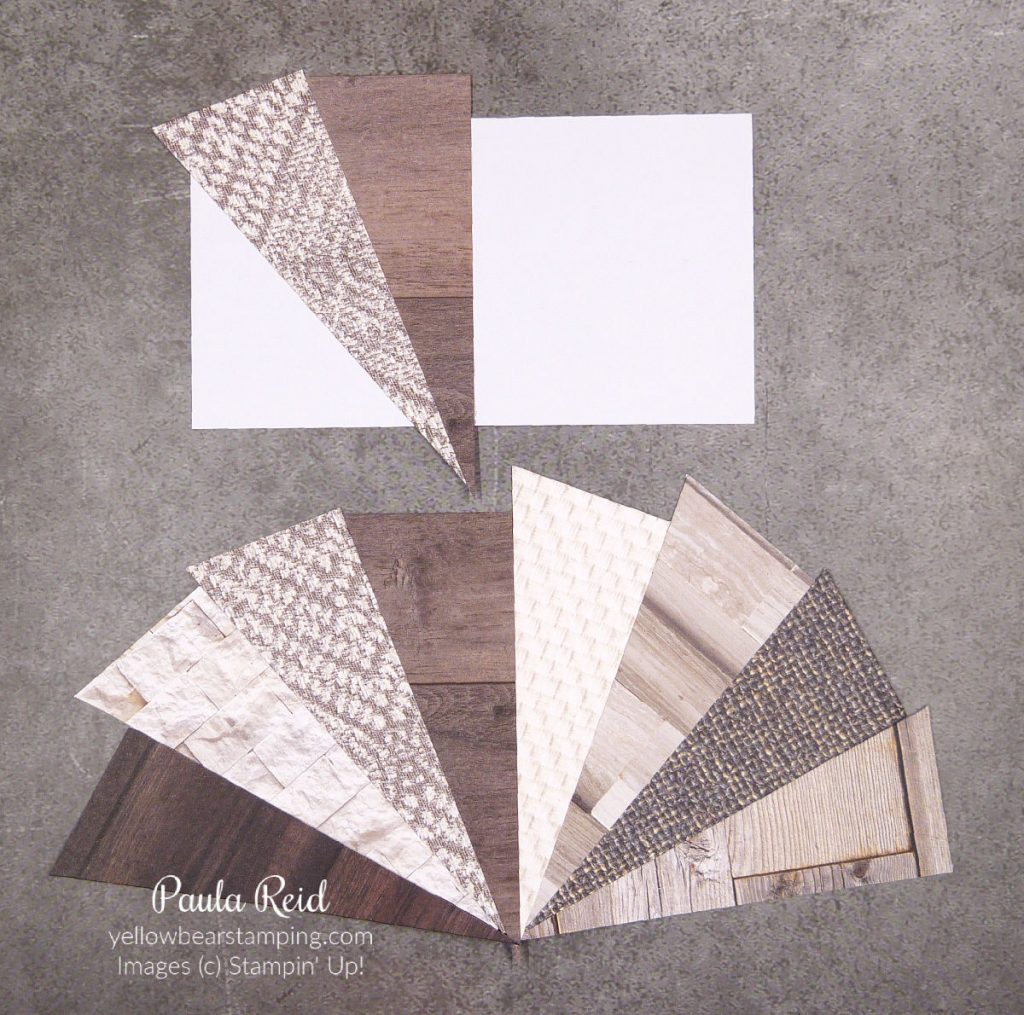
Because I was making two samples I took one triangle of each design for my layout. Make sure all your triangles are facing the same orientation and work out which order you want the pattern to be in before you adhere them to the copy paper. To adhere your DSP you need to cover the copy paper with adhesive. I found the easiest way to do this was by cutting a piece of Adhesive Sheet the same size, adhering it to the copy paper worked really well. You could use liquid glue but that might get a bit messy. Start placing your DSP triangles as per the top photo matching the straight edge of the DSP to the pencil marks. Continue adhering your DSP until all the copy paper is covered – there will be ‘overhang’ on all sides.
Trim the excess DSP so that you are left with a nice 2 3/4″ x 5″ design. Now it’s time to create your card.
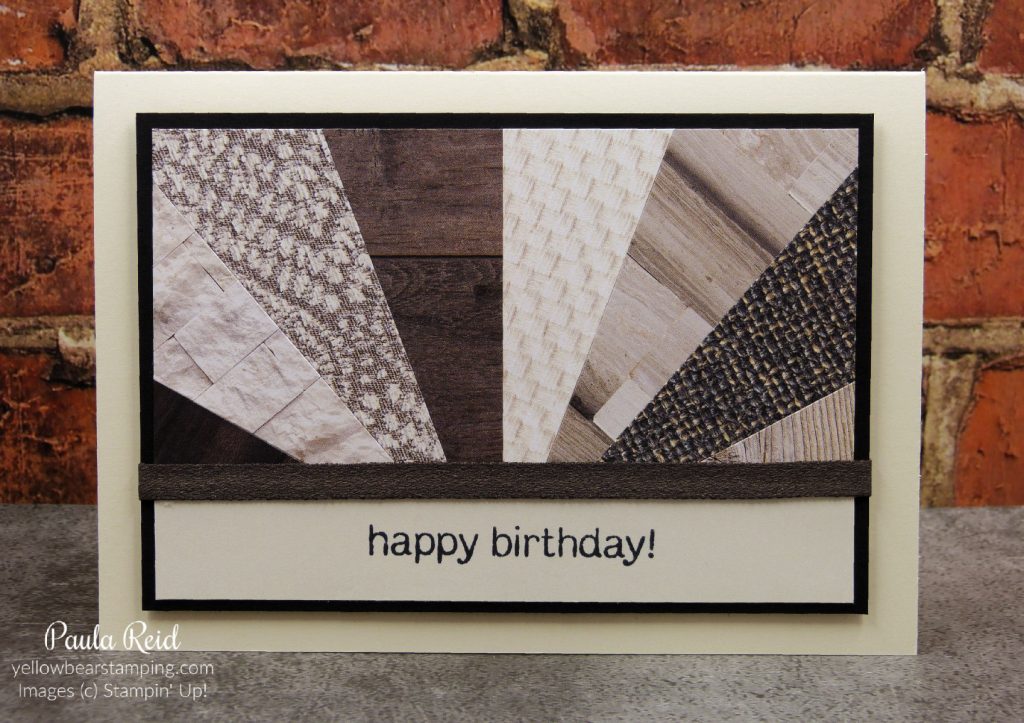
For this card I gave it a small mat of Basic Black (9cm x 13cm), stamped my sentiment (from Turtle Friends) on a scrap length of Very Vanilla and then covered the ‘join’ with a length of Early Espresso Faux Suede Trim. To give the card some dimension I adhered it to the base with dimensionals.
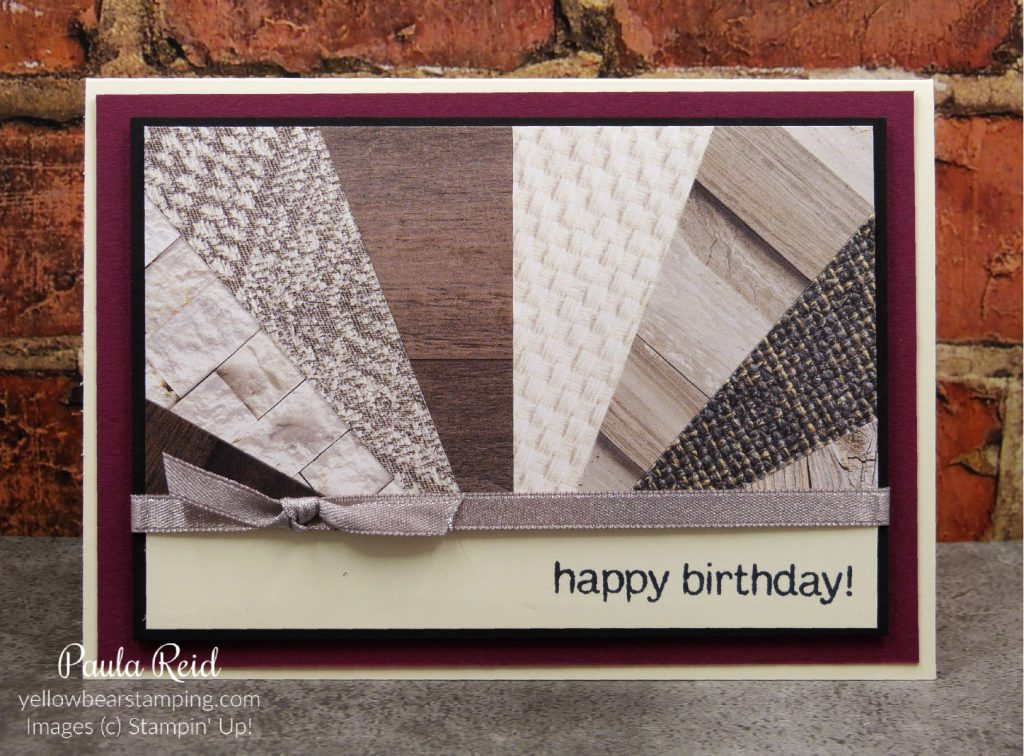
For this card I added Gray Granite Shimmer Ribbon and then an additional mat of Merry Merlot (love this colour) measuring 10cm x 14.3cm. The mat has been adhered directly to the Thick Very Vanilla card base with the other mat layer adhered with dimensionals.
You can use this design in a portrait orientation but I like it in the landscape. I hope you’ll give this technique a go with some of your favourite papers. If you would like to purchase a pack or two of DSP July is the month to do so as you can save 15% on selected papers. Check out which ones are included in the sale here.
Until next time …
