


Hi there
A couple of weekends ago we had our annual Creative Inkers Stamp Camp in Rotorua. It was great to be able to get together with my fellow demos. The last time we were all together was Stamp Camp 2020 so there was much to catch up on.
Over the weekend we made 5 projects using products from the January-June Mini Catalogue. On Friday night we were entertained by Sylvia who shared the Dandy Garden Suite from page 24-27.
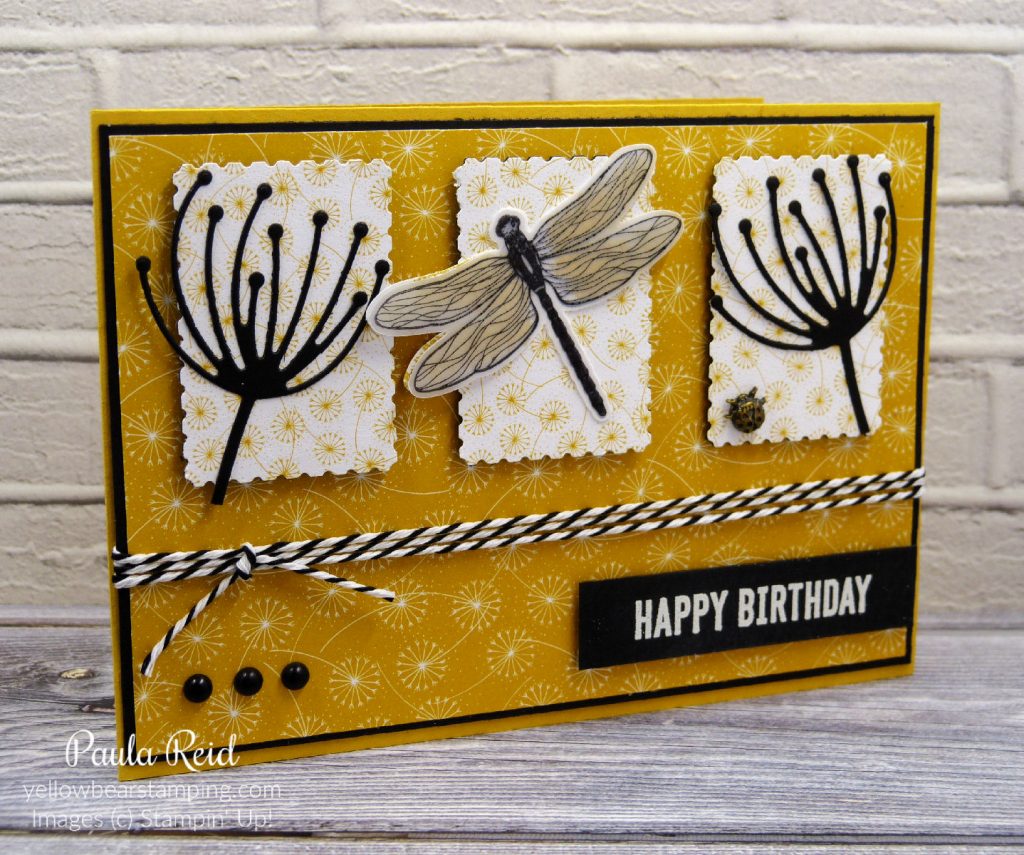
The Dandy Garden Suite has two bundles and we’ve used a mix of both bundles along with the coordinating Designer Series Paper and the really cute Ladybug trinkets. The Dragonfly has been stamped, coloured and punched from Basic White cardstock and then a second Dragonfly has been stamped and punched from Vellum. This was attached just on the ‘body’ so that the wings ‘float’. The Matte Blacks Dots are from the Love You Always Suite on page 11.
On Saturday morning Jan shared the Sand & Sea Suite from pages 40-42. I hesitated in getting this suite but am glad I purchased it. I love the look you get when you combine the Seashells 3D Embossing Folder with the Friends are like Seashells stamp and coordinating die.
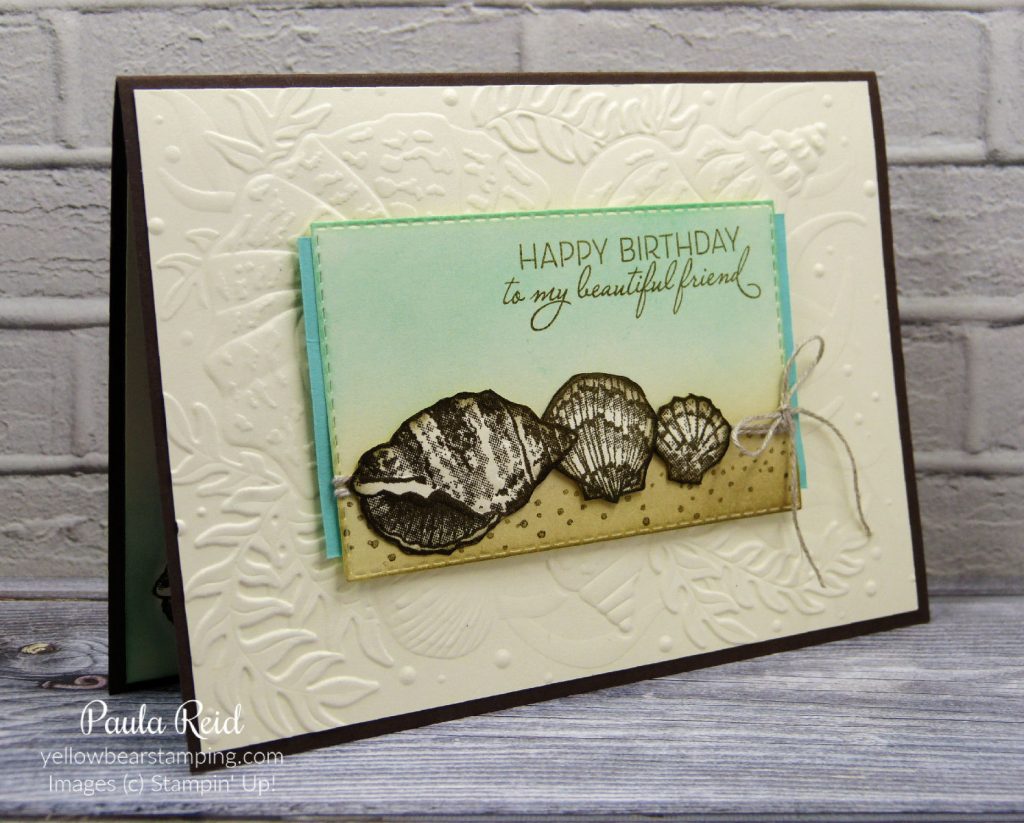
This suite is unique in that selected stamps coordinate with the die and then the die fits perfectly into the Seashells 3D Embossing Folder. For this card we’ve used the embossing folder as the background then layered our ‘sea’ scene onto a panel of Coastal Cabana. The shells have been individually stamped, fussy cut and then dry embossed to give a real 3D effect. The background ‘sand’ and ‘sea’ have been sponged using the new Blending Brushes from page 70 – they make blending colours a breeze.
Our next project taught by Jacque features the Hydrangea Haven stamp set from the Hydrangea Hill Suite on pages 18-20. The colours in this suite are Rococo Rose, Highland Heather, Seaside Spray, Misty Moonlight and Old Olive. When a stamp set has coordinating DSP we often find it hard to use that stamp with other colour combinations. Jacque’s card takes us away from the suite colours – we used Sahara Sand, Blushing Bride and Melon Mambo.
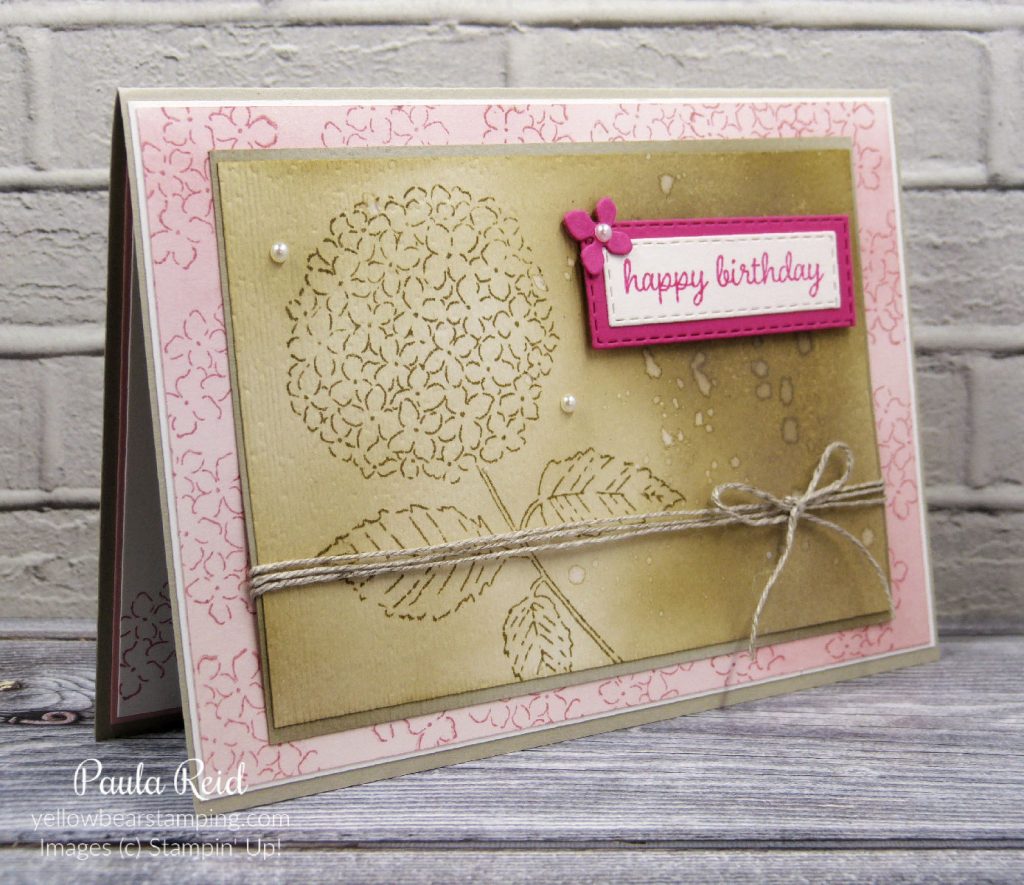
The main image has been stamped in Sahara Sand on Basic White cardstock then using the Blending Brushes Sahara Sand ink has been applied to give an ombre look. Using an Aqua Painter filled with water we flicked drops onto the cardstock – it’s a very neat effect. I also dry embossed my card front using the Subtle Embossing Folder. The background mat also started out as Basic White and has had the small image stamped in Blushing Bride and then Blushing Bride ink has been applied with the Blending Brushes.
Our last project for Saturday was taught by Karen – she went out of her comfort zone and taught this cut 3D box and gift card using the Simply Succulents bundle on page 39. I love making 3D projects.
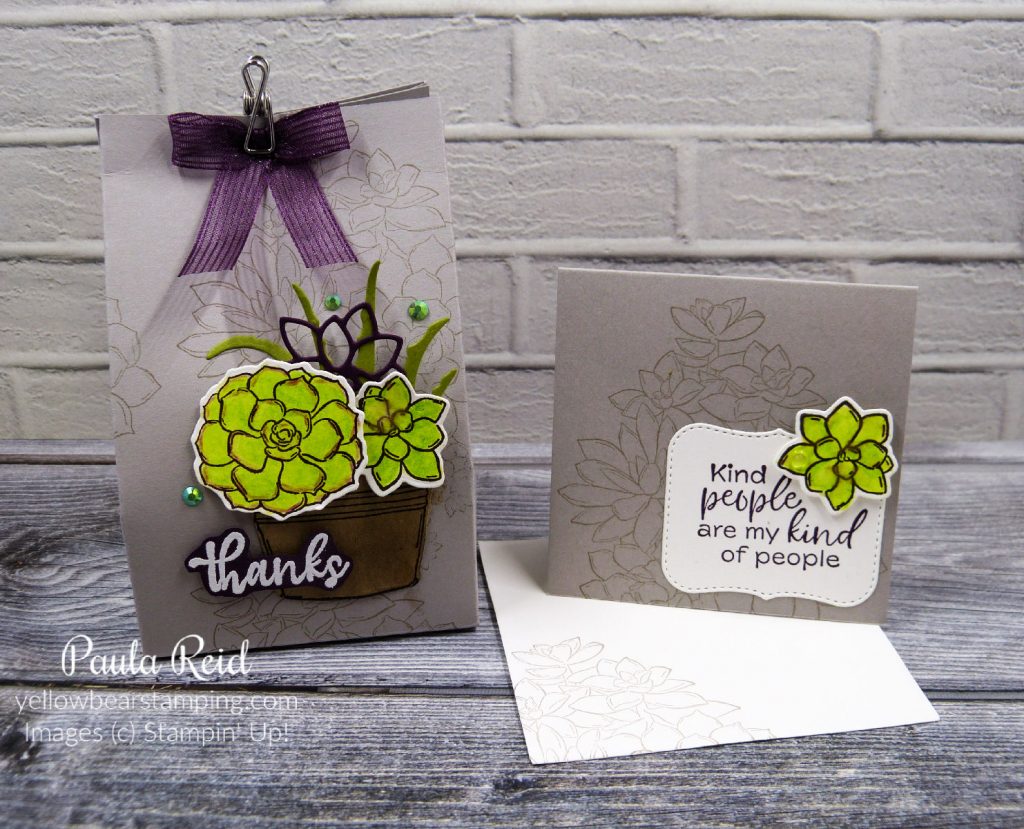
The gift card is a 3′ square card and coordinates with the box – both have been made using Gray Granite cardstock. We created our own design on the box stamping the large succulent stamp and stamping it in Gray Granite all over the box. This bundle has a coordinating die set with dies to match the stamp and one large lattice die. The succulents have been coloured in with our Watercolour pencils using Granny Apple Green and Rich Razzleberry around the edge. The Blackberry Bliss Striped ribbon is from the Ice Cream Corner Suite.
On Sunday Tee Jay presented the final project featuring the Love You Always Suite – again this suite has two bundles and can be found on page 10-13. This suite is packed full of additional elements – foil sheets, treat boxes, ribbon, charms, dots, Specialty Designer Series Paper and Designer Series Paper.
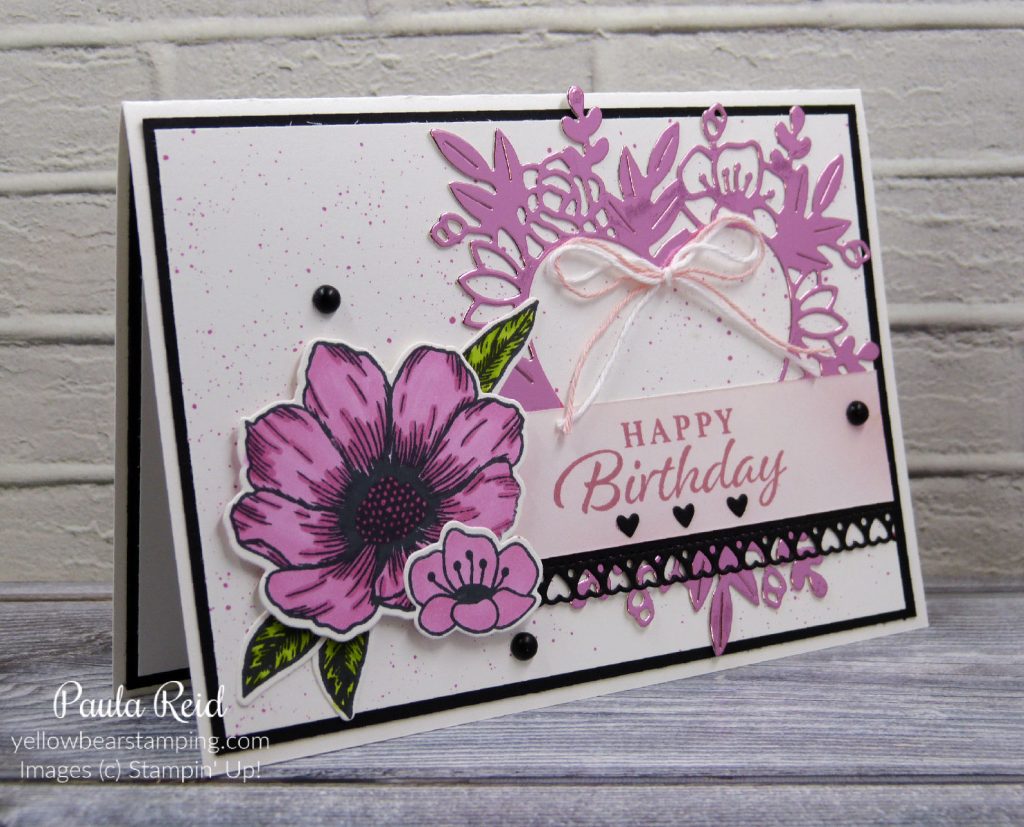
The big flower and leaves stamps are from the Forever & Always stamp set while the small stamp is from the Always in my Heart set. The foil sheets come in a pack of three colours – Blushing Bride, Rococo Rose and Sahara Sand. My card uses the Rococo Rose foil. I changed my sentiment to a Happy Birthday so I can use this card for a special lady who has her birthday later this month. The stamped images have been coloured in with Rococo Rose and Granny Apple Green Stampin’ Blends. To create the ‘speckles’ on the background I used the end of the Stampin’ Blend and flicked it against the lid – just make sure you don’t have items in the ‘firing line’ other than the cardstock :).
We are all looking forward to Stamp Camp 2022 🙂
Until next time …
