


Hi there
Last Tuesday I shared a project that required masking using a Post-It Note and today I have another project using a different masking technique. For this technique you can create your own mask as I’ve done or use a Decorative Mask as shown on page 128 of the Annual Catalogue. I’ve combined my mask with Embossing Paste but you could also use ink and a Blending Brush.
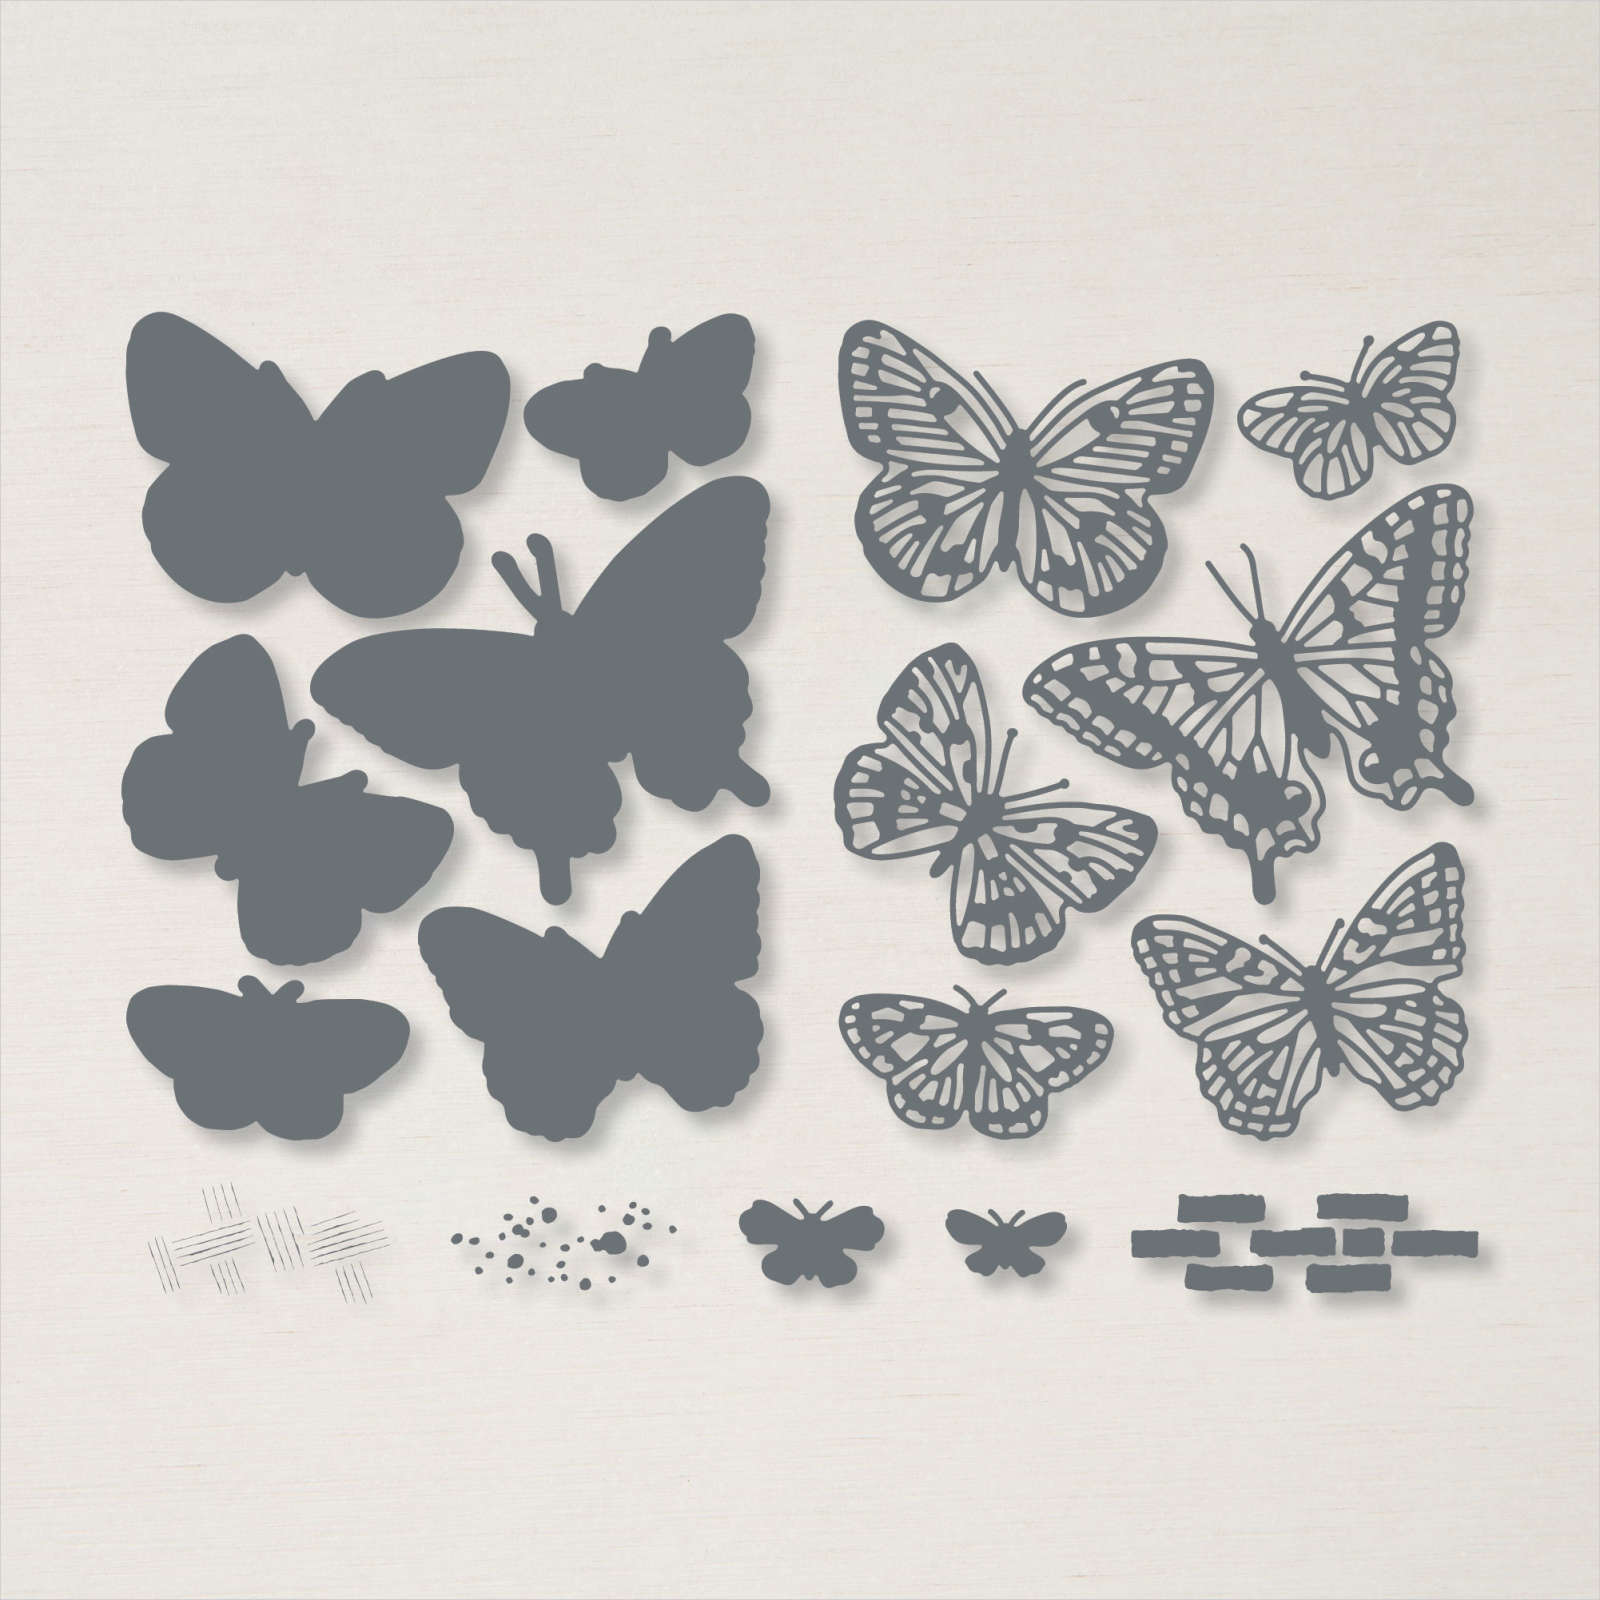
To create my mask I used the ‘bricks’ die (bottom right) from the Brilliant Wings dies on page 158 of the Annual Catalogue.
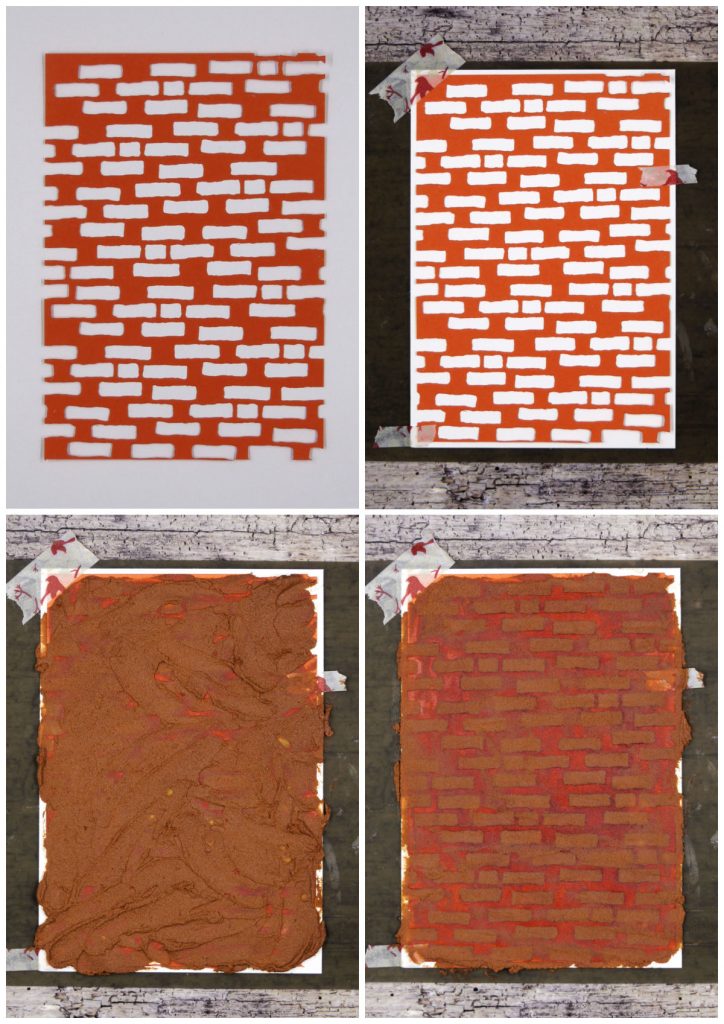
Using a scrap piece of cardstock (10cm x 14.3cm) I die cut the ‘bricks’ to create my mask. I found it’s best to place your silicone craft sheet down first then your cardstock and then the mask. I used some washi tape to hold it all in place. Embossing paste is white but with a few drops of ink refill you can create all sorts of colours. To achieve my ‘brick’ colour I put some Embossing Paste in a separate dish then added one drop of Crumb Cake, two drops of Cajun Craze, one drop of Early Espresso and the one more drop of Cajun Craze – make sure you mix in-between adding new colours. Once you get your colour mix to the shade you want, spread the paste on with a palette knife making sure you get a good coverage across the indentations of the mask. Wipe off the excess and remove the mask.
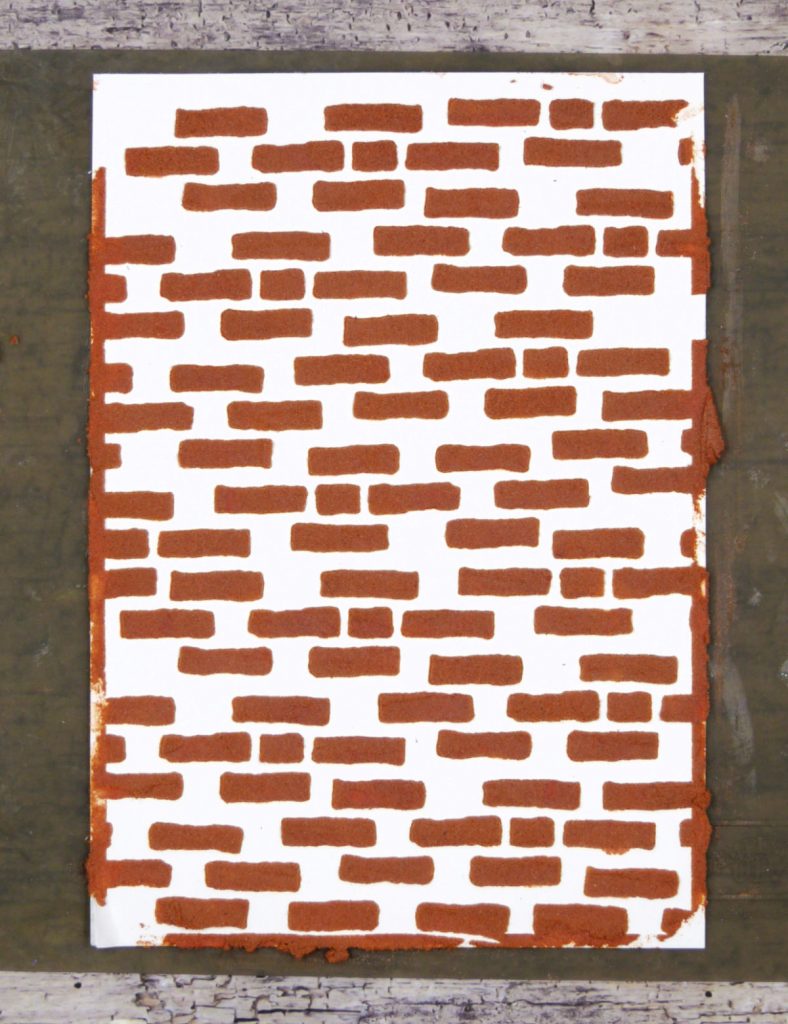
I let mine dry a bit before I trimmed it to the size I wanted for my card front.
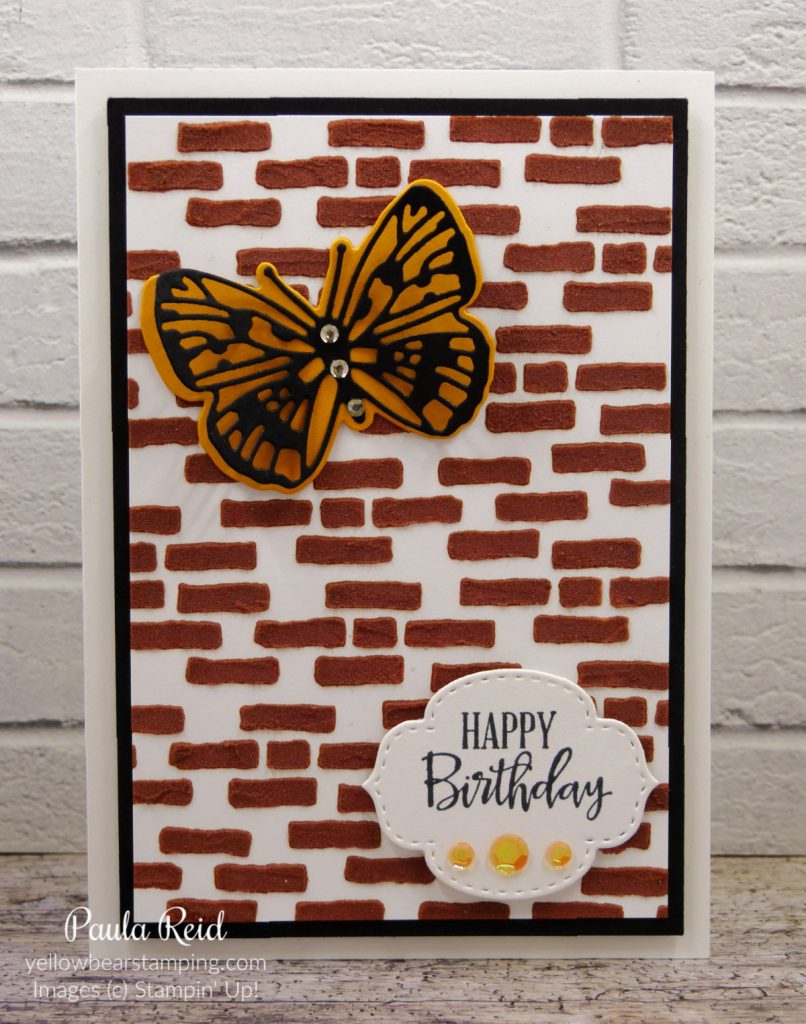
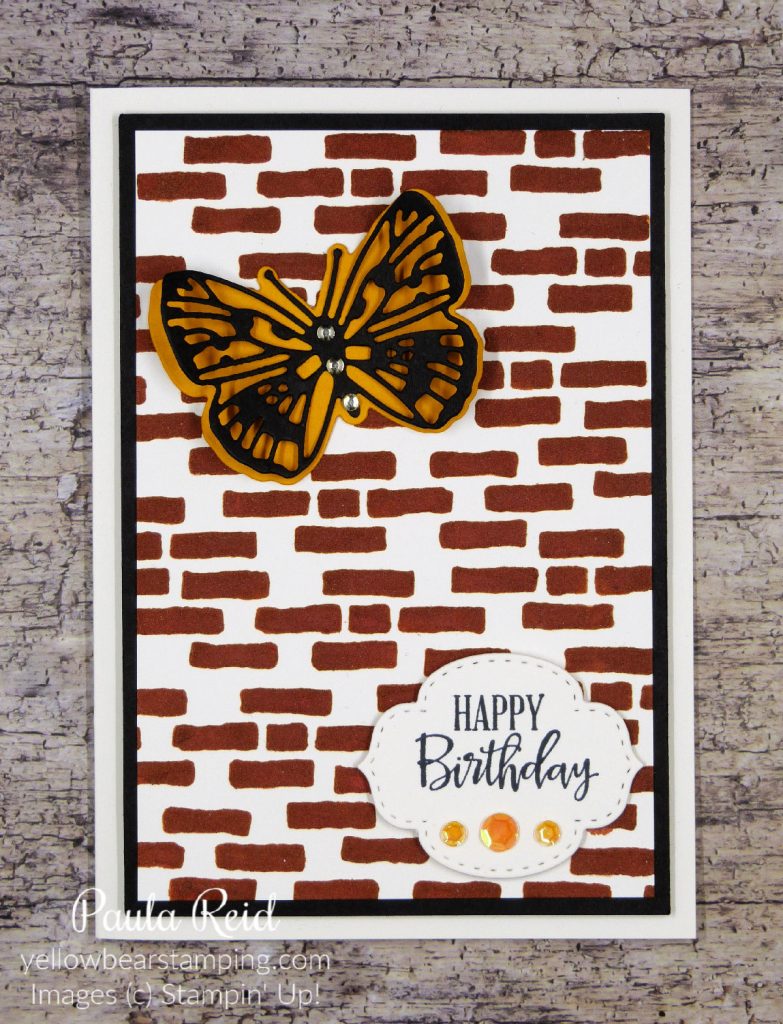
Now it’s time to decorate – I added it to a Basic Black mat and then a Thick Basic White base.
The base of the Butterfly is Mango Melody with a Basic Black overlay. My sentiment is from one of my favourite sets – Peaceful Moments. I hunted through my dies for a suitable label and decided upon this one from Stitched So Sweetly. The sequins are from the Artistry Blooms Adhesive-Backed Sequins which carried over from last years catalogue.
There are a number of dies that you could use to create you own masks – have a look through your ‘stash’ and have fun creating.
Until next time …
