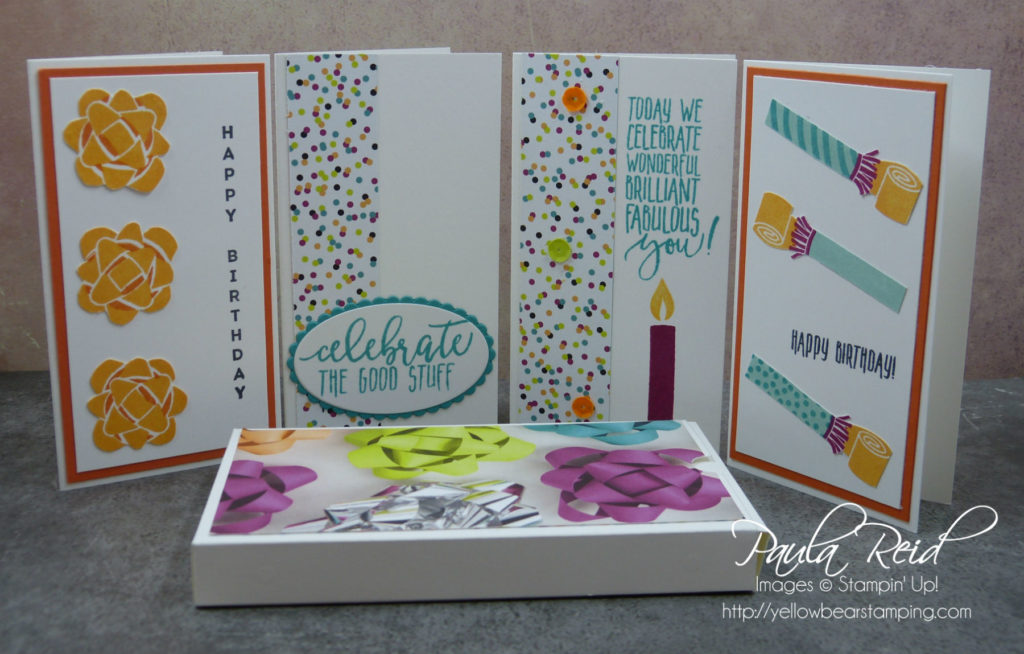
Hi there
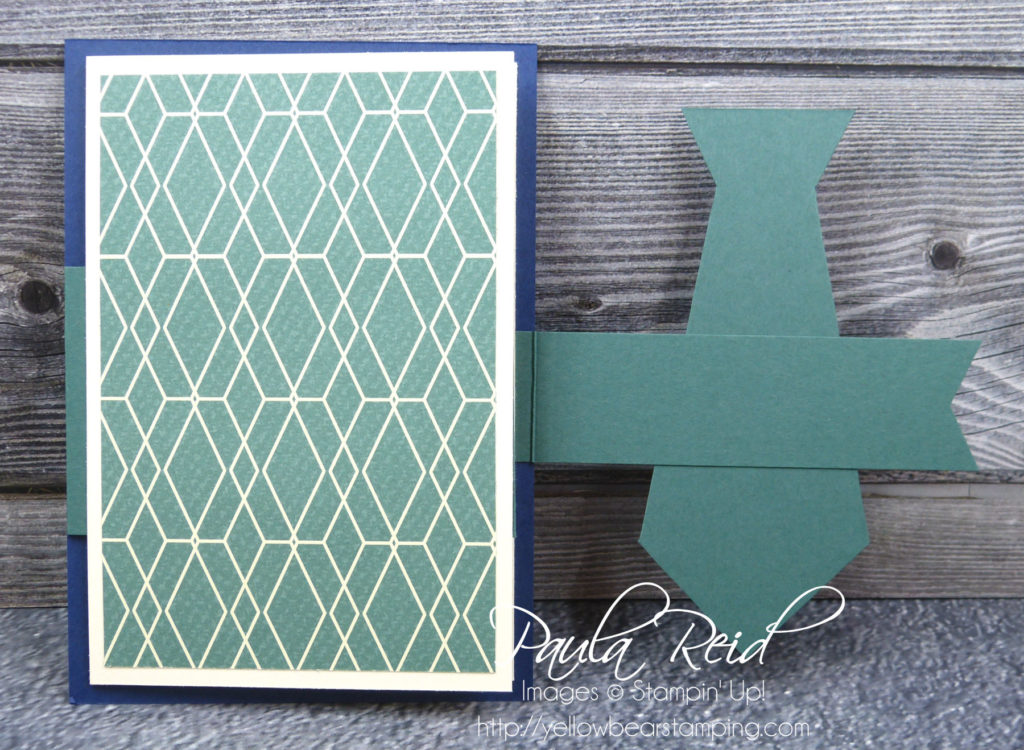
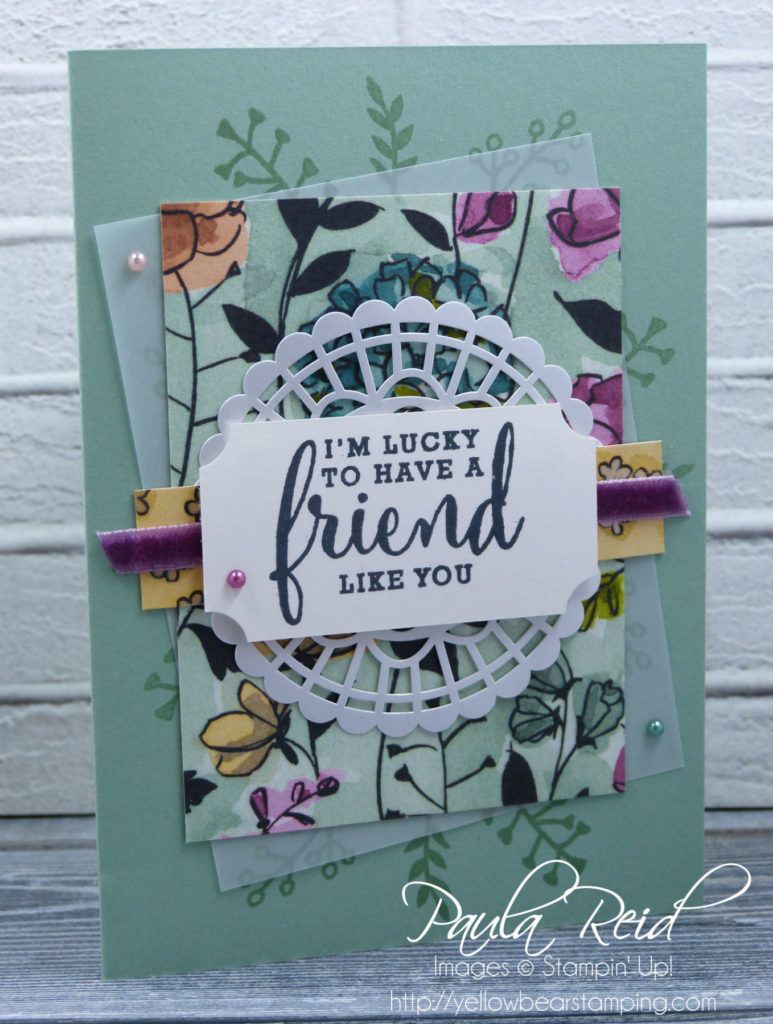
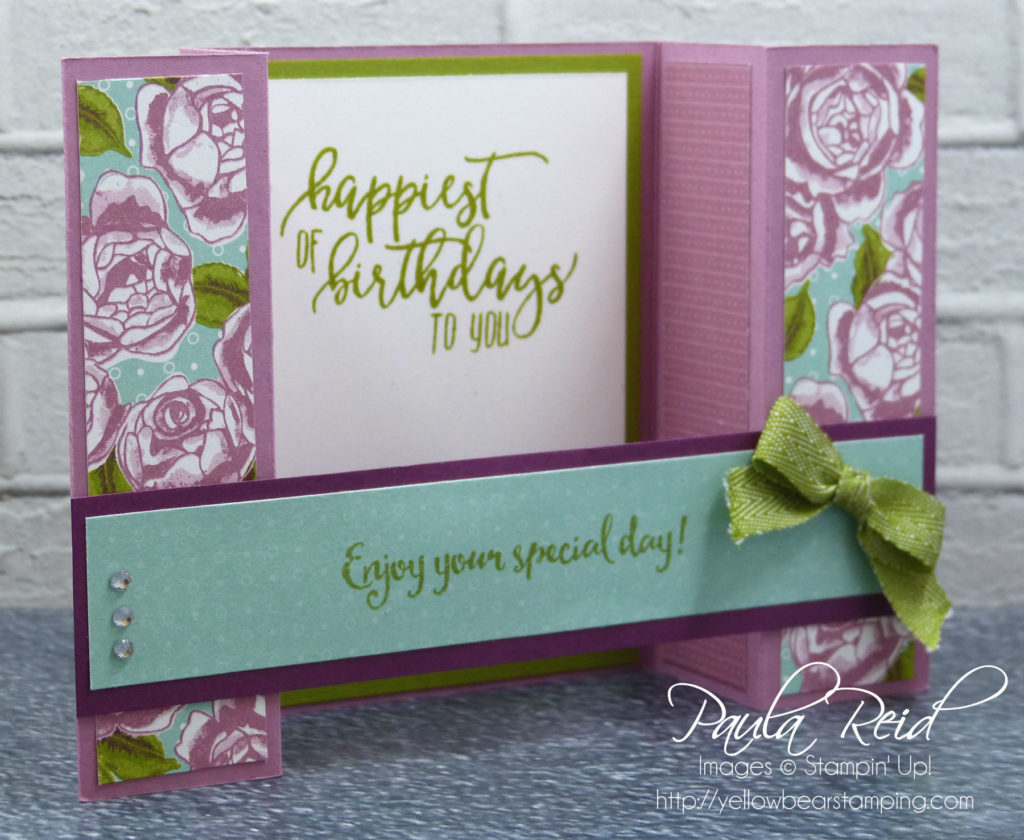
Yesterday I shared with you the Bridge Card and now I have the second fancy fold card we made – a Double Dutch Card. For this card I’ve paired the Petal Garden DSP with the Petal Palette stamp set. This post is longer than normal – check right to the bottom for all the measurements 🙂
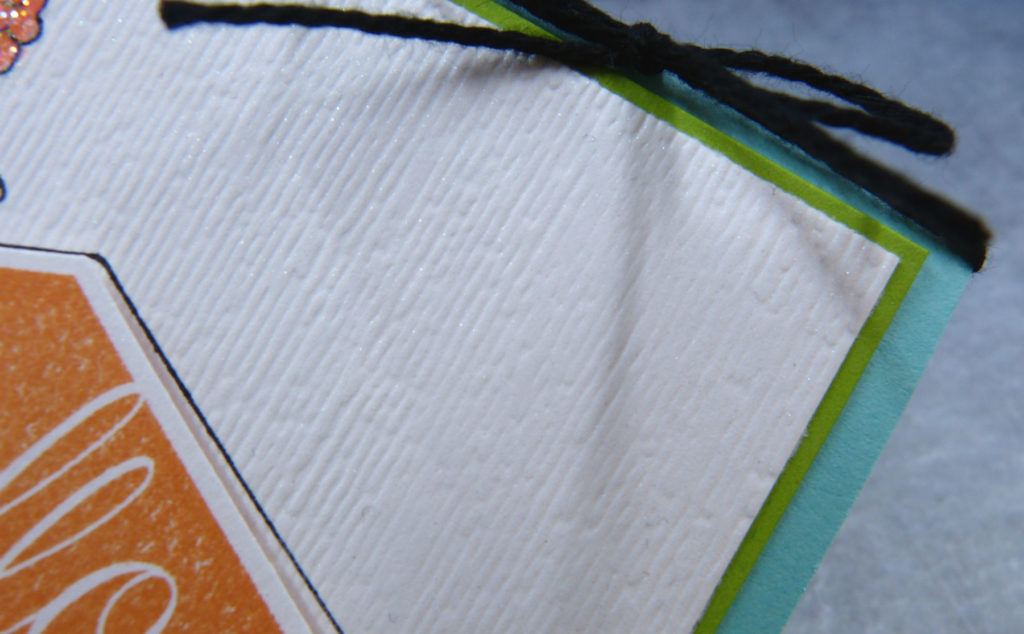
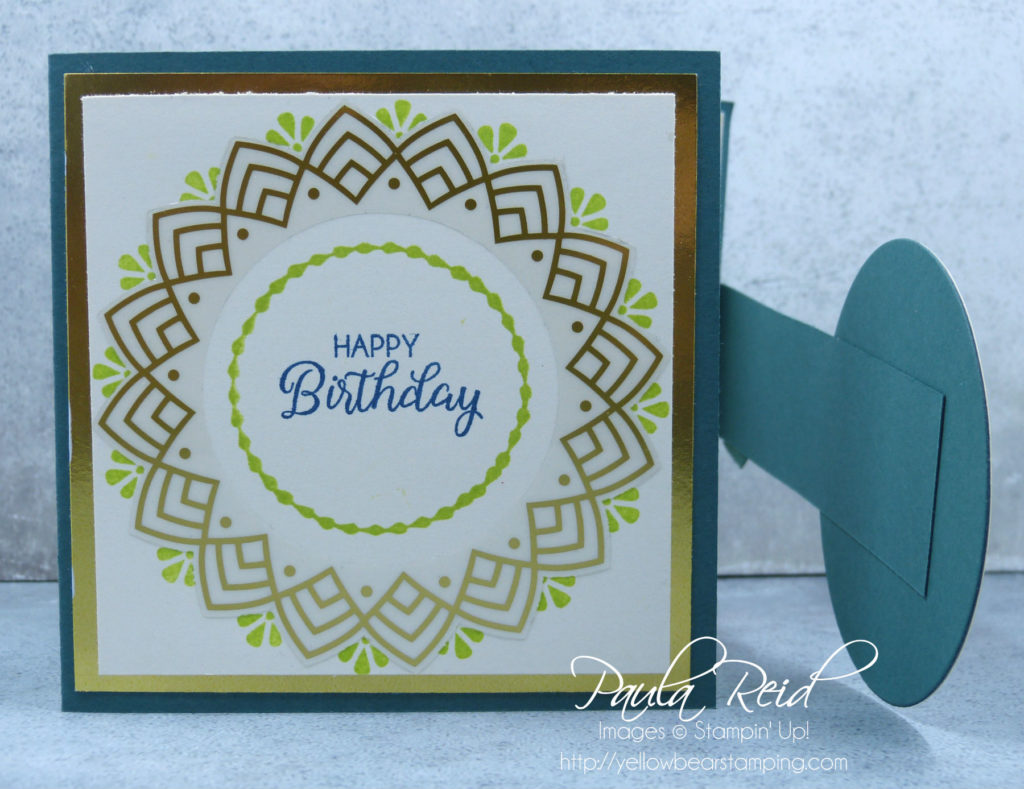
Here’s the front view – I love that even though this is a fancy fold card it can still stand on it’s own 🙂 The front image has been stamped on Shimmery White card stock then heat embossed with copper embossing powder. I never tire of seeing the powder heating and melting – it’s such a cool technique.
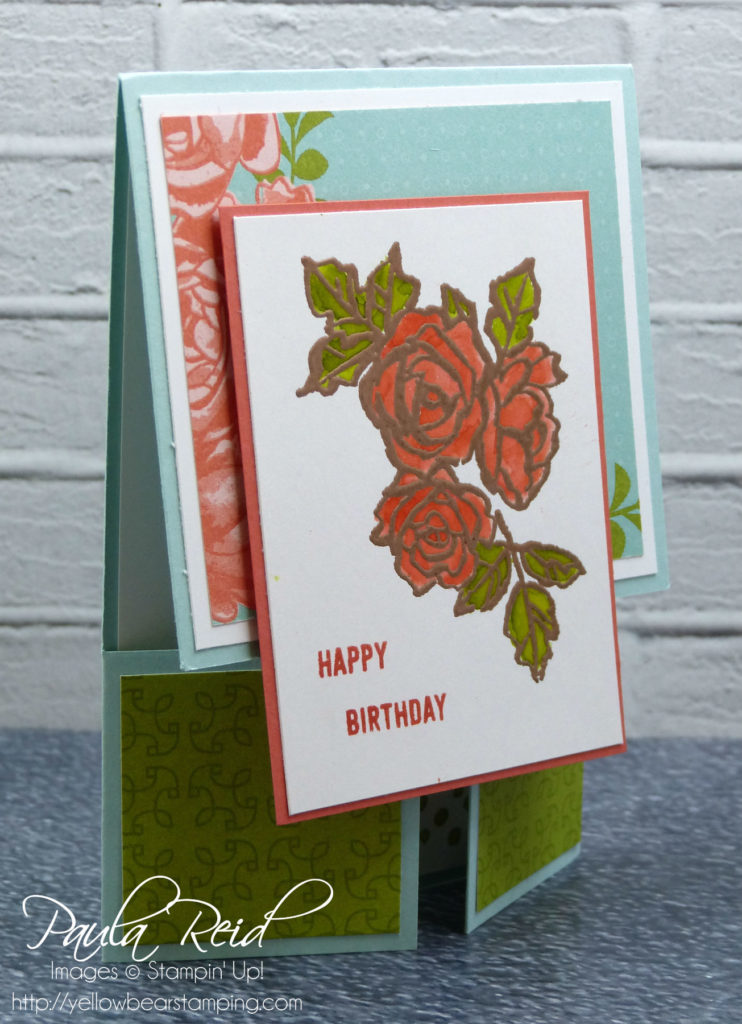
And now a side view – showing the fold over flap. The flower and leaves were coloured with ink using an Aqua Painter. I did a light layer of colour (Calypso Coral) and then went back and applied some more ink to create darker areas within the flower. The leaves were done the same way with Old Olive.
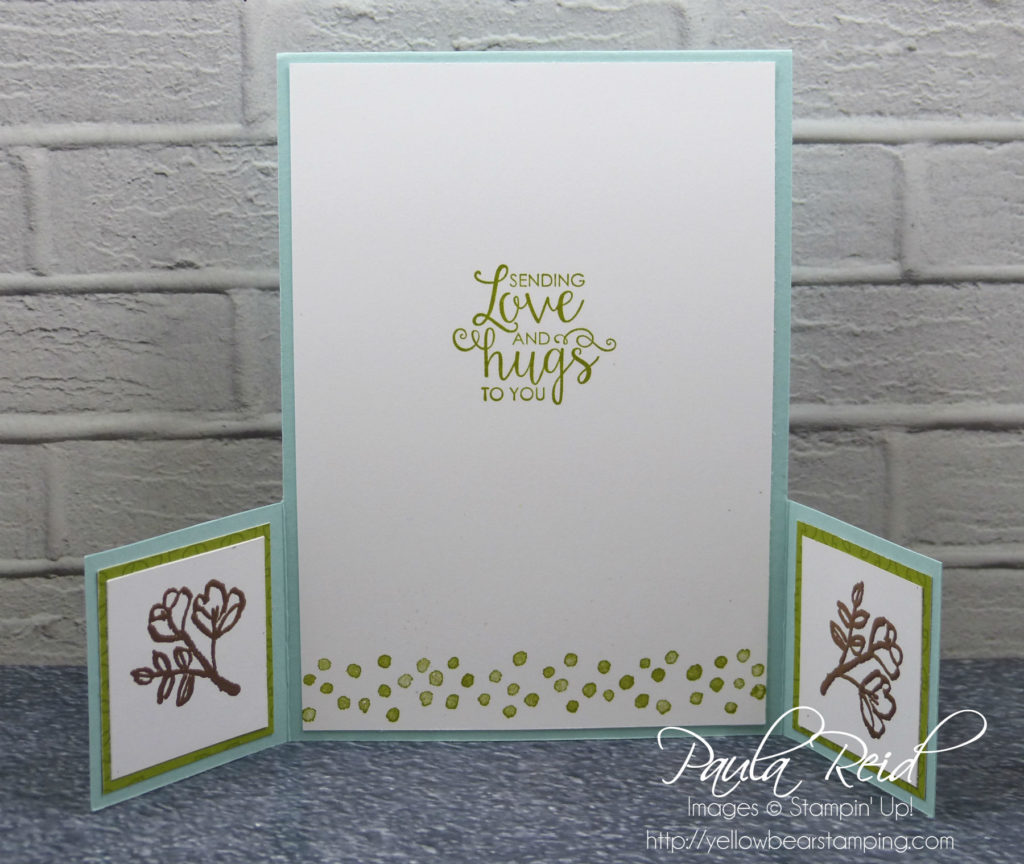
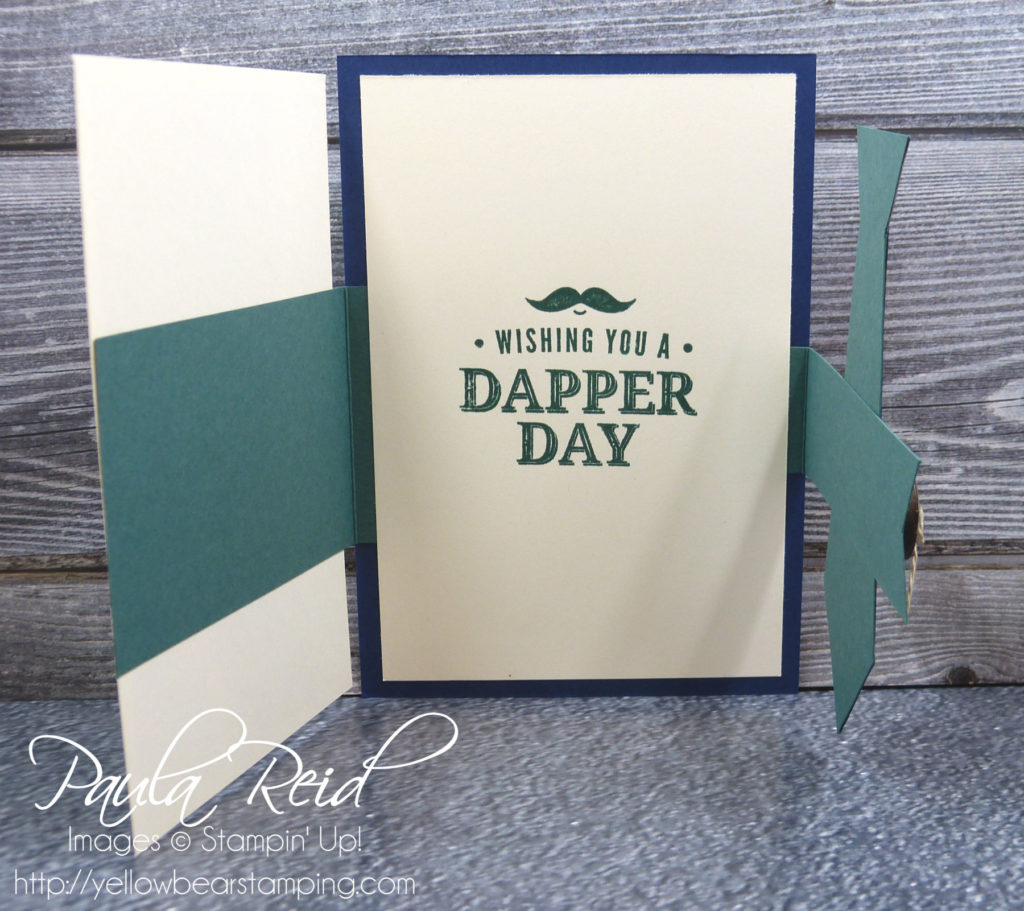
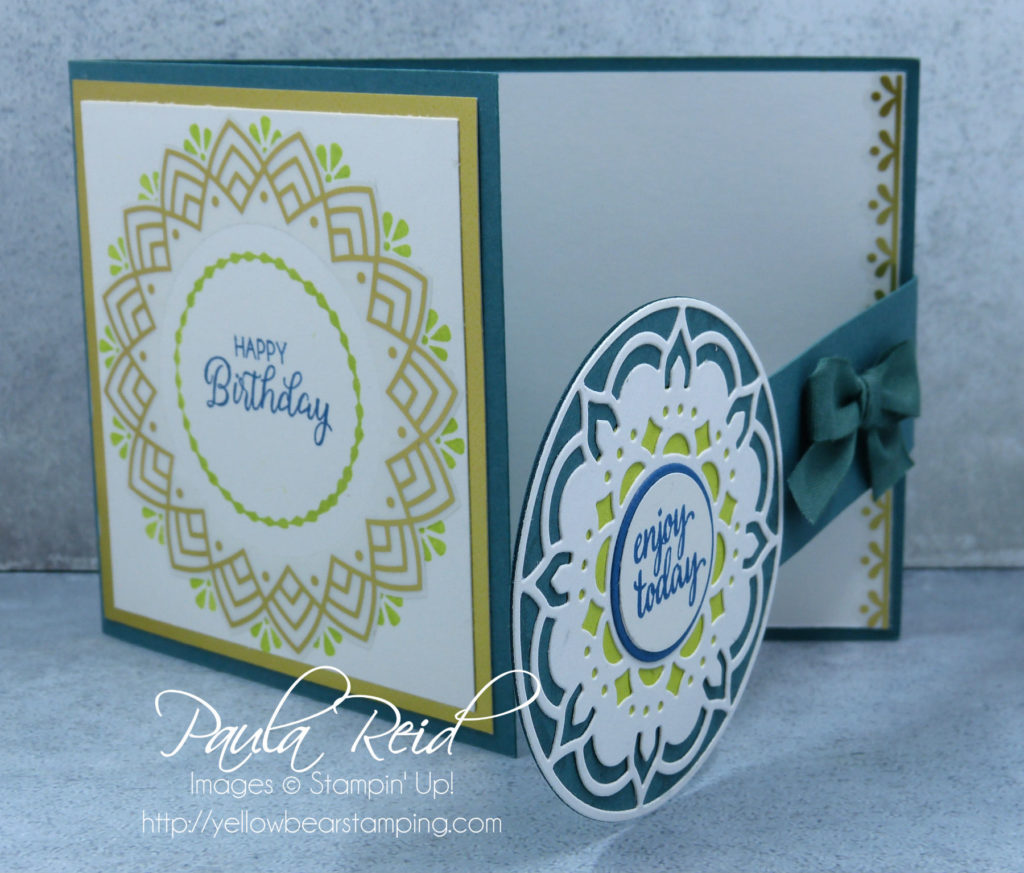
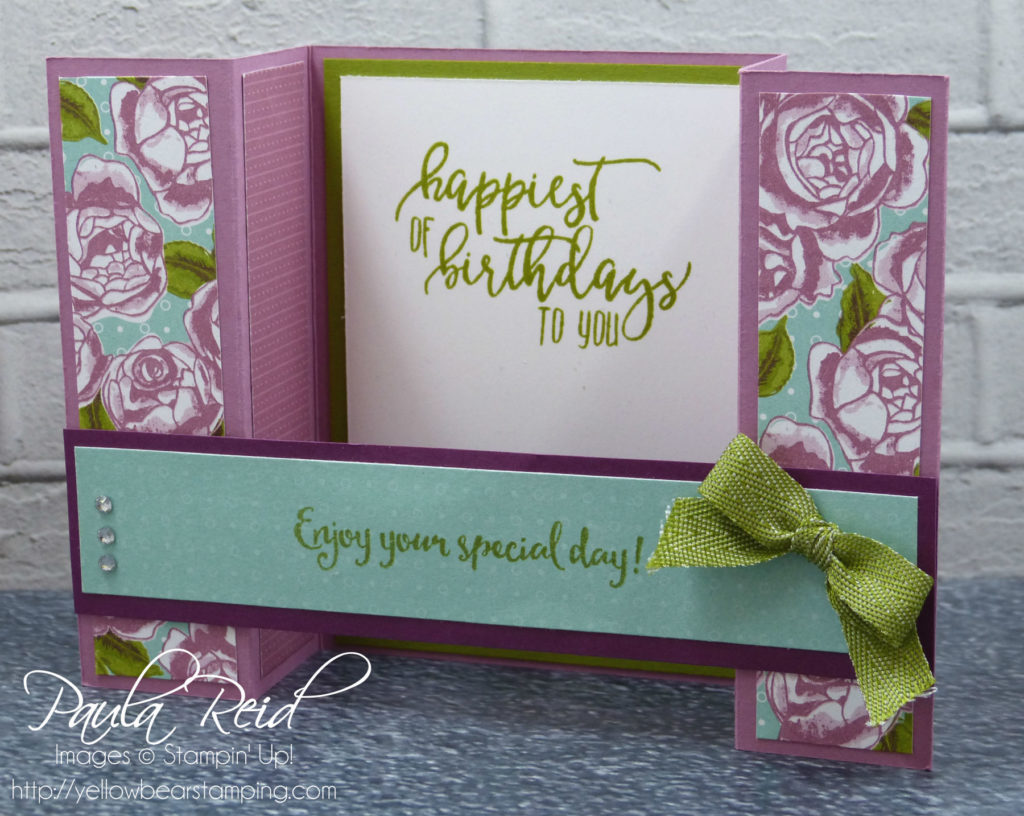
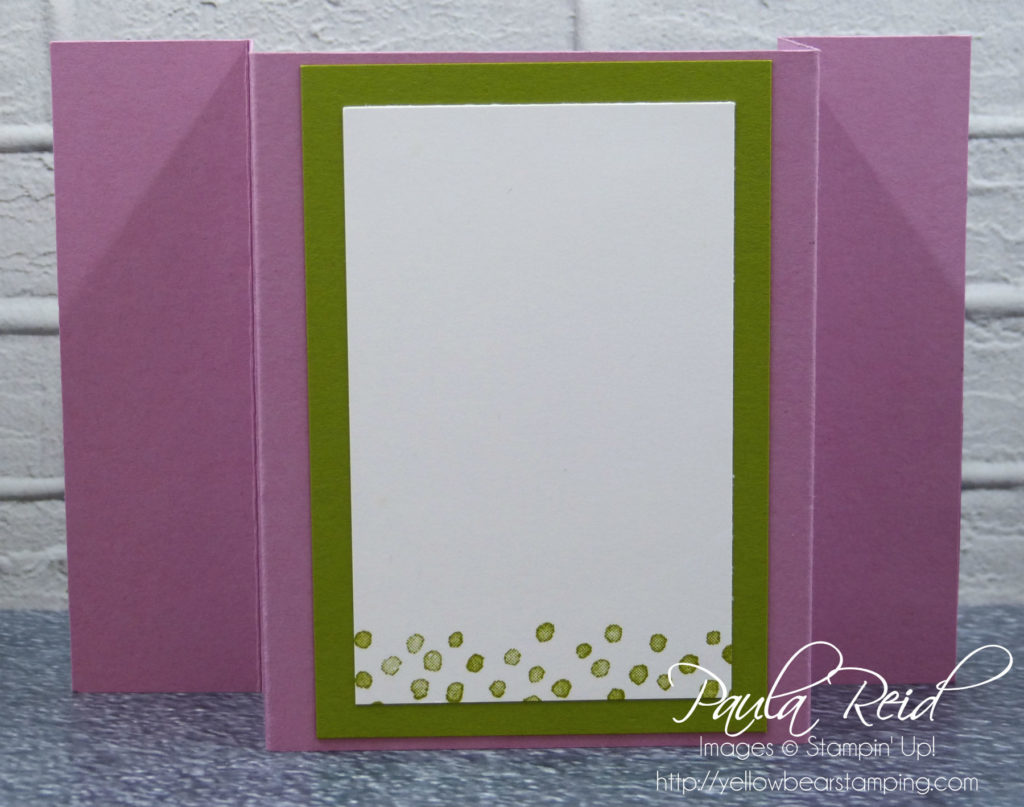
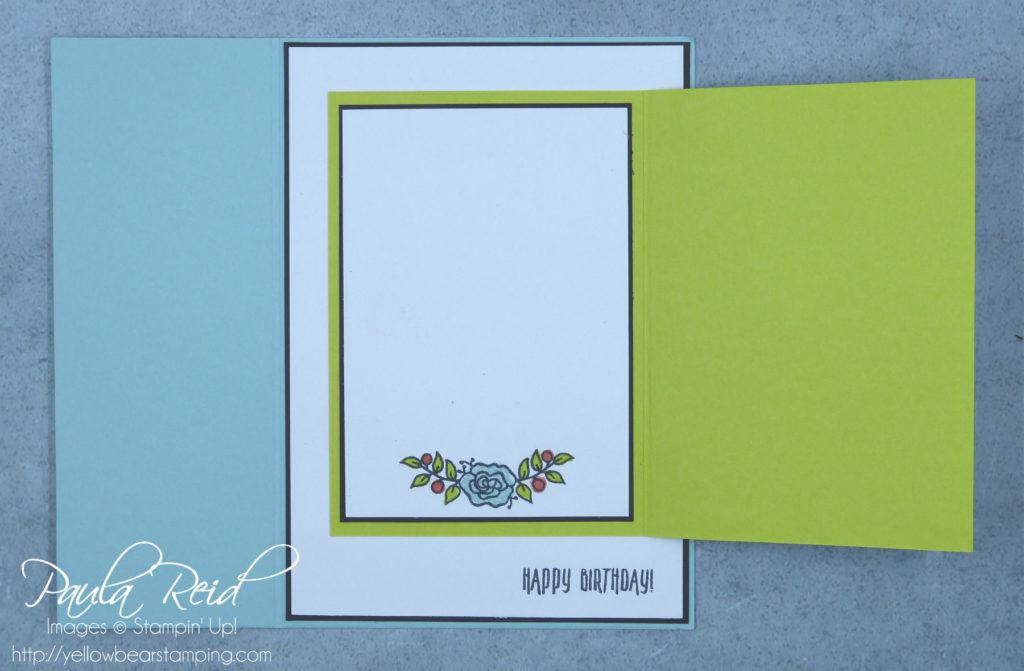
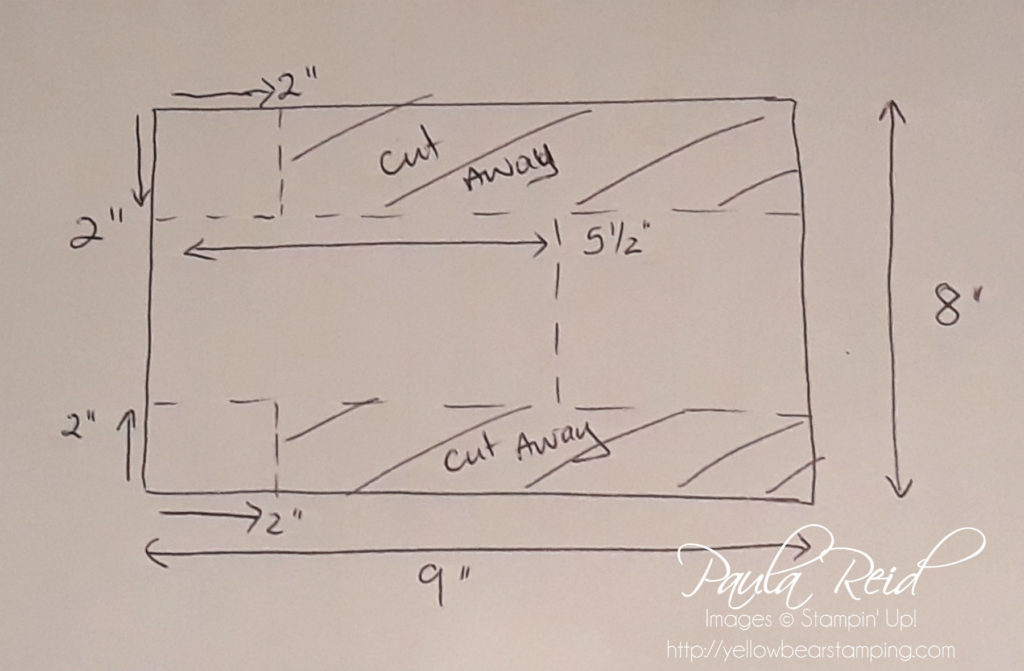
And finally the inside. The card base is Pool Party with the sentiment stamped in Old Olive on Whisper White card stock. The card base measures 8″ x 9″. To create the score lines – with the 8″ edge at the top score 2″ on either side. Then with the 9″ edge at the top score in and down 2″ to the first score line and repeat in and down 2″ from the first score line to the edge of the card base. Cut away as per diagram below then score at 5 1/2″ from left hand side.
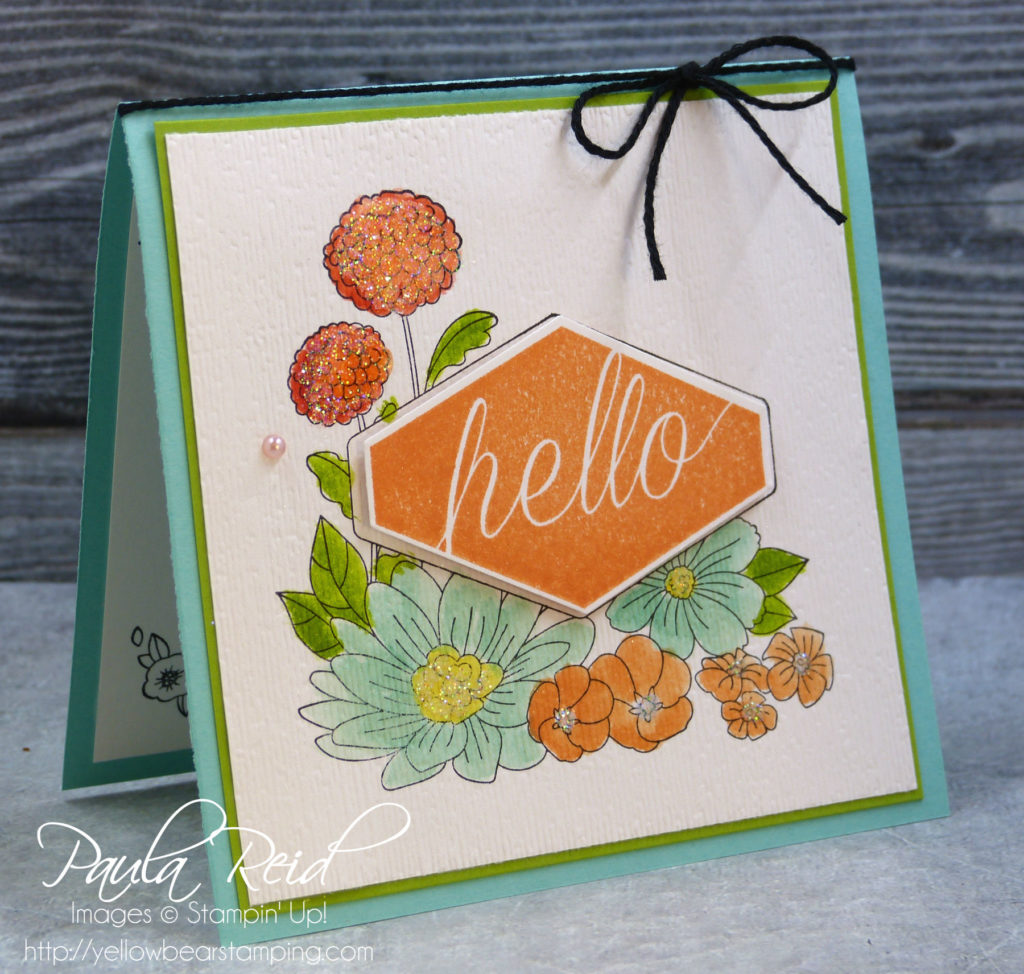
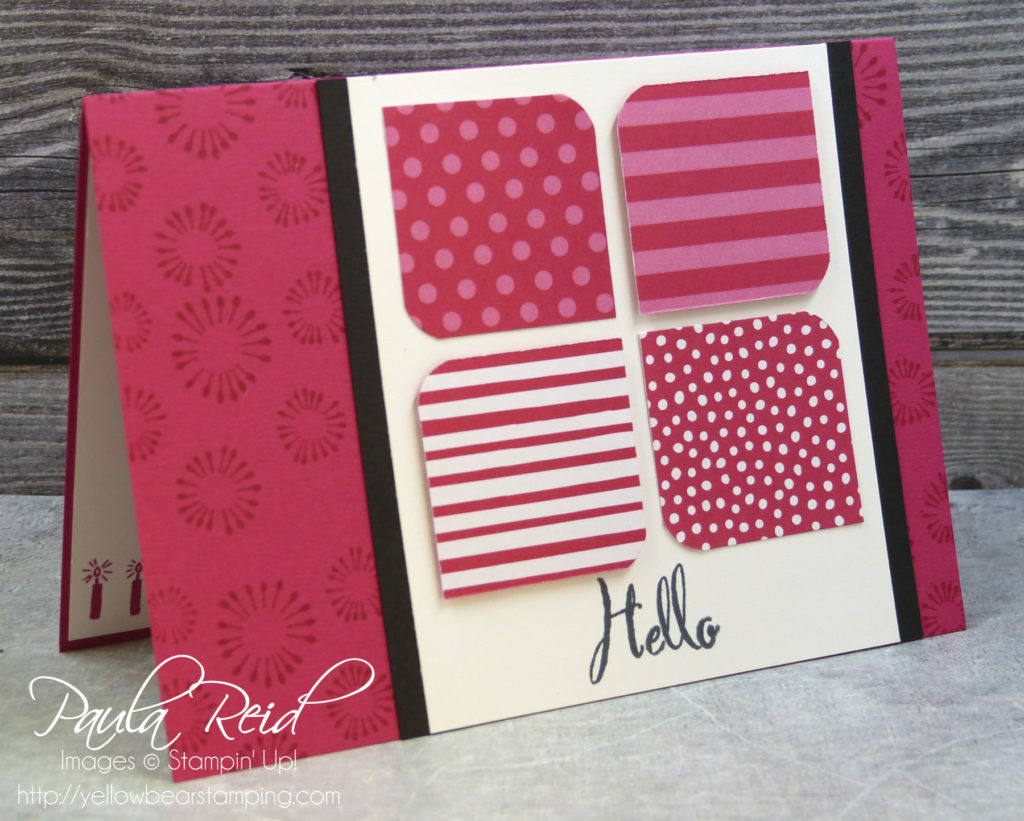
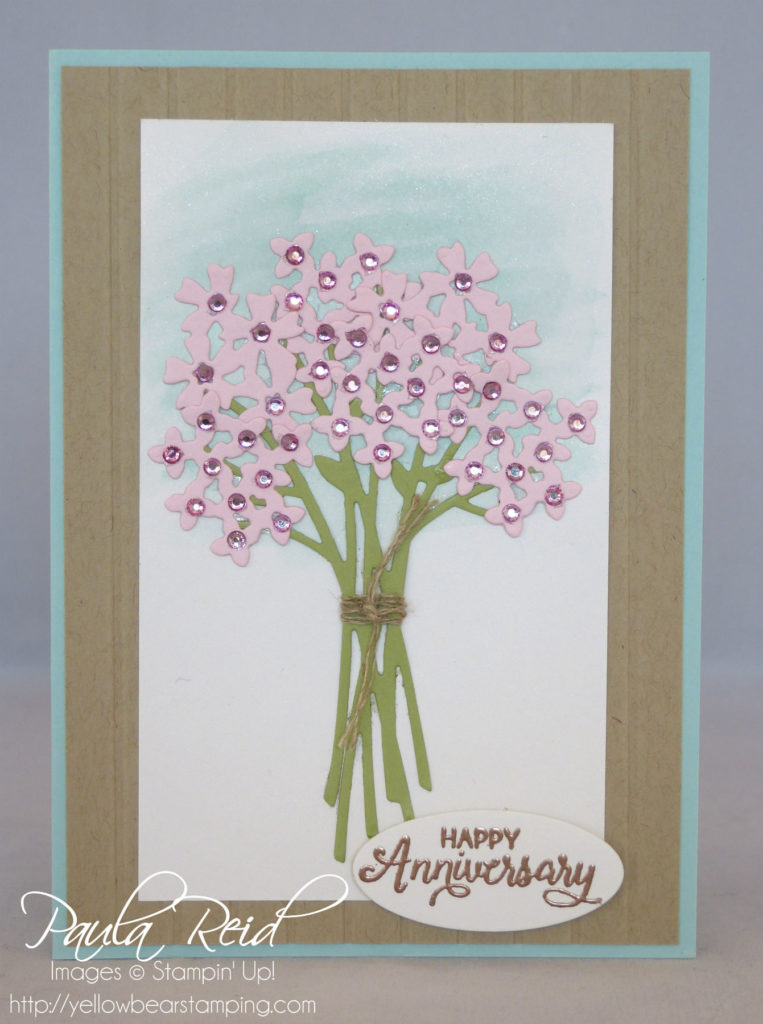
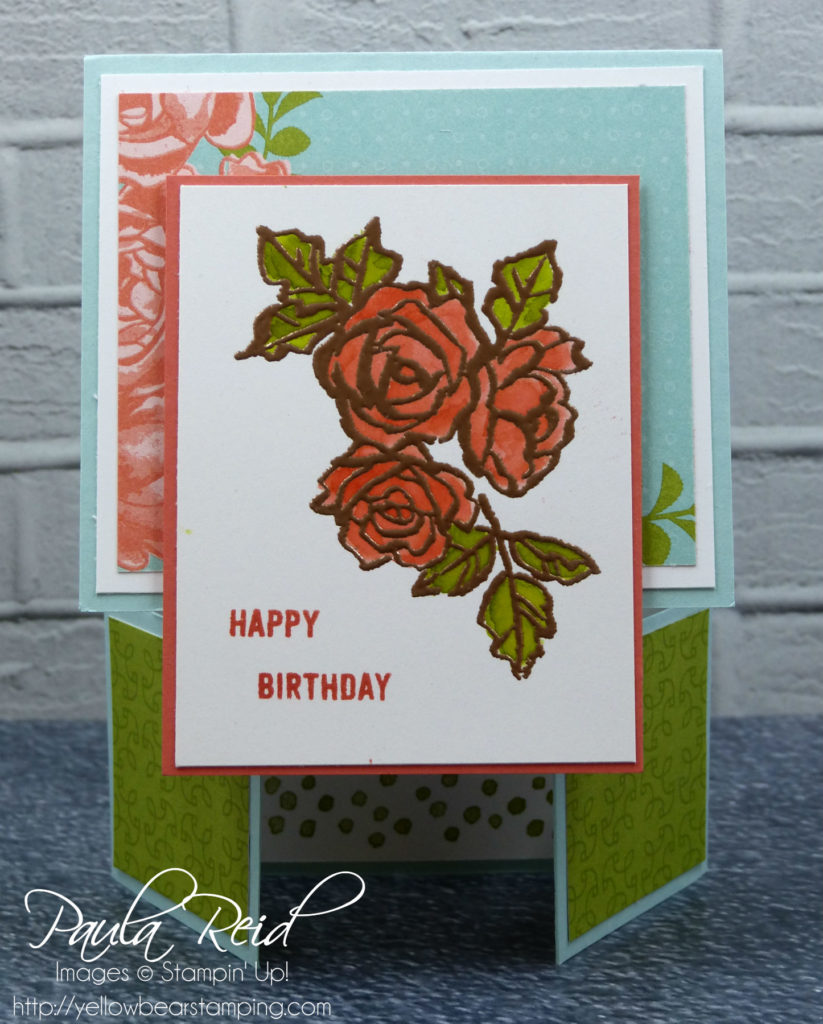
And here’s my second sample – ready for Mother’s Day (in New Zealand Mother’s Day is Sunday 13 May).
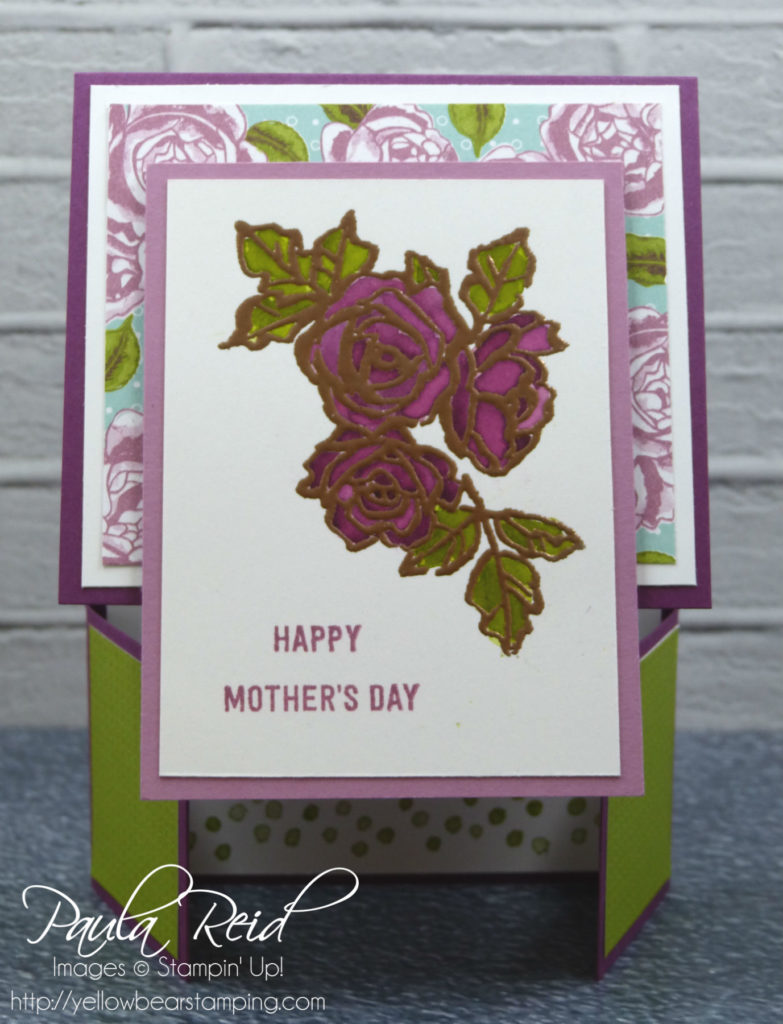
This flower was coloured in using Sweet Sugarplum as the first layer and then some Rich Razzleberry was added to create the darker shading.

The sentiment (from Thoughtful Banners) was stamped in Sweet Sugarplum and the front image is matted to Sweet Sugarplum while the card base is Rich Razzleberry.
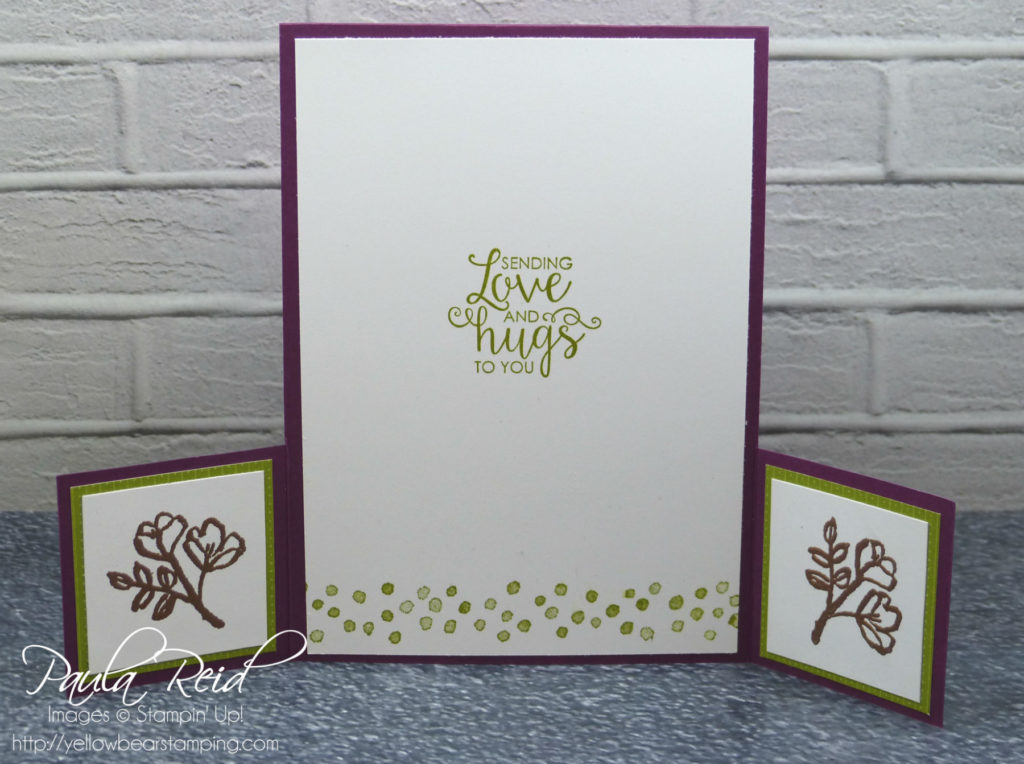
The inside sentiment is from Ribbon of Courage with the ‘dots’ coming from Petal Palette. The inside flower images are also heat embossed in copper and matted on DSP before adhering to the card base.
The other measurements for card are: DSP – 3″ x 3 1/2″ adhered to Whisper White 3 1/4″ x 3 3/4″, four pieces of DSP measuring 1 3/4″ – adhered directly to the card base front and inside. For the stamped images a piece of Shimmery White 2 3/4″ x 3 3/4″ adhered to a coloured mat of 3″ x 4″ and two pieces of Whisper White 4cm square for the inside images. The central Whisper White measures 9.5cm x 13.5cm.
One final thing to mention is that the stamped image is adhered with dimensionals but don’t put them right to the bottom of your image otherwise the ‘flap’ won’t open.
Until next time …