Joy to the World

By | December 14, 2017

Hi there

It’s hard to believe I have just over a week left of work for 2017 and then I get to be on holiday.  I’m really looking forward to two weeks off and not having to set my alarm :).

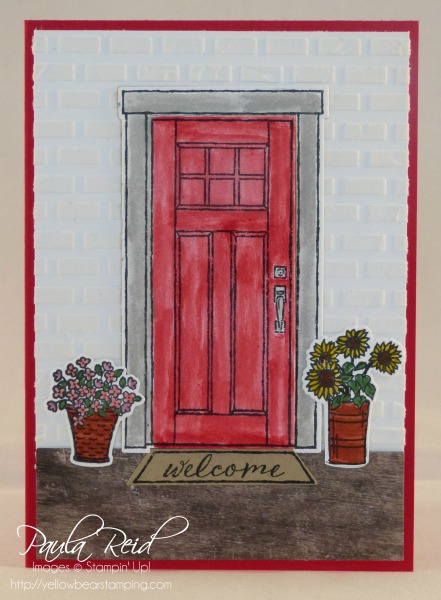
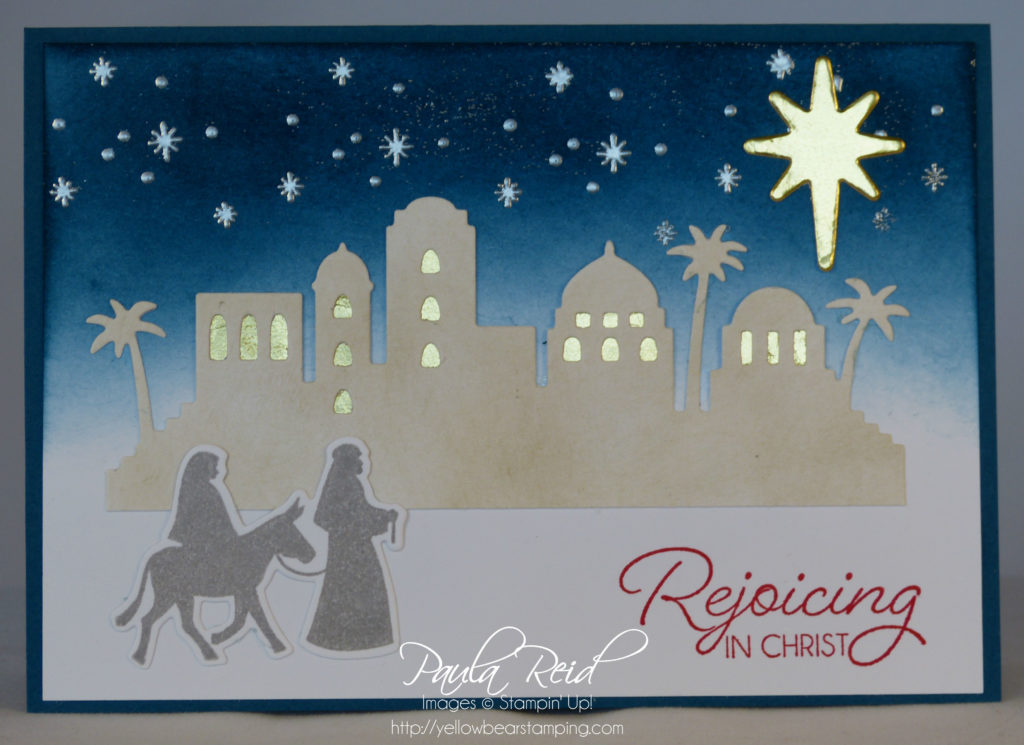
Here’s a card I made at one of our team trainings.  These training days are great as we get to play with product that we don’t have and it gives us a chance to create samples to share with you.  I don’t own this set so it was nice to be able to create a card with these dies.  The dies and the sentiment are from the Hearts Come Home Bundle.

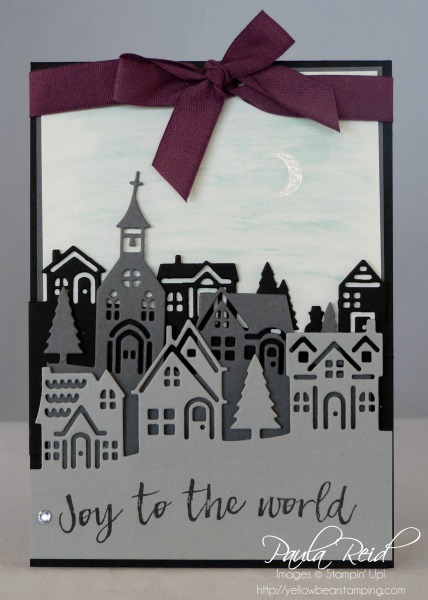
There are three different images in this dies set – one was cut out of Basic Black, another Basic Gray and finally Smoky Slate.  Together they form a cute little ‘village’ scene.  To create some depth for this card each layer is adhered with dimensionals.

To create the sky background we stamped the moon image with VersaMark and add clear embossing powder to our Shimmery White card stock.  Using an Aqua Painter and Soft Sky ink we lightly ‘washed’ over the card stock giving the gentle blue tint.

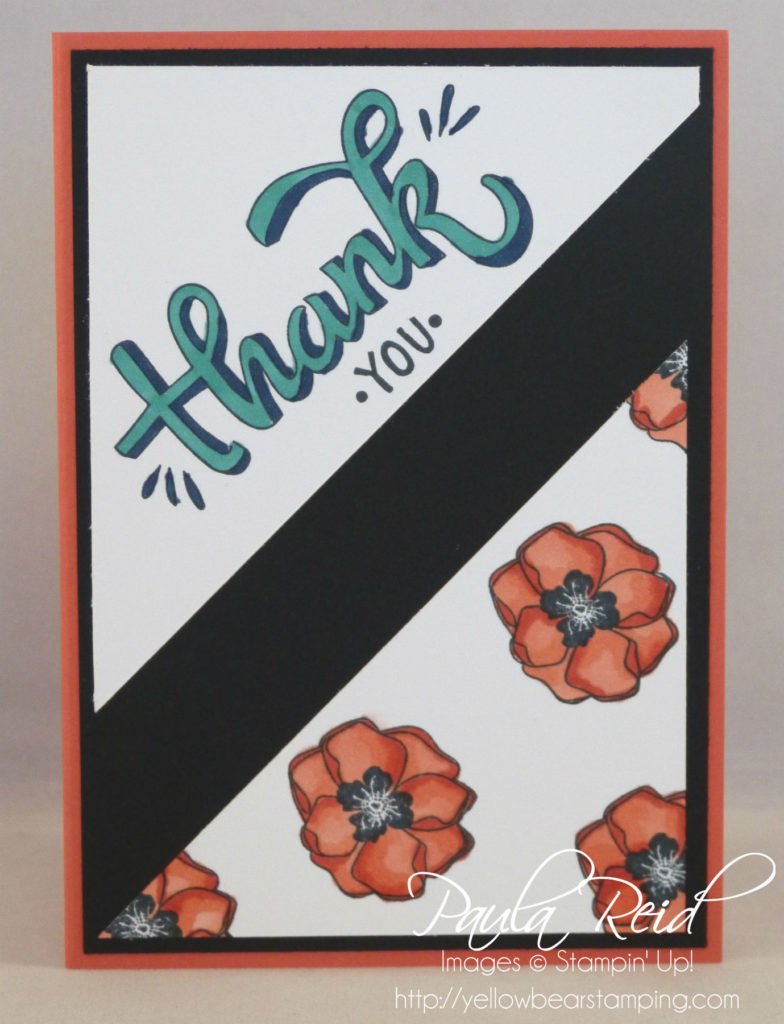
The sentiment is stamped in Memento Black ink with a Rhinestone added for some bling 🙂

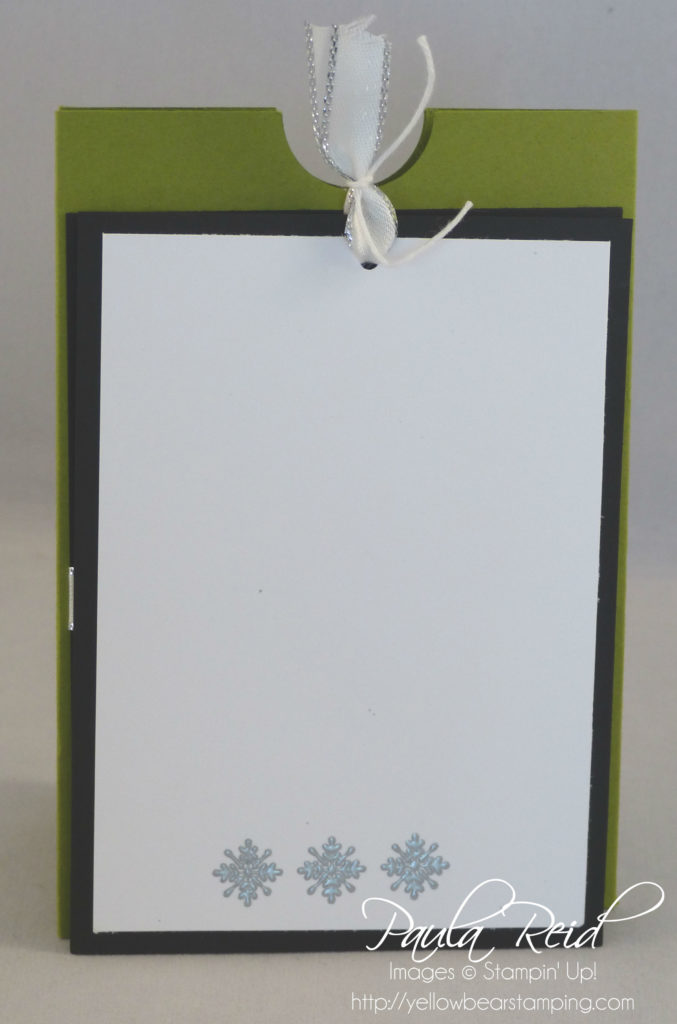
To finish the card off we wrapped some Fresh Fig 1/2″ Finely Woven Ribbon around the front and tied a bow.  The card base (Basic Black) in folded at the top so that the card stands nicely.

I still have a few more Christmas creations to share so keep an eye out over the coming week.

November Card Class Projects

By | December 9, 2017

Hi there

I’ve been a bit of a ‘bookworm’ lately and have forgotten to share the cards we made at our November Card Class.

I’m not sure what this style of card is called but I’ve called it a ‘Pocket Card’.

I know Black is not normally a colour used for Christmas but I really like it and think it goes well with Old Olive and the silver accessories.  Here I’ve used it with the Silver Foil Snowflakes, Silver Metallic-Edge satin ribbon, Silver Foil and Silver Embossing Powder (I don’t think there’s anything ‘ silver’ left to use!).

The sentiment and embellishment on the inside are from the Snowflake Sentiments stamp set – I’ve used this set heaps this year and am glad it’s carrying over.

The card stands on it’s own and when you pull the ribbon tag up you get to see the ‘inside’ of the card.  I’ve kept the inside fairly plain so that there’s plenty of room to write your Christmas message.

For our second project I gave the ladies a choice as to which design they wanted to use – or they could create their own combination.

The stamp set I’ve used here is the Color Me Happy set which was released with the Stampin’ Blends.

I kept the same style for each design but just changed the stamps, colours and card bases.  The first card uses Cherry Cobbler, the second uses Rich Razzleberry and Pink Pirouette, the third uses Pumpkin Pie, Daffodil Delight and Pool Party and the fourth card uses Calypso Coral, Bermuda Bay and Noght of Navy.

I’m loving the new Stampin’ Blends and it’s definitely ‘practice, practice, practice’ to get the blending just right.

I used Copper Foil and the Circle Framelits for the element behind the sentiment (which was hand cut).

If you’d like to have a play with the Stampin’ Blends and are around over the Christmas break I will be holding a class so you can try them out – keep an eye out for notification about this date (still to be confirmed).

I’ll be back soon to share more creations in the next day or so.

Stamparatus – second window for ordering

By | December 6, 2017

Hi there

The second window to reserve your Stamparatus opens today at 10:00am.  Check out my earlier post here about the new Stamparatus positioning tool.

The first Stamparatus reservation window reached its maximum number of reservations in just 15 minutes!  I think this tool is going to be very popular.  With this information Stampin’ Up! have reviewed the process for the second window and have made some changes so that people don’t miss out reserving one of these tools.

As was previously announced, the second reservation window will remain open from 6–31 December; however, during this reservation period we will take as many orders as we receive (yay!) and not close the window until 31 December.  So whether the total number of reservations is 100 or 100,000, the window will stay open!

Please note the following changes:

  • Beginning 19 March, we will ship Stamparatuses in the order the reservations were received (first in, first out) and continue through the next few months and beyond as product arrives in our warehouse. Because shipment dates are based on manufacturing lead times, not all of the reservations made during the 6–31 Decemberwindow will ship on 19 March (as was previously announced).
  • In order to accommodate demand, limits have changed as follows: one reservation per customer.
  • Because we are not limiting the maximum number of reservations for the second window, we will not offer a third window. This is the last chance for you to reserve a Stamparatus before it becomes available in the 2018–2019 annual catalogue.

The Stamparatus will change the way you stamp, and before long, you’ll wonder how you crafted without it! Why do YOU need one? You’ll fall in love with stamping all over again when you learn everything you can do with it!

  • Make multiples with ease
  • Consistently stamp crisp, clean images
  • If you want a darker impression, apply more ink and restamp—no need to start over
  • Make fewer mistakes, saving time and money
  • Easily create 2-step, 3-step, and 4-step stamped images using reversible plates
  • Develop new and specialized stamping techniques with adjustable stamping plates and precision placement

I need product details!

  • Compatible with Stampin’ Up!’s red rubber and photopolymer stamp
  • Foam mat to use with photopolymer stamps
  • Rulers and gridlines for quick measuring
  • 2 open sides so you can stamp on larger paper
  • 2 reversible plates: a total of 4 surfaces to work with
  • 2 magnets to hold the paper in place
  • Magnet storage areas
  • Retail Price–$99.00 NZD

How do I get one?

Good news!  While these are still in manufacturing mode, you can reserve your Stamparatus now to be one of the first to get your hands on it!  Simply log into the Stampin’ Up! online store and follow the prompts.  You need to a have an account setup with my online store.  If you haven’t got one set up check out my online store tab for instructions.  If you have any issues contact me.


Year End Sales Event

By | December 3, 2017

Hi there

From now until the 2nd of January we are having a Year End Sale.

Click here to see what is on sale.  The NZD amount is the far right hand column.

Promotion Dates: 1 December 2017–2 January 2018

  • Retiring items from the 2017 holiday catalogue are available while supplies last.
  • Excess items from the 2017 annual catalogue are available in limited quantities at the promotional price.
  • Discounted items may be added to a Starter Kit—or purchased with Stampin’ Rewards—at the promotional price.
  • Host sets can be purchased using only Stampin’ Rewards from a qualifying party.

Contact me or order on-line via my on-line store.

I will be placing my last pre-Christmas order on Sunday 10 December at 8:00pm so please let me know by 7:30pm if you want to order anything.  This will guarantee delivery before Christmas.

November Extravaganza Projects

By | November 26, 2017

Hi there

Last Saturday we held our Christmas Creative Inkers Extravaganza event.  We had a great day teaching five projects to 102 attendees.  The project I taught used the new Mini Pizza Boxes (pg 44 of the Holiday Catalogue) and products from the “Year of Cheer’ Suite (pg 36-37 of the Holiday Catalogue).

The Designer Series Paper (DSP) is the Year of Cheer Specialty paper and features classic foil designs.  This paper is slightly thicker than the usual DSP and is single sided.  It’s really lovely and coordinates with the Foil Snowflakes (also on pg 37).  The sentiment is from the Snowflake Sentiments stamp set on pg 35 and were heat embossed in either Silver or Gold then punched out using the new Everyday Label Punch (pg 12 of the Holiday Catalogue.

These Mini Pizza boxes are food safe so we decided to fill them with food – well chocolate is a form of food isn’t it?  The box holds 8 chocolate eclairs.  Other ideas for filling these boxes are biscuits, jewellery or 3″ x 3″ note cards.

The bows were made using the Envelope Punch Board.  I love the Envelope Punch Board – it’s such a versatile product and you can make really cute boxes with it as well.  If you don’t own one of these I would highly recommend you add it to your next order :).  To finish off the bow we added a faceted gem to the centre.

Here are the other four projects that were taught:

I hope you all have a great week – it’s only four weeks till Christmas.


Introducing the Stamparatus

By | November 16, 2017

Hi there

Last weekend we had our OnStage event for demonstrators from all across New Zealand – we even had a few overseas demos join us which was great.  We had a fabulous time seeing new products from the upcoming Occasions Catalogue – due for release 3 January 2018.  We also had a big announcement about a new tool that is to be released soon called the Stamparatus – a new stamp positioning tool that is exclusive to Stampin’ Up! and has been designed in conjunction  with demonstrators around the world.

Watch the below video to see the Stamparatus in action.

The Stamparatus will change the way you stamp, and before long, you’ll wonder how you crafted without it! Why do YOU need one? You’ll fall in love with stamping all over again when you learn everything you can do with it!

  • Make multiples with ease
  • Consistently stamp crisp, clean images
  • If you want a darker impression, apply more ink and restamp—no need to start over
  • Make fewer mistakes, saving time and money
  • Easily create 2-step, 3-step, and 4-step stamped images using reversible plates
  • Develop new and specialized stamping techniques with adjustable stamping plates and precision placement

I need product details!

  • Compatible with Stampin’ Up!’s red rubber and photopolymer stamp
  • Foam mat to use with photopolymer stamps
  • Rulers and gridlines for quick measuring
  • 2 open sides so you can stamp on larger paper
  • 2 reversible plates: a total of 4 surfaces to work with
  • 2 magnets to hold the paper in place
  • Magnet storage areas
  • Retail Price–$99.00 NZD

How do I get one?

Good news!  While these are still in manufacturing mode, you can reserve your Stamparatus now to be one of the first to get your hands on it!  As of  the 17th of November, you can participate in three different reservation periods.  Simply log into the Stampin’ Up! online store and follow the prompts.  You need to a have an account setup with my online store.  If you haven’t got one set up check out my online store tab for instructions.  If you have any issues contact me.

RESERVATION WINDOWS AVAILABLE TO SHIP
17–30 November 2017 Approx. 1 February 2018
6–30 December 2017 Approx. 19 March 2018
16–30 January 2018 Approx. 15 April 2018

Have more questions? We have answers. Check out the PDFs below.

Customer – How to reserve my Stamparatus.pdf

Customer Q & A

At Home – Welcome

By | November 13, 2017

Hi there

I was doing a bit of a tidy up of my photos tonight and found a card I made ages ago but forgot to share with you.  It uses a new set from the Annual Catalogue called ‘At Home’.

This stamp set has coordinating framelits which come as a bundle.  These framelits really add to the project – check out the second photo 🙂

To create the brick effect I’ve used the Embossing Paste and Pattern Party Decorative Mask.  When you first look at this card you’d think that the door is just a stamped image – but take a closer look.

The door opens – how cool is that.  With the help of the die this card becomes a ‘flip’ card.  The images are line art which allows for a range of colouring options – ink, watercolour pencils, markers and now our new Stampin’ Blends.

There are 25 stamps in this set with a range of sentiments for all occasions from birthday, congrats to Christmas.  The Sunflower image actually has pumpkins in front of it but I did a bit of masking so that I could have just the flowers.

Well that’s all from me at the moment but do check back soon for more creations.

Quilted Christmas

By | November 6, 2017

Hi there

One of the great things about being a demonstrator are the training days we have where we learn new techniques and get to see new products.  A couple of months ago we had a wider team training day that was focused around products from the Holiday Catalogue.  I was able to make some samples using products that I hadn’t purchased – one of which was the Quilted Christmas Suite.  Here are two cards I made using the Christmas Quilt bundle and the Quilted Christmas DSP stack.

My image is stamped in Lemon Lime Twist and Pool Party and the sentiment is stamped in Garden Green.  The card base is Real Red.  The image was stamped on Whisper White then die cut.  The layers on top are also from the Quilt Builder Framelits Die.

For this card I started with a strip of DSP that was matted in Real Red then added the quilted ‘snowflake’.  I’ve kept the colours to match the DSP of Real Red and Garden Green.  The sentiment is also part of the Christmas Quilt stamp set that is part of the bundle.

You may have noticed the red ‘bling’ in the centre of my snowflake.  There are two ways to turn your Rhinestones into whatever colour you wish.  For this card I just coloured the rhinestone with a red Sharpie marker but now you can also do this using our new Stampin’ Blend Alcohol Markers.  With this option you can create at least 24 different colours as each marker comes in a light and dark shade plus we have the Ivory and Bronze markers.

Don’t forget we have our upcoming Christmas Extravaganza on Saturday 18 November.  If you would like to come please contact me before Friday 10th November as we only have a few spaces left.

I will be placing another order tomorrow night (Tuesday 7th) so if you are wanting to place an order for any supplies please let me know before 8:00pm.

Stampin’ Blends are here

By | November 1, 2017

Hi there

I’m excited to introduce to you “Stampin’ Blends” – Stampin’ Up!’s premier alcohol markers.

Check out this video on our new Stampin’ Blends

To cover all the blending bases, we’re also offering for a limited-time a 16-card project kit and stamp set with beautiful line-art images.

The kit contains the following:

All you need to supply is Memento Ink, dimensionals, glue dots and of course the new Stampin’ Blends.  The stamp set is sold separately but you can purchase the kit and stamp set as a bundle.

And here are the sample cards – four cards of four designs.

I’ve uploaded the new brochure to my Catalogues page for you to download.  If you would like a hard copy please let me know and I can post one out to you.

I’m really excited about this new product and look forward to sharing them with you.

If you are interested in purchasing any of these new products please contact me or order on line via my store.

Happy 5th Birthday

By | October 30, 2017

Hi there

I had a very productive weekend in the ‘Craft Department’ – it’s great when the creative juices flow!

Our neighbours youngest turned 5 over the weekend and started school today – a good day was had :).  He’s really into his Lego Ninjago but I couldn’t find any punch art examples to create for his card so I went with just blocks.

It’s a similar style to the one I made for my nephew last month – check here for the measurements

I wanted to have the number on the front of the card along with the Happy Birthday so I cut die cut the sentiment twice using narrow strips of Basic Black that cut the ‘Happy’ and a small part of the Birthday so I could trim off the joining letters.  I then ran it through a second time cutting the ‘Birthday’ and a small part of the Happy.  To make it easier to adhere I added the Multipurpose Adhesive sheet to the Basic Black prior to cutting out.

The ‘5’ in adhered with dimensionals and the ‘TH’ is cut with the retired Little Numbers dies.

These cards are simple to make but look really effective – perfect for all ages.

Upcoming Event – we have our final Extravaganza event for 2017 happening on Saturday 18th November at 12:30pm.  If you would like to come along (cost $45 for 5 projects, afternoon tea and a $10 voucher to spend on product) please let me know by Wednesday 8th.  We’d love to have you join us for the afternoon.


Embossing Paste and Decorative Masks

By | October 24, 2017

Hi there

For those of you in New Zealand I hope you have a relaxing and enjoyable long weekend.  I started my Saturday by tidying my craft cupboard and desk – I’m not sure what happened but when I put everything back in the cupboard I ended up with a spare clean shelf! Looks like I might need to go ‘shopping’ to fill it up :).  On that note I will be placing an order tomorrow night – Wednesday 25th so if there is anything you want to order please contact me before 7:30pm.  Don’t forget we still have the special promotion on at the moment with our Designer Series Paper – buy three packs of selected paper and get a fourth FREE.

A couple of weeks ago I had a play with colouring the embossing paste and using our Pattern Party Decorative Masks (pg 201 of the AC).  I ended up mixing enough paste to make two cards.

After applying the embossing paste I used two different stamp sets to complete my cards.  First up I used Stylized Birthday to add my ‘Happy Birthday’.  This is a single stamp set (pg 80 of the AC) and great to use for a quick sentiment that fills a blank space.

I tinted the embossing paste with a couple of drops of Berry Burst.  Did you notice that the width of the ribbon is not actually 1/2″ as it should be?  Well when I placed the ribbon across it was too wide and covered my sentiment so I added a strip of Tear & Tape to half of the ribbon, folded the ribbon in half and then adhered it – I now have 1/4″ Finely Woven Ribbon :).  Here’s a little secret tip – to cover up a few bits of wayward paste add pearls randomly (and strategically) to the masked area.  The final touch is a felt bow (pg 197 of the AC).

My second card uses the Label Me Pretty bundle (pg 27 of the AC).

This time I kept the ribbon at it’s full width across the card and also made a bow from the ribbon.  Another tip to share is if you get bits of paste in areas they shouldn’t be – like on the edge of the card – don’t throw your project away, instead grab your sponge or sponge dauber and sponge the coordinating colour around the edge of the card:).

The image for the sentiment is coloured in using our Stampin Markers – Lemon Lime Twist, Tranquil Tide, Powder Pink and Berry Burst.

Upcoming Events – we have our last Extravaganza event for 2017 happening on Saturday 18 November from 12:30 – 5:00pm.  We will be making five projects with a Christmas theme so if you’re interested in coming along please email me so I can book you a seat.

Well that’s all for tonight – don’t forget if you would like to place an order contact me before 7:30pm.

Eastern Palace – with accessories

By | October 18, 2017

Hi there

It’s been awhile since I made a card using products from the Eastern Palace Suite so over the weekend I had some time to create and here’s what I made.

The Eastern Palace Suite (page 18-19 AC) consists of not only stamps and dies but Designer Series Paper (DSP), Gold Vinyl Stickers and Mini Tassels Assortment.  I hadn’t used any of the tassels so wanted to add these as a feature to my cards.  These cards use all but one of the products

The top layer is Very Vanilla cut at 9.5cm x 13.8 then a layer of Fresh Fig or Tranquil Tide cut at 10cm x 14.3cm.  The base is Thick Very Vanilla.

I stuck the sticker on a piece of Fresh Fig then die cut it with the coordinating die.  This is adhered with dimensionals.  The 1/4″ Natural Trim in gold goes perfectly with this card to attach the mini tassels.

For the sticker on this card I ended up ‘fussy cutting’ around the sticker as the coordinating die covered up too much of the layer underneath.  The sentiment is from the Beautiful Bouquet stamp set.

For both cards the Very Vanilla layer is adhered directly to the coloured card stock and then adhered with dimensionals.

These colours look really great with the Very Vanilla – almost regal.

Well that’s me for tonight.

Night in Bethlehem and Painted Harvest

By | October 16, 2017

Hi there

Last month I held a workshop and taught two cards featuring Night of Bethlehem Bundle and the Painted Harvest set.  Both cards used our Note Cards rather than full sized cards.  For this months card class (with a different group of ladies) I decided to recreate these cards but using full sized cards.

The products and method of creating this card were the same as for the Note Card – the only difference was I used the full length of the die and didn’t cut off as much from the bottom of the scene.  I decided to use Dapper Denim (the same colour as the sky) for the card base rather than Thick Whisper White.

I did change this card a bit though as I wanted to try a different colour scheme for the flower – I’ve used Crushed Curry and Cherry Cobbler and then carried the Cherry Cobbler for the sentiment and mat.  After I’d stamped the image and sentiment it looked a bit ‘blank’ so rather than add the ‘dots’ I added three pieces of Linen Thread and a bow.  The card base is Thick Very Vanilla.  We used the ‘masking’ technique to get the leaves to appear behind the flower even though they were stamped last.

Don’t forget we still have the Designer Series Paper sale on at the moment – buy three packs and get the fourth FREE.  To see the list of available papers check out my blog post here.  Let me know if you are interested in purchasing any of these.

Well tomorrow night I’m off to see theatre to see ‘Matilda’ – really looking forward to that.

Until next time …

Happy Birthday Lego Card

By | October 6, 2017

Hi there

Here we are again at the weekend :).  The weeks just seem to be flying by.  Last week my nephew turned 23 and he’s really into Lego at the moment so guess what design his card was?  That’s right Lego

I’ve used Pacific Point, Daffodil Delight and Real Red to create my blocks.  The blocks are 1 1/4″ x 1 1/4″, 1 1/4″ x 1 7/8″ and 1 1/4″ x 2 1/2″.  I did have to trim the bigger block a bit so they would all fit on the Basic Black card base.  The circles are cut with the 1/2″ circle punch.

The circles are adhered with Glue Dots – I think that was the longest part of making the card!  Before I adhered them to the Glue Dots I added the white ‘shadow’ with a White Gel Pen.

I didn’t want to add a stamped sentiment so my favourite die – ‘Happy Birthday’ – was pulled out and cut out of Basic Black.  This was adhered using the MultiPurpose Adhesive Sheets.

In case you’re wondering it’s not your ordinary Lego blocks he’s into but really cool sets like this one – a Parisian Restaurant.

Don’t forget the October Promotions we have running at the moment.  The World Card Making Day offers are only available until 10 October so let me know if there is anything you want.  The Designer Series Paper Sale runs till the 31st October.

Birthday Party Project For A 10 Year Old – Part Two

By | October 2, 2017

Hi there

Back again with the last two projects from the party.  The birthday girl had recently purchased Foxy Friends stamp set and punch so with that in mind I created a project that she could recreate using these products.  I don’t have either of these (yet) so I showed them how you can scrunch up the card stock and split it very carefully to create a faux suede look for your card stock.  We used the Pansy Punch – mine got a bit squished on the way home – so my photo hasn’t come out that well.

These paper clips are the giant ones (100mm) which I purchased from Whitcoulls (a stationery shop in NZ).  To build it you punch out two circles – mine are 1 3/4″ – using a heat gun apply glue in a frown shape towards the bottom of the circle and adhere the top of the paper clip to the glue.  Let it set then add some dimensionals to the circle  above the paper clip then apply more glue on top of the paper clip and adhere the second circle.  Then you can decorate your paper clip how you want – punch art, flowers etc.

The final project was a card using the shaving foam technique 🙂  I had made two samples then showed them one on the day.  I just gave them the option of Berry Burst, Powder Pink and Lemon Lime Twist as the colour combo – the same colours as the corner book mark.

This is such a cool technique and the girls thoroughly enjoyed making their cards.