Hi there
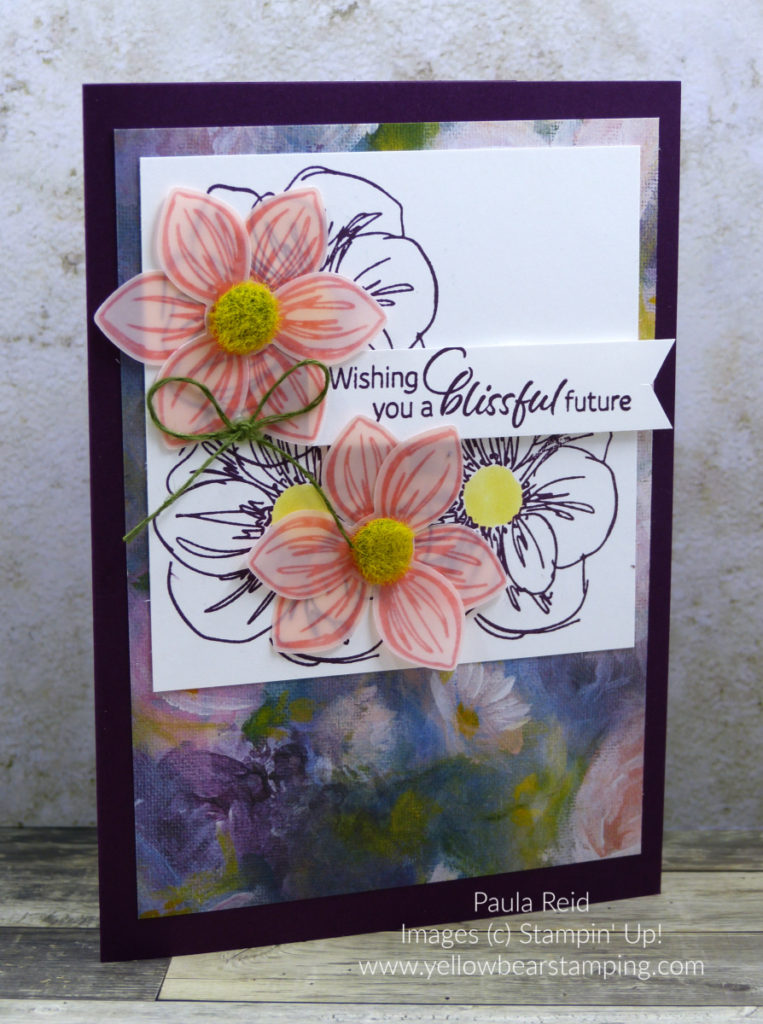
I think it’s safe to say a fair number of us have fallen in love with the Perennial Essence Designer Series Paper – the colours and images are stunning. If you don’t know what I’m talking about turn to page 108 and 166 of the Annual catalogue to see this gorgeous paper. The images remind me of paintings by Monet. It’s almost to lovely to cut into but I did and here’s my first creation.
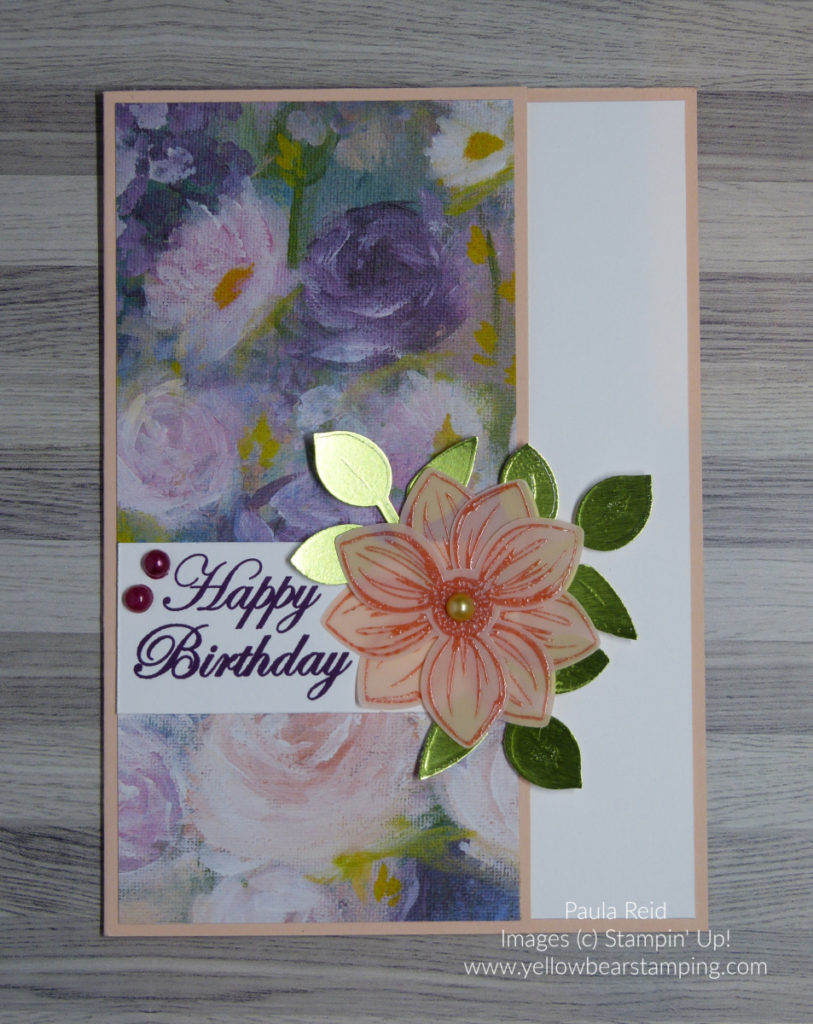
I CASED the card design from Patty Bennett – a US demo – but changed everything else :). I decided I wanted to use as many new ‘paper products’ as possible. We have the new Perennial Designer Series Paper (page 166), Petal Pink Perennial Essence Vellum Cardstock (page 169) and Old Olive Noble Peacock Foil Sheets (page 167).
The stamp sets I’ve used for this card are the Floral Essence set (part of the Perennial Essence Suite – page 107-108) and Magnolia Blooms set which is from the new Experience Creativity Beginners Brochure.
The flower image was stamped in Flirty Flamingo then I added Clear Embossing Powder. This sets the ink as it can smudge a bit when stamped on the Vellum. Once heat embossed the images were punched out with the new Perennial Flower punch on page 188. If you look closely at the foil leaves you’ll see they too have been heat embossed with Clear Embossing Powder. Did you know that the leaf image from the Floral Essence set coordinates with the Leaf Punch on page 187?
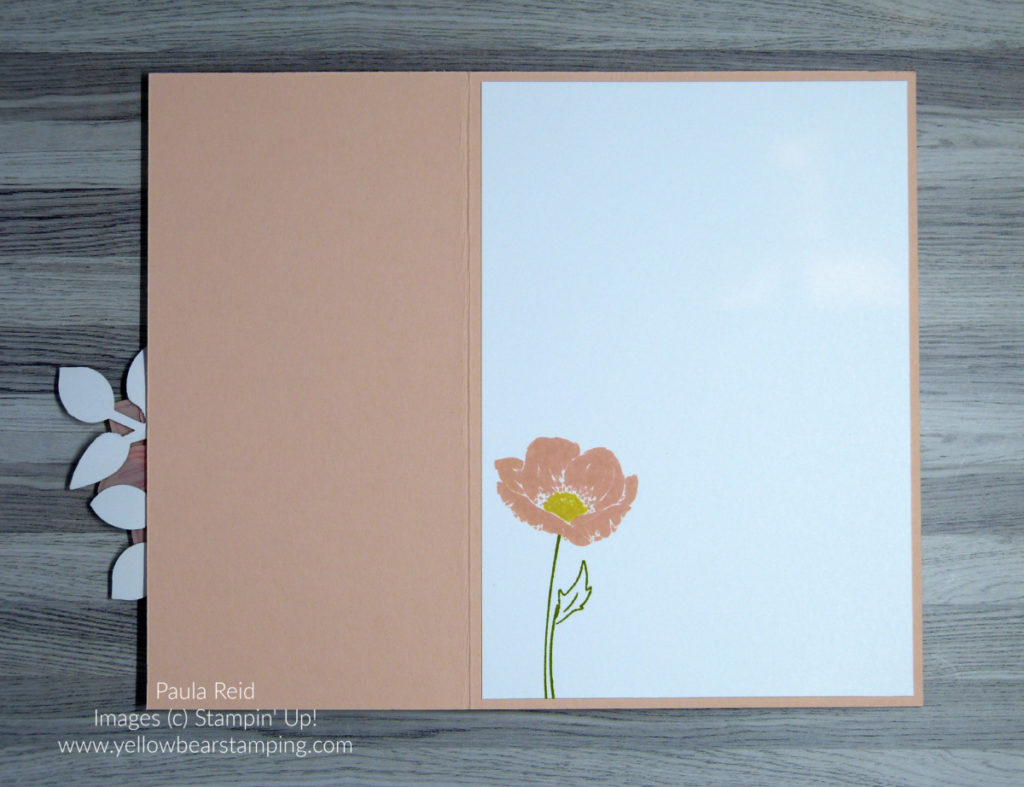
I even remembered to photograph the inside of the card :). Here I’ve used the smallest flower image and stamped it in Petal Pink with a So Saffron centre. This set has three different flower sizes – one a line art image and the other two solid images. The greenery has been stamped in Old Olive.
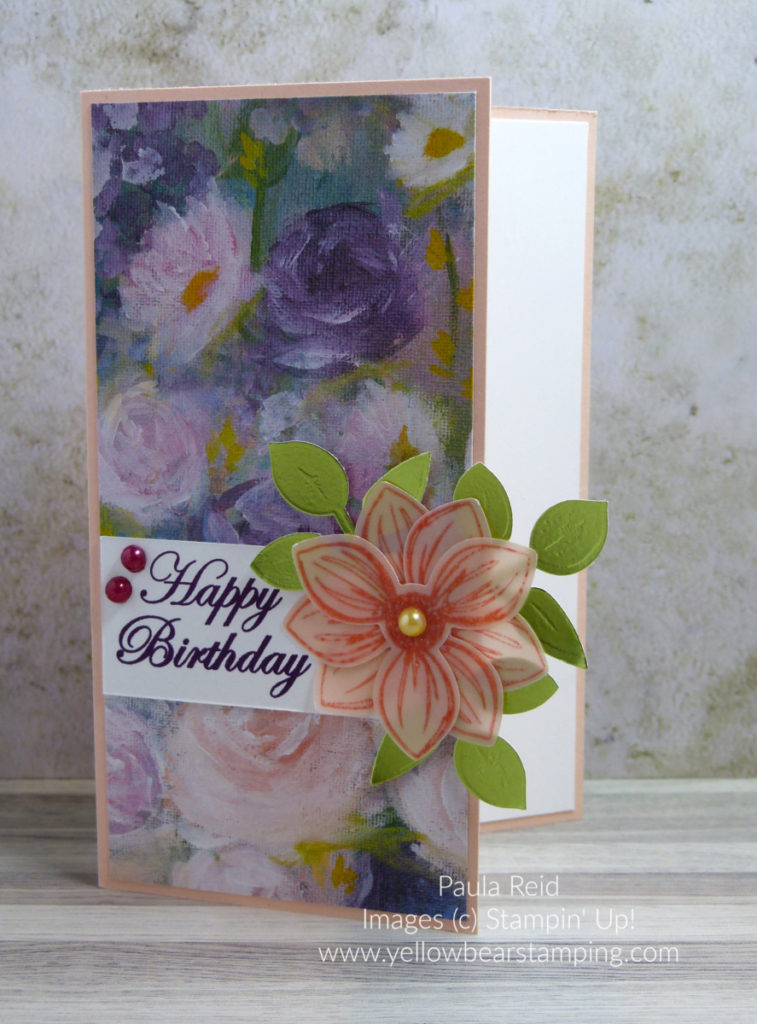
To finish off the centre of the front flower I coloured one of our Basic Pearls with the new So Saffron Stampin Blend (page 179). The sentiment has been stamped in Rich Razzleberry and two more pearls have been coloured in with the light Rich Razzleberry Stampin’ Blends.
You may have noticed that a section of the card front has been trimmed off (3cm to be exact) to show the insert. You’ll need to check back tomorrow to see how I’ve used it for my second card using the Perennial Essence Designer Series Paper.
I hope you’ve enjoyed seeing this card – if you would like to order any of the supplies used please let me know – remember if your order comes to $110NZD you will earn yourself an $11NZD Bonus Days coupon to use next month towards your next order.
Until then …