Technique Tuesday – Smooshing Technique

By | November 2, 2021

Last month we had an online event for demonstrators in the South Pacific. It was a fun afternoon of crafting together with presentations and some ‘hands on’ crafting. The first presentation was the ‘smooshing’ technique. My first attempt did not turn out well – it ended up in ‘file 13’ – but I was pleased with ‘take 2’.

Daisy Garden - Smooshing Technique

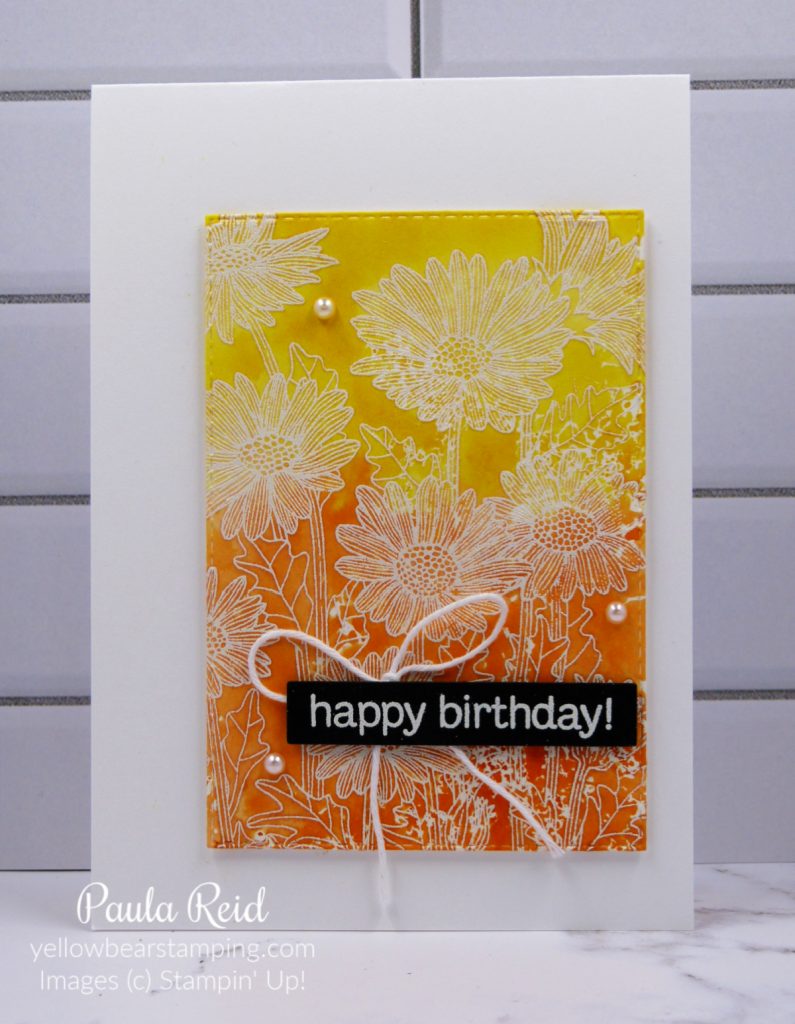
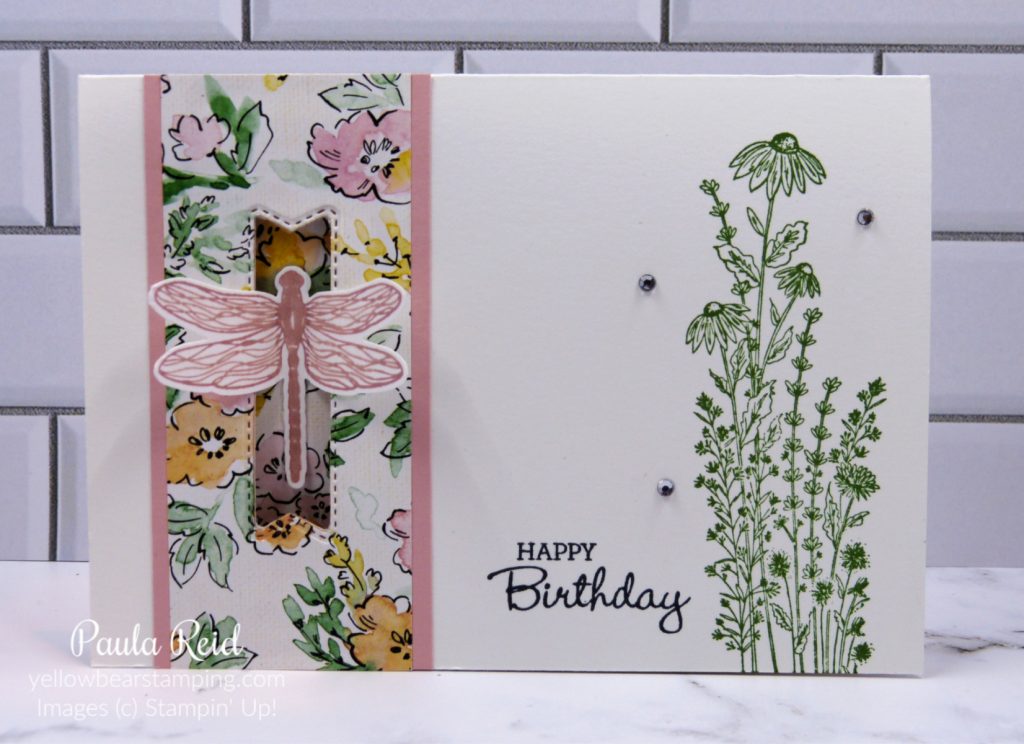
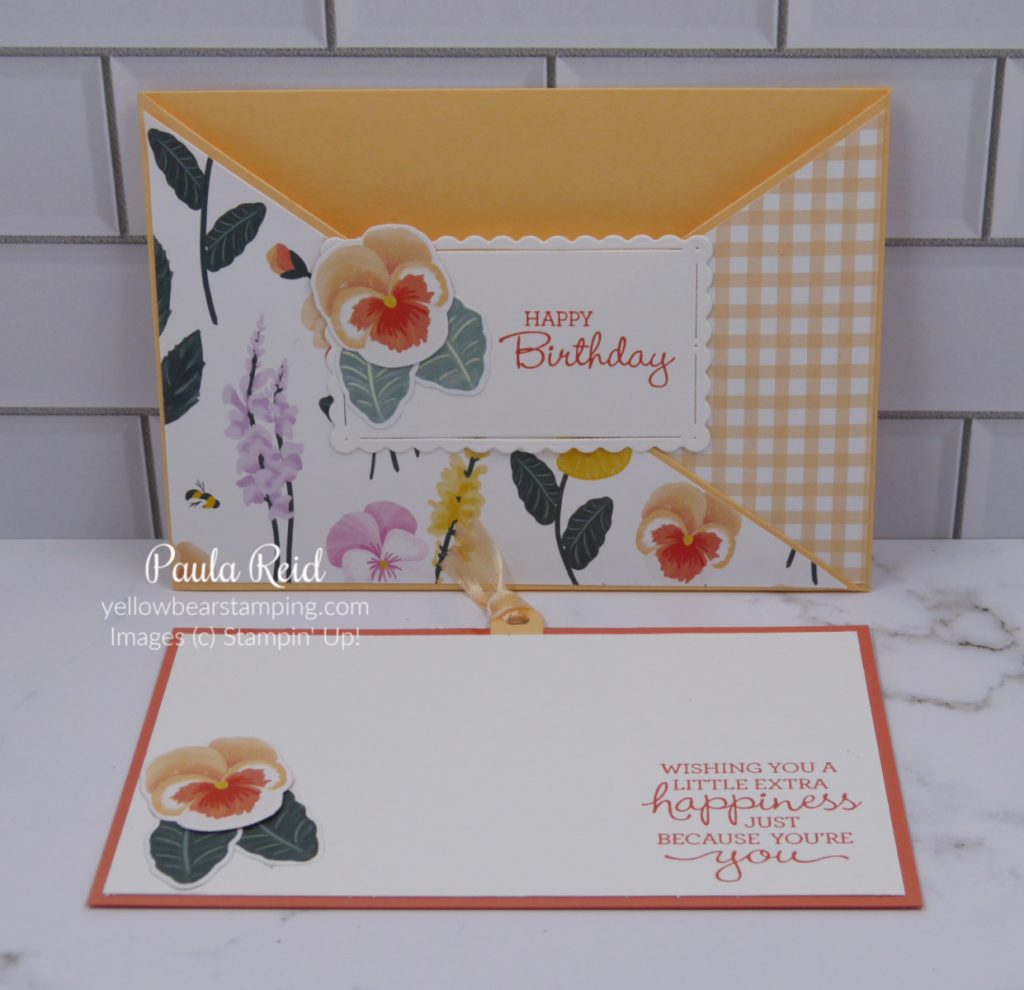
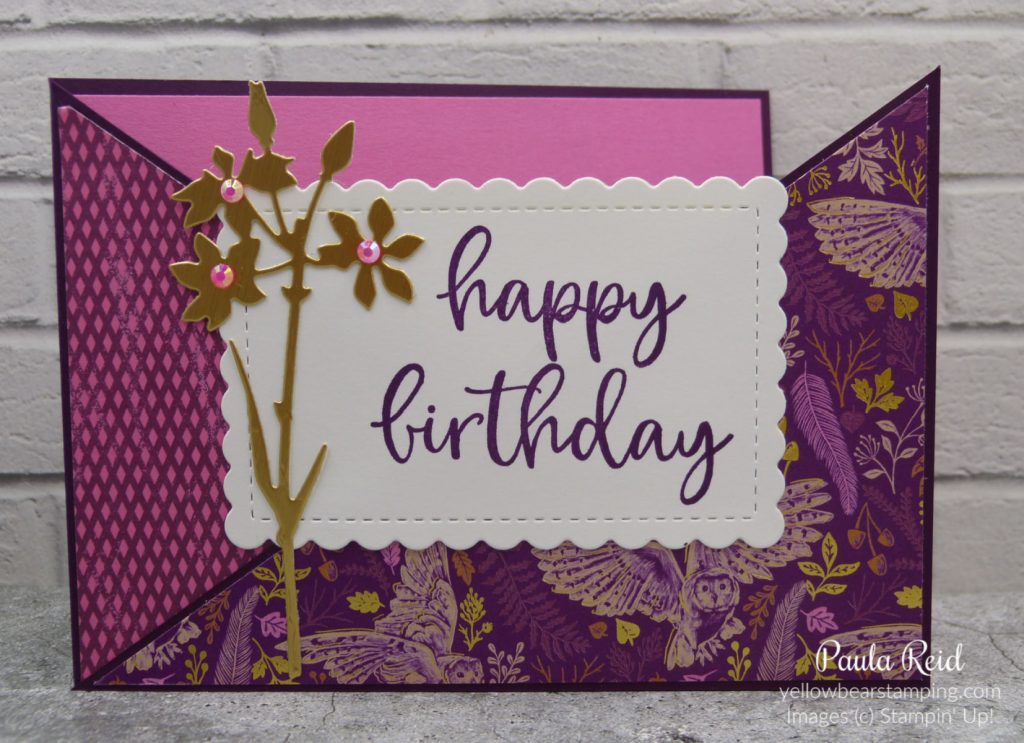
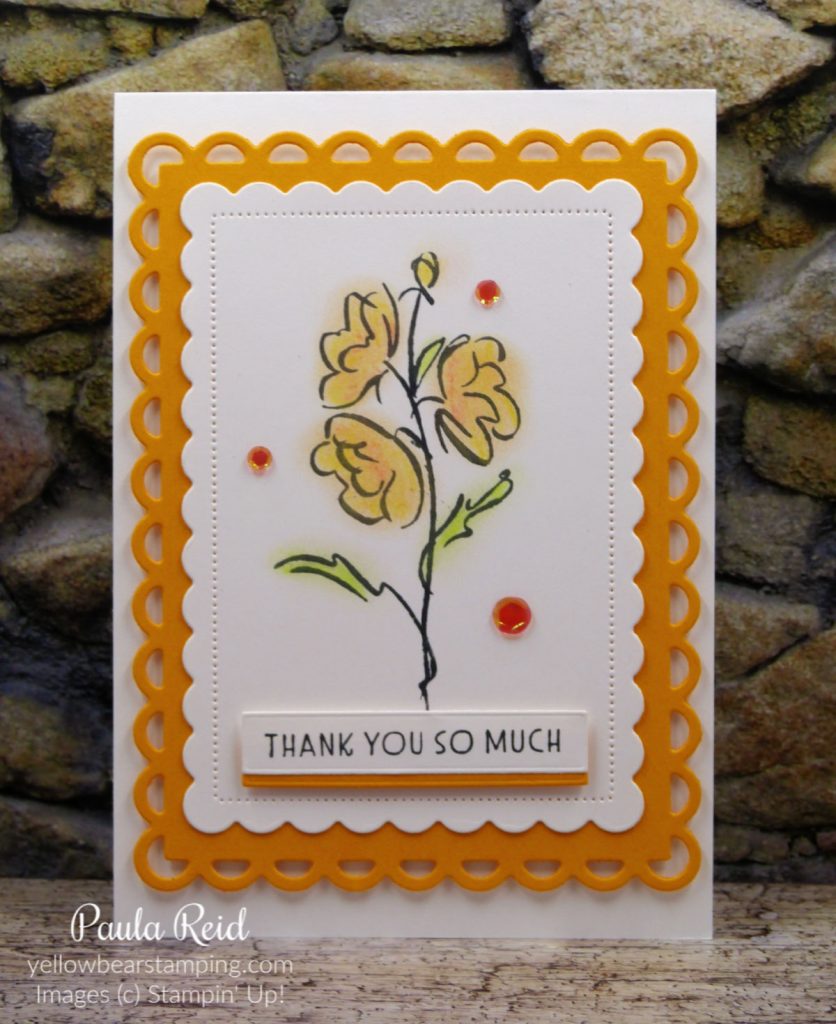
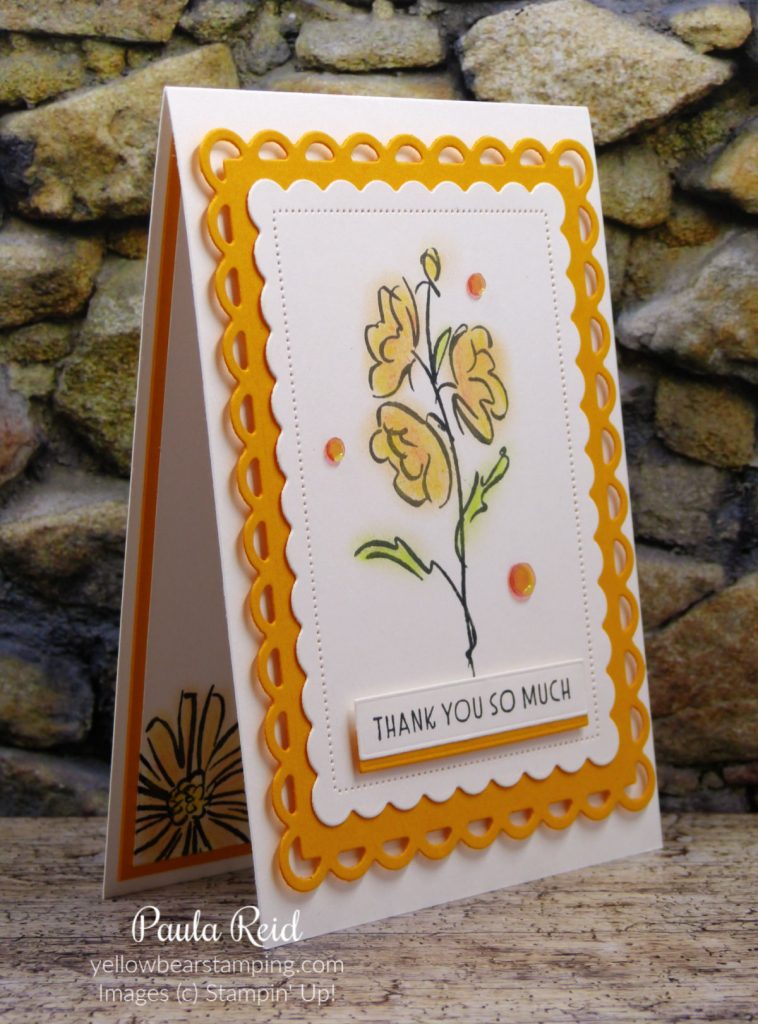
To create my card I started off with a piece of Shimmery White measuring 8cm x 12cm. I stamped my image – Daisy Garden – with VersaMark and White Embossing Powder. Now the fun begins. You will need either a piece of Window Sheet or some cellophane. I used the cellophane wrapper from a pack of Designer Series Paper.

Smooshing Technique - step one

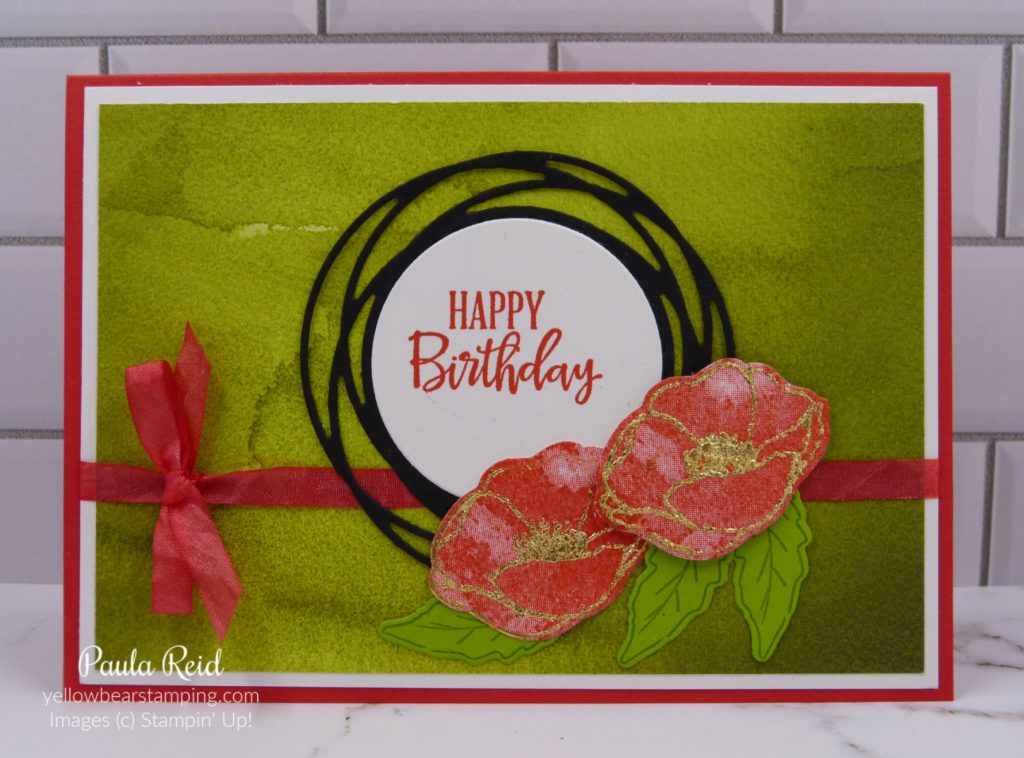
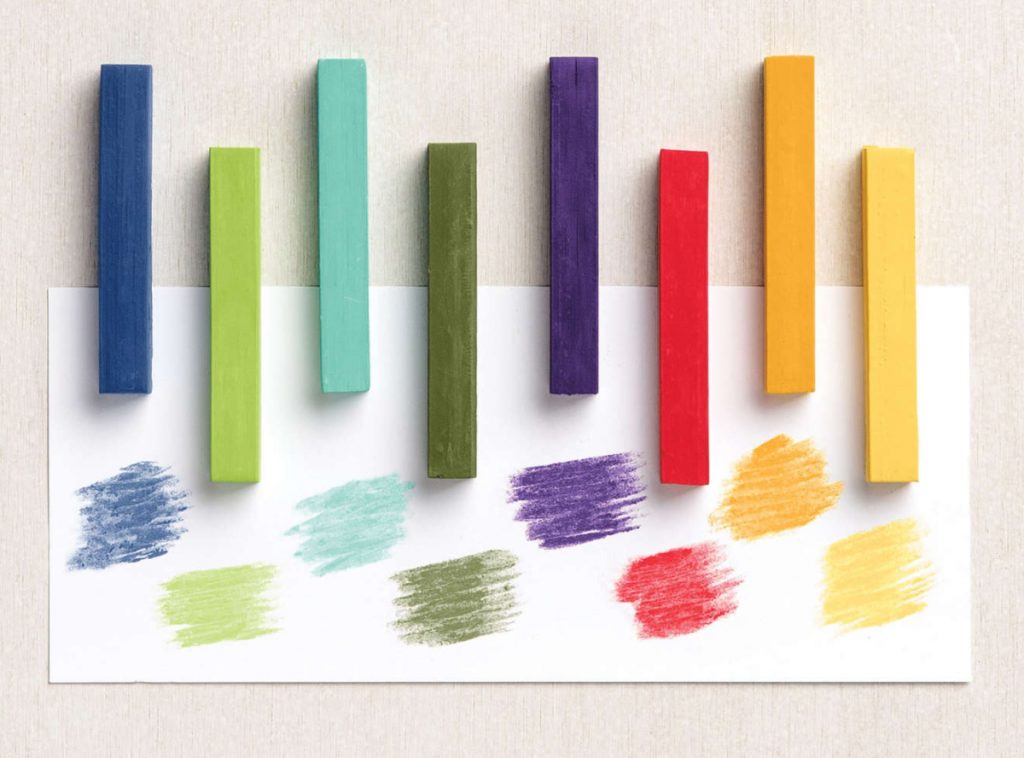
I ‘swiped’ my Daffodil Delight ink pad (left to right) and then repeated the process with Pumpkin Pie. It doesn’t matter if the colours overlap a bit.

Smooshing Technique - step two

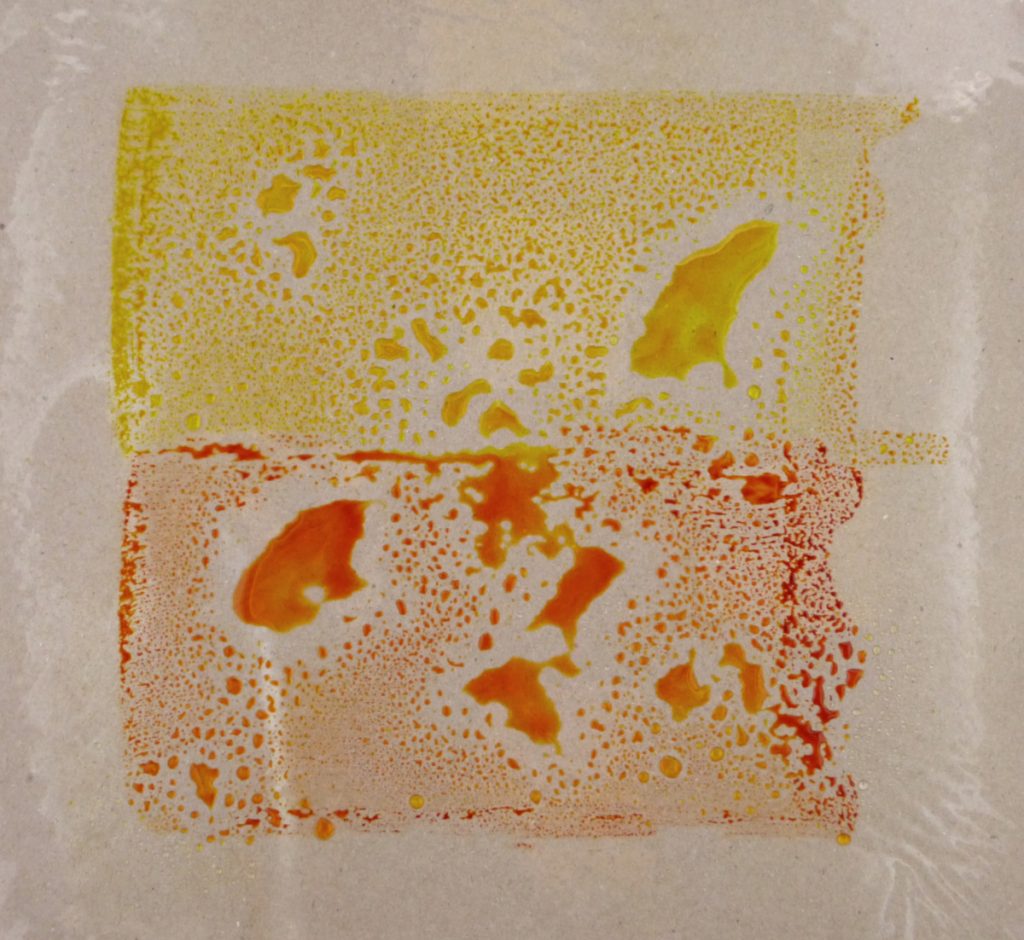
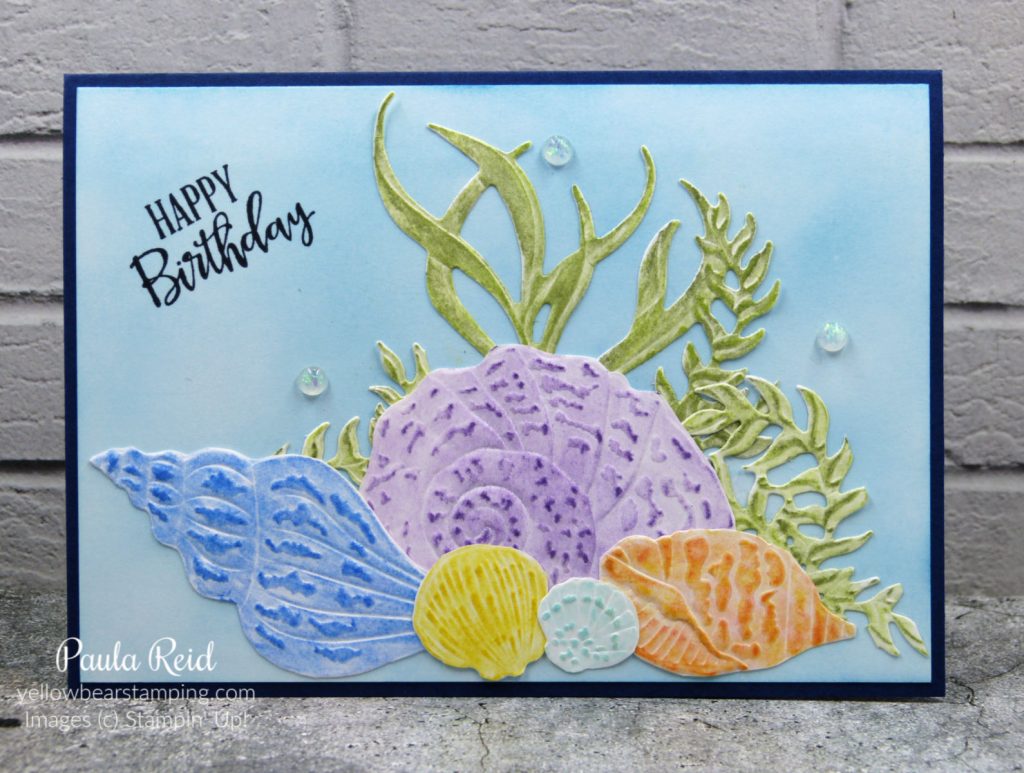
Add a light spritz of water to the inks then place your stamped image face down so that it picks up the ink. I gave it a gentle push all over so that I got good coverage of the ink before lifting it off. I then gave it a bit of a heat with the heat tool on the low setting to dry it a bit.

Daisy Garden - Smooshing Technique

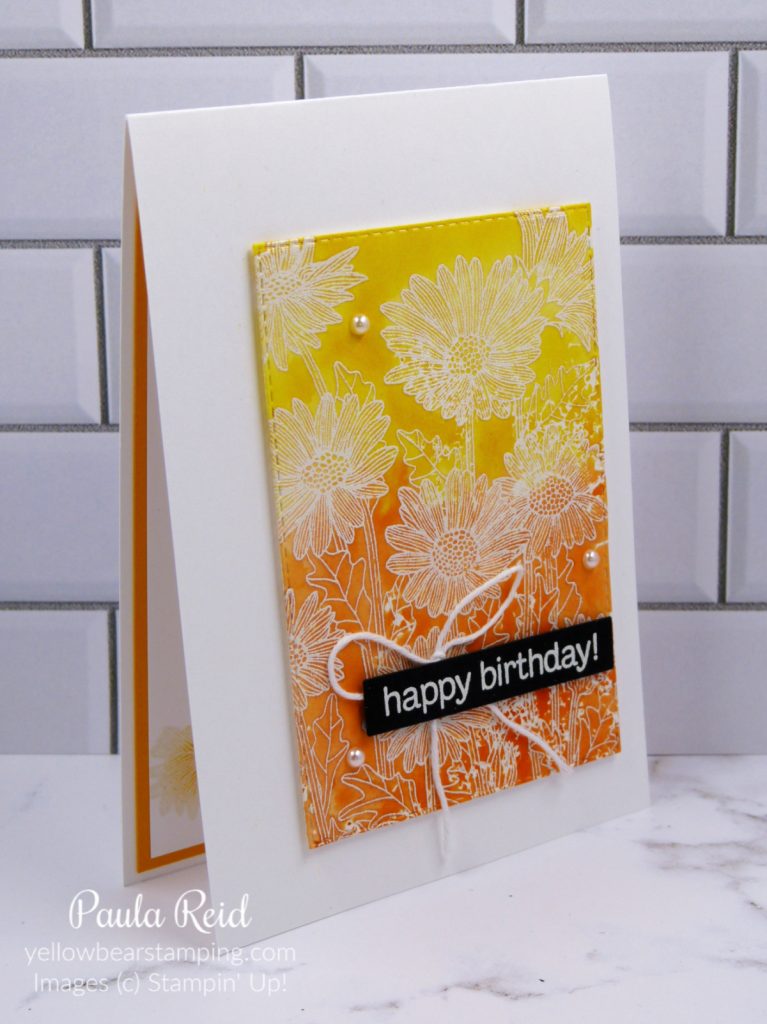
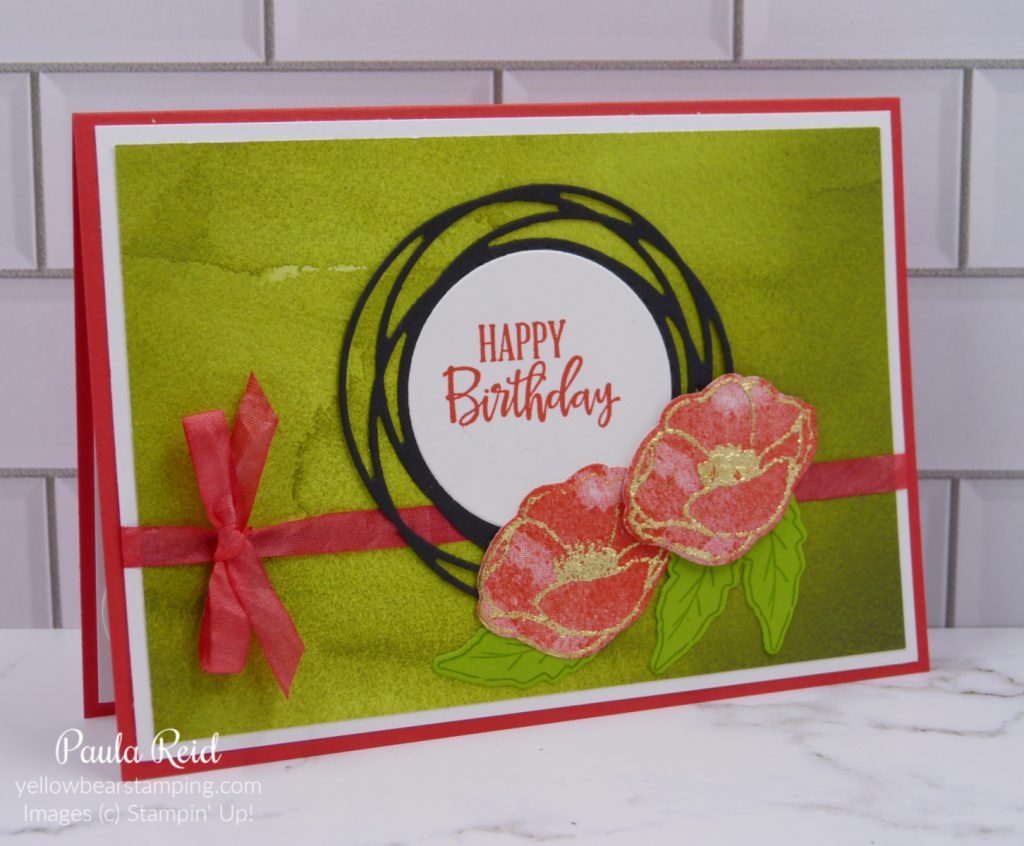
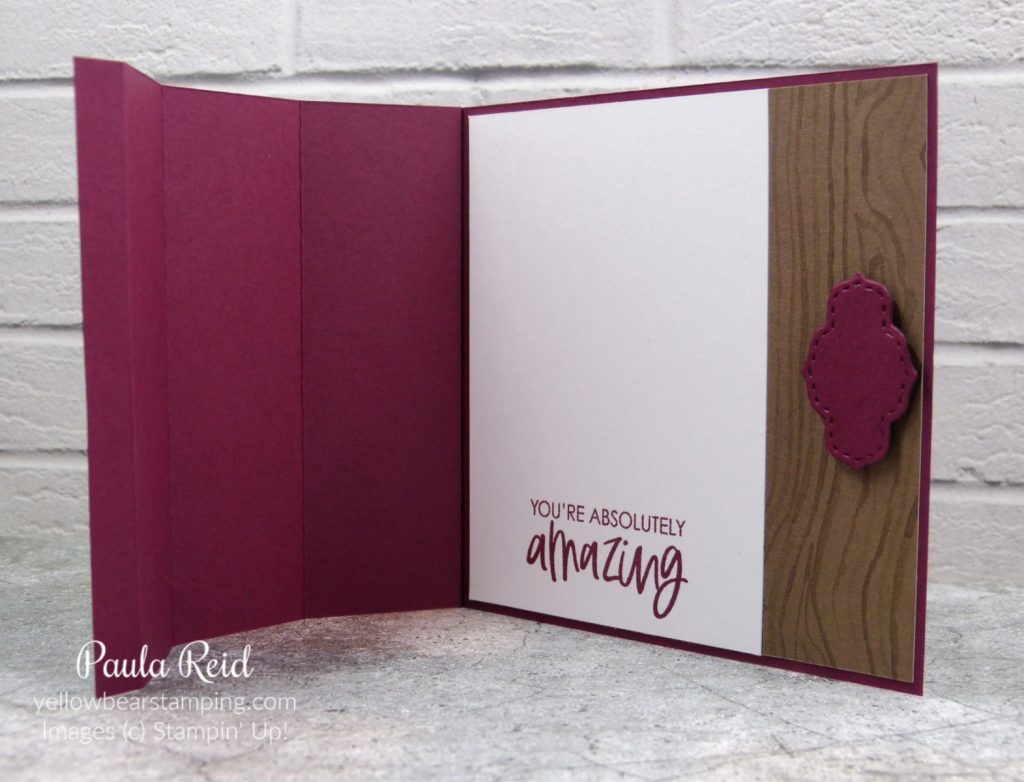
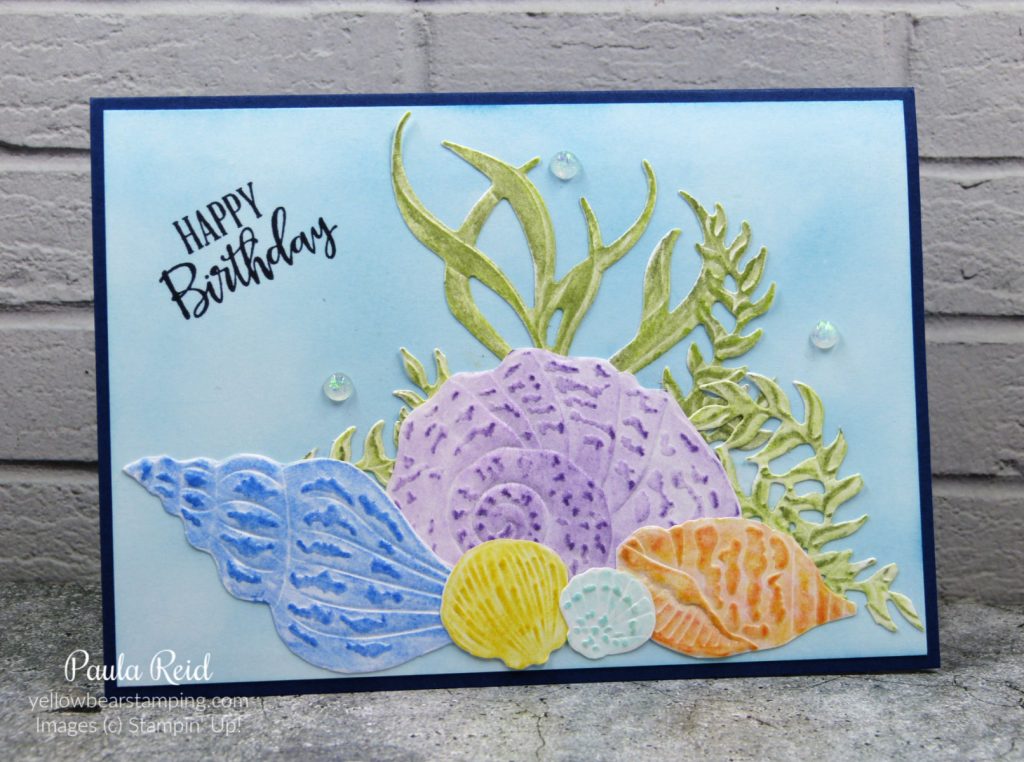
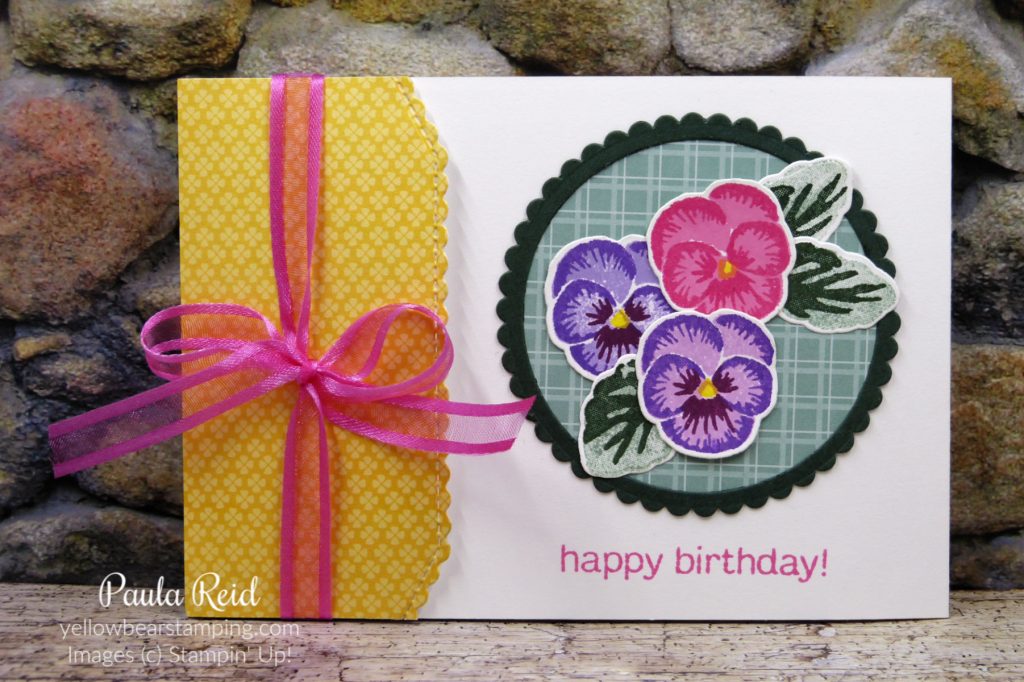
Once it was dry I trimmed it down using the Stitched Rectangle die and adhered it to my Thick Whisper White card base using Foam Adhesive Strips. I kept with the heat embossing theme for the sentiment as well. I like the contrast of the black cardstock against the Pumpkin Pie. This was adhered with dimensionals. The bow uses White Baker’s Twine from the Baker’s Twine Essentials Pack. This pack contains 5 different colours – Crumb Cake, White, Black, Gray Granite and Very Vanilla.

This technique gives you another alternative for your backgrounds when you don’t want a plain white background. It’s also the type of technique that every time you try it you’ll get a different look. So grab a couple of colours and give it a try.

Until next time …

Yellow Bear Stamping

Friday Fun Fold – Closure Card

By | October 29, 2021

Hi there

I have two cards to share today – one landscape and one portrait – featuring the same fun fold to create a Closure Card. I first made this style of card back in January 2019. I CASED it from a card I was given but I think the original design was created by a US demo – Rachel Tessman.

Dragonfly Garden - Closure Card

To create the closure the original card used the Classic Label punch which has now retired. I’ve managed to replicate this by using one of the dies from the Tasteful Labels dies – this particular die has become very handy as a replacement for cards that previously used the Word Window Punch or the Classic Label Punch.

Dragonfly Garden - Closure Card

The Dragonfly keeps the card closed but if you fold the wings in to the centre as per below, the card will open.

Dragonfly Garden - Closure Card

I’ve used the Dragonfly Garden Bundle to create this card – bundles are great for two reasons – your stamp set comes with either a coordinating punch or die set to easily cut out the images and you get to save 10% when buying a bundle.

Dragonfly Garden - Closure Card

When I adhered the panel to the front of the card I didn’t let the glue dry before doing my die cutting which meant the die didn’t leave a clean cut – note to self – allow the glue to dry next time. So that the inside looks nice and tidy I added the strip of DSP. The Dragonfly is adhered with Glue Dots. The next card is also CASED from Rachel Tessman.

Butterfly Brilliance - Closure Card

This card is created in the same way as the previous one. Before I die cut the hole I cut 1/2″ off each side of the front to create the narrower front.

Butterfly Brilliance - Closure Card

I’ve used another bundle for this card – Butterfly Brilliance Bundle – which comes with a stamp and coordinating dies. The stamp in this bundle is a single stamp with six difference sized and shaped butterflies. The dies consist of one big die to cut all your stamped images in one go and then 6 individual dies to create the overlays plus an additional 5 dies to compliment you projects.

Butterfly Brilliance - Closure Card

For the inside of this card I added an insert to write the message on which has also been die cut with the stitched effect to give a nice surround to the hole.

The Designer Series Paper (DSP) used on both cards is from the Hand-Penned pack.

Both these sets work really well with this fun way to close your card.

Until next time …

Yellow Bear Stamping

Technique Tuesday – Gilded Leafing with Adhesive Sheets

By | October 26, 2021

Hi there

Over the last couple of weeks I’ve shared some different ways for you to use our Gilded Leafing – applying with Tear & Tape and also with Heat & Stick Powder. Today I have another method using our Adhesive Sheets which can be found on page 167 of the Annual Catalogue.

Butterfly Brilliance and Gilded Leafing using Adhesive Sheets

For this card I wanted the overlay for the butterfly to have the Gilded Leafing on it. The Heat & Stick Powder wouldn’t have worked as this is a die and not a stamped image which has been die cut. The Adhesive Sheet works really well with die cut images. I started with a scrap piece of Basic White just bigger than the die. Normally you would adhere the Adhesive Sheet to the back of your image so you can adhere it to your project but this time you want to adhere the sheet to the top. Next, place your die on top and run it through your die cutting machine. Remove the protective sheet and apply the Gilded Leafing patting it down to a smooth finish. Now to create the card base.

Butterfly Brilliance and Gilded Leafing using Adhesive Sheets

Using the second and fourth largest Stitched Rectangle dies create a frame from Basic White. I cut them at the same time. Adhere Foam Adhesive Strips to the back of the frame around the outer and inner edges. My card base is slightly smaller than usual and measures 10.5cm x 14.3cm to accommodate the frame. Before adhering the frame to the base I added my background which is the lovely Fresh Freesia Shimmer Vellum from page 135. The sentiment is from the Turtle Friends set – I love this font – which has been heat embossed in White and die cut using one of the labels from the Pretty Pillowbox dies. Now that the base is complete adhere your Gilded butterfly – I used some of the Foam Adhesive Strips for this.

I hope the last couple of weeks projects have inspired you to try our the Gilded Leafing and also highlighted some of alternative uses of our adhesive range. If you have any questions about these projects please leave me a comment.

Until next time …

Yellow Bear Stamping

Friday Fun Fold – Pocket Card

By | October 22, 2021

Hi there

Last Friday I shared a Faux Pocket Card and today I have a ‘real’ Pocket Card to share. I’ve used one of my favourite suites from the Annual Catalogue – Pansy Petals Suite. I love this paper and am now on my second pack of paper.

Pocket Card featuring Pansy Patch Bundle

This card looks similar to the one from last week but keep reading to see the difference.

Pocket Card featuring Pansy Patch Bundle

Instead of opening the card you pull the the tab up to reveal the insert. The ‘card’ outer creates a pocket for the insert.

Pocket Card featuring Pansy Patch Bundle

The ‘pocket’ uses a whole sheet of cardstock which has been cut in half lengthwise (10.5cm x 29.7cm) and scored in half at 14.8cm. Taking one piece at a time cut it diagonally from centre top to bottom left and then the next piece centre top to bottom right. Adhere both ‘rectangle’ sections together making sure that the long edges of the diagonal sections are on the bottom. Decorate the diagonal sections with Designer Series Paper (10cm x 14.3cm – cut in half on the diagonal). Before you ‘criss cross’ your pocket shut apply Tear & Tape at the bottom of the middle section as well as at the bottom of the triangle flap that will be the top layer – for my card the top layer was the left hand flap.

Pocket Card featuring Pansy Patch Bundle

To decorate the front of my pocket I used a Scalloped Rectangle die from the Scalloped Contours set and added a die cut Pansy and leaves from some of the DSP designs. I also carried it through to the insert – this time using some darker leaves. The sentiment on the front and inside of the card are from the Pansy Patch set. The insert measures 9cm x 13.8cm for the Basic White and 9.5cm x 14.3cm for the Calypso Coral mat. For my ‘tab’ I die cut two ‘eyelets’ from the Tailor Made Tags die set and adhered them either side of the insert.

You now have two variations of Pocket Cards to create – which one will you try first?

Until next time …

Yellow Bear Stamping

Technique Tuesday – Gilded Leafing with Heat and Stick Powder

By | October 19, 2021

Hi there

I have another project using the Gilded Leafing and this time we’re combining it with the Heat & Stick Powder from page 167. This is the ‘go to’ page for all the different types of adhesives.

Painted Poppies with Gilded Leafing applies with Heat and Stick Powder

For this card the Gilded Leafing gives a similar effect as heat embossing. I’ve used the Painted Poppies stamp set which is a ‘two-step’ stamp and stamped the solid image in Poppy Parade. Next ink up the outline stamp with VersaMark and stamp onto of the solid image. Apply the Heat & Stick Powder as you would embossing powder and heat until the powder turns to liquid – don’t overheat. Now you’re ready to apply the Gilded Leafing. As my stamped images are small I was able to put them upside down in my container so that the leafing adhered directly to the Heat & Stick. If you have a larger image you will need to place pieces of the leafing on top of the Heat & Stick and gentle push them together to adhere.

Painted Poppies with Gilded Leafing applies with Heat and Stick Powder

This angle gives you a better look at the Gilded Leafing effect. The gold leafing is more ‘sparkly’ than gold heat embossing. The leafing works well on any ‘two step’ stamp like Art Gallery or Hand-Penned Petals.

This card has another technique – have you spotted it? We don’t have any Poppy Parade ribbon so I coloured a length of the White Crinkle Seam Binding Ribbon with my Stampin’ Blends, left it to dry for a bit then adhered a length to the card front before tying a bow. This ribbon is a ‘go to’ one as you can colour it any number of colours to coordinate with your projects.

Check back again next week to see how I use the Gilded Leafing with Adhesive Sheets.

Until then …

Yellow Bear Stamping

Friday Fun Fold – Faux Pocket Card

By | October 15, 2021

Hi there

You may have heard of or made a Pocket Card but have you made a Faux Pocket Card? This was my first attempt at a Faux version and I love how easy it was to create.

Blackberry Beauty Faux Pocket Card

From this view the card base looks as though it’s a ‘pocket’ but in fact it opens up like a normal card.

Blackberry Beauty Faux Pocket Card

My card base measures 10.5cm x 29.7cm and is scored in half. You now want to cut the front in half on the diagonal from the top left (centre fold) to the bottom right. It’s best to decorate your front before adding the cut of portion back onto the card base. My Designer Series Paper (DSP) is from the beautiful Blackberry Beauty Suite on page 44-45 of the current July-December mini catalogue. This paper is stunning – one side is patterned and the other a design which has gold foil accents. My DSP measures 10cm x 14.3cm and was cut on the diagonal. Before adhering the DSP to the cut off triangle you need to flip it over so that the long edge is at the bottom and the short edge is on your right.

Blackberry Beauty Faux Pocket Card

Now that the DSP is adhered we’re ready to ‘reassemble’ the card. As you can see from the photo above the triangle is adhered on top of the base with the long edge at the bottom. I used liquid glue to adhere my triangle – just make sure you only apply glue to where it will be adhered to the card base. To decorate the front I die cut a Scalloped Rectangle from the Scalloped Contours dies, added a die cut Brushed Metallic flower from the Meadow dies plus some Polished Pink Jewels.

Blackberry Beauty Faux Pocket Card

This card was for a ‘special’ birthday and as you get your ‘Gold’ Super card on reaching 65 I created my own ‘Gold’ card for the inside. This also covers up the cross over part of card and gives it a bit more stability.

This is another quick and easy fold to create with a standard card base. Next week I’ll share with you a pocket card so remember to check back.

Until then …

Yellow Bear Stamping

Technique Tuesday – Gilded Leafing with Tear and Tape

By | October 12, 2021

Hi there

Have you tried our Gilded Leafing on page 143 of the Annual Catalogue? This was a carryover product from the January-June Mini Catalogue and I must admit I haven’t used mine much. Over the next couple of weeks I’ll share some ways you can use it with different types of adhesive. First up is using it with Tear and Tape to create a straight edged border to your projects.

Beauty of the Earth - Gilded Leafing with Tear and Tape

To create this look I started with a normal card front of Very Vanilla measuring 10cm x 14.3cm. My Designer Series Paper (DSP) measures 4.5cm x 14.3cm and 2.5cm x 14.3cm. I’ve been using the Beauty of the Earth paper lately for projects and this particular paper is a great design for masculine cards – I need lots of masculine birthday cards for work. The two pieces of DSP are butted up to each other leaving a strip of the Very Vanilla cardstock to lighten the front.

Beauty of the Earth - Gilded Leafing with Tear and Tape

Now the fun begins. Make sure the end of your Tear and Tape has a clean cut edge then adhere on top of the DSP. I added my tape along the edge of the wider piece of DSP. Make sure you get another clean cut of the tape at the other end. I repeated this step on the edge of the other piece of DSP but this time I butted the tape up to the edge of the DSP.

Beauty of the Earth - Gilded Leafing with Tear and Tape

The Gilded Leafing comes in a round container but for ease of use I have put mine in a larger container which has a hinge lid. The leafing is very light weight and if you’re not careful when opening the lid you’ll end up wearing it. Before I emptied the contents into the larger container I put a dryer sheet inside and then emptied the leafing and that certainly helped and it’s not as ‘fly away’ as before. To apply the leafing to my project I then removed the backing from the Tear and Tape and placed the card front face down into the leafing making sure the leafing has adhered to the adhesive tape. Turn it over and ‘brush’ off the excess gilded leafing with a makeup brush or a sponge. I keep a piece of sponge in the container all the time.

This is such a cool effect and can be achieved very easily. The sentiment is from Biggest Wish and has been added with dimensionals.

Beauty of the Earth - Gilded Leafing with Tear and Tape

And for the inside I added the tree from the coordinating stamp set – Beauty of Friendship.

I’ll have another way for you to use this product on your projects so check back next Tuesday.

Until then …

Yellow Bear Stamping

Friday Fun Fold – Bay Window Card

By | October 8, 2021

Hi there

I’m back again with another fun fold card that’s new to me – it’s called a Bay Window Card. It uses a half sheet of A4 cardstock and with 5 easy scores you have a fun fold card.

Beauty of the Earth Bay Window Fun Fold Card

This card design has been around for awhile and was so easy to make. It folds flat so is a good design if you need to post it rather than give in person.

Beauty of the Earth Bay Window Fun Fold Card

You can see why it’s called a ‘Bay Window’ card from this angle. It’s a great way to showcase our wonderful Designer Series Paper (DSP). Here I’ve used two designs from the Beauty of the Earth paper. The three centre panels really show off the paper.

Beauty of the Earth Bay Window Fun Fold Card

And here’s a view from the top. The front panel tucks in behind the small label (die cut from Stitched So Sweetly) which is attached with dimensionals to the base of the card.

Beauty of the Earth Bay Window Fun Fold Card

I’ve put my sentiment (from Color & Contour) at the bottom of the inside panel instead of my normal middle to allow me an uninterrupted space to write my message.

I had fun making this card – I’ve seen some other variations of this card so might just have to give them a go too.

Until next time …

Yellow Bear Stamping

Technique Tuesday – Chalk Pastels and Dry Embossing

By | October 5, 2021

Hi there

Who knew the Chalk Pastels were so versatile? Today’s project features another technique for you to try with the Chalk Pastels and an Embossing Folder. I’ve chosen the Seashells 3D Embossing Folder. These aren’t normal colours I would have chosen to use with this folder but I actually really like how it turned out. The Chalk Pastels come in a box of 8 colours

Chalk Pastels

For my card I’ve used all the colours – some images have two colours combined.

Seaside Seashells 3D Embossing Folder with Chalk Pastels

First off I dry embossed a piece of Basic White with the Seashells 3D Embossing Folder then die cut it with the coordinating Seaside Seashells die – some of the images needed a bit of ‘fussy cutting’ to get them as individual pieces. Next the colouring. With the Chalk Pastel flat I rubbed it across the embossed image. To begin with I was disappointed with the look as only the ‘raised’ portions of each image had been coloured. Using a trusty Cotton Bud I spread the chalk dust so that the entire image was coloured – much happier with this technique. I then went over the top again to add more definition. The shell on the far right was first coloured with Mango Melody and then I added a bit of Poppy Parade to create a more ‘orange’ colour. The underwater ‘greenery’ is a mix of Mossy Meadow and Granny Apple Green.

Seaside Seashells 3D Embossing Folder with Chalk Pastels

For my ‘bling’ I used the Opal Rounds which carried over from the last mini catalogue. To create my background I used a Blending Brush and Pacific Point ink. The sentiment is from Peaceful Moments.

You can check out the previous two techniques I’ve shared here and here using the Chalk Pastels. I hope these projects have inspired you to try out the Chalk Pastels. If you’re interested in ordering them or anything else head on over to my online store or contact me directly.

Until next time …

Yellow Bear Stamping

Friday Fun Fold – Side Flap Card

By | October 1, 2021

Hi there

I came across a card idea I’d saved from years ago and decided to recreate it to fit our metric cardstock and current products.

The original card used half a sheet of cardstock for the base and the flap. What I wanted for my card was to recreate the ‘flap’ on the side and still have the card being a standard sized card. To achieve this I added an extra bit of cardstock for my ‘flap’.

Side Flap Card using Pansy Patch Suite and Basic Borders Dies

And here is my finished card featuring products from the Pansy Petals Suite. I used a half sheet of cardstock (10.5cm x 29.7cm) scored in half with the fold being on the right hand edge. I then attached the ‘flap’ to the left hand side of my base. The ‘flap’ measures 10.5cm x 7.5cm – scored at 2cm. Before creating my decorative edge I adhered a piece of Designer Series Paper (DSP) measuring 10.5cm x 5.5cm. The Basic Borders Dies has six different designs – I liked the scalloped stitched edging to coordinate with the scalloped circle mat behind the pansies. The ribbon is adhered to the back of the card on top of the join so looking at the back you wouldn’t know the ‘flap’ had been added. All the components for the front were bits I had lying around on my desk – I’ve given myself a challenge to use them up and not have them just ‘sit’ there and then eventually get thrown out.

Side Flap Card using Pansy Patch Suite and Basic Borders Dies

To break up the ‘whiteness’ of the inside I adhered another piece of coordinating DSP from the Pansy Petals but you could stamp another image on here if you liked or use it for writing your message. When I use a White or Vanilla base I like to add a coloured mat to the insert so for this card I used the same colour as the ribbon – Polished Pink.

I hope you’ve enjoyed this new quick and easy fun fold – until next time …

Yellow Bear Stamping

Technique Tuesday – Chalk Pastels and VersaMark

By | September 28, 2021

Hi there

I’ve got another technique to share today using our Chalk Pastels, VersaMark, a Sponge Dauber and a Cotton Bud.

Chalk Pastels - applied to stamped VersaMark w=image with Sponge Dauber

For this card I stamped the large image from Forever Blossoms with VersaMark to the largest tag from the Tailor Made Tags dies. To apply the Chalk I ‘scribbled’ some to my desk pad and then using a Sponge Dauber picked up the chalk dust and applied it to the image in a dabbing motion. I also used a Cotton Bud in the same way to apply to the smaller parts of the image so as to stay within the lines.

Chalk Pastels - applied to stamped VersaMark w=image with Sponge Dauber

I’ve used Gorgeous Grape for the flowers, Granny Apple Green for the leaves and Mossy Meadow for the stem. I wasn’t going to purchase the Stitched Greenery Die as I wasn’t use how much I’d use it – well this is now my ‘go to’ for backgrounds. It’s quick and easy to transform a plain white background into a subtle white background.

Chalk Pastels - applied to stamped VersaMark w=image with Sponge Dauber

And then for the inside I restamped a portion of the large stamp and coloured it. I like having my inside images going ‘off the page’. Did you notice the Granny Apple Green ribbon on the tag? This was created by colouring the White 1/4″ Crinkled Seam Binding Ribbon with my Granny Apple Green Stampin’ Blends. That means I can get whatever colour I want using my Blends.

I hope that you can see the possibilities that the Chalk Pastels offer to creating wonderful projects.

Until next time …

Yellow Bear Stamping

Friday Fun Fold – Delightful Tag Topper Card

By | September 24, 2021

Hi there

Today’s card is another variation on a Gate Fold card – it uses the Delightful Tag Topper punch to create the closure.  I love it when our products have more than one use. I’ve created a number of this style of card in the past and previously I had used the Scallop Tag Topper Punch – you can check out a previous design here which also uses the punch to create a ‘chocolate’ holder.

Delightful Tag Topper Gate Fold Card

This card uses a standard size card base 14.8cm x 21cm. Before you can score your centre fold you need to create the closure. I make a pencil mark on both edges so that I can then line the punch up to ensure the ‘flaps’ are in the same position. For this card I decided to punch extra ‘flaps’ from the Designer Series Paper (DSP) and cover them rather than leaving them as just cardstock.

Delightful Tag Topper Gate Fold Card

I’ve used the Nothing’s Better Than stamp set for my card along with DSP from the In Good Taste paper pack. I couldn’t decide which colour to use for my card base so have used a favourite – Gray Granite which has a coordinating ribbon which I used to secure the card closed. I carried the cups and saucers – which could be for tea or coffee – to the inside and stamped the sentiment at the bottom to allow room to write the message.

Delightful Tag Topper Gate Fold Card

Having been in lockdown here in Auckland for going on 5 1/2 weeks and still another 1 1/2 to go I plan to send this card to a friend to book in an ‘in-person’ coffee when we are able.

Until next time …

Yellow Bear Stamping

Technique Tuesday – Chalk Pastels

By | September 21, 2021

Hi there

Did you know we now stock an assortment of Chalk Pastels? They can be found on page 126 of the Annual Catalogue. I bought mine back in July and final got them out of the wrapper – how bad is that? There are 8 colours – Night of Navy, Granny Apple Green, Coastal Cabana, Mossy Meadow, Gorgeous Grape, Poppy Parade, Mango Melody and Daffodil Delight.

Chalk Pastels

There are a number of ways you can use them – with a Blender Pen or Water Painter, a Sponge Dauber, Embossing Paste or direct to cardstock as I’ve done in my project today.

Chalk Pastels - direct to cardstock using Color & Contour stamp set

I’ve used the Color & Contour bundle along with the Daffodil Delight, Mango Melody, Poppy Parade, Granny Apple Green and Mossy Meadow Chalk Pastels. I wanted a nice dark black stamped image so used Jet Black StazOn ink. NB: remember to clean your stamp with StazOn cleaner when using StazOn ink. The flowers have been coloured in with a mix of Daffodil Delight and Mango Melody with a small amount of Poppy Parade and then blended together. You can either use you finger or a Cotton Bud. For the leaves I used Granny Apple Green and a touch of Mossy Meadow – again blended together. I deliberately went over the lines when I was blending the colours to give the overall image a softer look.

Chalk Pastels - direct to cardstock using Color & Contour stamp set

For the inside I stamped one of the other images from the set partly off the cardstock and coloured it the same way. The Artistry Blooms Adhesive-Backed Sequins were the perfect finishing touch for my project – they come in four colours – Calypso Coral, Coastal Cabana, Rich Razzleberry and Mango Melody.

I hope to have another play with the pastels and try the other methods I mentioned above – so keep an eye out for more projects with this product. Don’t forget to check them out on page 126.

Until next time …

Yellow Bear Stamping

Friday Fun Fold – Folded Paper Frame

By | September 17, 2021

Hi there

One of the good things about sharing fun fold cards with you each week is that I get to revisit and recreate projects that I haven’t done for years. Todays project isn’t a ‘fun fold’ card as such but has a fun fold element to go on your card and is another great way to use your gorgeous Designer Series Paper (DSP).

Folded Paper Frame - Pansy Petals Suite

What do you think? – isn’t this a great alternative to highlight your stamped images or as I’ve done create a 3D image with stamped components. The Pansy Petals Suite worked so well for this card – DSP, stamps and dies.

Folded Paper Frame - Pansy Petals Suite

The Folded Paper Frame is easy to make and requires a 4 1/4″ square of DSP. I used my Simply Scored Scoring Tool to make it easier to score the diagonal lines that create the fold back flaps to the frame. These lines are scored at 1″ and 1 1/2″ on all four sides. The inside square that you can stamp or attach your stamped images to is a 2 7/8″ square.

Folded Paper Frame - Pansy Petals Suite

When I started making this card I wasn’t sure what I was going to put ‘inside’ my frame. The answer was already on my desk. I found some stamped and die cut images from a previous project so all I needed was the stem to create my floral arrangement. To soften the background for the image I applied Pacific Point ink with my Blending Brush for a sky effect.

The Folded Paper Frame can be attached to a landscape or portrait card as shown in this blog post.

I hope you give this fun fold frame a go – I’d love to see how you decorate it.

Until next time …

Yellow Bear Stamping

Technique Tuesday – One Layer Cards

By | September 14, 2021

Hi there

I fellow demonstrator recently shared a card she had made that had only one layer – the card base – so I thought I’d give it a go. It’s actually harder than it seems – getting some depth to your project by just using stamps and ink. This was a first for me.

One layer card using only stamps and ink - Beauty of the Earth

To start I created a mask around the edge of the card leaving a 3/4″ border using Post-It Notes. Using Pacific Point and a Blending Brush I applied ink to fully cover the unmasked area. TIP: once you’ve inked up your brush start off your project on your scrap paper and slowly work in a circular motion onto the area you want coloured. This will help to get an even application of ink. If you need to reink your brush repeat the process. If you start on your project 9 times out of 10 you’ll be too heavy handed with the pressure and end up with a dark patch – trust me I’ve learnt the hard way.

One layer card using only stamps and ink - Beauty of the Earth

Once you’re happy with the coverage stamp your image. The foliage stamp from the Beauty of Friendship set is a two-step stamp which means there are two different images that get stamped to make up the full depth of the foliage. For this example I stamped both images in Mossy Meadow and then added some ‘blossoms’ using Flirty Flamingo. After stamping my tree I felt my project still needed something more and knowing it was a ‘one layer’ card I searched my stamp sets and found the ‘birds’ from Beautiful Moments. Having the birds at two different heights gives the card some depth too.

One layer card using only stamps and ink - Beauty of the Earth

I had fun making the first card so thought I’d try a ‘take two’. This time I changed the orientation so that I could stamp more trees. The process was the same with the Post-It Notes and applying ink. TIP: previously when I’ve wanted some ‘sky’ I’ve used Balmy Blue but haven’t been completely happy with the colour so I tried Pacific Point which I feel gives a truer ‘blue’. I’d never used it before as I thought it would be too bright but when applied with a Blending Brush it ticks the box.

One layer card using only stamps and ink - Beauty of the Earth

The middle tree trunk is stamped at full strength but the left and right trunks have been stamped with the ‘stamped off’ technique as used in this blog post. For a more ‘spring’ look I used Granny Apple Green for the foliage using only one image for the left and right trees. This image gives the effect of two stamps – part of the image is solid and part is lighter – I love this effect. For the centre tree I stamped part two of the two step in Garden Green for extra definition and depth. You can just see the inside tree which has been partially stamped off the card base.

Well there you have another technique to try – can you create a one layer card with only stamps and ink?

Until next time …

Yellow Bear Stamping