Fun on Wheels Slider Card

By | June 17, 2023

Hi there

I hope you’re enjoying the new Annual Catalogue and the new In Colours – do you have a favourite colour yet? Pebbled Path is a favourite and coordinates with lots of colours. Wild Wheat was my least favourite but it’s starting to grow on me the more I use it.

When I first looked through the catalogue the Fun on Wheels bundle (page 90) jumped out at me and I knew who would be the first recipient of a card made with this bundle. My brother is a ‘MAD’ keen cyclist and thinks nothing of going for a 100 – 150km (62 – 93 miles) bike ride on a Saturday morning.

Last week he celebrated his birthday and here’s the card I made for him – it’s a slider card.
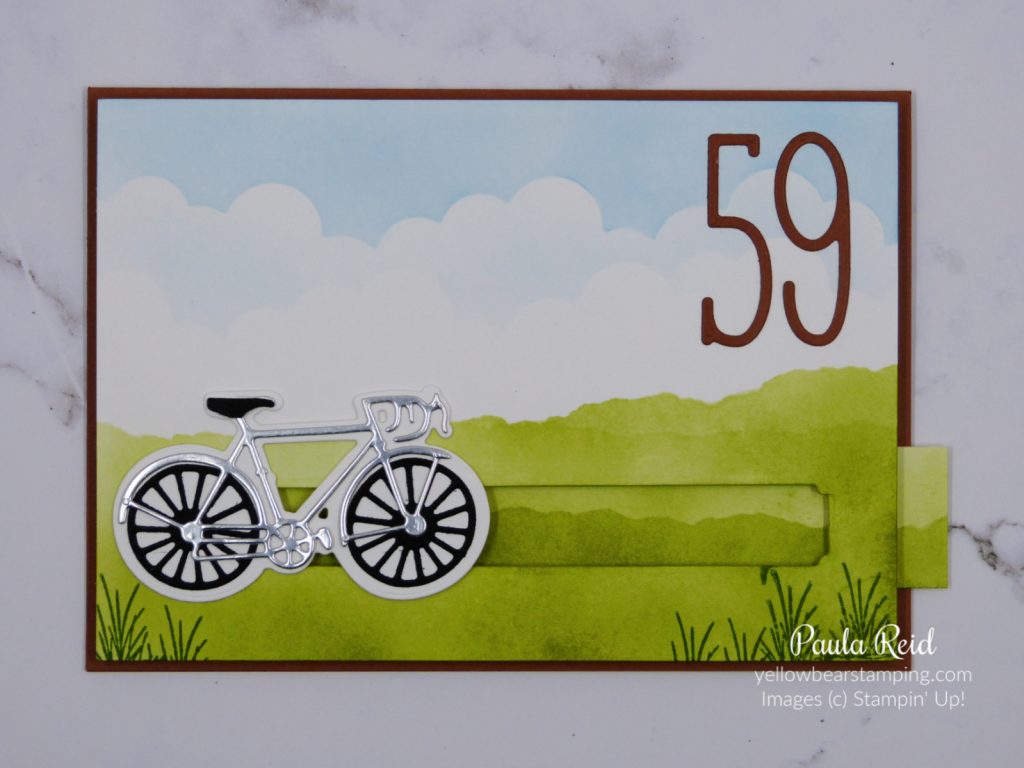
The bike moves across the front of the card by pulling the strip that is sticking out on the right. It also reveals the sentiment as the bike moves along. The background ‘scene’ has been created using blending brushes, ink (Azure Afternoon for the sky and Old Olive for the grass) and the Basic Borders dies.
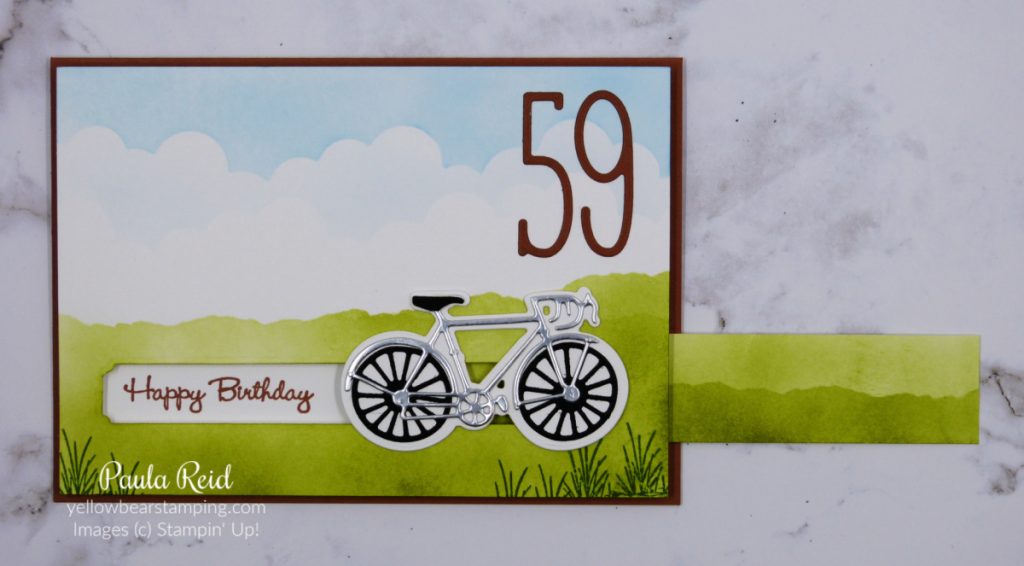
The bike has been die cut in two parts – the frame and the wheels – then adhered onto a solid bike die cut. To make it easy to adhere I added Adhesive Sheets to my cardstock/foil before die cutting. Adhesive Sheets are a must in my craft space – if you don’t own any I highly recommend adding them to your next order – they are so useful and save you getting glue everywhere.

Check out my business Facebook page for a video of the card in action.
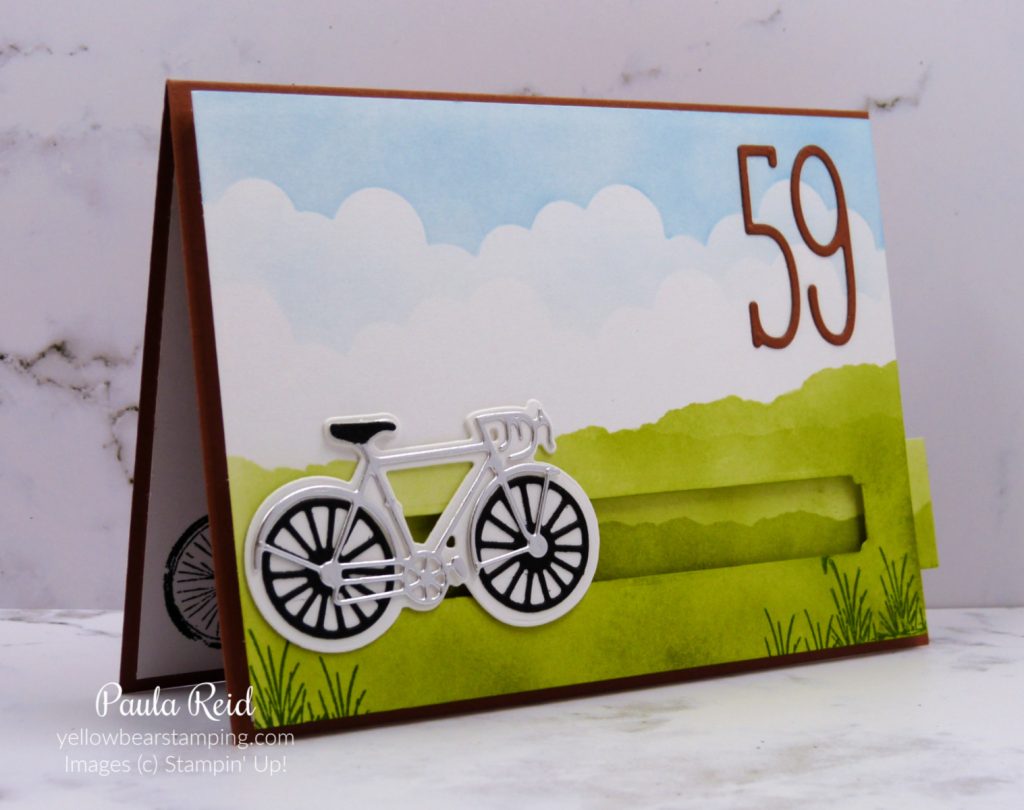
If you haven’t received a copy of the new 2023-2024 Annual Catalogue and would like one please let me know and I’ll get one sent to you.

Until next time …

Starter Kit+ Joining Offer for June

By | June 8, 2023

It’s a fabulous time to join Stampin’ Up! – sign up this month and get even more FREE product in your customisable Starter Kit. Sign up between 1–30 June and you’ll get to select $285 NZD $333 NZD worth of products for only $189 NZD + free business supplies + free shipping + all the fun being a part of Stampin’ Up! There are many additional benefits of being a demonstrator beyond the ability to earn commission on sales and receive discounts on your orders.  As a demonstrator you’ll have early access to products, demonstrator only events, access to training, connection with stamping friends around the globe and be part of my team.

If you want to know more, check out Join Stampin’ Up! – to take advantage of this amazing offer sign up before 30 June.  I would love to have you join my team.

Designer Series Paper Sale – 1st to 30th June

By | June 7, 2023

We all love beautiful Designer Series Paper, so from now until the 30th June, you can enjoy a 15% discount on select Designer Series Papers from our new 2023–2024 Annual Catalogue and Online Exclusives. Whether you’re a scrapbooker, a card maker or simply a paper lover, this is a great time to stock up and save on gorgeous paper so you have artistic and versatile paper designs on hand for your next projects!

All Designer Series Paper on pages 129-132 of the Annual Catalogue are included in this sale plus Hello, Irresistible our Online Exclusive paper offering.

You can place an order via my online store or directly with me.

Wisteria Wishes – Three different looks

By | April 11, 2023

Hi there

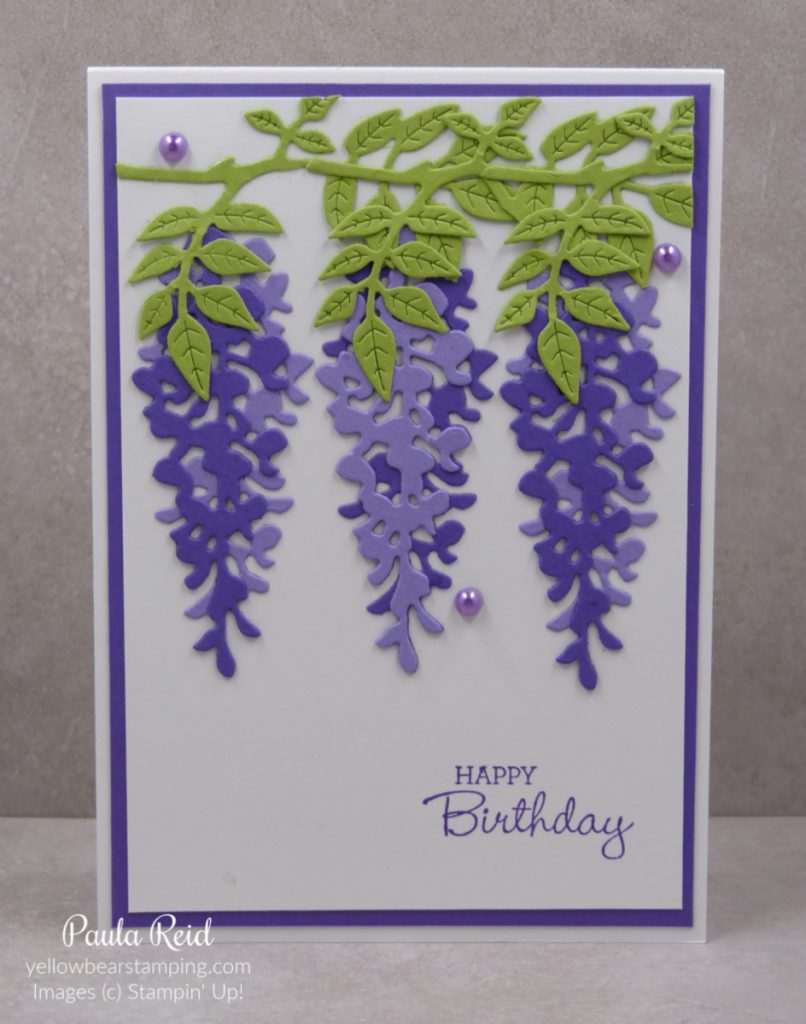
Over the coming weeks I’ll share some projects featuring some of our retiring products – first up we have the Wisteria Wishes bundle. A number of the stamped images have a coordinating die which makes it so much easier to cut out – better than ‘fussy cutting’. There are also stand alone dies that create a two layered Wisteria flower. Both the stamped and die cut flowers can be used ‘hanging’ or around the other way to create flowers. My first card uses only the dies.

Wisteria dies

To create my Wisteria I’ve die cut the two images in two colours – Highland Heather and Gorgeous Grape – then ‘mixed and matched’ them. I cut a couple of the ‘greenery’ dies from Old Olive and layered them on top of each other to create the vine. The Highland Heather Pastel Pearls just finish it off.

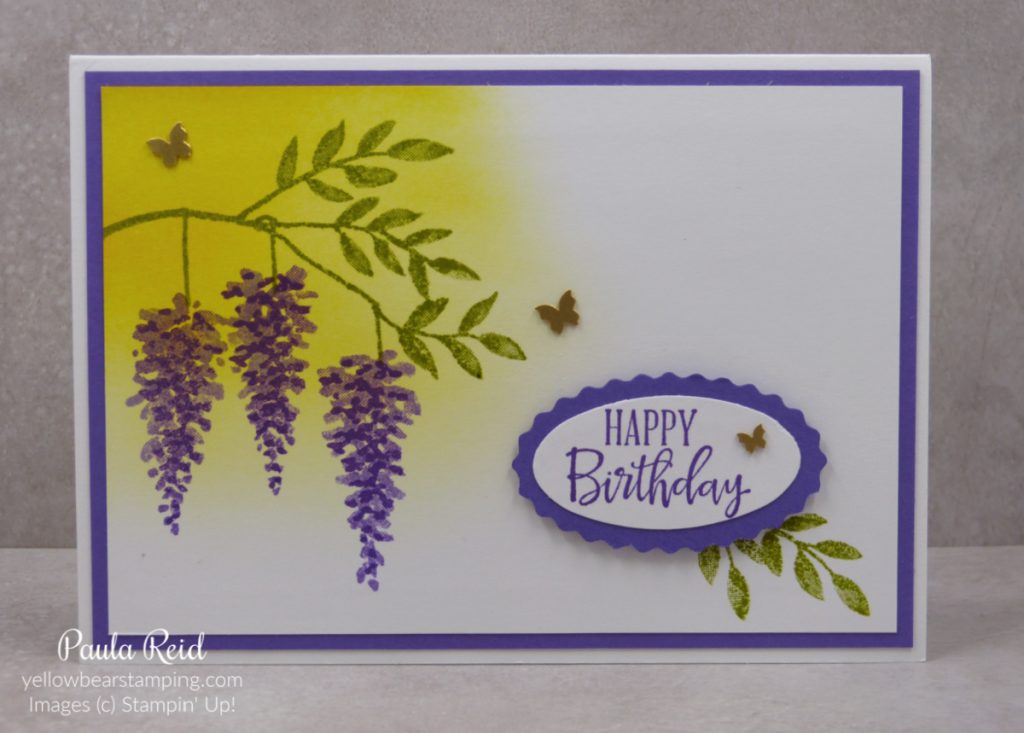
Wisteria Wishes stamp set

My second creation is a CASE based on a card from Su Mohr and uses only the stamps. I loved how she had the ‘yellow’ glow behind the Wisteria. Even though this card is a single layer card – pretty much ink only – you can create depth by having the two step/two tone image. I love using a white base with a coloured mat and then the image on top of that. My embellishment for this card was the Brushed Brass Butterflies – I’m glad they’re carrying over.

My last card is a combination of stamps and dies.

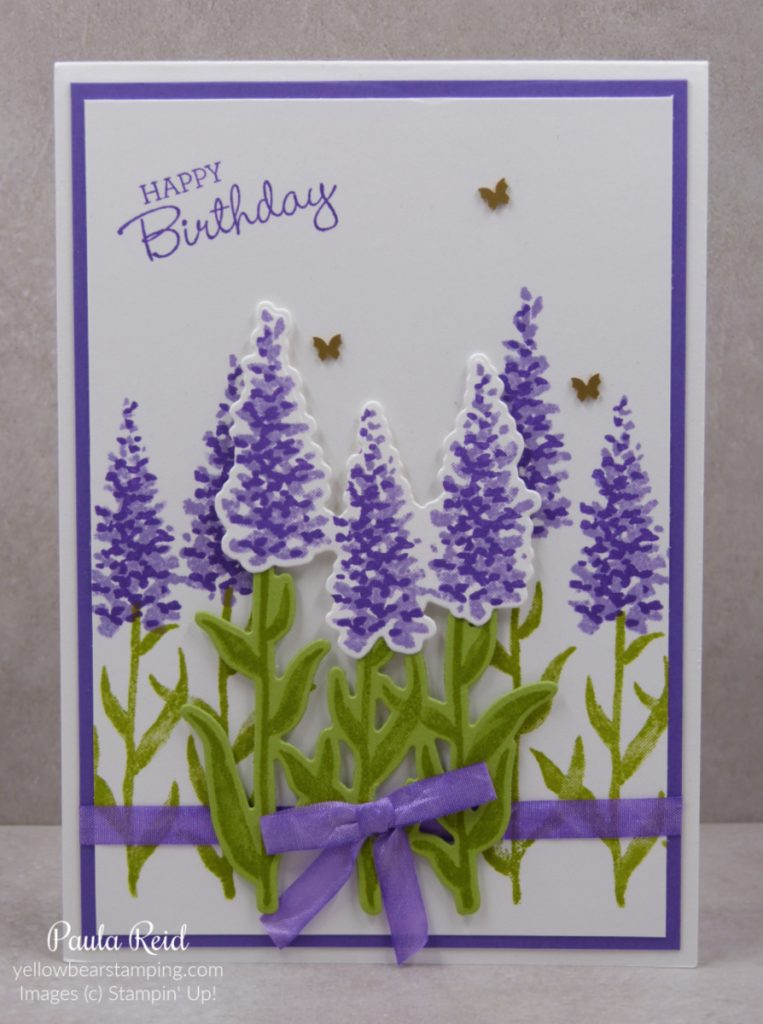
Wisteria Wishes Bundle - stamp and dies

The stamped images – flowers and stalks – come as three on the one stamp. For the background images I stamped them so that one went off the edge giving the illusion of a row of flowers in a field. To give the card some extra dimension I stamped the images on scrap cardstock then die cut them and adhered them with dimensionals. I didn’t have any coordinating ribbon so I coloured some of the White Crinkled Seam Binding Ribbon with my Highland Heather Stampin Blend. I will be sad to see this ribbon go as it was so versatile. I do love the little butterflies hovering over the flowers.

If you like these projects and want to create them for yourself it’s not too late to purchase the Wisteria Wishes bundle.

Faux Centre Step Cards

By | April 5, 2023

Hi there

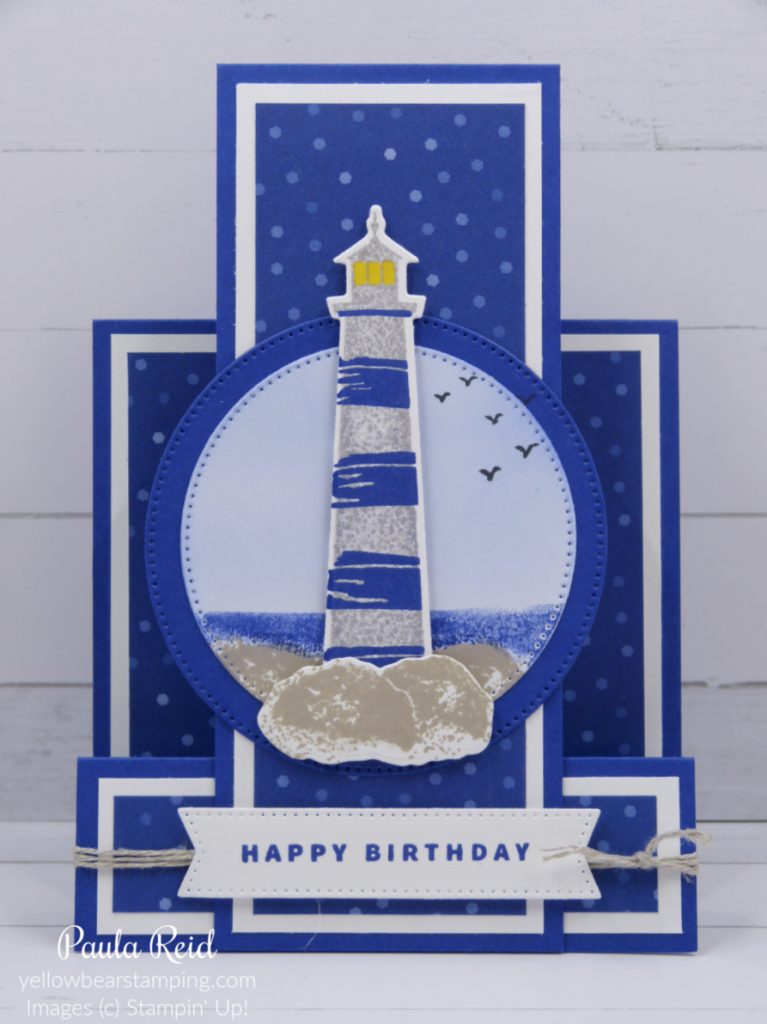
I was in need of two special masculine birthday cards recently and found an easy but effective card to create – it’s called a Faux Centre Step card. I did make some slight adjustments from the tutorial I was CASEing to fit my metric cardstock.

Lighthouse Point Faux Step Card

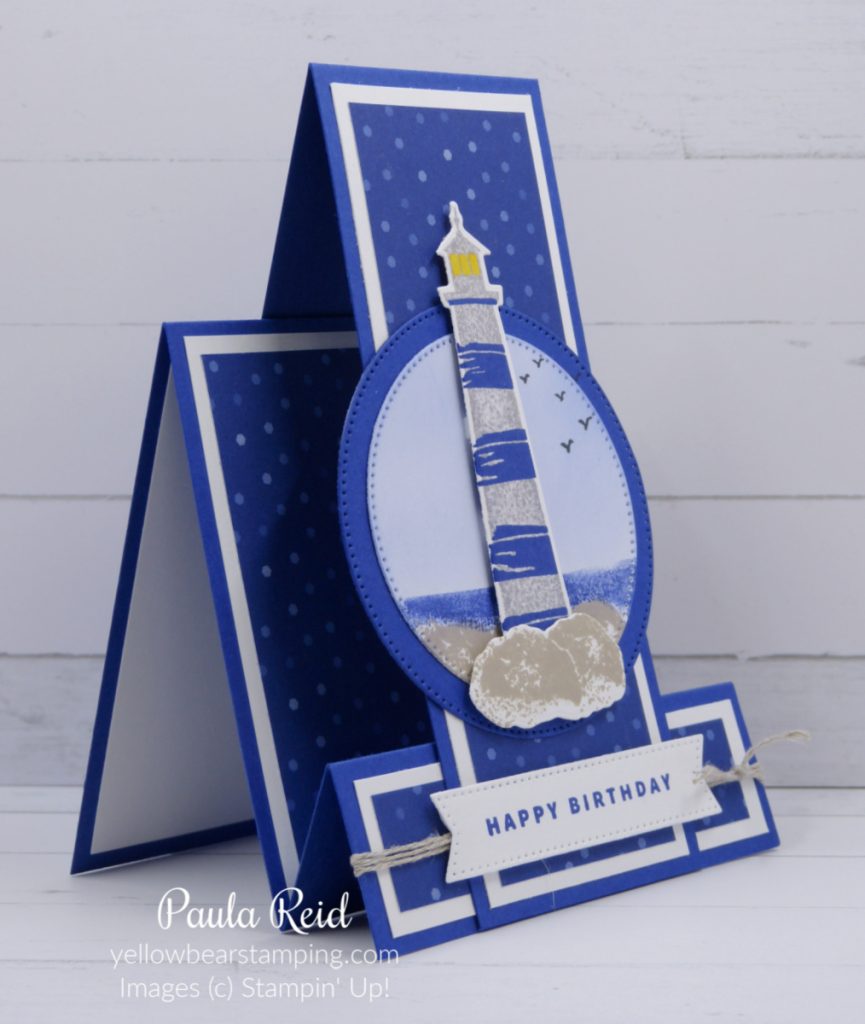
I decided for my first attempt I would CASE the card as per the tutorial (thanks Pat’s Card Corner). It features the Lighthouse Point Bundle which is sadly retiring at the end of this month. The base cardstock is Starry Sky with the coordinating In Colour 6″x6″ Designer Series Paper (DSP).

Step cards are normally one piece of cardstock with a couple of cuts and various score lines to create the folds – check out some previous blog posts featuring two variations here and here.

For the ‘Faux’ design you have two main pieces – the base and then the centre panel which only require scoring.

Faux step card using Lighthouse Point

The fun part was creating the ‘scene’. For the sky I applied a light layer of Starry Sky ink with a Blending Brush coming down to almost the bottom of the circle and then added the rocks at the bottom using Sahara Sand (which is retiring). I then filled in the gap with the water stamp using Starry Sky. The lighthouse is stamped in Smoky Slate with the ‘bands’ stamped in Starry Sky. This is then adhered with dimensionals and extra rocks are added over the top.

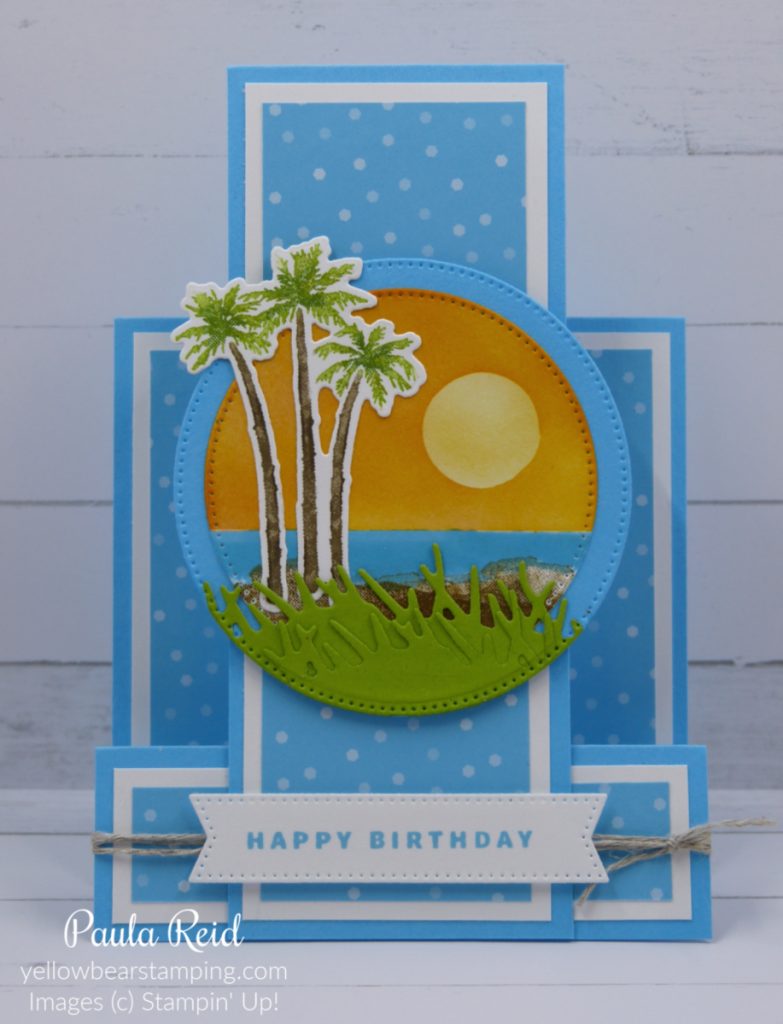
As mentioned earlier I needed two cards so kept with the style of card but changed the stamp set and colours.

Faux step card using Paradise Palms

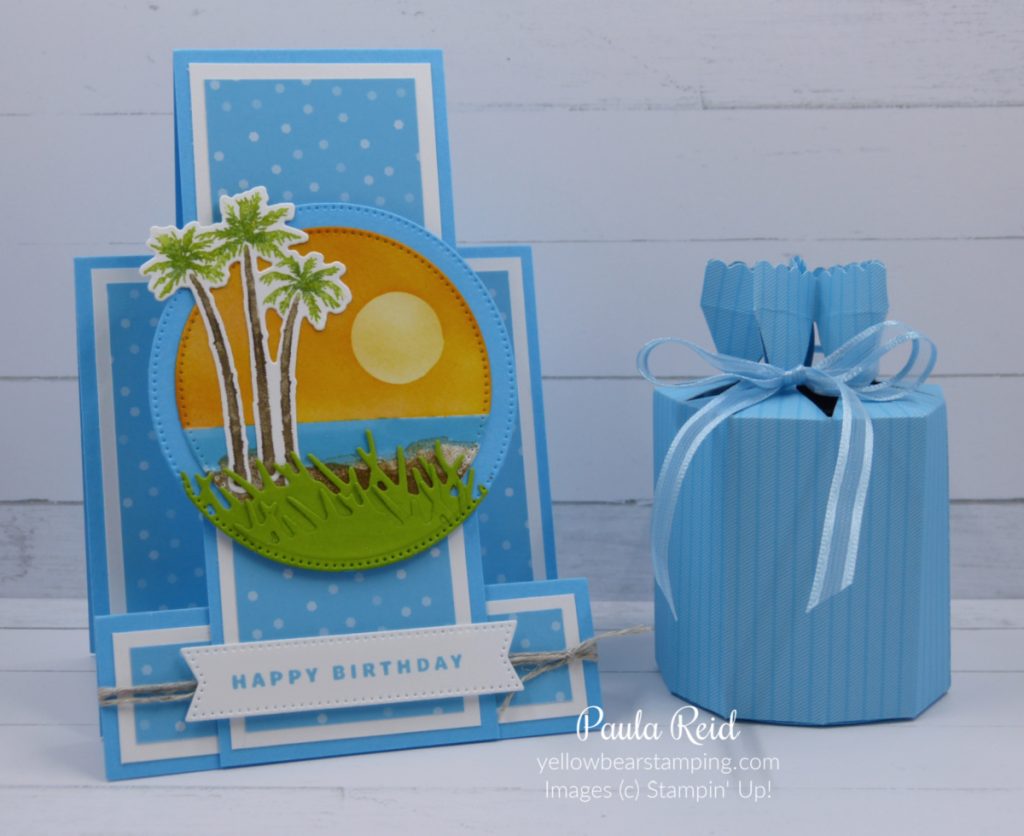
For this card I’ve used the Paradise Palms Bundle which is also sadly retiring. The base for this card is Tahitian Tide. The three palms is one stamp so to get two colours on the one image I used my Stampin Write Markers and the ‘direct to rubber’ technique. I used a couple of different ‘greens’ together for the palm fronds.

Faux step card using Paradise Palms and gift box made with Cracker and Treat Box die

This card was being hand delivered so I made a gift box using the Cracker & Treat Box Die (which is carrying over) and filled it with chocolates.

If you’ve missed receiving my latest update and you would like to receive a copy, please head to the top of my blog to sign up.

Until next time …

Dainty Delight Fun Fold – Gatefold Pop Out Card

By | March 20, 2023

Hi there

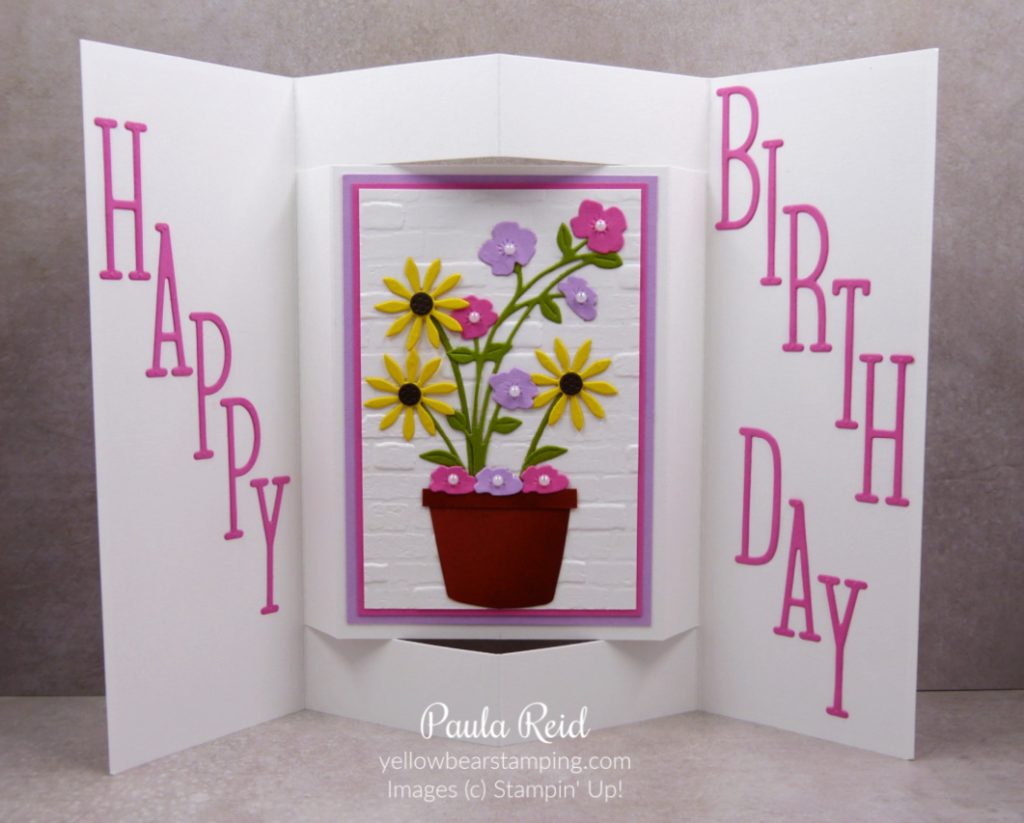
A friend had a big ‘0’ birthday last month and I wanted to make her a special card to celebrate this milestone. I love making fun fold cards and had seen a ‘new to me’ fold called a Gatefold Pop Out card. After a quick Google search I found some instructions for an oversized card which was perfect for what I was wanting.

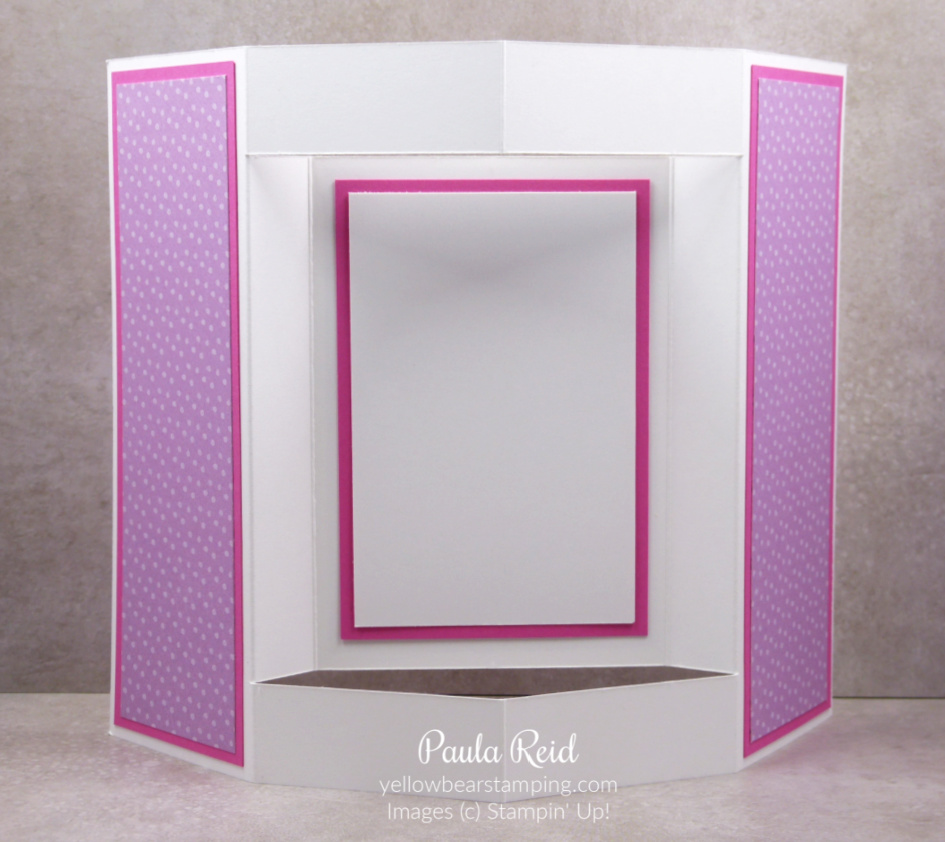
It looks complicated but once you’ve done the cuts the scoring is easy and then it’s a matter of ‘mountain’ or ‘valley’ folding on the score lines to create this fun fold card. I used Thick Basic White for my card base as it nice and firm.

I was glad of the oversized card as it allowed me to use the new Alphabet A La Mode dies. I love the thinness of these dies allowing you to make longer words to fit on your projects. To make it easy to adhere the letters I used our Adhesive Sheets. Adhesive Sheets are great for fine and delicate dies that are often hard to add adhesive to without getting the adhesive everywhere.

I had made a swap for a team event using the flower pot design and so I CASE’d (Copy And Share Everything or Copy And Selectively Edit) my own idea for this card. The flowers have all been cut using the Dainty Delight dies. The Brick and Mortar embossing folder works well for the background to the flowers.

The back of the card allows plenty of room to add your message and when the card is on show your message is out of view.

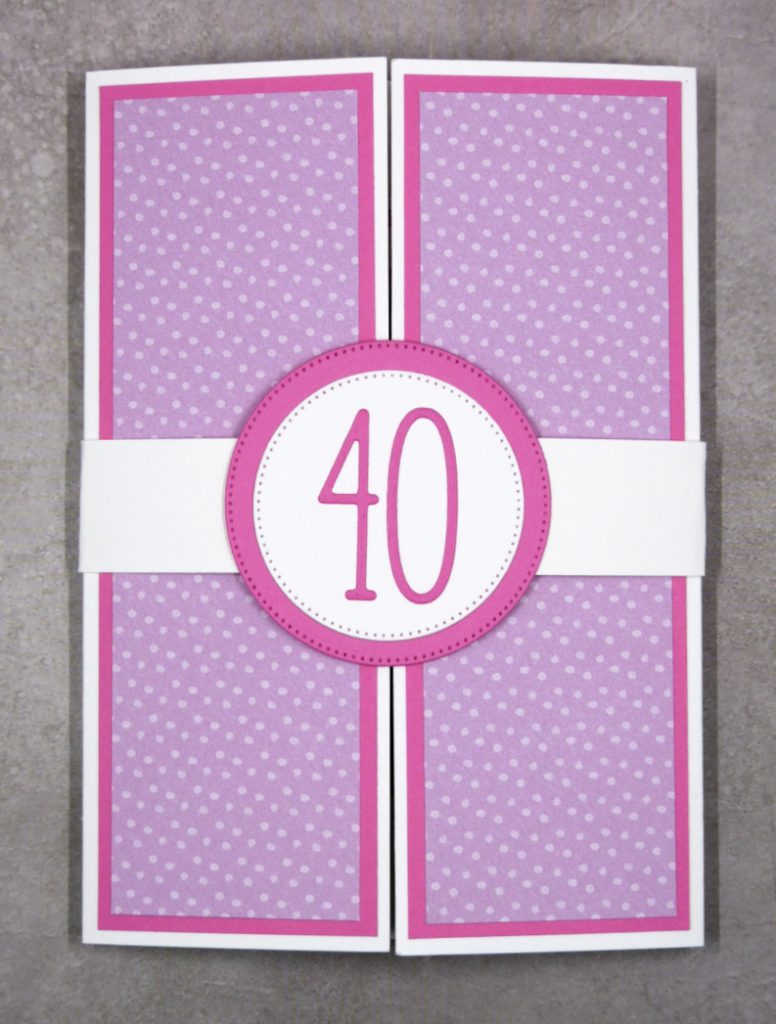
I made a belly band to keep the card closed and added the all important ’40’ to the front. As the card was taller than a normal card (from memory it was 8″ high) I was glad of 12×12 paper to adhere to the front panels.

I now need to sort the measurements for a normal sized metric card. I love a challenge like that so watch this space.

I hope you’ve enjoyed seeing this cool fold.

Until next time …
Beautifully Happy with Dandy Designs

By | March 13, 2023

Hi there

Yesterday I shared the a card featuring the Dainty Delight bundle that I taught at a recent event. The second card I taught featured two Sale-A-Bration items – the Beautifully Happy stamp set and Dandy Designs Designer Series Paper (DSP). Unfortunately Sale-A-Bration has now finished but you could easily change the image and paper to supplies you have on hand. I like the layout of this card and it could be ‘upsized’ to a full sized card instead of the Notecard size.

Notecards using Beautifully Happy and Dandy Designs DSP

Beautifully Happy is a two set stamp. This means you stamp the outline image first then add in colour with the solid image stamps. Stamping in Memento Black can sometimes give too dark or strong an outline so for these cards we used Basic Gray or Gray Granite. For the flowers we used Calypso Coral or Fresh Freesia and the leaves were Soft Succulent or Soft Sea Foam to coordinate with the Dandy Designs paper.

Once the image had been stamped we die cut a portion using the second largest stitched circle from the Stylish Shapes Dies. This die set is my ‘go to’ set – it contains circles, squares and a variety of banner dies.

We used the same sentiment – Happy Birthday – from the Something Fancy bundle – stamped in Basic Gray and die cut with the coordinating die. When you want to add a coloured mat but don’t have a die the next size up you can do a partial mat as we have done here. Die cut the same shape from your coloured cardstock and just have a small amount showing at the bottom.

Well that’s all for now – until next time …

Dainty Delight Bundle and Artistic Mix Decorative Masks

By | March 12, 2023

Hi there

After taking a break from blogging, social media and sending out regular newsletters I’m ready to get back into my paper crafting journey. I hope you’ll join me as I share my creations with you.

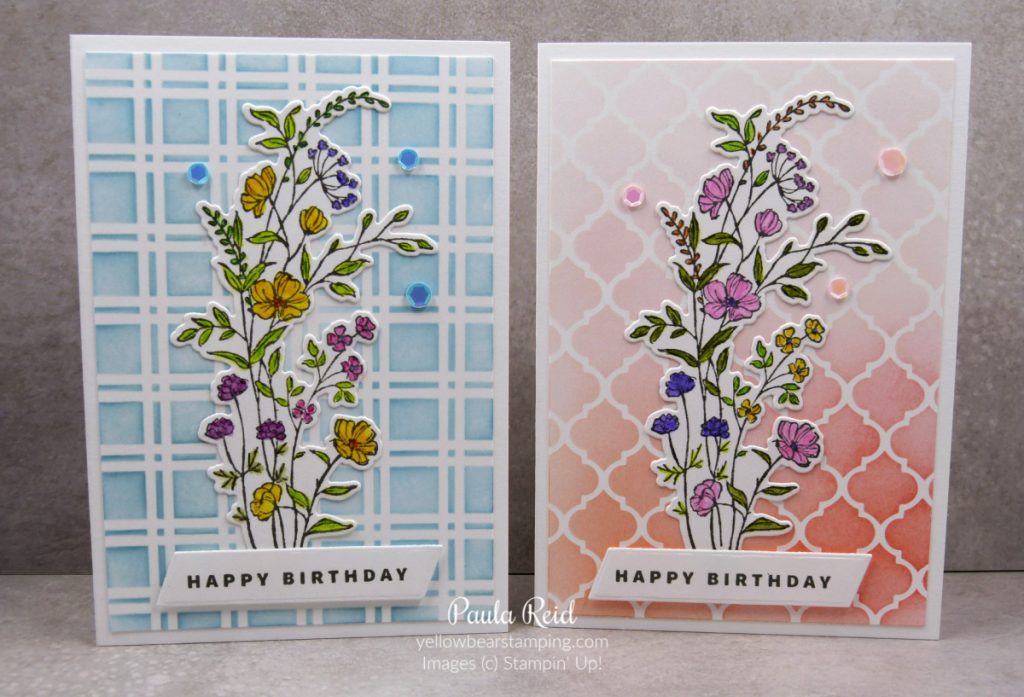
Last month I held a workshop with a lovely group of ladies and taught two cards. The first card features one of my favourite bundles from the January-April Mini Catalogue – the Dainty Delight Bundle (Page 55). This bundle consists of a stamp set and coordinating dies. When you purchase one of our bundles (stamp and dies or stamp and punch) you save 10% on the total cost.

Notecards using Dainty Delight Bundle with Artistic Mix Decorative Masks for the background

The Dainty Delight stamp set has five line art images and four sentiments. I love line art images as they allow a range of colouring techniques to be used. The image was stamped with Basic Gray and then coloured in with our Watercolour Pencils before being die cut with the coordinating die. Using the pencils allowed everyone to colour their flowers as they liked.

To add some colour and depth to the background we used the Artistic Mix Decorative Masks and Blending Brushes from the Annual Catalogue. I gave two options of design and colour – Pacific Point on the left or Flirty Flamingo on the right.

The sentiment is from the Something Fancy Bundle (Page 17). I have used this ‘Happy Birthday’ stamp so much and love the coordinating die that cuts it out perfectly.

No card is complete without some form of embellishment and here we used the Pastel Adhesive -Backed Sequins from the Country Floral Lane Suite (Page 9).

I hope you’ll check back tomorrow when I’ll share the second card we made.

Until next time

Split Circle Cards – CI#114

By | February 2, 2022

Hi there

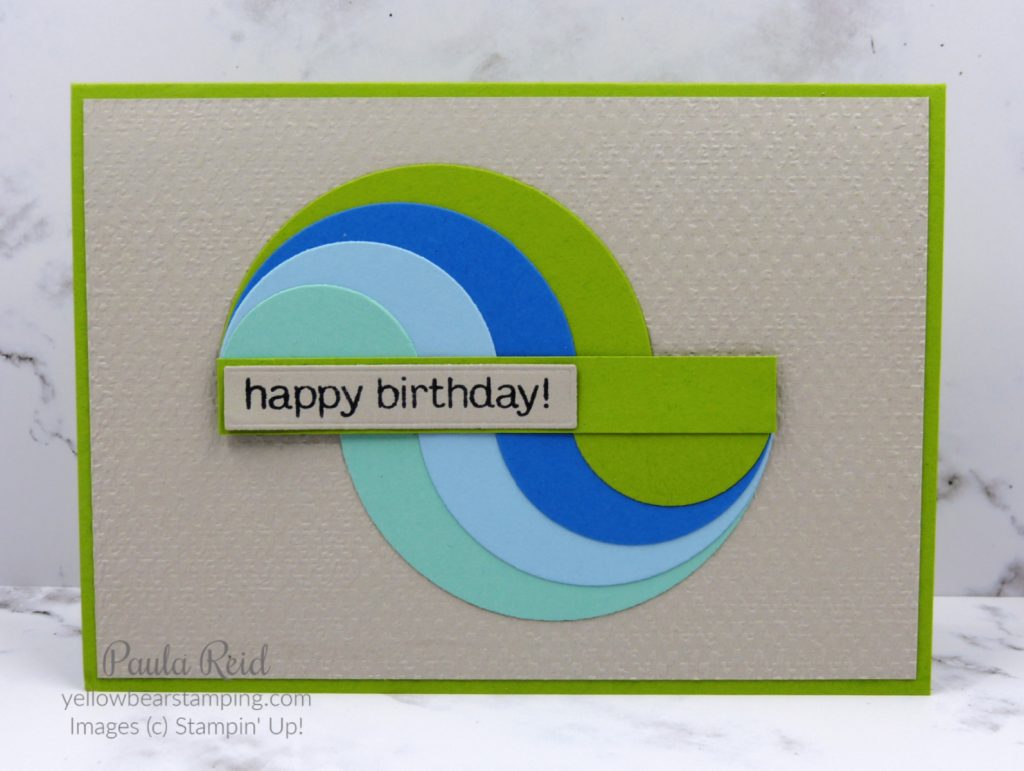
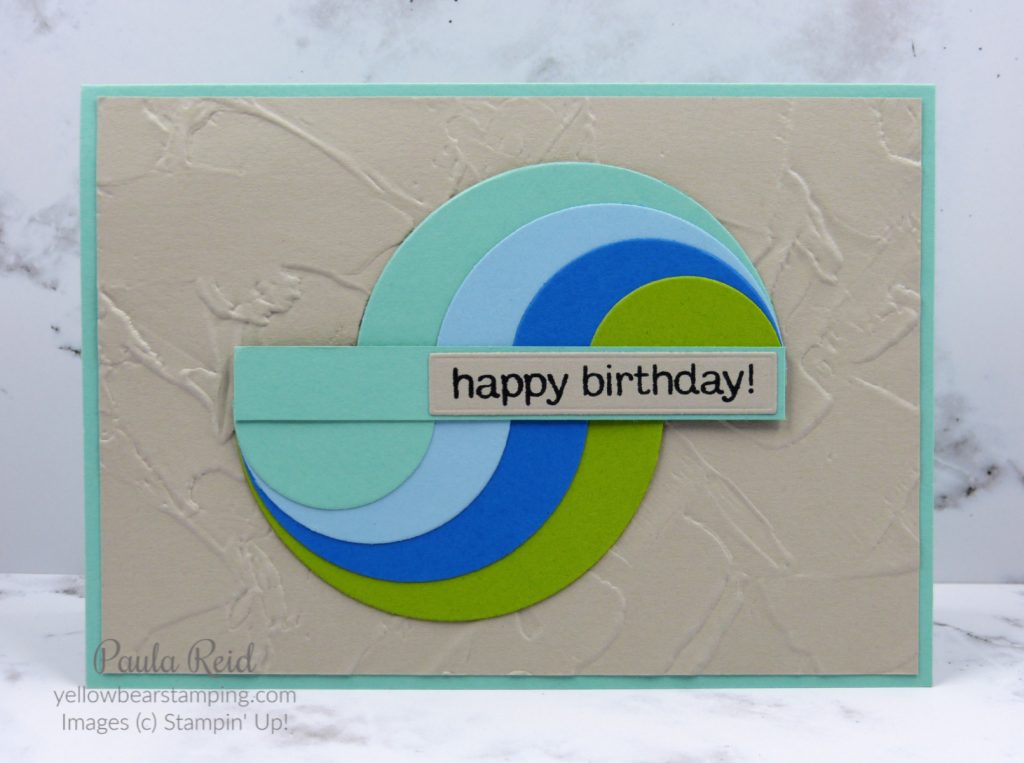
Over the weekend I saw a great colour challenge combo on the Colour Inkspiration Facebook group. As soon as I saw the colours I knew exactly what to create with them – a Split Circle card. This design has been around for awhile but I only made my first one last Tuesday when I friend showed me how.

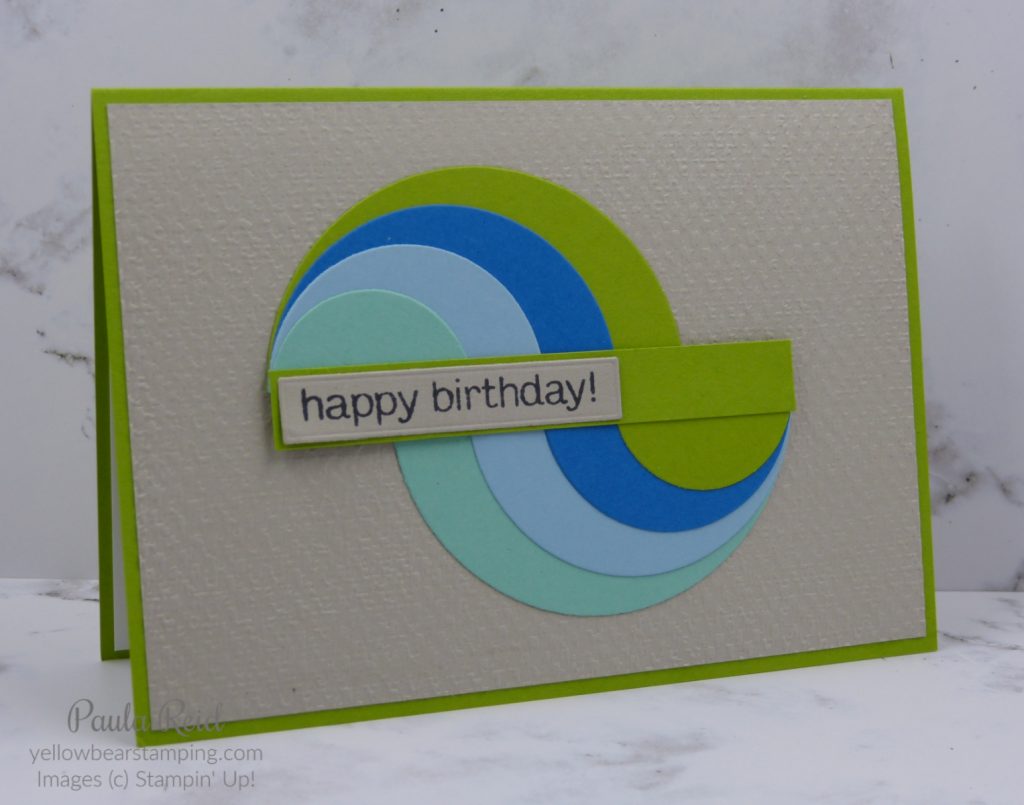
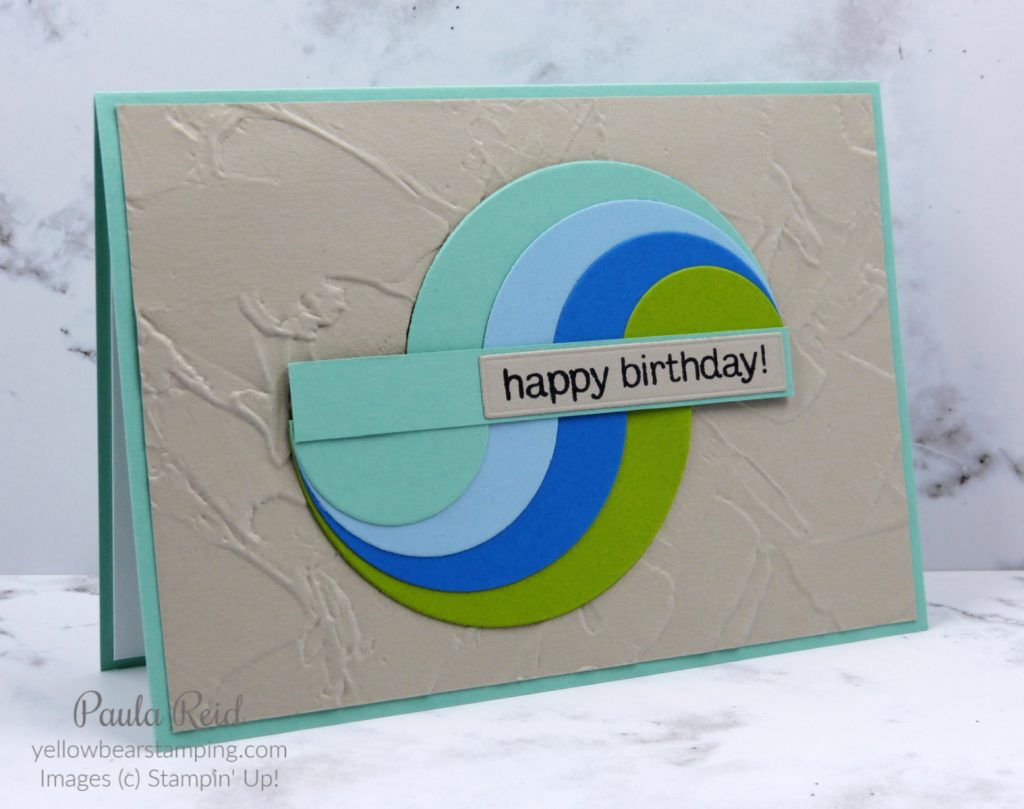
Splir_Circle_Card
Splir_Circle_Card

To create these two cards I cut the following sized circles using the Layering Circles Dies. 1 3/8″ (Coastal Cabana & Granny Apple Green), 1 7/8″ (Balmy Blue & Pacific Point), 2 3/8″ (Pacific Point & Balmy Blue) and 2 7/8″ (Granny Apple Green & Coastal Cabana).

Splir_Circle_Card
Splir_Circle_Card

I dry embossed the Sahara Sand mat with the Tasteful Textile and Painted Texture Embossing Folders. These cards will be great to add to my stash for work birthdays – with over 200 staff now I need a few cards each month.

Well that’s all for now. Until next time …
Yellow_Bear_Stamping

Turtle Friends – Happy Anniversary

By | January 26, 2022

Hi there

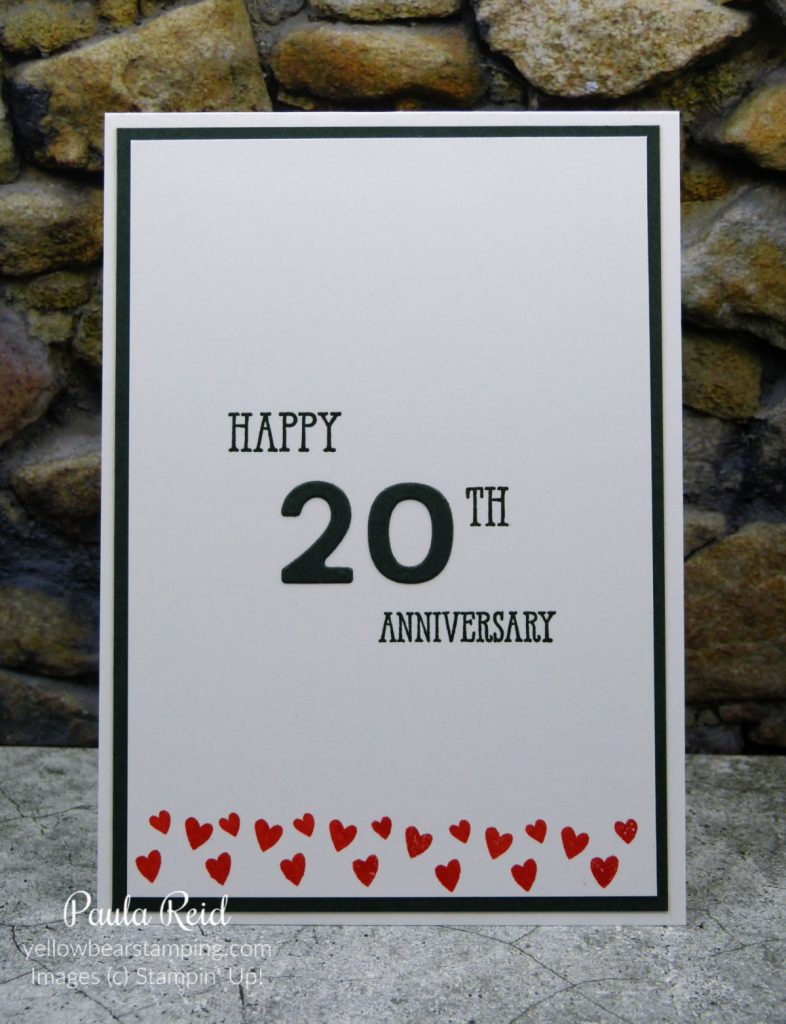
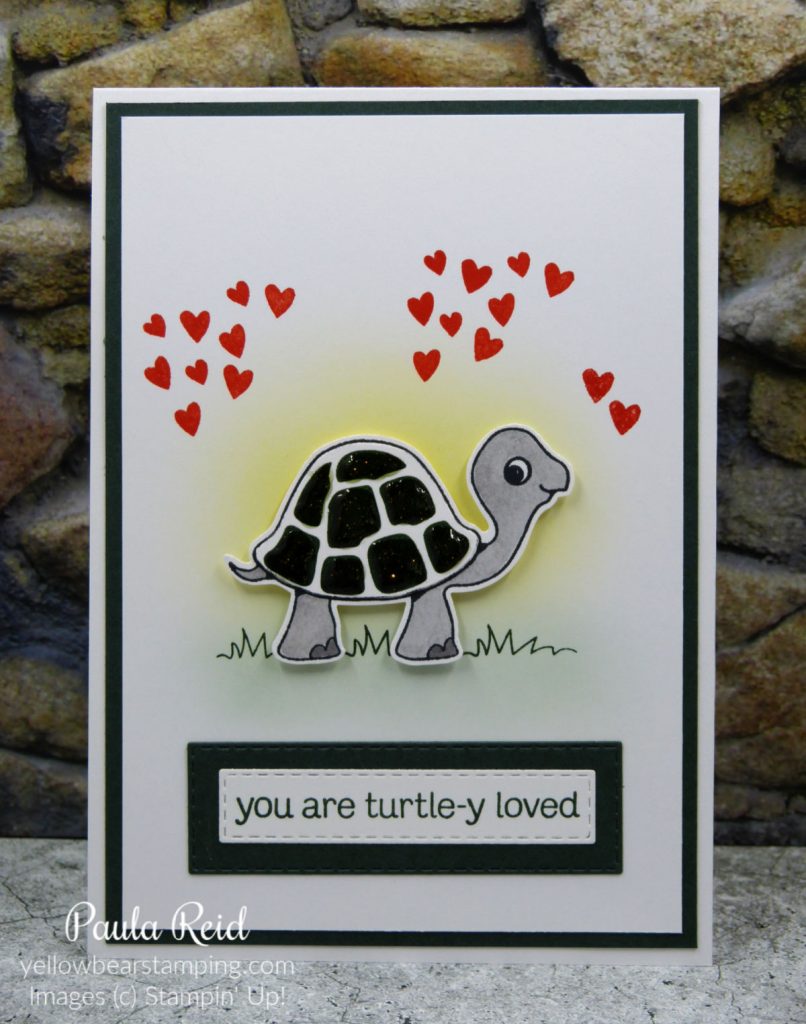
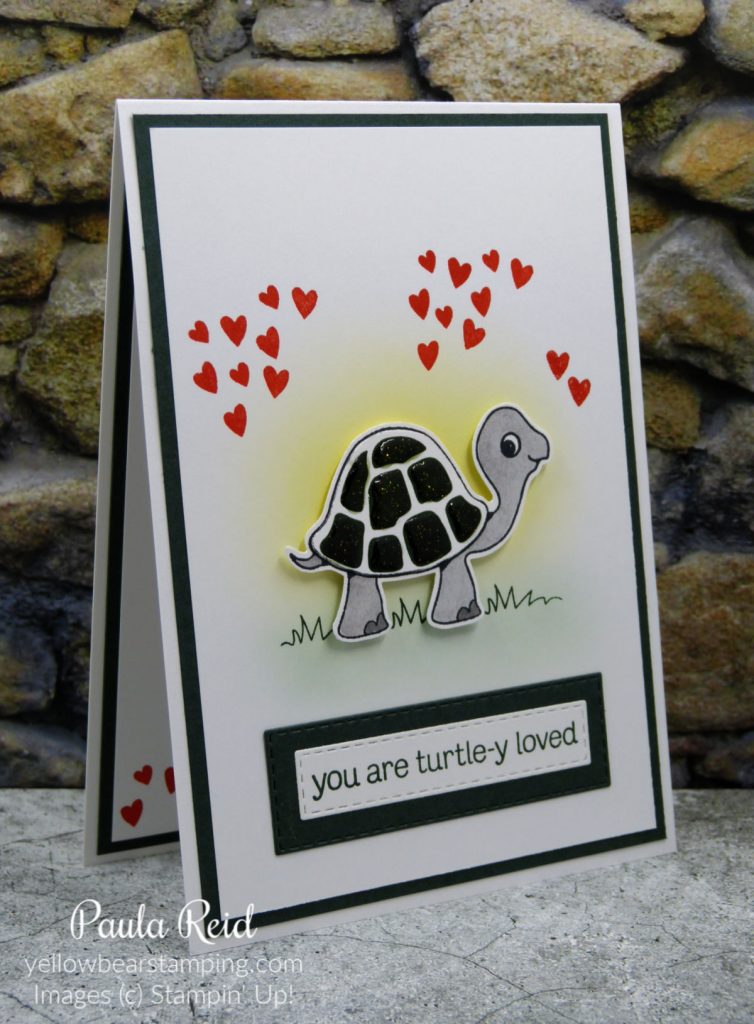
Last week Phil and I celebrated our 20th Wedding Anniversary – and this is the card I made for him using Turtle Friends.

Turtle_Friends_Wedding_Anniversary_Card

This set is so versatile and can be used for any number of occasions and it has a good selection of sentiments to go with the images. I love my Blending Brushes so applied some Daffodil Delight and Soft Succulent to my Basic White base for the background. Did you know that Emeralds are the stone for 20th wedding anniversaries – hence the ‘green’ theme. Mr Turtle has been stamped in Memento Black, coloured with Smoky Slate Stampin Blends then punched out with the coordinating Turtle Punch. I then restamped his shell in Evening Evergreen and applied Shimmery Crystal Effects to his shell. Just make sure you give this plenty of time to dry – I left mine overnight.

Turtle_Friends_Wedding_Anniversary_Card

The ‘hearts’ stamp has 3 individual hearts so by stamping the image six times I got to 18 – 2 short – so Plan B has needed. I covered two of the hearts with a piece of Washi Tape, inked up the stamp, removed the Washi Tape (the most important step) stamped away and then repeated this to get my two additional hearts. I also did this on the inside.

Turtle_Friends_Wedding_Anniversary_Card

I used a favourite retired set Well Wishes to stamp the inside of the card. Washi Tape to the rescue again – to get my ‘TH’ after the number I covered the ‘anks’ from the ‘Thanks’ stamp.

We had a lovely day celebrating and remembering our happy day – bring on the next 20 years 🙂

Until next time …
Yellow_Bear_Stamping

Awesome Otters – Sale-A-Bration stamp set

By | January 14, 2022

Hi there

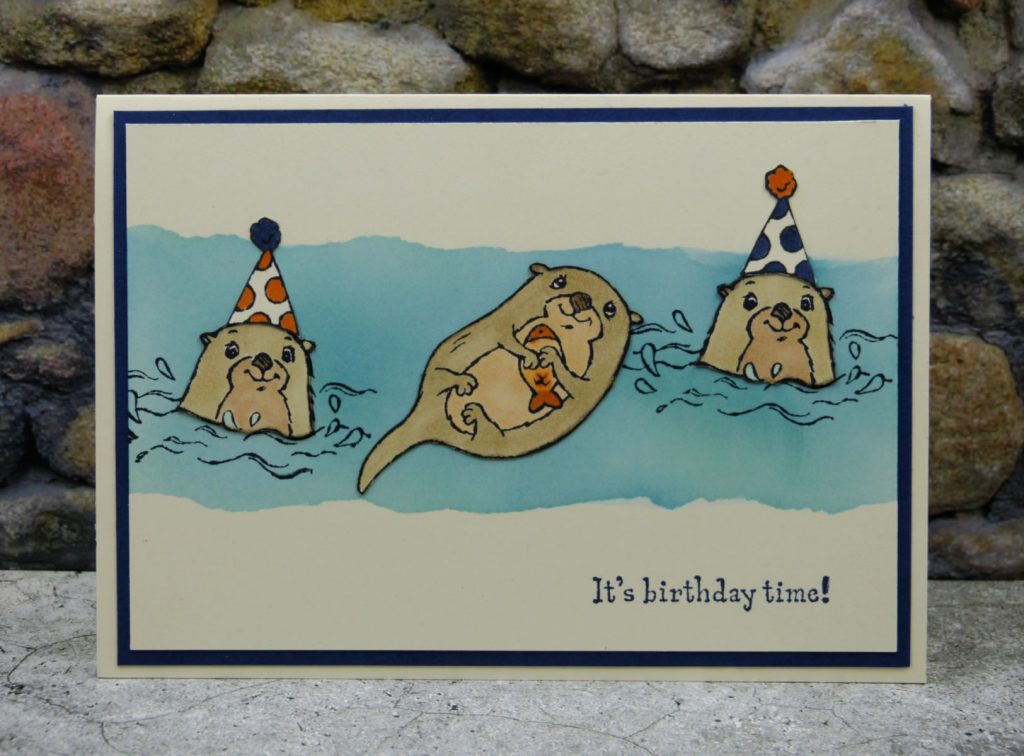
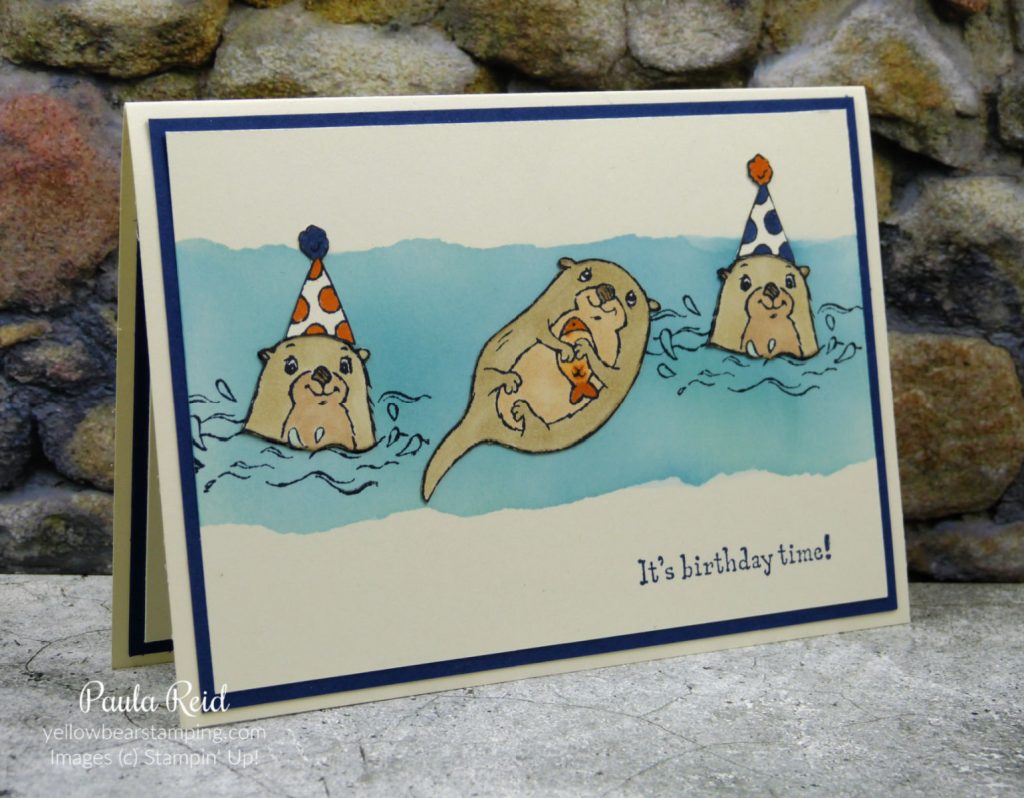
Have you checked out the Awesome Otters on page 11 of the Sale-A-Bration brochure? They are so cute. For my first card I’ve combined a few techniques – masking, blending and fussy cutting – to create this fun birthday card.

Awesome_Otters_Sale_A_Bration

I got the design idea for this card from page 26 of the Annual Catalogue. Using a scrap piece of grid paper I roughly torn it in two and adhered it to my card front with temporary adhesive leaving a big gap in-between to create my ‘river’. I applied Pacific Point and Pool Party ink with my Blending Brushes in the ‘gap’.

Awesome_Otters_Sale_A_Bration

I originally stamped, coloured and cut the otter lying on his back then thought he looked a bit lonely so stamped, coloured and cut out two more friends to join him. I then went back and directly stamped the two otters coming out of the water on my ‘river’ and adhered the coloured images on top of the images stamped. Their party hats have also been fussy cut and adhered on top.

Awesome_Otters_Sale_A_Bration

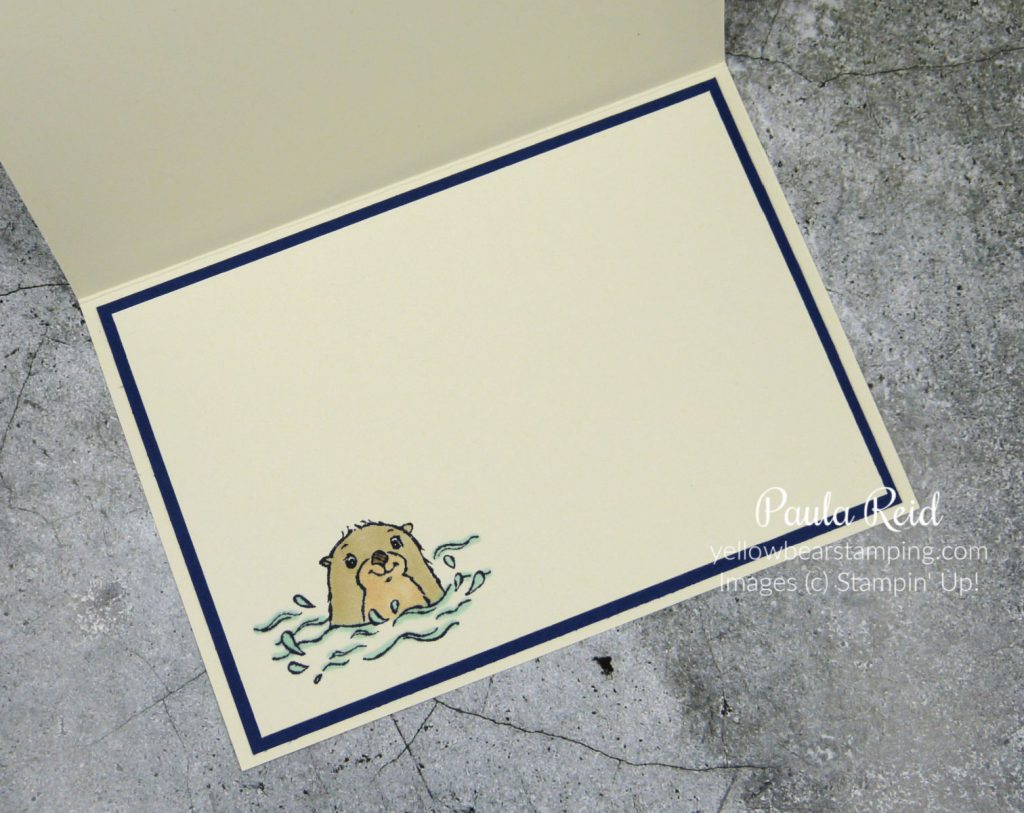
For the inside I stamped directly to the card and coloured it. I’ve gone with Ivory Stampin Blends for their tummies and Crumb Cake for the rest of the body. The water is outlined with Pool Party.

If you would like to have your own set of Otters place an order of NZD$110 with me between now and 28 February and you will receive the FREE stamp set.

Check back soon for more Otter creations.

Until then …

Yellow_Bear_Stamping

Sentimental Swirls – ROYGBIV

By | January 10, 2022

Hi there

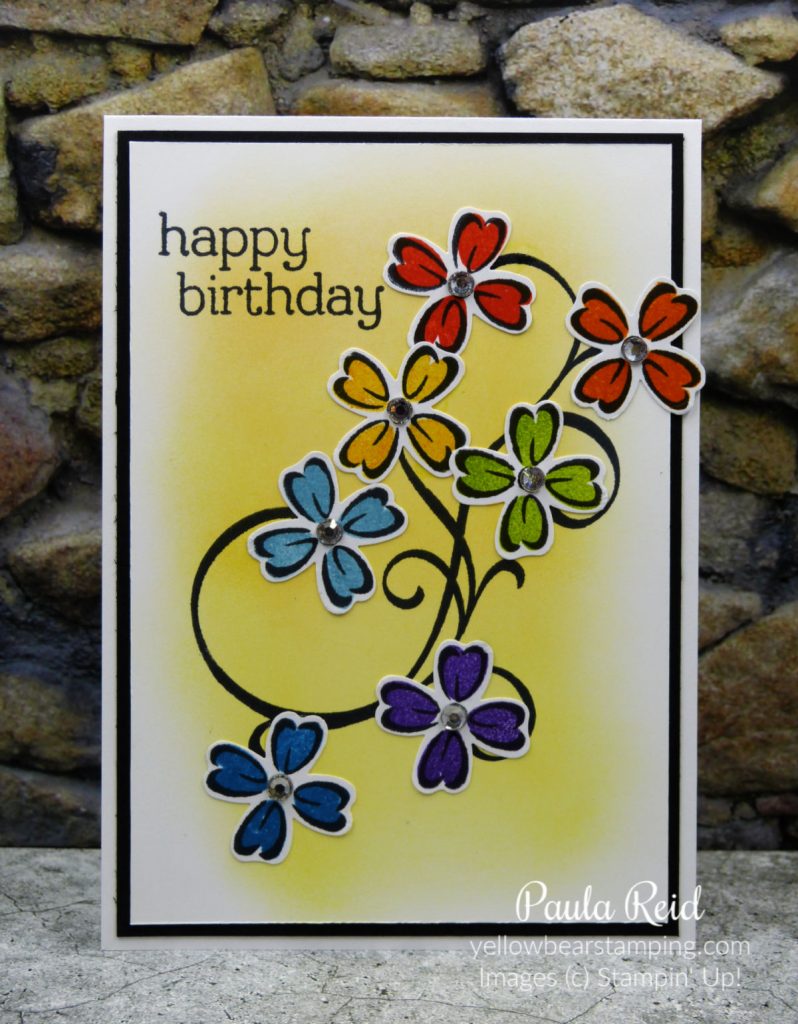
Happy New Year – for those of you in the Southern Hemisphere I hope you’ve had/having a lovely summer break. I am now back at work and getting back into the swing of things. Last week I managed to have some ‘me’ crafting time with some of the new products from the January to June 2022 Mini Catalogue. If you haven’t received your copy yet let me know and I’ll get one sent out. As a demo we get to pre-order a month before each new catalogue so we can have samples to share with you. My first purchase was Sentimental Swirls (page 56) which is the Million Dollar set inspired by Sam Hammond Donald aka Pootles. For those of you that follow Pootles you’ll know she likes the ‘rainbow’ colours hence I’ve called this card ‘ROYGBIV’.

Sentimental_Swirls_ROYGBIV

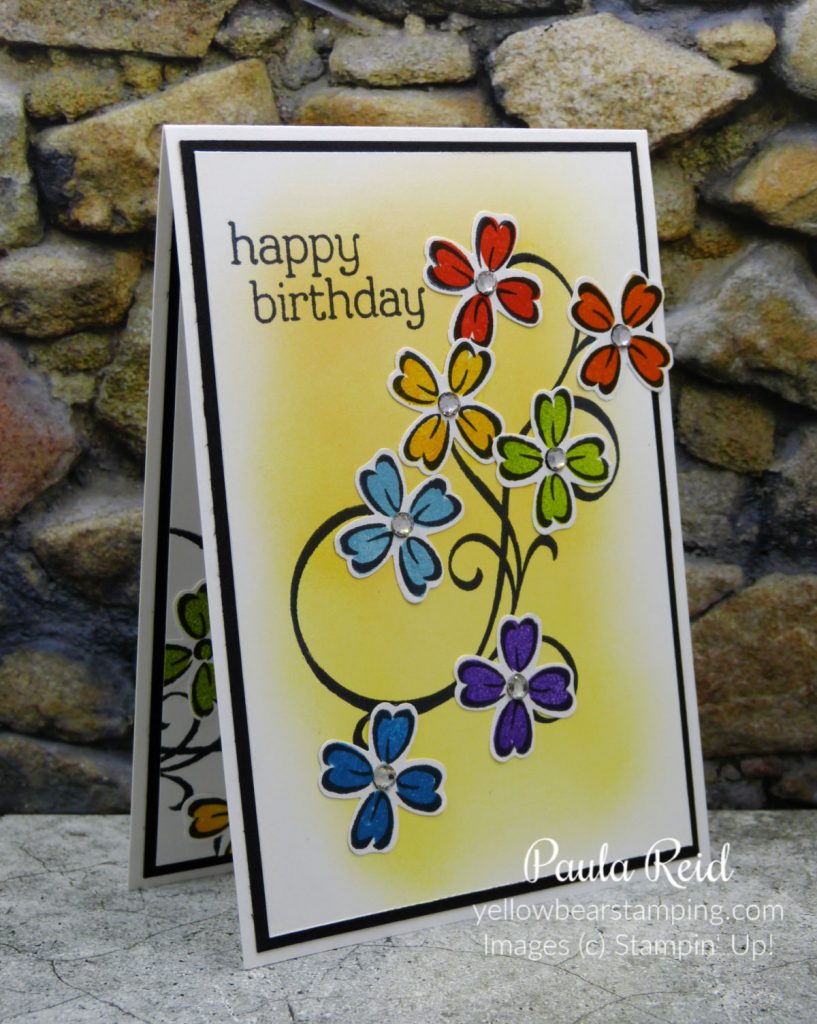
I started this card by applying Daffodil Delight and Mango Melody with my Blending Brush then stamped the main ‘swirl’ image in Memento Black. On scraps of Basic White I stamped the flower outline in Memento Black then added my colour with the solid image. R = Poppy Parade, O = Pumpkin Pie, Y = Mango Melody, G = Granny Apple Green, B = Balmy Blue, I = Pacific Point and V = Gorgeous Grape.

Sentimental_Swirls_ROYGBIV

This stamp set coordinates beautifully with two punches that are in the Annual Catalogue – Strawberry Builder Punch and the Flowers & Leaves Punch (both on page 148 AC). Here I’ve used the smaller flower from the Flowers & Leaves Punch. To finish off my card I added large Rhinestones to the centre of each flower.

This stamp set comes with 27 images and sentiments and I’m sure will be a popular set. Thank you Sam for creating such a wonder set. If you would like to purchase this set the ordering code is 157996 (NZD47.00).

It’s also Sale-A-Bration time again. During January and February you can choose a FREE Sale-A-Bration product with every NZD$110 or NZD$220 order you place. Check out the FREE products here.

Until next time …
Yellow_Bear_Stamping

Friday Fun Fold – Fold Over Card

By | December 31, 2021

Hi there

What a year it’s been and what better way to finish off than with another Fun Fold card. When you’re in need of a Fun Fold card head over to the ‘Search’ field at the top of my blog and enter ‘Fun Fold’ and you’ll have 52 to select from. Card number 52 is a favourite design which I’ve called a Fold Over Card. Check out some previous ones here and here. The last one includes the measurements.

Flowers of Friendship - Fold Over Card

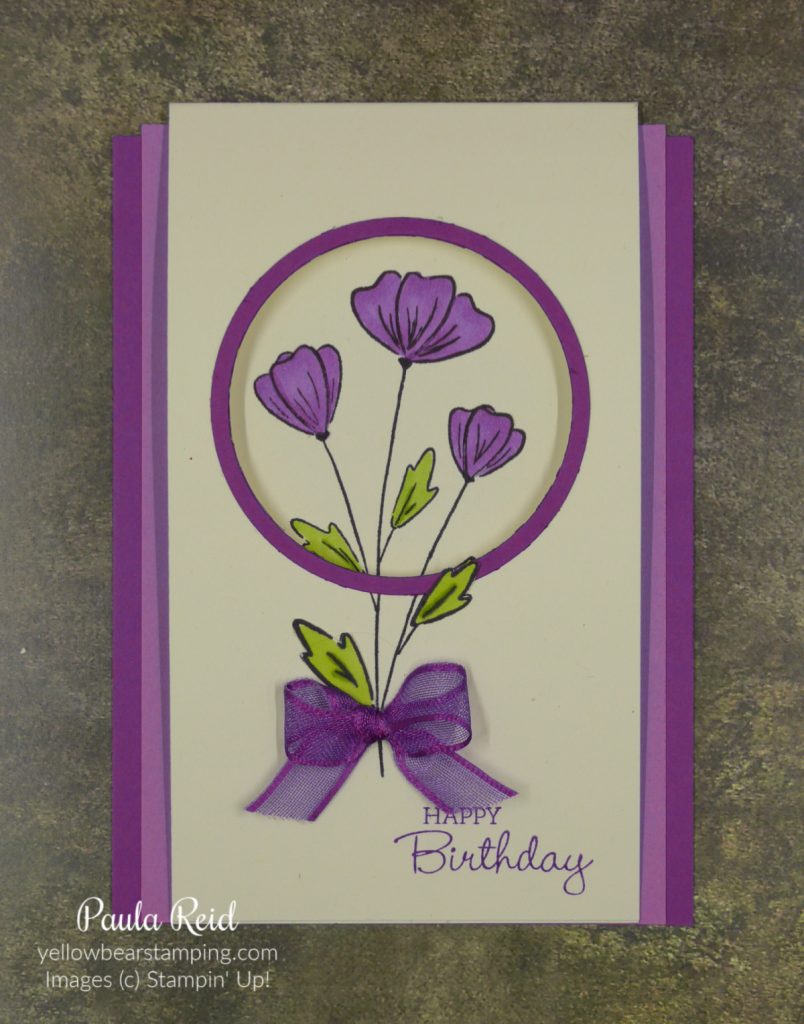
For this card my colour combination is Gorgeous Grape and Highland Heather with a touch of Granny Apple Green and I’ve used the Flowers of Friendship stamp set.

Flowers of Friendship - Fold Over Card

I prefer to use my Stamparatus for this card so that I know my top and inside images will be in exactly the same place. I’ve started using my Stamparatus more of late – it’s a great tool to have in your kit not only for straight stamping but if you need to reink your stamp for some reason you know that when you re-stamp you’ll still be lined up. There are also some great techniques you can achieve with the Stamparatus. To find what these are type ‘Stamparatus’ in the Search field at the top of my blog.

Flowers of Friendship - Fold Over Card

The stamped circle cut out didn’t go to waste – I ‘fussy’ cut the centre petals from each flower and then adhered them on top of the inside image to give a bit of dimension. For the petals on the front I stamped the images on a scrap piece of card stock, coloured them in with Stampin’ Blends, ‘fussy’ cut them and adhered. The reason I did this was that Stampin’ Blends tend to ‘bleed’ through the cardstock and I didn’t want this showing on the inside plus it again adds dimension to the front of the card.

I hope you’ve enjoyed seeing the different Fun Folds I’ve shared during the year. When I started back in January I wasn’t sure if I’d have enough to share one per week for the whole year but I needn’t have worried as I still have more to share.

I hope you all have a wonderful New Years Eve and I look forward to sharing more creative projects with you in 2022.

Until next time …

Yellow Bear Stamping

Technique Tuesday – Black Ice

By | December 28, 2021

Hi there

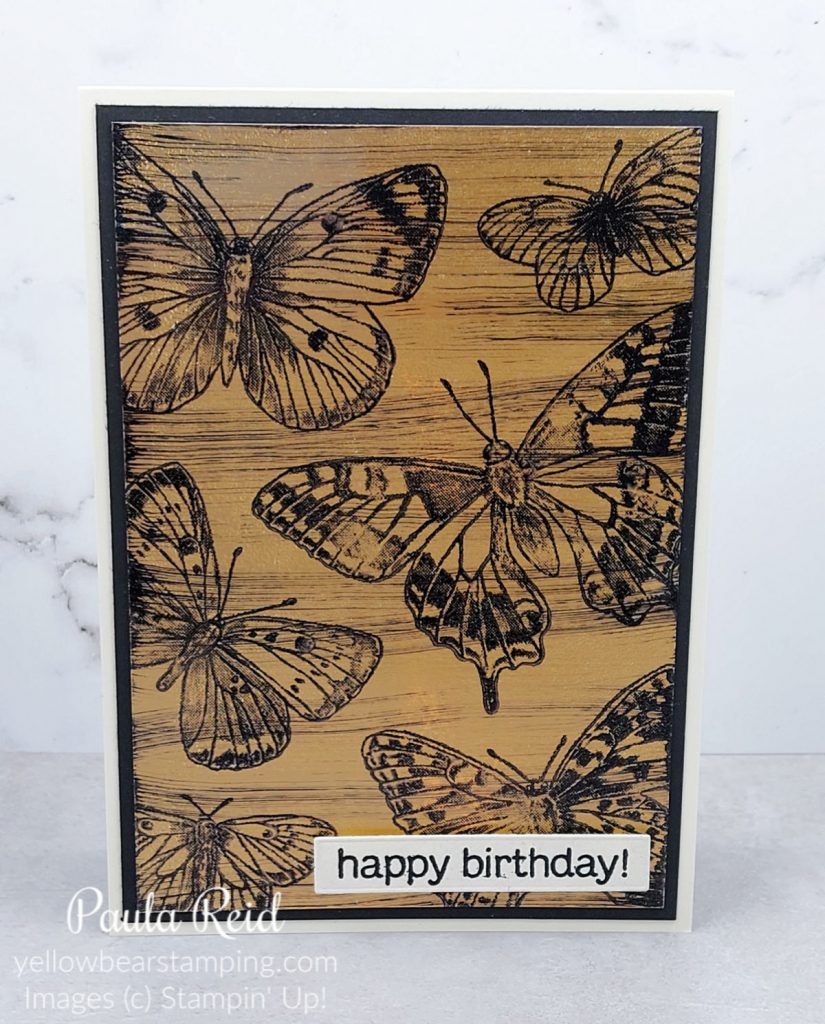
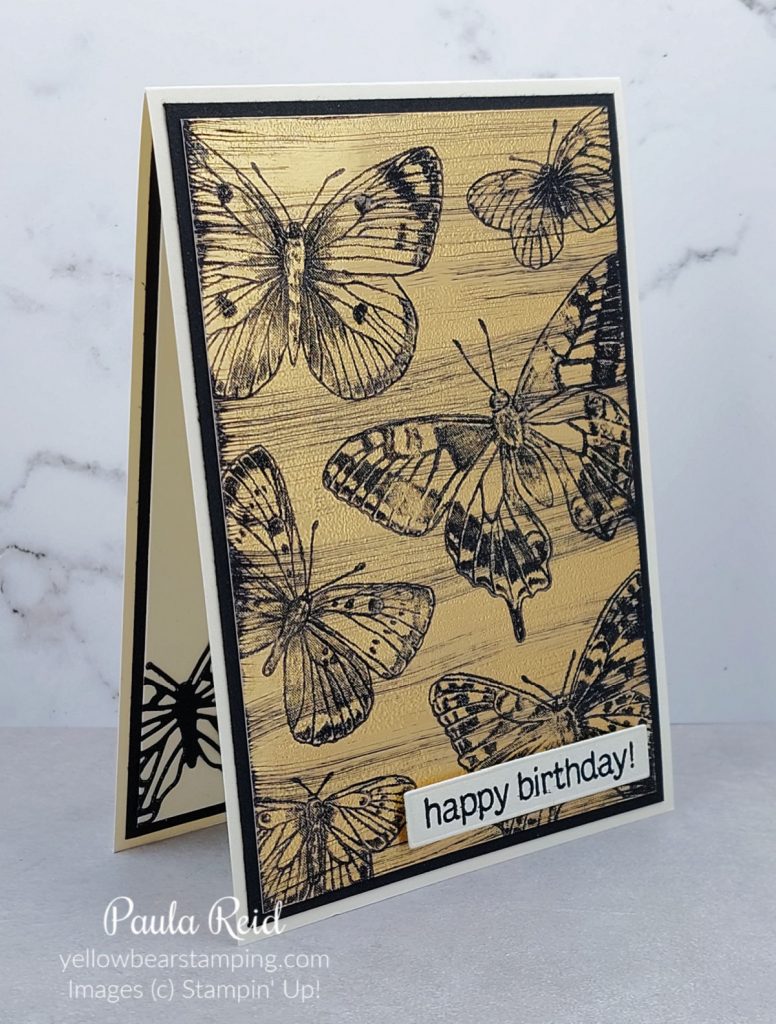
At the beginning of the year I decided I would share a different technique with you every Tuesday. Today is the last Tuesday of 2021 and for my last share I’ve chosen the Black Ice technique. There are still plenty more techniques to share so I’ll slowly slot them in with other blog posts during 2022.

Butterfly Brilliance - Black Ice Technique

I’ve used the Brushed Metallic Cardstock for this technique – you can also use foil. First up you want to create the ‘streaks’ of black on the cardstock before stamping your image. To do this lightly drag the edge of your Black StazOn ink pad across the cardstock. You want to get a bit of black on the edge of the cardstock and then subtle streaks across the center. Repeat this until you have covered your cardstock. Next stamp your image on top of the streaks. I’ve used the Butterfly Brilliance stamp with the help of my Stamparatus.

Butterfly Brilliance - Black Ice Technique

Even though the StazOn ink is an alcohol based ink and dries quickly I left mine for a few minutes before this next step. You could also apply your heat tool on a low setting for a few minutes. Taking your VersaMark ink pad lightly drag it across your cardstock to create streaks that run in the same direction as your StazOn lines. You want to barely touch the cardstock. Don’t press down with the VersaMark pad but simply use the weight of the ink pad to apply the clear sticky ink. Apply clear embossing powder over the top and heat with your heat tool. As the powder melts it bubbles and gives an extra dimension to your stamped image.

Here’s another card I created with the same image but a different colour cardstock.

Butterfly Brilliance - Black Ice Technique

This was my first attempt and was a bit ‘heavy handed’ with the StazOn streaks. Practice makes perfect.

I hope you’ve enjoyed the techniques I’ve shared over the year and have given some of them a try. To find all the techniques I’ve shared you can search for them using the ‘search’ field which can be found at the top right of my blog. Either type in ‘techniques’ or a particular technique you are looking for eg ‘Black Ice’. If you have any questions about any of the techniques I’ve shared please contact me.

Until next time …
Yellow Bear Stamping

Friday Fun Fold – Window Card

By | December 24, 2021

Hi there

There are a number of variations for ‘Window Cards’ and this one uses a piece of Window Sheet so you can see through to the greeting on the inside of the card.

Window Card using Window Sheets

The card base measures 19.5cm x 10.5cm and is scored at 5cm – the 5cm section becomes the top front portion of your card. You will need three additional pieces that measure 5cm x 10.5cm to complete the card base. In addition you’ll need a piece of Window Sheet measuring 6.5cm x 10.5cm, two mats measuring 4.5cm x 10cm, two pieces of Designer Series Paper measuring 4cm x 9.5cm.

Window Card using Window Sheets

The Window Sheet is sandwiched between the upper and lower pieces of cardstock. Cardstock has been added on top of the Window Sheet to strengthen it and so that you don’t see the joins of the Window Sheet to the cardstock. TIP: if you want to stamp an image or sentiment onto your Window Sheet make sure you use StazOn ink.

I have one more Fun Fold card to share with you next week – that will make 52 different types of folds you now know how to make.

Until next time …
Yellow Bear Stamping