Hi there
I find it hard to create a sympathy card – deciding on the stamp set to use and then what words to write inside. At last years OnStage in November we got a sneak peak at the Sale-A-Bration brochure and one set that jumped out was the Lasting Lily set. This set is a ‘distinktive’ stamp – read right to the end of my post to find out more about this new style of stamp. Here are two samples I’ve made using this lovely set:
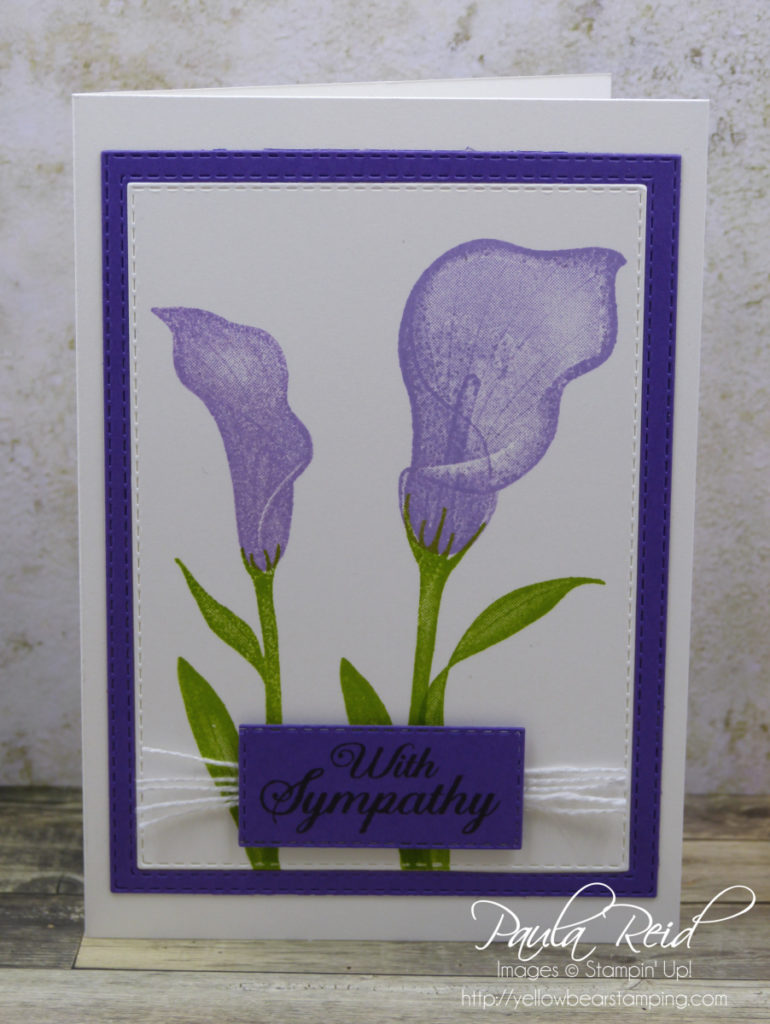
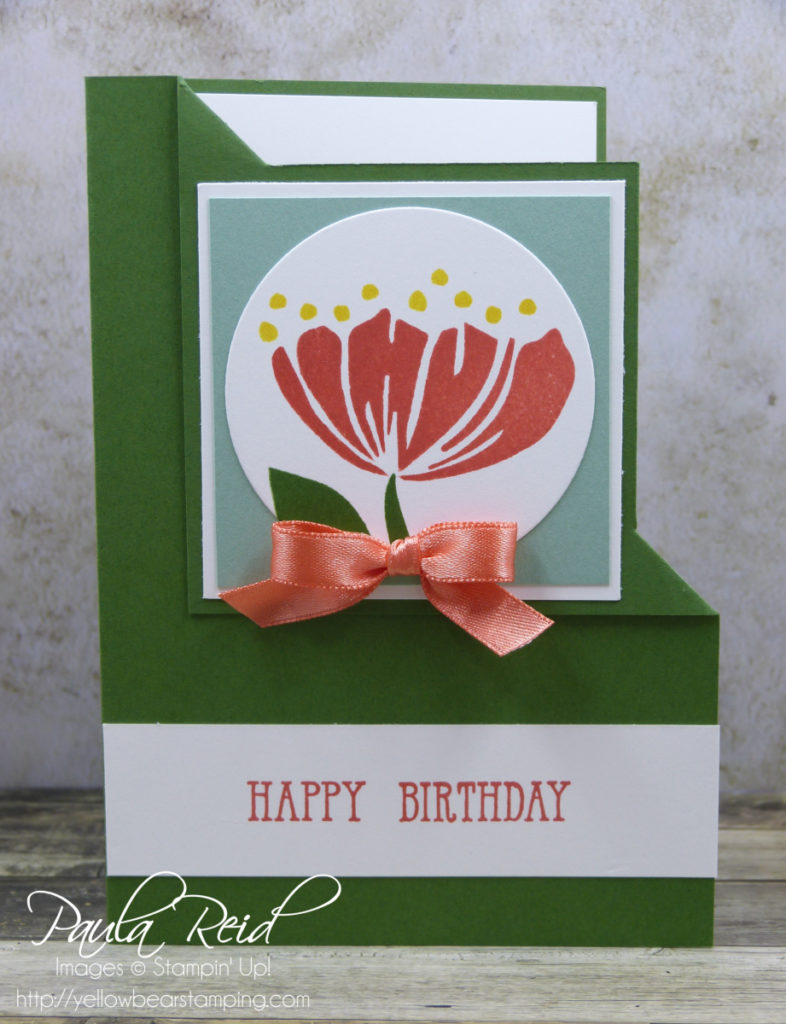
This first card is a full sized card – the base is Thick Whisper White and the mat is Highland Heather. I’m not normally a ‘purple’ girl but since this colour got added to the colour family I’ve really enjoyed using it. Yellow will still be my favourite colour :). The stems of the flowers are Granny Apple Green and compliment the Highland Heather.
I’ve used a piece of the new Whisper White 5/8″ Flax Ribbon behind the stamped sentiment. This ribbon can be left whole or as I’ve done here separate out the threads. I did leave the bit behind the sentiment whole for ease of adhering.
As you can tell I love my new Rectangle Stitched Framelits 🙂
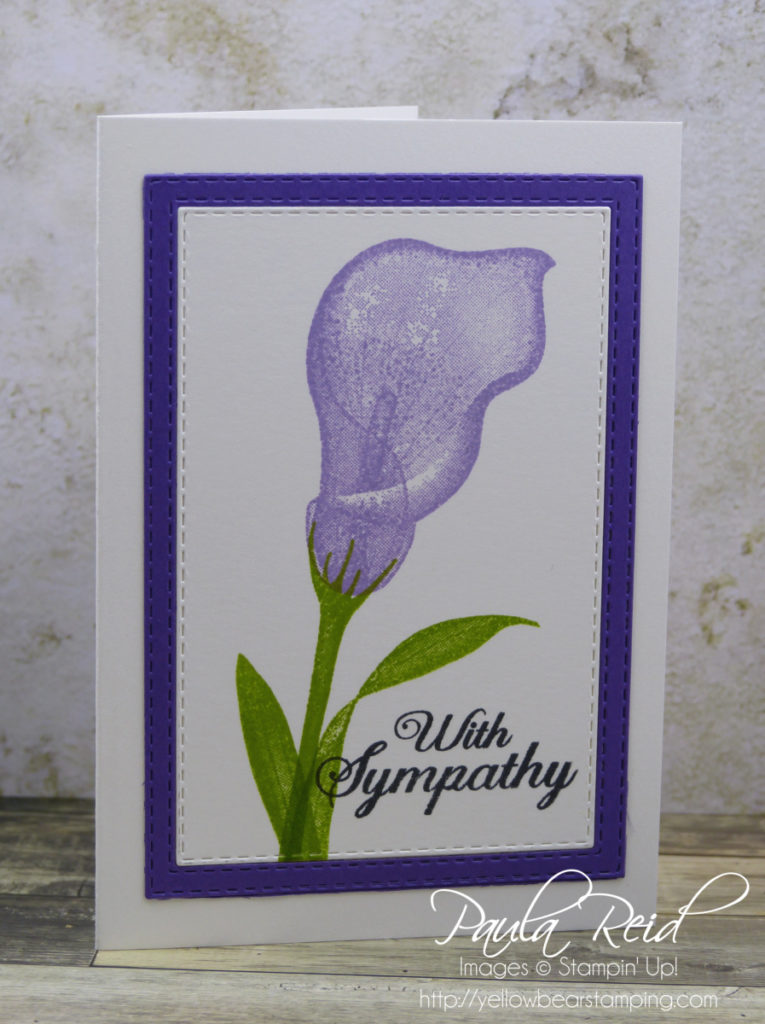
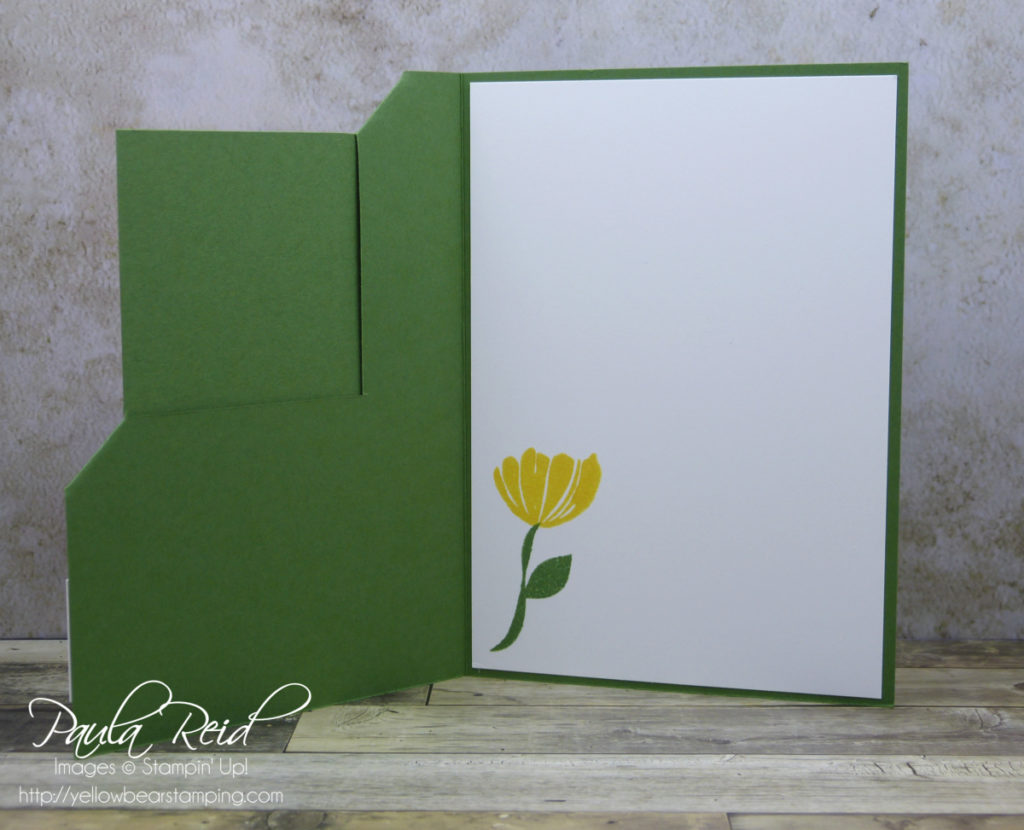
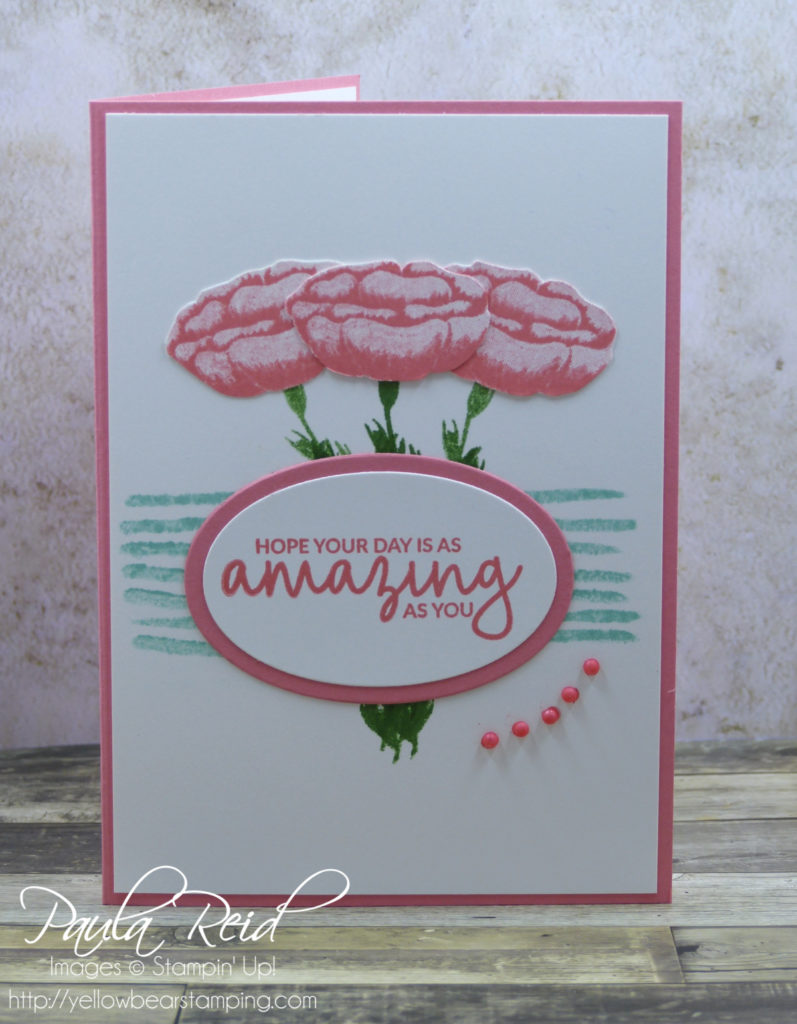
For my second card I used one of our Notecards & Envelopes – these are a perfect size and already come pre-scored so it doesn’t take long to create a card. This time I only used one flower as the card area is smaller. The stem for this flower is just a stem and then there is a second stamp which stamps the leaf on the right. I really wanted another leaf to the left so I turned the stamp around 90 degrees and used the lower part of the leaf stamp – it worked a treat. The sentiment is stamped directly onto the image in Memento Black.
As mentioned at the beginning of this post the Lasting Lily set is a ‘Distinktive’ stamp set. ‘Distinktive’ stamp sets are a new patent-pending range of stamps. The stamps made with this ‘distinktive’ process lay down the ink at different opacities giving the finished image more depth.
Here’s a quick video from Stampin’ Up! showing you how to use these stamps and also gives some handy tips.
At the beginning of this month Stampin’ Up! bought out a limited time release of dies that coordinate with some of the Sale-A-Bration stamp sets – well Lasting Lily is one of those sets so between now and 31 March you can purchase the coordinating framelit dies for this stamp set. I’m hoping to have time this week to create something with my set – so watch this space. Check out my post here for more details. If you’re interested in placing an order let me know or you can order online via my online store.
Well that’s it for now. Until next time …