Nature’s Poem Suite – OnStage Project

By | July 7, 2018

Hi there

It’s been a good crafting day today – I’ve made 14 cards using a One Sheet Wonder template – I’ll take some photos tomorrow of the cards and share them with you over the coming days.  If you don’t know what a One Sheet Wonder is you’ll need to check back tomorrow to find out :).

It’s the perfect time to do a One Sheet Wonder as our current special for July relates to our Designer Series Paper (DSP).  For the month of July for every three packs for selected DSP you purchase you get one FREE pack.  For the list of selected papers you can check them out here.  You can order your DSP via my online store or contact me directly.

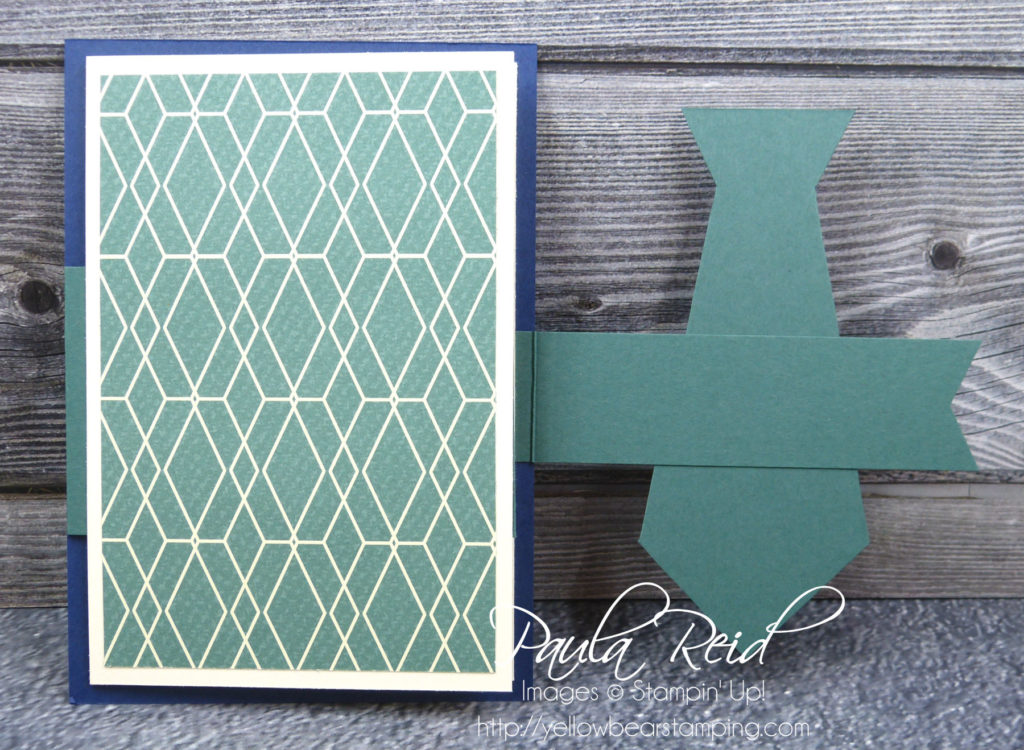
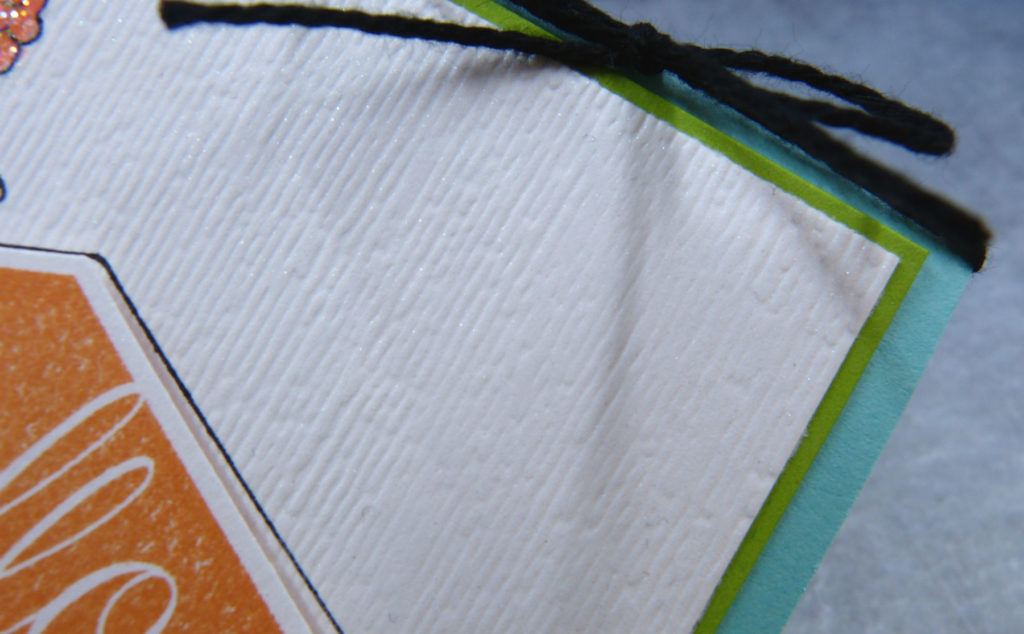
Today’s card features products from the Nature’s Poem Suite – page 142 -144.  This suite consists of a stamp set, framelits (which can be purchased as a bundle), twine (Blackberry Bliss, Crumb Cake, Grapefruit Grove & Mint Macron), trinket embellishments, cardstock pack (Petal Pink, Soft Suede & Tranquil Tide) and the Nature’s Poem Designer Series Paper (DSP).  This DSP is one of the papers on offer in the July special.

This card uses all the components from the suite.  The background stamp was inked in Soft Suede and stamped off before stamping onto the Very Vanilla cardstock.  The ‘Rooted in Nature’ stamp set also compliments a favourite set – Lovely as A Tree.  The trinkets were adhered with glue dots and then the sentiment was placed over the top.  The leaves have been stamped in Tranquil Tide and Grapefruit Grove then die cut with the coordinating die.  The Framelits set has 12 dies of which 3 are emboss only dies.  These dies will add an extra dimension to your projects.  Watch the video below to see how to use them and see some samples using this set.

Don’t forget to check back tomorrow to see the start of my One Sheet Wonder cards.

Until then …

DSP July Promotion – buy 3 packs and get 1 FREE

By | July 2, 2018

Hi there

Back by popular demand is the ‘buy 3 packs and get 1 FREE’ of selected Designer Series Paper (DSP).  This is a good time to stock up on DSP.  My favourites are Animal Outings, Nature’s Poem and Wood Textures.

We also have a recruiting promotion happening this month so if you’ve ever thought about signing up to the Stampin’ Up! family July is the month to do it.  When you sign up you get to choose one FREE ink pad assortment (there are five to choose from).   I would love to have you as part of my team so if you are interested or have any questions please contact me.

For more details on these promotions check out my Promotions page

Graceful Glass Suite

By | June 30, 2018

Hi there

It’s the last day of June and we are now half way through the year – where did the first six months of 2018 go?  The only good thing is that we are getting closer to summer – I’m not a fan of the cold.

Today’s post uses products from the Graceful Glass suite (page 164 – 165 Annual Catalogue).  This was one of the Make and Takes we made at OnStage in April.

The ‘paper’ in this suite is actually Vellum and comes in a pack of 24 sheets of 6″ x 6″ single sided designs.  You get 2 sheets of 12 different designs.  The stained glass imagery is perfect for colouring in with our Stampin’ Blends or other colouring tools.  Have you seen that we now have 22 different colours in the Stampin’ Blends range – check out page 205 of the Annual Catalogue.  We have used the Lovely Lipstick and Pineapple Punch Blends for this card.

The sentiment is from the Painted Glass stamp set which has coordinating thinlit dies and comes as a bundle – buy the bundle and save 10%.

Another new product used here is the Black 1/8″ cord.  The suite also has Tinted Faceted Buttons that come in a pack of 24 – 8 of three different colours – Call Me Clover, Grapefruit Grove and Lovely Lipstick.  They also come in two different sizes – 1 cm and 1.3 cm.

Here’s another product video for you to watch to see the products up close, find out some tips and check out some samples.

Well that’s it for today – I have one more Make and Take to share with you from our April event so check back soon to see which suite it will be from.

Until then …

Delightfully Detailed Suite – Note Card & Envelopes

By | June 27, 2018

Hi there

It was a chilly start to the day here in Auckland – only 2 degrees Celsius – but the sun came out and it ended up being a beautiful day.

I had hoped to share with you another couple of cards using the Animal Outings set but when I went to download the photos from my camera to my computer nothing came across.  I think I may need to go and buy another memory card so you might have to wait until the weekend till I can photograph them again.

In the meantime I’ll share the cards we made at our OnStage event back in April.  The first card showcases the Delightfully Detailed Suite on page 38 and 39 of the Annual Catalogue.  This suite comes with a stamp set & punch bundle plus some gorgeous laser-cut specialty paper, tulle ribbon, faceted dots, note cards & envelopes and a Memories & More card pack.

The Note Cards & Envelopes come in a pack of 20 colour-washed cards: 5 each of 4 designs.  The cards are Very Vanilla and either Blackberry Bliss or Mint Macaron on the front.  The Laser-Cut Specialty Paper is Vanilla on one side and white on the other side and comes in a pack of 8 sheets – 4 each of 2 designs.  One of the designs is a 12″ x 12″ design while the other has distinct patterns to cut out and use.

My card uses one of the distinct patterns and has been mounted on a Blackberry Bliss base.  The best way to adhere the laser cut paper is with a Fine Tip Glue Pen – this is a ‘must’ to have in your tool kit.

The coloured card stock band and banner are the new In Color  Grapefruit Grove.  The sentiment – from the Detailed with Love stamp set – has been stamped in Memento Black ink on Very Vanilla and then two corners have been ’rounded’ with the new Detailed Trio Punch while the other two corners have been punched out with one of the designs from the punch.  The 5/8″ Polka Dot Tulle ribbon comes in Very Vanilla or Whisper White and has been wrapped around the Grapefruit Grove band before being adhered.  The final touch is the Blackberry Bliss Faceted Dot.  There are four different colours in this pack and three different sizes of dots – 3mm, 4mm & 6mm.  The colours are Basic Black, Blackberry Bliss, Grapefruit Grove and Mint Macaron.

Here’s a video that shows you in more detail the products that make up this suit plus some samples – enjoy watching.

If you would like to purchase any of the products from this suite or anything else from the catalogue please contact me to place your order or you can order online via my online store

Until next time …


Animal Outings – Happy 8th Birthday

By | June 24, 2018

Hi there

Here’s my second card using the animal outings stamp set.  This time I needed it for our 8 year old neighbour who had a birthday back in May.  I wasn’t sure if I’d be able to fit 8 giraffe on the front – it was a tight squeeze but I got there 🙂

This time I used three different colours of the Stampin’ Blends for the main part of the giraffe – Crumb Cake, Bronze and Ivory.  The markings are Daffodil Delight and Pumpkin Pie.

I got a bit tricky with the construction for this card – once I’d cut out my circles I stamped the leaf image (minus the frog) using Pear Pizzaz.  After adhering the giraffe to  the back of the Whisper White card front I added adhesive to the back of the neck.  I then placed the stamped circle back into the hole where it had been originally cut – no wastage of card stock – aligning the leaf image behind the giraffe.  The mats around the circles are Dapper Denim and Emerald Envy and these just finish the look of the card.

Now that I have the coordinating dies for this stamp set I look forward to not having to manually cut out the images – although I think I did a pretty good job with the fussy’ cutting :).

Well that’s it for now.  I’ll be back soon with some more creations using products from the new 2018-2019 Annual Catalogue.

Until then …


Animal Outings – Happy Birthday

By | June 22, 2018

Hi there

At April’s OnStage event all attendees received the new stamp set Animal Outings – page 27 of the Annual Catalogue.  This set is part of the Animal Expedition suite and comes as a bundle with the coordinating dies.  Also included in this suite is the Animal Expedition Designer Series Paper, Animal Expedition Cardstock Pack, Leaf Ribbon and Frames Elements (wood frames, borders & accents).

Now this is probably a set I wouldn’t have chosen myself but I’ve had fun using it and will share a couple of projects I’ve made using it with you over the next couple of days.

First up is a card I made back in April for a friend’s son who was turning 7.  I don’t own many ‘kids’ stamp sets as my nieces and nephews are now adults so this set was perfect for a 7 year old.

I stamped my Giraffe’s on scrap Whisper White card stock then coloured them in with my Stampin’ Blends.  I think with this type of image you could actually get away with colouring them in any colour.  I forgot to write down the colours I used but I think the main colour is Crumb Cake with the markings being Pumpkin Pie, Daffodil Delight and Bronze.  As I didn’t have the dies the stamped images were all hand cut out – I now have the coordinating Animal Friends dies :).

To create the circles for the Giraffe I used the Layering Circle Framelits.  The circles looked a bit bland just cut out on their own so I created a ‘mat’ from Emerald Envy card stock and adhered over the top.

The number was cut using the Large Number Framelits (which have since retired) in Soft Suede.  And of course this card needed a coordinating gift box which was filled with chocolates.

Check back tomorrow for another ‘kids’ card.

Until then …

Truly Tailored – Happy Birthday Phil

By | June 18, 2018

Hi there

Just a quick post tonight – last month was my husbands birthday and here is the card I made for him.  I had actually made it back in February at our Creative Inkers Stamp Camp.  This cool card was taught to us by Rhonda Fawcett and uses product from the now retired True Gentleman Suite but you could recreate this card with other patterned DSP.

This is not just a cool card front but a very cool fancy fold card.  The ‘tie’ folds out to the right

and then the card front folds out to the left to reveal the inside.

The main colours used in this project are Night of Navy and Tranquil Tide.  This insert and front mat are Very Vanilla.

Until next time …

Accented Blooms and Subtle Embossing Folder

By | June 14, 2018

Hi there

At last months team training I got to use the new Subtle Embossing Folder (page 223) and I’m sure you will want to add this folder to your wish list.  It’s a bit hard to see the texture on the photo in the catalogue so I thought I’d share a close up for you here.

For this project we’ve paired it with the Accented Blooms stamp set on page 19.

The Card base is a returning colour – Coastal Cabana while the mat is a new colour – Granny Apple Green.  These colours both belong to the Brights Collection.  The Tailored Tag Punch which carried over from the Occasions Catalogue coordinates with the two sentiments from this set – here we’ve used the ‘Hello’ which has been stamped in Mango Melody another new Bright colour.

The outline image has been stamped with the returning StazOn Jet Black Ink (page 202) on Shimmery White card stock and then coloured in using the coordinating inks plus Daffodil Delight – you can use aqua painters or blender pens for this.  After the image had been coloured in we ran it through the Big Shot with the Subtle Embossing Folder – it gives a great texture to the card.  The final touches of Dazzling Diamonds, some Basic Black Solid Bakers Twine and a pearl from the Share What You Love pack completes this card.

And here’s a close up view of what the design is like.  I can see this folder being very versatile.

Here’s a fun video that shows a few projects from the new catalogue – have fun watching.

Until next time …

2018-2020 In Color Team Swaps

By | June 10, 2018

Hi there

May was a very busy month for me – hence not much happening on the blog front – but I’m back on track and have heaps of new projects to share with you.

I hope you’re enjoying the new 2018-2019 Annual Catalogue.  I’m loving the new In Colors and today I’m going to share with you the card I made for our team swaps last month.  It uses a number of new products and I was able to make 30 of these very quickly with the help of the Stamparatus.  This is definitely a ‘must have’ tool for any stamper – check out page 207 of the Annual Catalogue.

Each year Stampin’ Up! introduce 5 new In Colors that are around for two years.  This years In Colors – Lovely Lipstick, Grapefruit Grove, Pineapple Punch, Call Me Clover and Blueberry Bushel – are lovely and bright and best of all is the yellow – I’m in love with it :).

This card showcases the new In Color 6″ x 6″ Designer Series Paper.  You get four sheets of each design and there are 2 double-sided designs in all five colors.  The DSP squares are 1 1/2″ square with two corners rounded – I used the top of the Envelope Punch Board to achieve this.  Two of the squares are also adhered with Dimensionals.

The ‘Hello’ was stamped using the Make A Difference stamp set which is part of the Share What You Love Suite on page 178.  This is a great set of letters and comes with some additional stamps such as ‘double’ letters – the ‘ll’ is one stamp.  Stamping this was so easy with the help of the Stamparatus – I could get my letters all lined up and stamped perfectly for the 30 samples I was making :).  The background stamp is one I won at OnStage – Birthday Backgrounds on page 71.

The candles across the bottom are from Birthday Backgrounds and were also stamped with the help of the Stamparatus.  As the plates on the Stamparatus are hinged I was able to move it along and my stamp remained perfectly aligned and straight.

Here’s the Blueberry Bushel sample

Call Me Clover

Grapefruit Grove

and finally Lovely Lipstick.

Do you have a favourite In Color yet?  Leave me a comment to let me know your favourite.

Until next time …

Happy Mother’s Day

By | May 13, 2018

Hi there

Today is Mother’s Day in New Zealand – a day when we honour our Mother’s (and all women) for the amazing contribution they make to our lives.  I am very fortunate that my Mum only lives a few minutes away and we get to see and talk to each other all the time.  She has (and still is) an amazing role model for me and I love her dearly.  She gives so much of herself to her family, friends and those around her in need.  Thank you for everything you do Mum and your unconditional love for us xx.

Here is the card I made for her – it’s called a Double Dutch Fold.  You can see more details about this card on my earlier post here

I also wanted to honour the ladies at Church and give them a little gift today so I made these cute little Ferrero Roche cups.  I also made these ‘Diaper Fold’ pouches and added a tea bag and coffee sachet – they were very well received.  The men were a bit jealous so I’ll have to come up with something special for them for Father’s Day in September.  Sorry the photo’s not that great – I didn’t finish them till late Saturday night 🙂  Thanks to my friend Delys for the inspiration.

They were so quick to make and look really cute.  The little cups use a piece of DSP that measures 2″ x 6″.  First off cut off 2 cm (this will be folded in half lengthwise to create the ‘handle’) then score every 2cm along the 6″ side.  Then score it in half at 1″.  Snip the vertical score lines to the horizontal.  Join together at the side and then fold the cut flaps in to create the bottom.  I added a 1 1/4″ circle on the inside to cover up the flaps.  The handle is adhered to the outside (I used Fast Fuse).  Adhere the cup to a 2″ circle and then adhere to a doilie.  Add the chocolate and you’re done :).

The tea and coffee pouch is made using the ‘Diaper’ fold and doesn’t require any adhesive.  I got my individually wrapped tea bags from Gilmours in Auckland but most supermarkets sell individually wrapped tea bags (I was wanting a box of 100!).

Well I hope you’ve all had a lovely day – and now it’s time for bed.

Until next time …

Share What You Love – new product suite

By | May 7, 2018

Hi there

This month we have a great promotion on offer.  It’s an early release of one of the upcoming suites in the new catalogue.  It’s called Share What You Love and is a suite to celebrate 30 years of Stampin’ Up! being in business.  There are three different bundles in this offer – ‘Just Getting Started’, ‘A Little More, Please’ and ‘Gotta Have It All’ plus you get the chance to order the new 2018-2020 In Color inks – so place your order before 31 May to receive these new products.  Watch the video below to see what’s included in the three bundles.  You can also check out the Share What You Love flyer on my Promotions page.

At our recent training event we got to have a play with some of the products from this suite and here is the sample I made.

The card base (and stamping on it) is a past favourite In Colour that is returning come 1 June – Mint Macaron.  The other new products used on this card are the coloured pearls, Rich Razzleberry 1/4″ Velvet Ribbon, Pearlised Doily, tag from the embellishment kit and the DSP.

The DSP  consists of handpainted designs on heavyweight sheets.  This thicker paper will be great for making 3D projects as it is stronger.  There are 24 sheets in this pack – 4 each of 6 double-sided designs.  4 of the designs have a translucent pearlised finish.  The paper has a wonderful array of colours – 12 in fact – so I’m sure you’ll love it.

Now I have a ‘special offer’ of my own to share with you.  This month it’s my birthday so for every NZD50.00 order placed with me you will go into a draw for a mystery product present :).  If your order is NZD$100 you’ll get two chances in the draw.  I’ll draw the winner at the end of the month.

May is a busy ‘birthday’ month for me – this is what I got up to yesterday afternoon – writing out 20+ birthday cards so if your birthday is in May expect to see one f these in your letterbox shortly.

Until next time …

Eastern Palace – Fancy Fold Card

By | May 6, 2018

Hi there

We’ve had some beautiful weather this past week – lovely sunny days with blue skies.  I hope it lasts a bit longer as I’m not a fan of winter.  Although with winter not that far around the corner it does mean that the new Annual Stampin’ Up! catalogue is not far away either – 1 June.  I hope to receive the catalogues in a week so will have them ready to send to you shortly.

Following on from my recent Fancy Fold cards here’s another one.  I CASED the design of this card from an overseas demo – BJ Peters.  I’ve used products from the Eastern Palace Suite and teamed it up with Tranquil Tide, Lemon Lime Twist and Gold – very regal.

When the card is closed it looks just like a normal card front – with a few layers.

But open the side flap and there’s more underneath.  For the front I’ve used one of the larger stickers from the Easter Gold Vinyl Sticker pack.  The stamped images are from the Eastern Beauty stamp set.

Open it even more and all is revealed.  The bow on the ‘arm’ uses the 1/2″ Finely Woven Ribbon – this ribbon is lovely to use for a bow.  I’ve adhered it with a Glue Dot.

To create the front ‘circle’ I cut out a circle in Tranquil Tide then layered it with one of the die cuts from Very Vanilla which has a piece of Lemon Lime Twist behind it.  The centre is layered even more with a piece of Dapper Denim and the sentiment stamped in Dapper Denim on a smaller Very Vanilla circle.

The Eastern Palace Suite was an early release suite last year and Stampin’ Up! have another ‘early release’ suite – ‘Share What You Love’.  The products from this suite have been packaged into three different bundles that are available for the month of May – ‘Just Getting Started’, ‘A Little More, Please’ and ‘Gotta Have It All’.  Come 1 June these bundles will no longer be available but you will be able to purchase the products individually.

I’ll be back tomorrow with a sample to share with you.  In the meantime check out my ‘promotions‘ page to find out more about this suite.

Until then …

Picture Perfect Party Narrow Note Cards & Envelopes

By | April 29, 2018

Hi there

It’s been a while since I shared my projects using the Picture Perfect Party suite of products but I have one more project to share :).  I created this project as part of my Stamp Camp presentation back in February.  It combines products from the suite along with the Narrow Note Cards & Envelopes.  I also created a box to put them in using the Lots to Love die.  If you have fallen in love with this suite there is only one month left to stock up on the products so let me know if you want to order anything.  I will be placing an order on Tuesday night so let me know before 8:30 pm.

I think I ended up using all the images from the set on these cards :).

I’ve also used some of the Tutti-Frutti sequins as the colours match the papers from Picture Perfect Party DSP pack.

These cards required a bit of ‘fussy’ cutting but that’s OK as I find it quite relaxing – not everyone enjoys fussy cutting.

The box is made from Whisper White card stock and then decorated with this fun design from the Picture Perfect Party DSP pack.  I’ve really loved the bright colours in this pack and will be sad to see it go at the end of May.

Well I’m heading off to bed as it’s back to work tomorrow.

Until next time …

Petal Garden Fancy Folds – Double Dutch Fold

By | April 24, 2018

Hi there

Yesterday I shared with you the Bridge Card and now I have the second fancy fold card we made – a Double Dutch Card.  For this card I’ve paired the Petal Garden DSP with the Petal Palette stamp set.  This post is longer than normal – check right to the bottom for all the measurements 🙂

Here’s the front view – I love that even though this is a fancy fold card it can still stand on it’s own 🙂  The front image has been stamped on Shimmery White card stock then heat embossed with copper embossing powder.  I never tire of seeing the powder heating and melting – it’s such a cool technique.

And now a side view – showing the fold over flap.  The flower and leaves were coloured with ink using an Aqua Painter.  I did a light layer of colour (Calypso Coral) and then went back and applied some more ink to create  darker areas within the flower.  The leaves were done the same way with Old Olive.

And finally the inside.  The card base is Pool Party with the sentiment stamped in Old Olive on Whisper White card stock.  The card base measures 8″ x 9″.  To create the score lines – with the 8″ edge at the top score 2″ on either side.  Then with the 9″ edge at the top score in and down 2″ to the first score line and repeat in and down 2″ from the first score line to the edge of the card base.  Cut away as per diagram below then score at 5 1/2″ from left hand side.

And here’s my second sample – ready for Mother’s Day (in New Zealand Mother’s Day is Sunday 13 May).

This flower was coloured in using Sweet Sugarplum as the first layer and then some Rich Razzleberry was added to create the darker shading.

The sentiment (from Thoughtful Banners) was stamped in Sweet Sugarplum and the front image is matted to Sweet Sugarplum while the card base is Rich Razzleberry.

The inside sentiment is from Ribbon of Courage with the ‘dots’ coming from Petal Palette.  The inside flower images are also heat embossed in copper and matted on DSP before adhering to the card base.

The other measurements for card are:  DSP – 3″ x 3 1/2″ adhered to Whisper White 3 1/4″ x 3 3/4″, four pieces of DSP measuring 1 3/4″ – adhered directly to the card base front and inside.  For the stamped images a piece of Shimmery White 2  3/4″ x 3 3/4″ adhered to a coloured mat of 3″ x 4″ and two pieces of Whisper White 4cm square for the inside images.  The central Whisper White measures 9.5cm x 13.5cm.

One final thing to mention is that the stamped image is adhered with dimensionals but don’t put them right to the bottom of your image otherwise the ‘flap’ won’t open.

Until next time …

Petal Garden Fancy Folds – Bridge Card

By | April 23, 2018

Hi there

This month at card class I taught two ‘fancy fold’ cards.  I wanted them to be ones that didn’t use a Big Shot and could easily be recreated.  They also had to be folds that I hadn’t taught before – now that made my selection hard.  I finally decided on the Bridge fold and Double Dutch Fold cards.  First up I’ll share the Bridge card – you’ll have to check back tomorrow for the Dutch Fold.

The paper is from the Petal Garden 6″ x 6″ which I purchased last year and then forgot to use!  I’m not really a ‘flowery’ person but I really love this paper and the colours that are in it.

The paper is double sided with a flower pattern on one side an a plan design on the other.

You can get two cards from one sheet of A4.  The card base is 4 1/4″ x 8 1/8″ and this is scored at 1 1/4″ and 2 1/2″ from each end.  The four pieces of DSP for the inside panels measure 1″ x 4″.  The ‘bridge’ piece of DSP measures 1″ x 14.3cm and this is adhered to a piece of card stock that measures 1 1/4″ x 14.8cm.  The sentiment is from Dragonfly Dreams and is stamped in Old Olive.  To attach the ‘bridge’ fold the left hand panel in and attached one end of the ‘bridge’ to the outer panel.  Leave the right hand panel fully extended and attach the other end of the ‘bridge’ to the outer panel.

The inside and back panels measure 3″ x 4″ for the coloured card stock (I used Old Olive) and the Whisper White measures 2 3/4″ x 3 3/4″.  The inside sentiment is from a favourite set of mine – Picture Perfect and the back image is from Petal Palette.

When folded flat this card fits in a standard C6 envelope so it can be posted.   The final touches to this card are three rhinestones and a bow tied with the Old Olive Mini Chevron Ribbon.

Tomorrow I’ll share the second card style – Double Dutch Fold.

Until then …