Bird Ballad – Watercolour Pencils

By | August 13, 2019

Hi there

I didn’t realise it was that long since I’d done a post – so to make up I’ll share three posts over the next three days.

While my friend was travelling overseas a couple of months ago she lent me her Free As A Bird stamp set – so I stamped the main image a couple of times to colour in at my leisure.  So in my recent ‘desk tidy’ I found them and got colouring.

I decided to colour them in with different tools – first up Watercolour Pencils.  We have two sets of watercolour pencils giving us 23 colours to choose from.  You can find them on page 179 of the Annual Catalogue.

Bird Ballad - Watercolour Pencils

The card base is a standard base 21cm x 14.9cm scored at 10.5cm.  From the card front I die cut the largest Stitched Nested Label to create a ‘window’.  To make sure I got the image in the correct place I closed the card and then placed the stamped image inside the ‘window’ cut out.  It’s best to adhere it with our Multipurpose Liquid Glue so you can move it easily into place.  Once it was in place I adhered the sentiment in the bottom corner.

Bird Ballad - Watercolour Pencils

To create the frame around the window I took a piece of Basic Black (just bigger than the die) and die cut the largest sized die from it.  I then trimmed down my piece of cardstock to give an even edge on either side of the stitching.  This was then adhered to the front of the Calypso Coral card base – again I’d recommend Multipurpose Liquid Glue.  The sentiment is from Colorful Seasons and die cut with smaller dies from the Stitched Nested Labels on page 196.

Bird Ballad - Watercolour Pencils

My bird image has been stamped with Memento Ink onto the largest die cut out.  Seeing as my favourite colour is yellow I went with yellow birds :).  I’ve used a mix of Daffodil Delight and Crushed Curry.  Starting from the left bird #1 has been coloured in with just Daffodil Delight, bird #2 is Daffodil Delight with his ‘markings’ being done with Crushed Curry, bird #3 has a light colouring of Daffodil Delight and then his ‘markings’ are a heavier colouring of Daffodil Delight and finally bird #4 I coloured his head and back in a heavier Daffodil Delight, his front in a lighter shading of Daffodil Delight and his markings in Crushed Curry.  There beaks are coloured in with Pumpkin Pie and a light colouring over the top with Early Espresso.  The flowers are Calypso Coral (to match the card stock), leaves a mix of Old Olive and Granny Apple Green and the branch is Early Espresso.

Check back tomorrow for the next ‘colouring in’ of this image.

Until next time …


Fable Friends – Baby Cards

By | July 31, 2019

Hi there

There seems to have been something in the water at work – 5 of my colleagues have become parents (either for the first time or again).  So far we’ve had 2 boys and 3 girls with one more arrival due in the next couple of months.  After seeing a card made by my talented friend and fellow demo Paula Dobson, I purchased Fable Friends as it can be used for babies or little kids (or even big kids as I made here).

I taught this card a couple of months ago and then had to create more 🙂

Fable Friends - Baby Card - Poppy Parade

First up stamp your image then create a mask.  I used a Post It Note making sure I had enough ‘sticky’ for the mask to adhere to the cardstock.  Once ‘Peter’ has been covered I placed a piece of scrap paper (or if you have the long Post It Notes use one of those) across the bottom.  I used my grid paper to make sure the edge of the paper was straight (tape the ends down with Washi Tape).  Taking your Sponge Brayer ink up the roller – here we’ve used Balmy Blue for the background – and starting off the page apply the ink making sure you go the whole way across the cardstock.  Rolling backwards and forwards move up the cardstock until you are happy with the ink coverage.  You’ll  need to reink your brayer.  Remove the scrap paper but not the mask covering ‘Peter’.  Stamp the grass just below the inked line as per photo then remove the mask.  You are now ready to stamp your sentiment and colour in ‘Peter’.  I used our Stampin’ Blends – Crumb Cake (light and dark), Petal Pink and Poppy Parade (light and dark).  The final touch – some sequins.

Fable Friends Baby Card - Balmy Blue

For this card I used a mix of Daffodil Delight and Pumpkin Pie for my background to create more of a ‘sunset’ scene.  This one is coloured in with Soft Suede (light and dark), Petal Pink and Balmy Blue.  His buttons are Night of Navy.  I also decided to use the Well Written Framelits instead of stamping.  These words have been cut out in the same colour as the jacket.

Fable Friends Baby Card - Flirty Flamingo

Here I’ve used the sequins as ‘flowers’ with my grass.  This time the colours are Smoky Slate (light and dark), Petal Pink and Flirty Flamingo (light and dark).

Fable Friends Baby Card - Granny Apple Green

And the last combo is Ivory, Crumb Cake (light), Petal Pink and Granny Apple Green (light and dark).

Each front has been adhered to the Thick Whisper White card base with plenty of dimensionals.

There are so many combinations for rabbit and jacket colour – what will your combo be.

Well that’s all for now.  Until next time …

Daisy Lane 2019-2021 In Color Notecards

By | July 23, 2019

Hi there

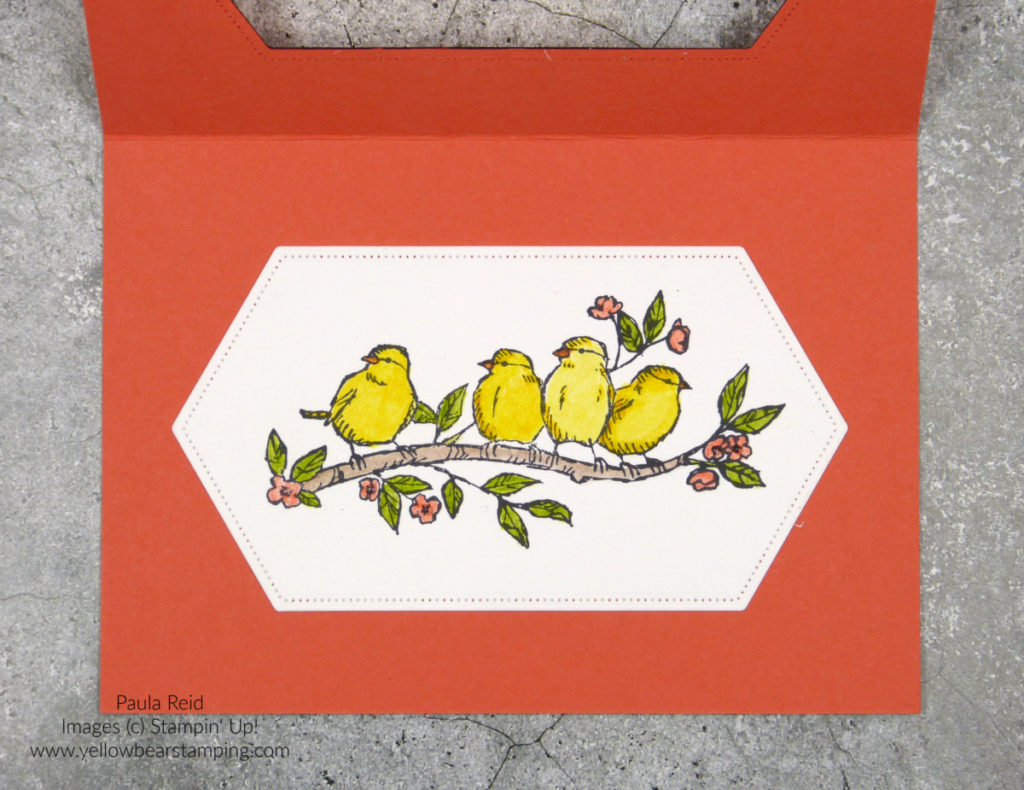
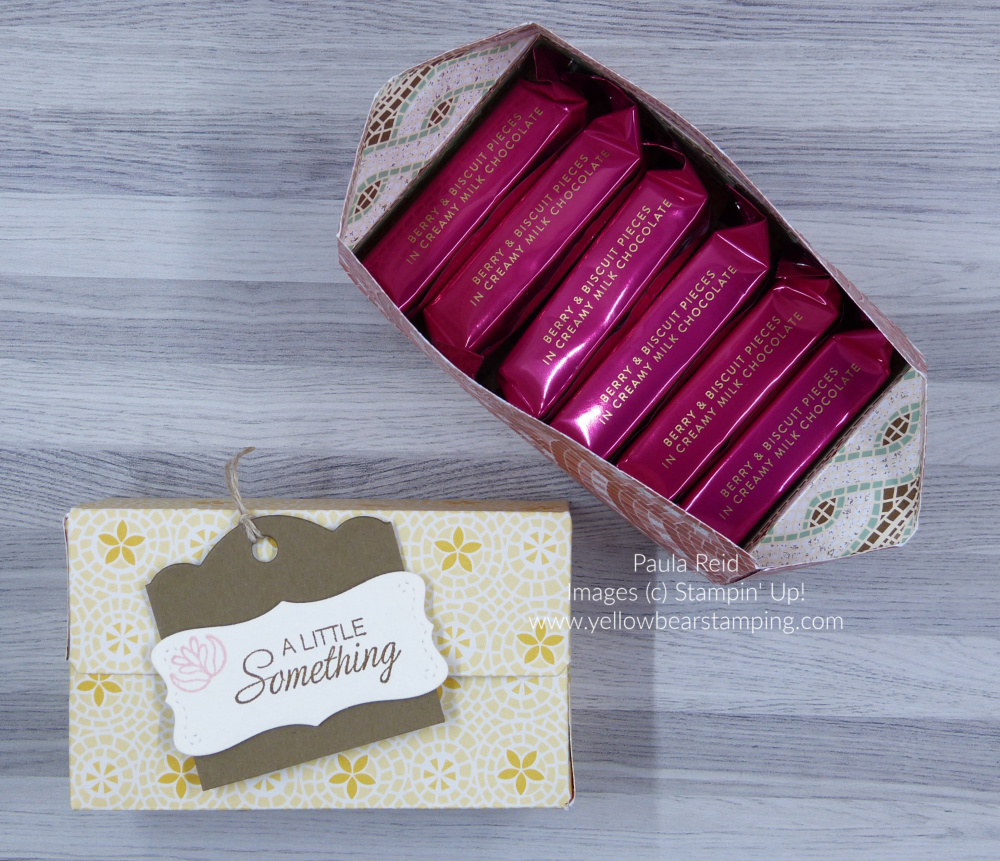
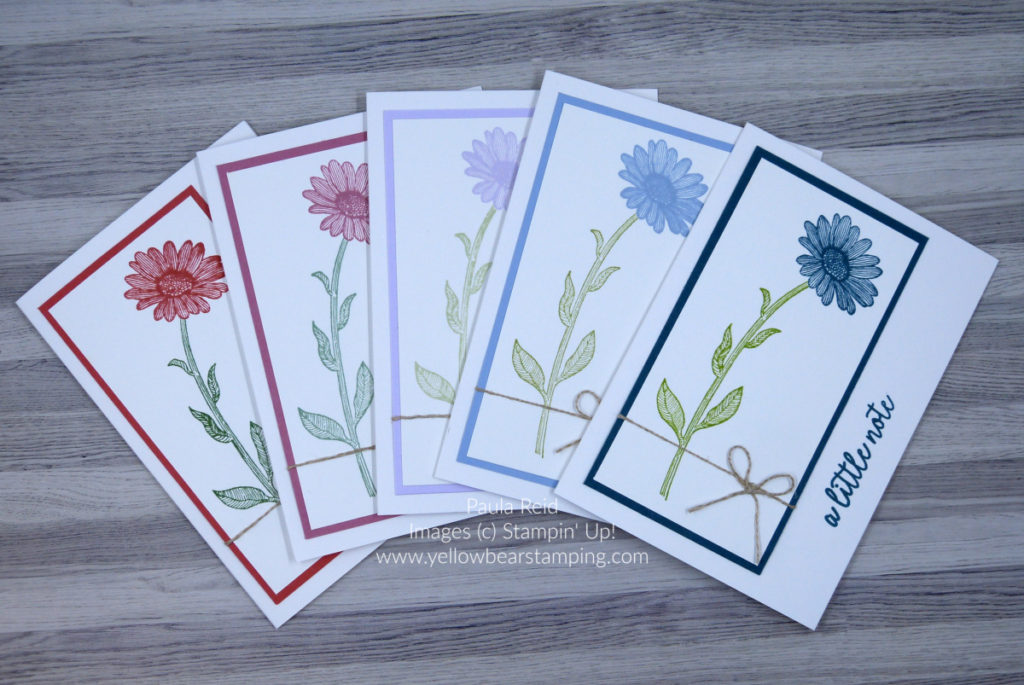
Back in April we had our ‘Demonstrator Only’ event (OnStage) where we got to see new products and the 2019-2020 Annual Catalogue before they were released.  As part of our ‘goodie bag’ we received the lovely stamp set Daisy Lane.  This set can be purchased on it’s own or as a bundle with the Medium Daisy Punch.

Daisy Lane 2019-2021 In Color Notecards

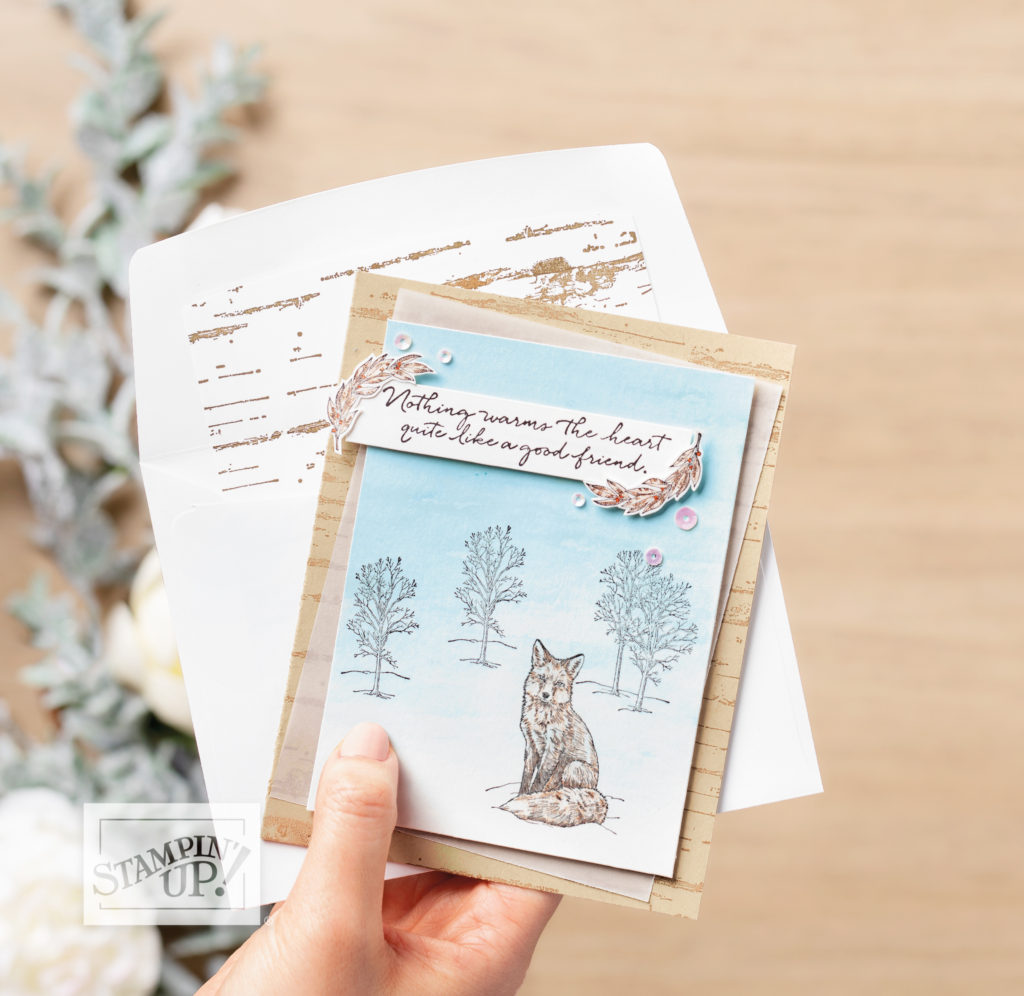
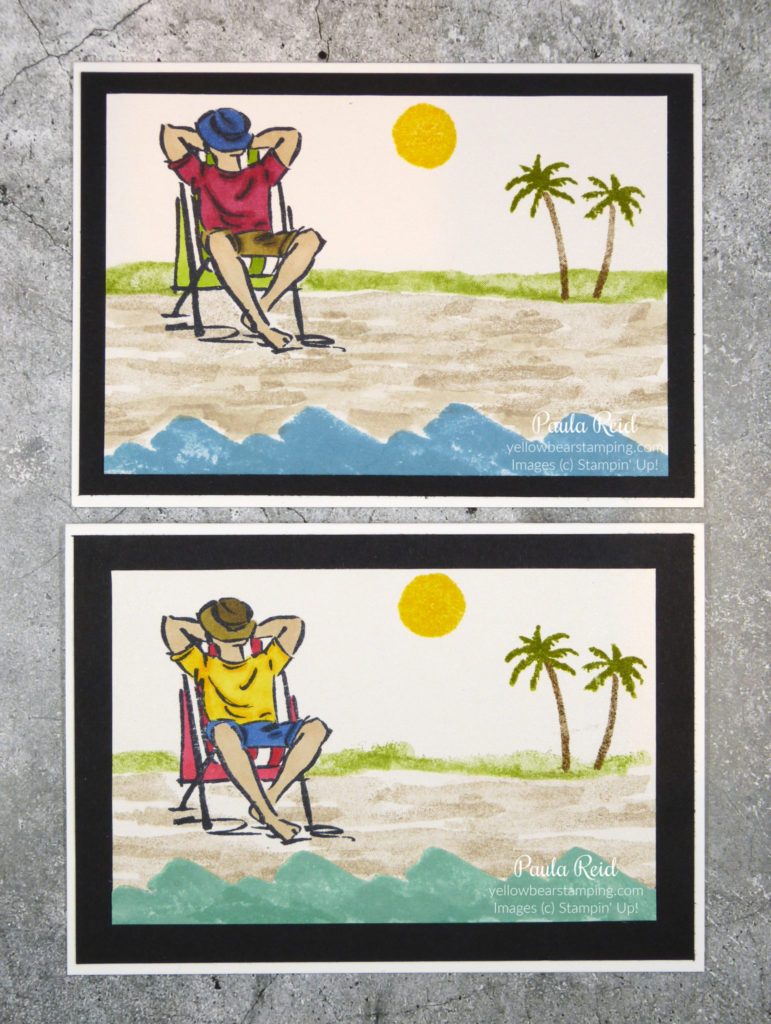
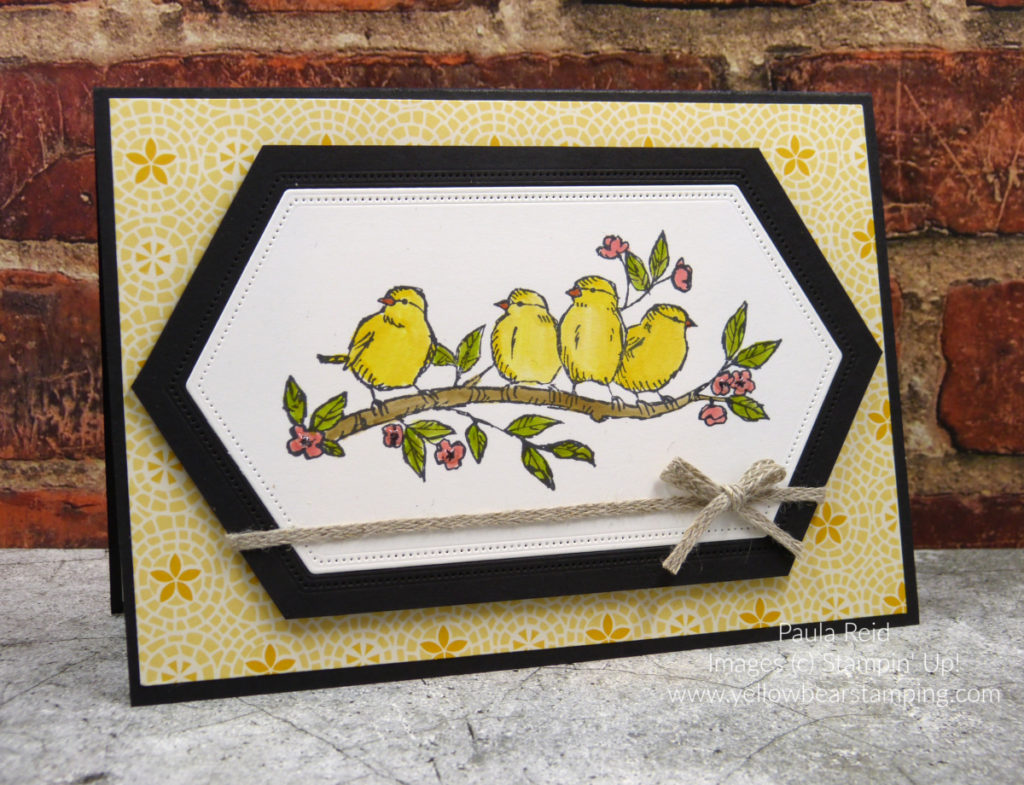
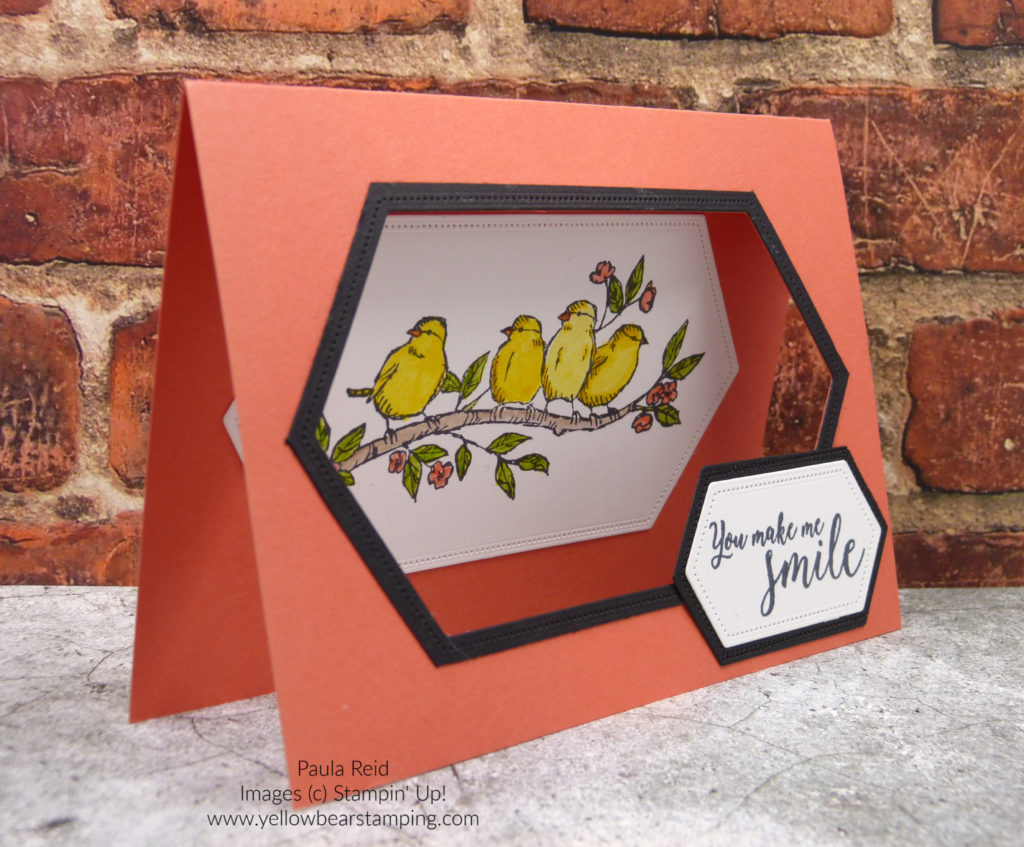
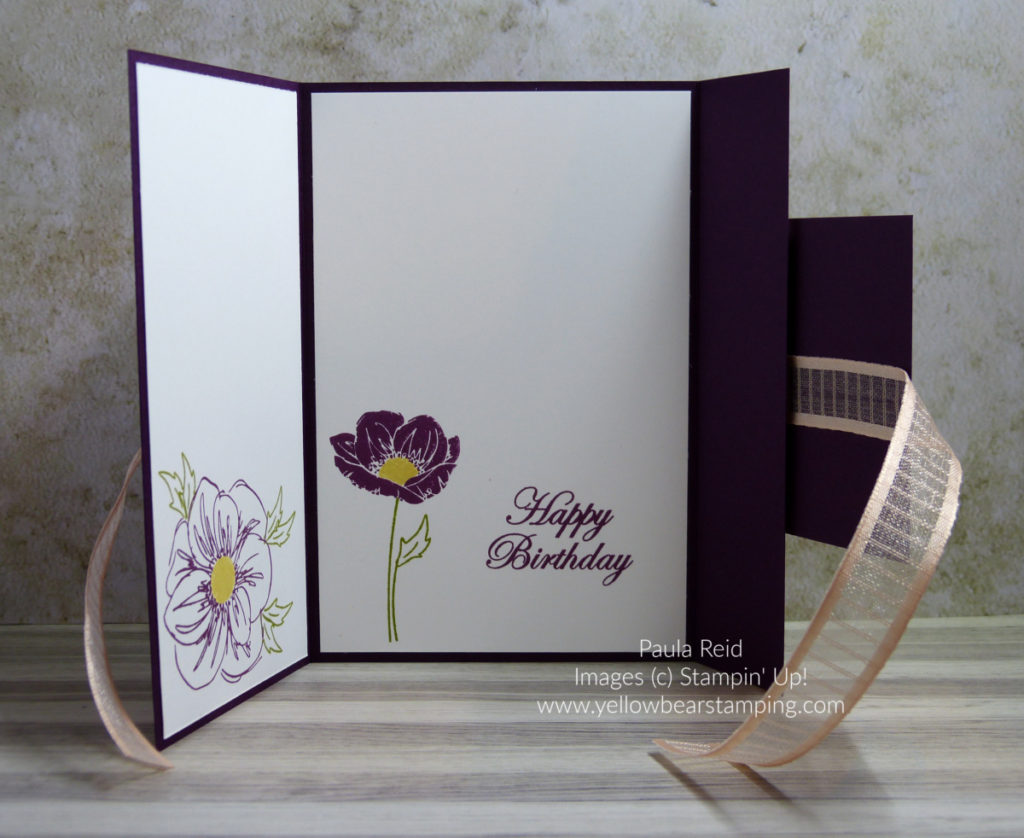
I love our Notecards and Envelopes – they make quick and easy cards that can be used individually or made into a set of cards to give away as a gift.

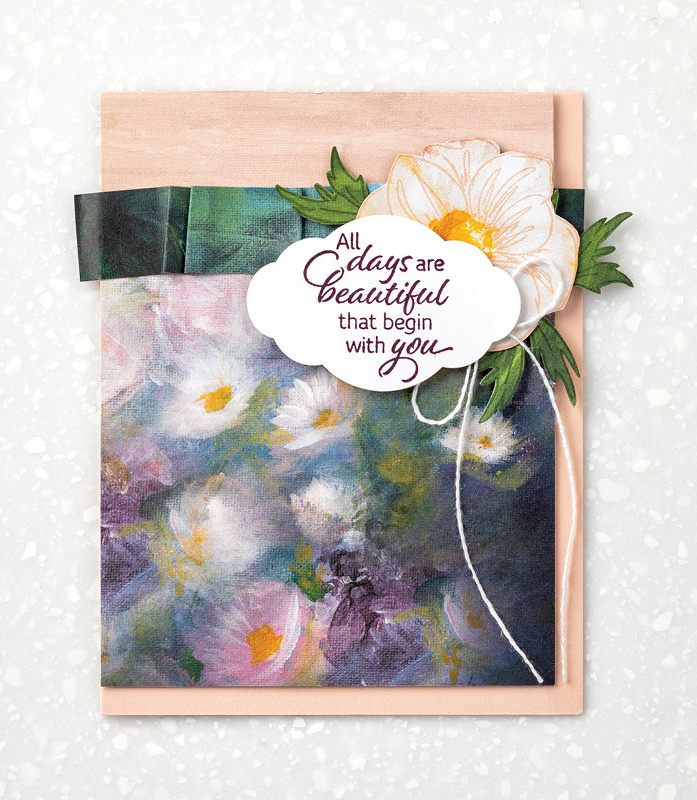
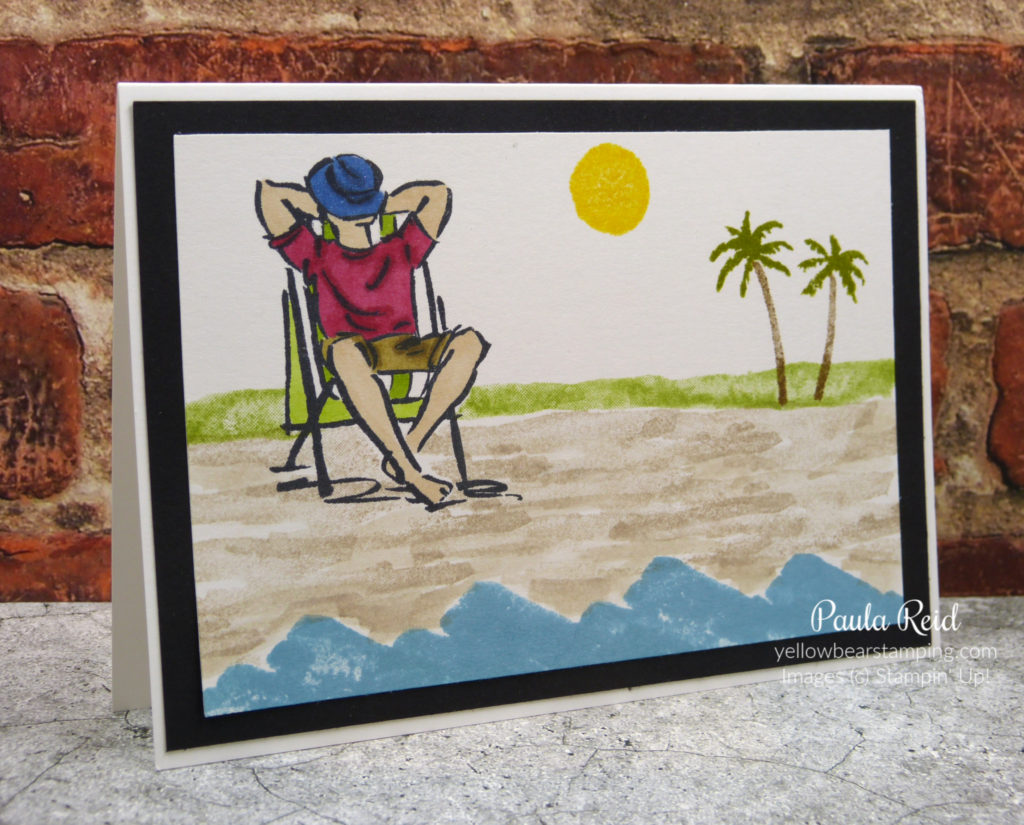
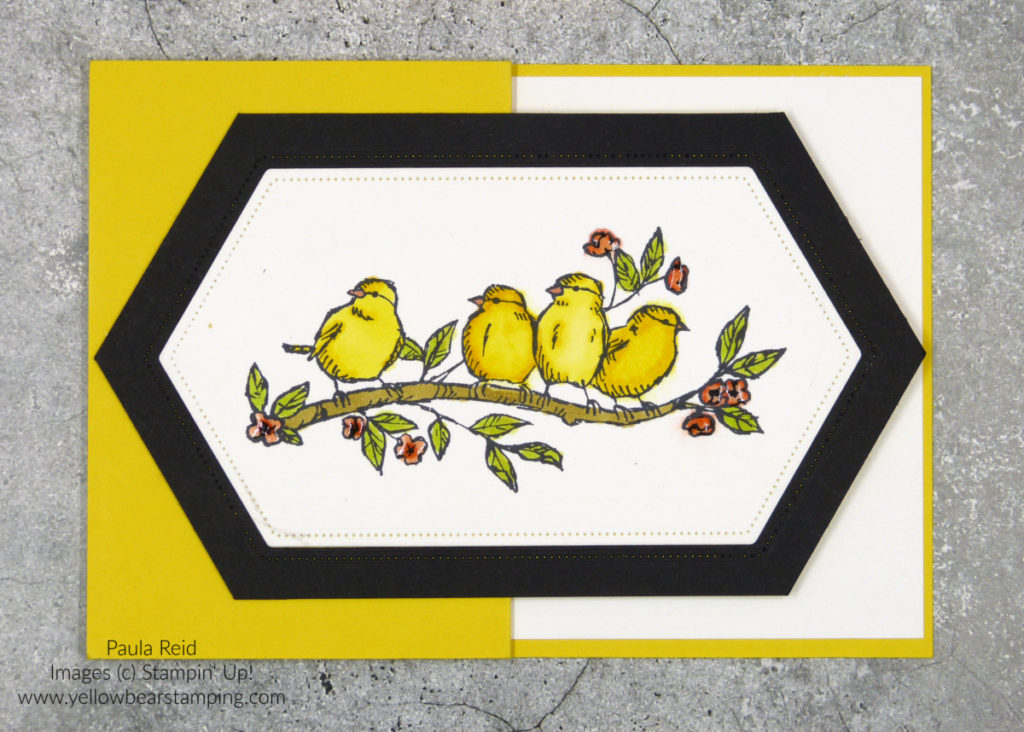
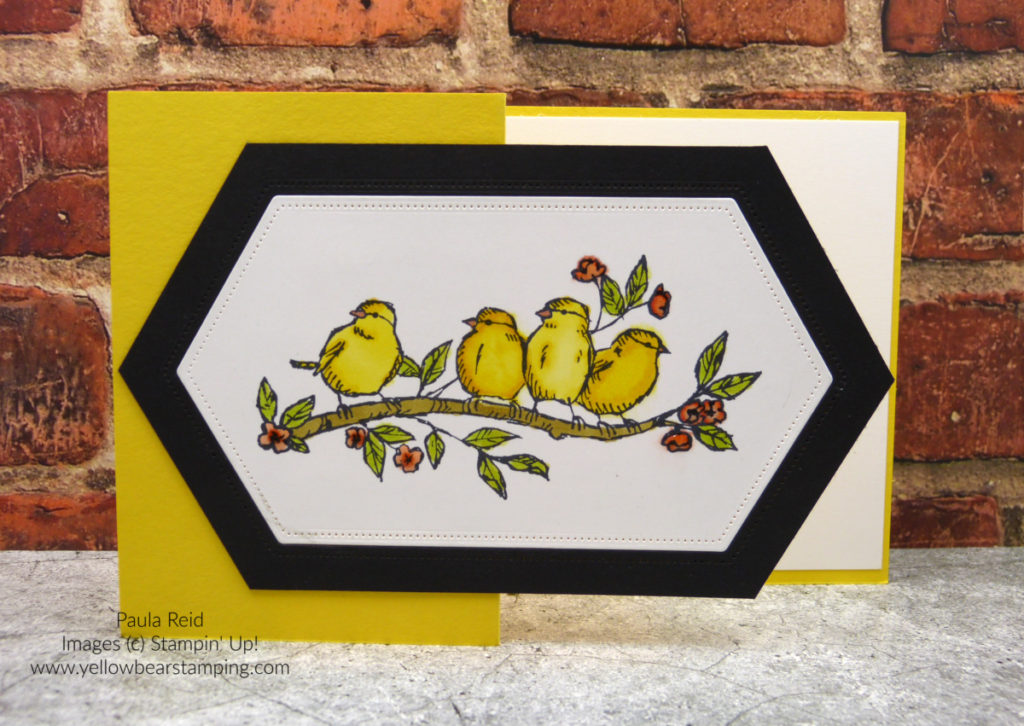
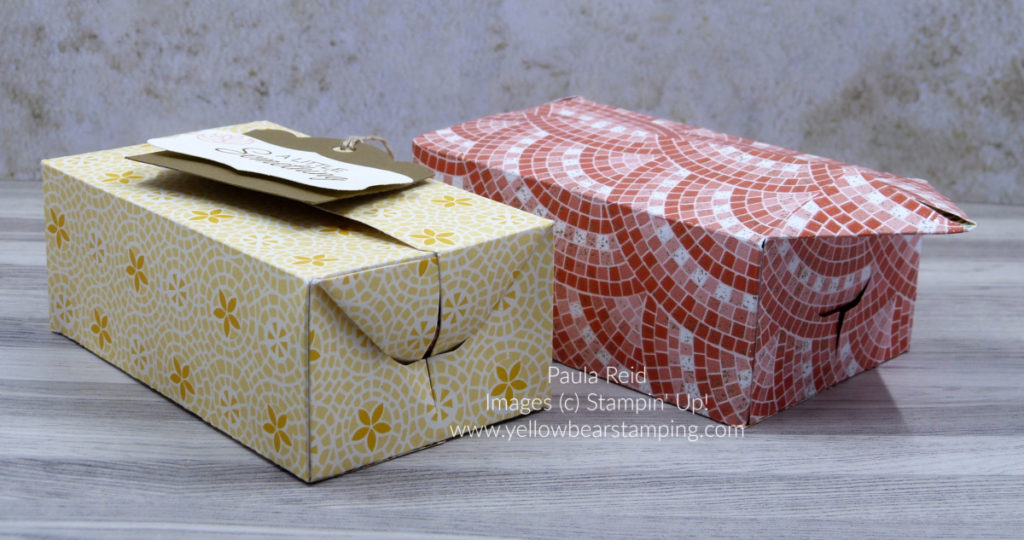
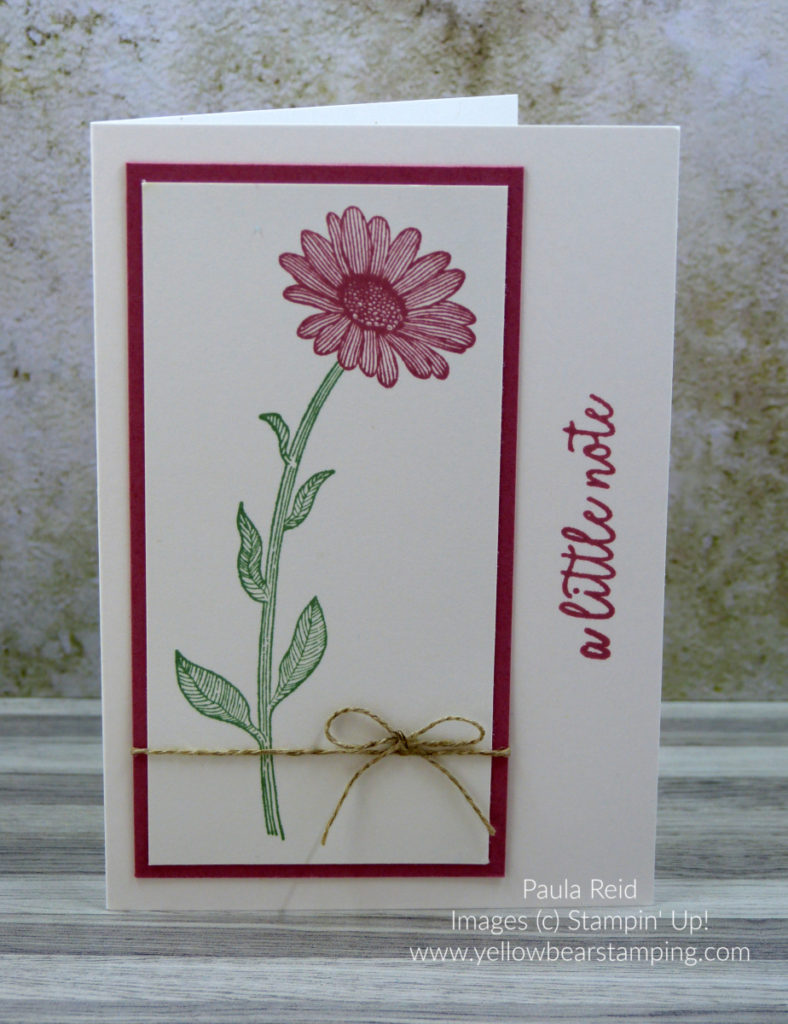
Here I’ve done the same design but changed the colours to showcase the new 2019-2021 In Colors – from left to right we have Terracotta Tile, Rococo Rose, Purple Posy, Seaside Spray and Pretty Peacock.

Daisy lane Notecard - Terracotta Tile

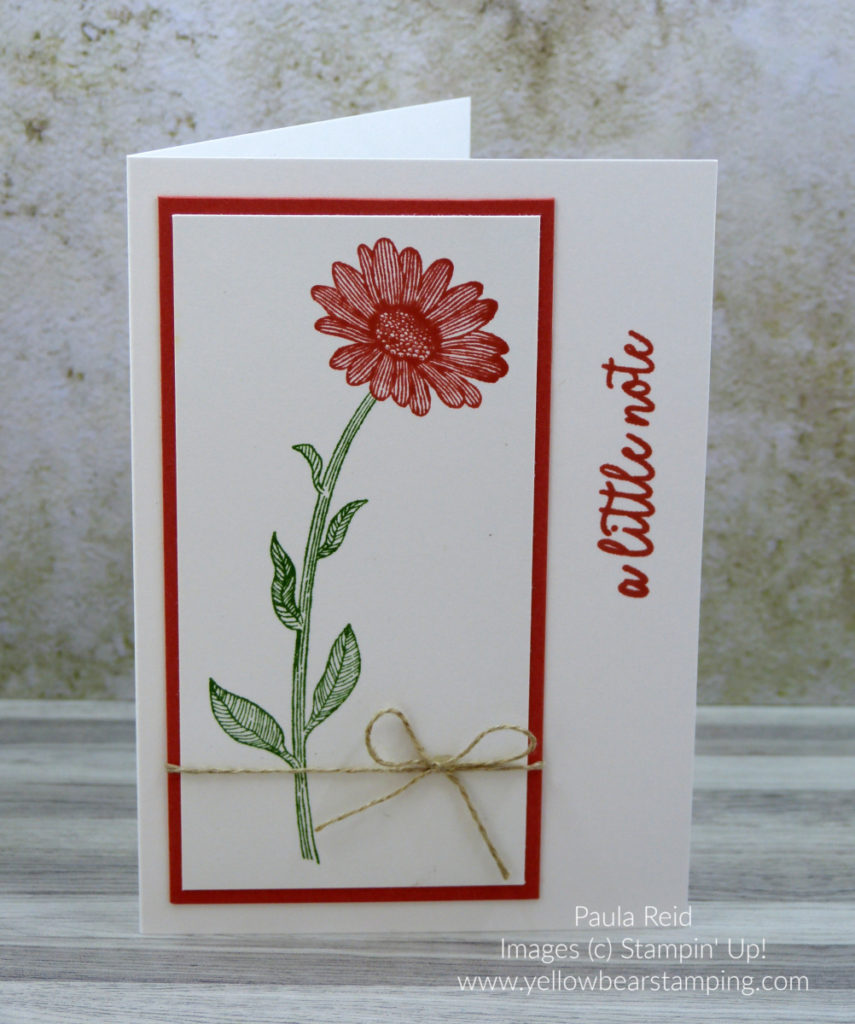
Each card has a different ‘green’ for the leaves and stem.  I flicked through my Colour Coach to find the best match – here I’ve paired the Terracotta Tile with Garden Green.

Daisy Lane Notecard - Rococo Rose

Rococo Rose and Mint Macaron

Daisy Lane Notecard - Purple Posy

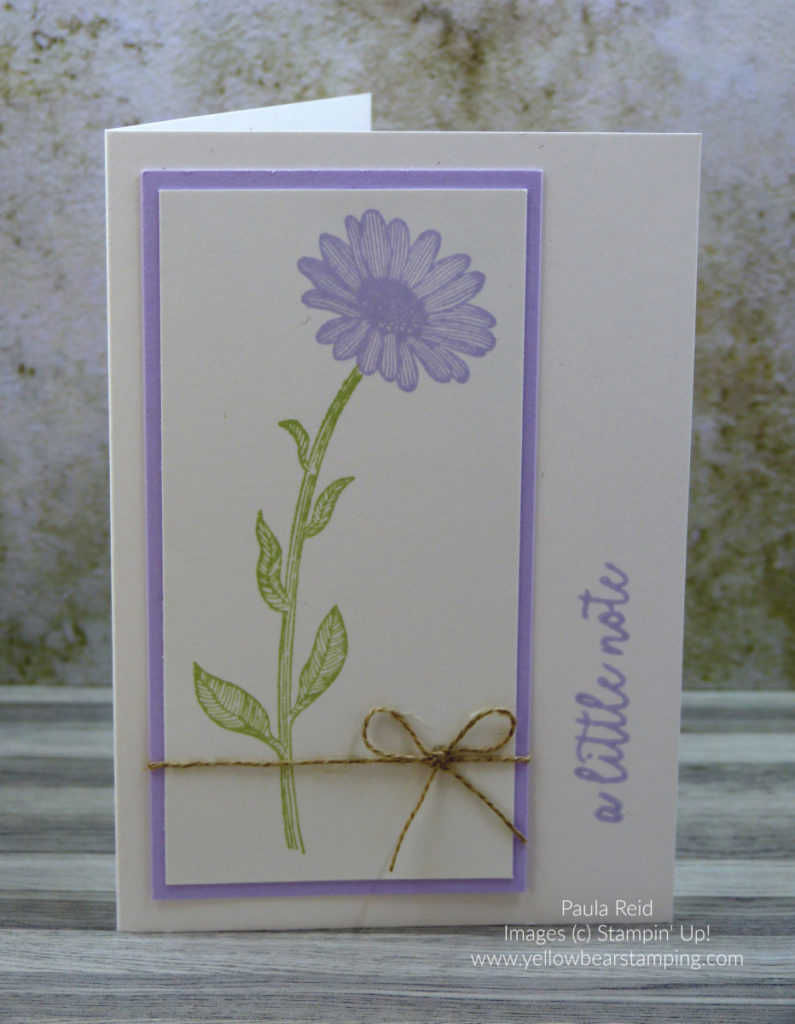
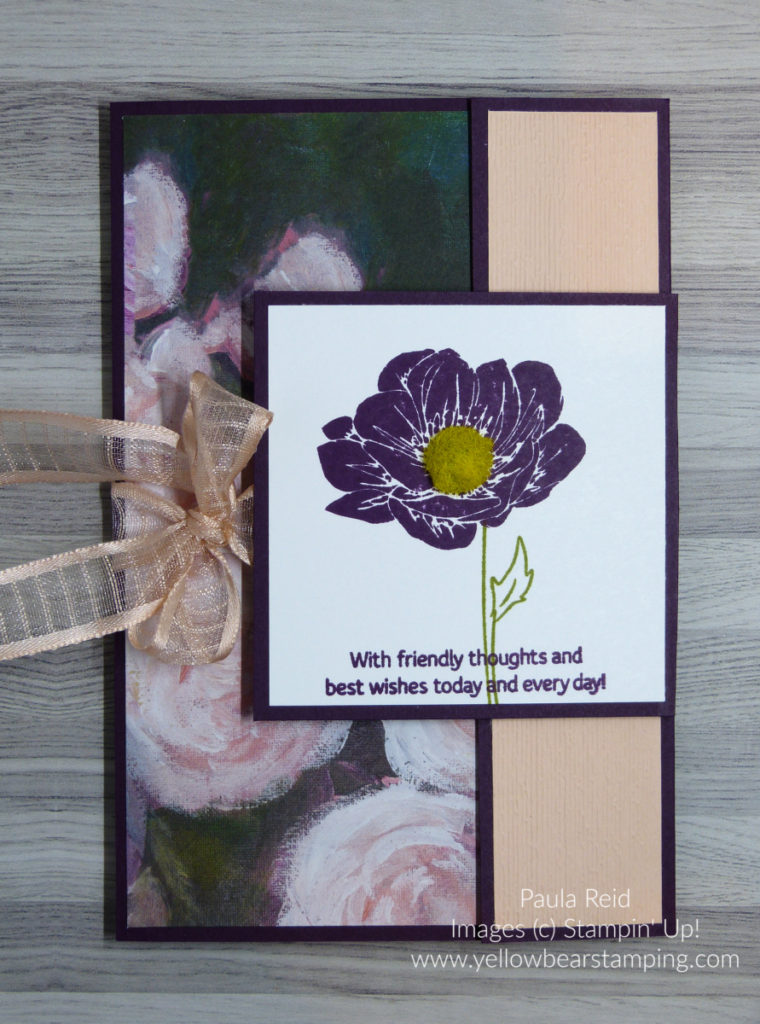
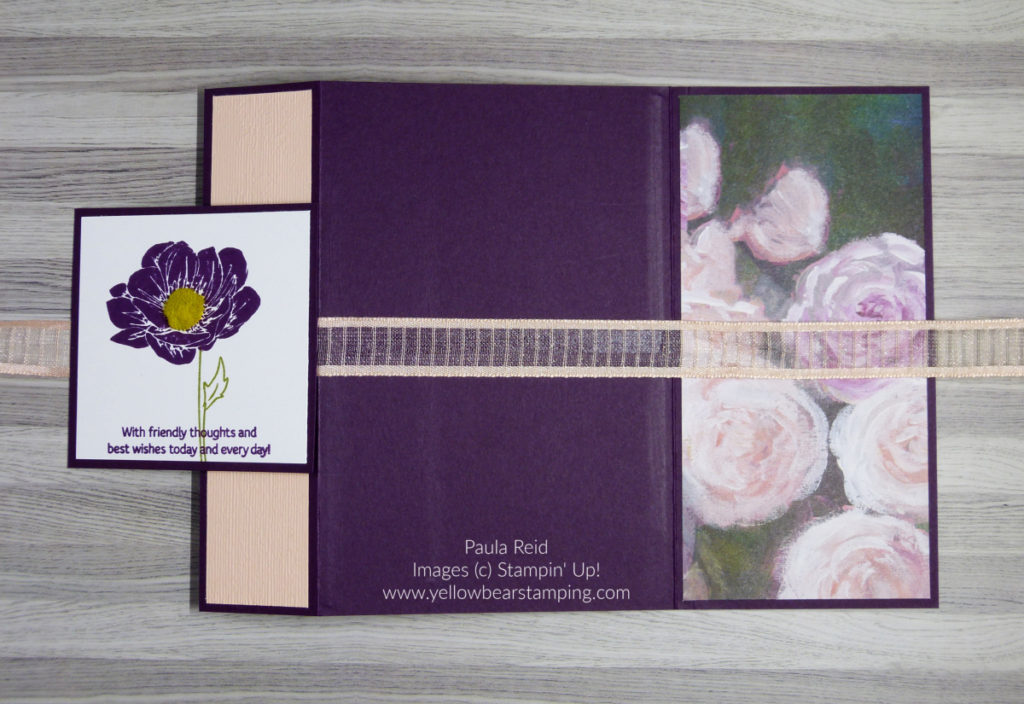
Purple Posy and Soft Sea Foam (this is a colour I haven’t used much so was glad to let it see the light of day)

Daisy Lane Notecard - Seaside Spray

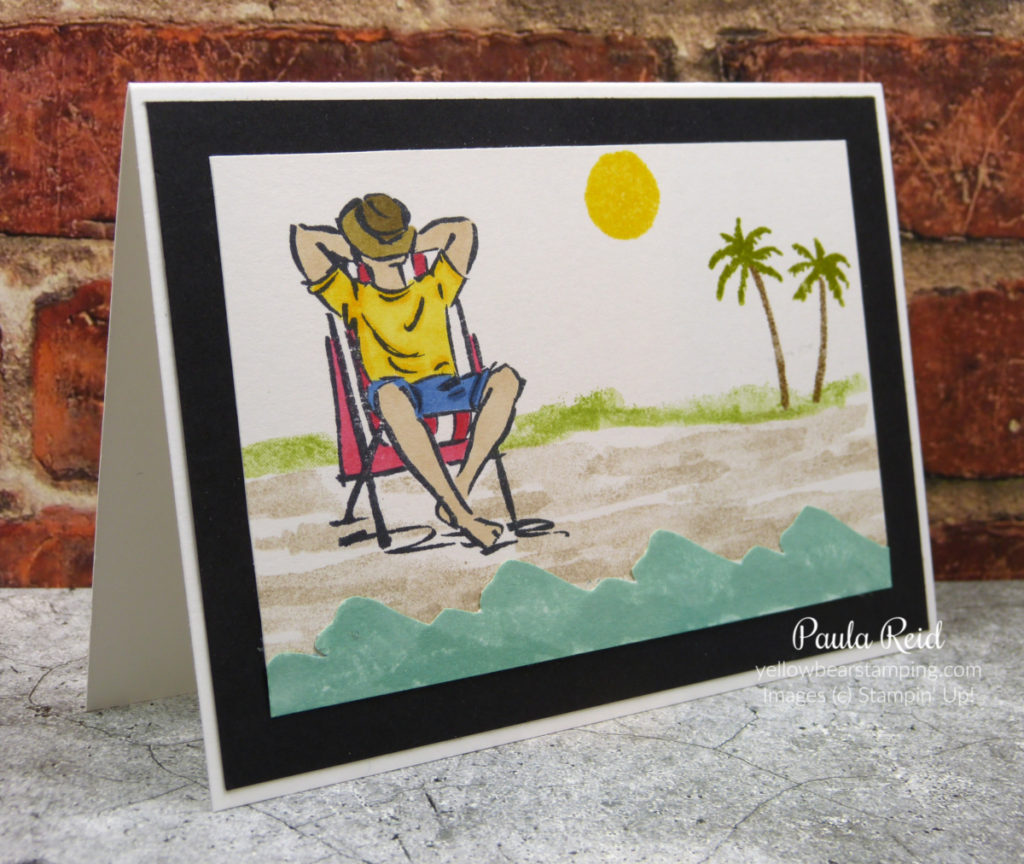
Seaside Spray and Pear Pizzazz

Daisy Lane Notecard - Pretty Peacock

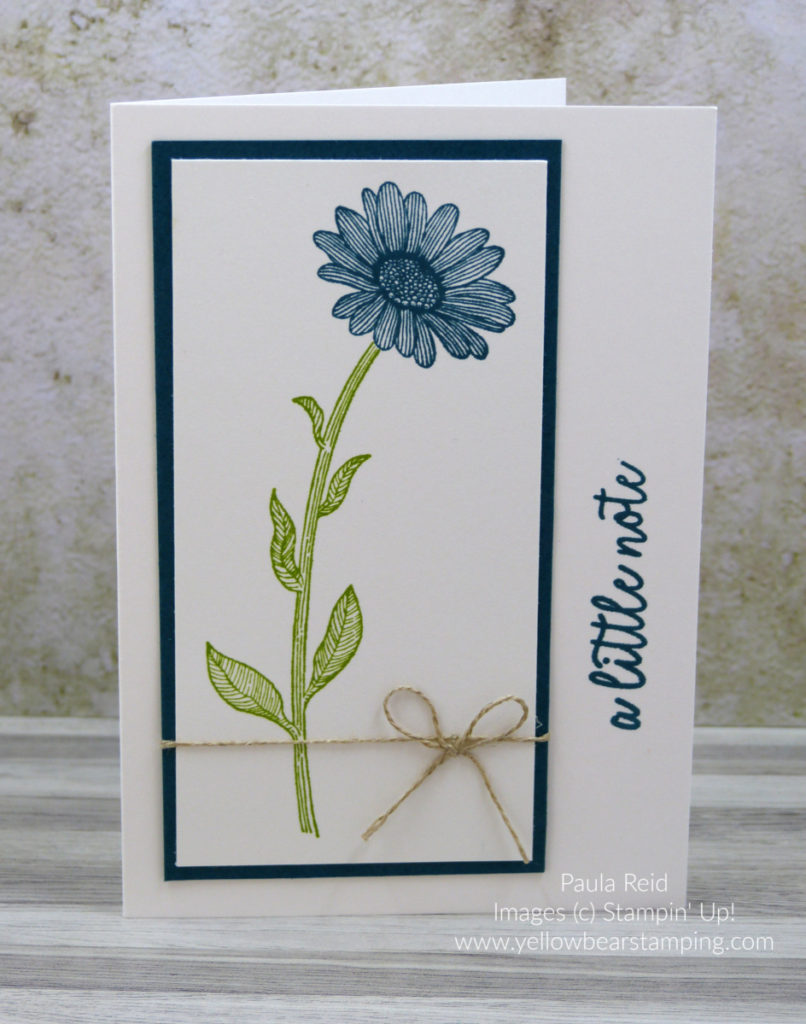
And finally Pretty Peacock and Granny Apple Green

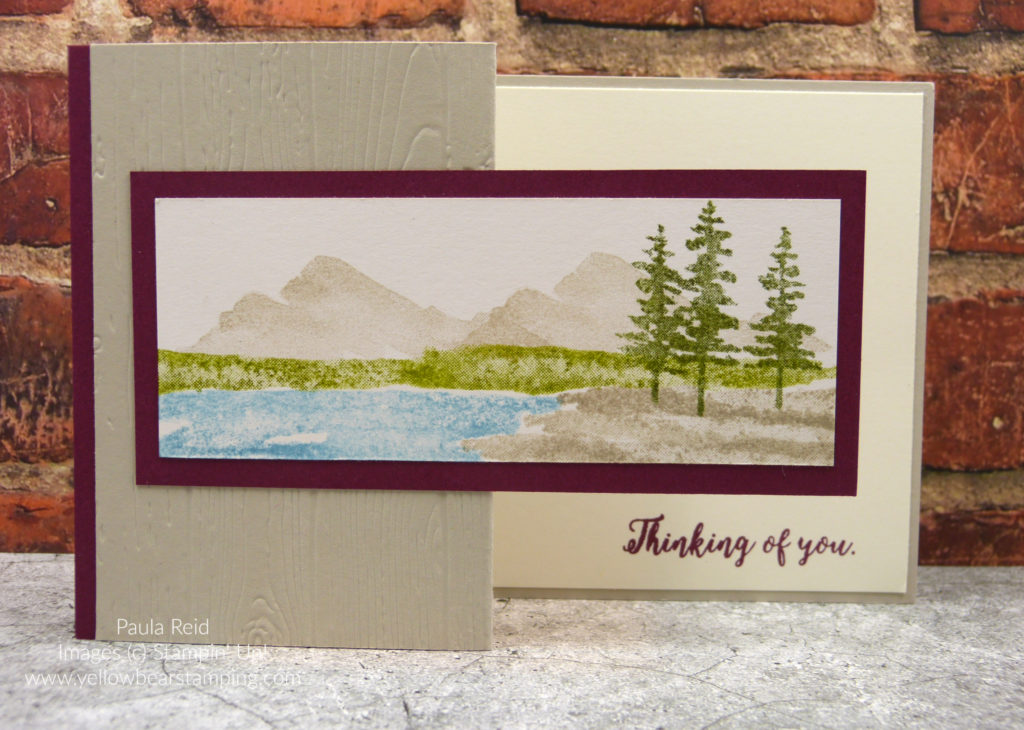
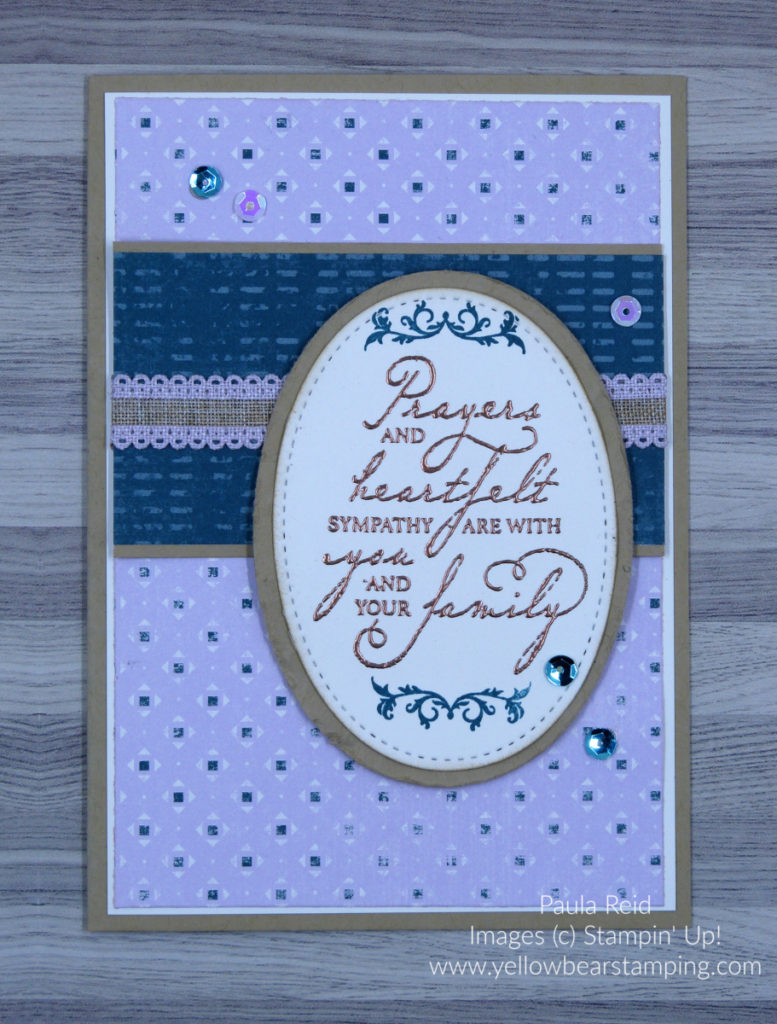
The coloured mat measures 11.5cm x 6 cm and the Whisper White stamped cardstock measures 11cm x 5.5cm.

The Linen Thread has been wrapped around the mat and cardstock and then the bow has been added with a Glue Dot (I folded the Glue Dot into half and then half again).

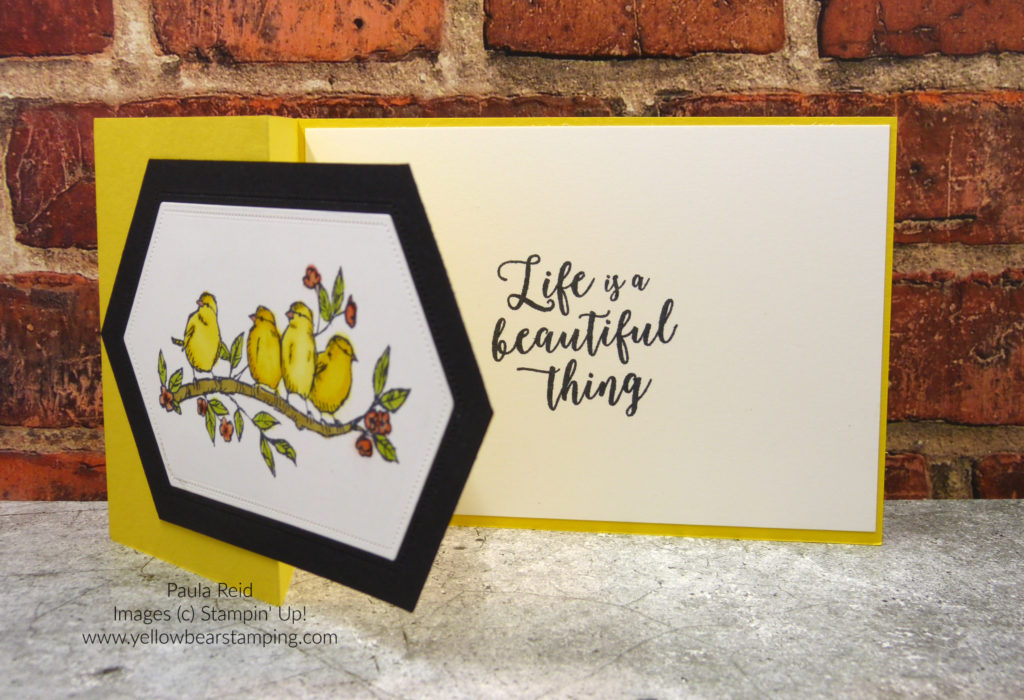
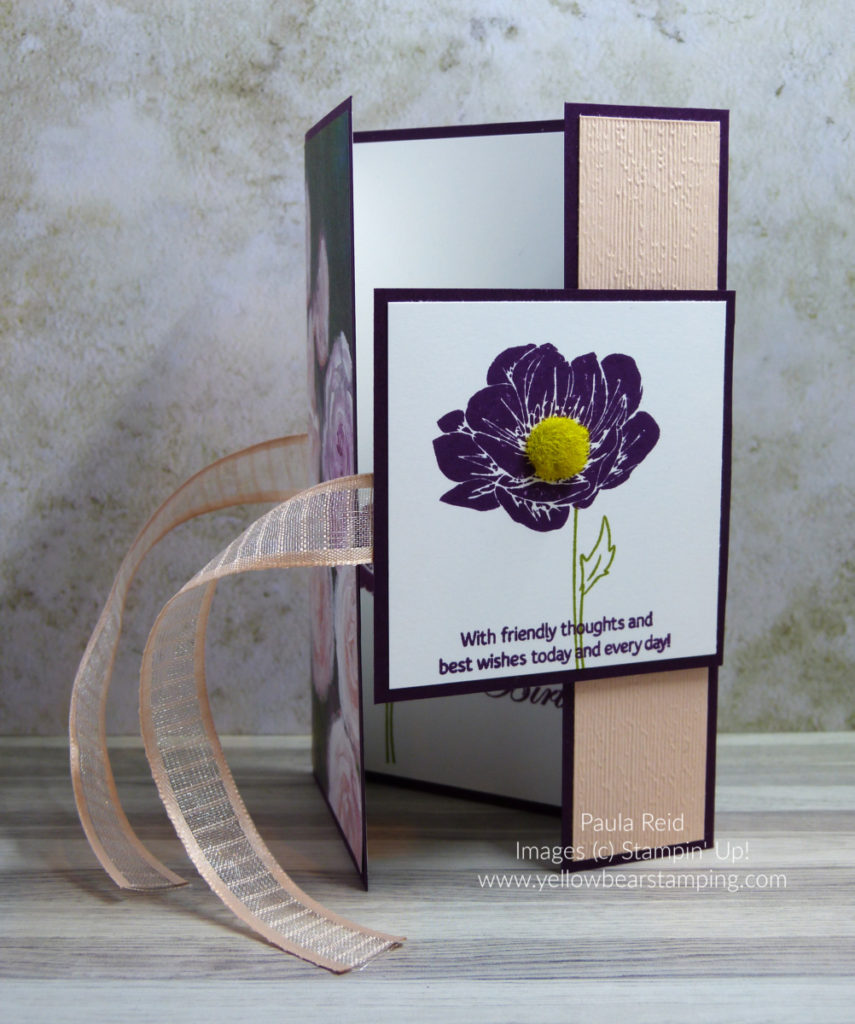
The sentiment is from Butterfly Gala and has been stamped in the same colour as the flower and mat.  For a bit of change the sentiment has been stamped vertically with some starting from the bottom, middle and top.

If you would like to be able to see, play and buy product early and attend these great events why not sign up and become a demonstrator this month (or next month) and receive and additional NZD50 worth of product in your Starter Kit – there are so many benefits in becoming a Stampin’ Up! demonstrator.  I would love to have you join my team.  If you would like to know more about becoming a demonstrator contact me or check out my Join My Team page.

Until next time …

Woven Heirlooms from the Woven Threads Suite

By | July 21, 2019

Hi there

My project today is a card we made at a recent team training and uses products from the new Woven Threads Suite (pages 12-14 Annual Catalogue).  I don’t have this suite so it was great to create a card and be able to share it with you.  This suite consists of a stamp set, dies & coordinating 3D embossing folders, Designer Series Paper (DSP), Sequins and Trim.  The DSP and sequins coordinate with the 2019-2021 In Colors – Pretty Peacock, Purple Posy, Rococo Rose, Seaside Spray and Terracotta Tile.

We had a couple of colour combos to choose from for this card – I went with the Purple Posy/Pretty Peacock option.  The card base is Crumb Cake with a Whisper White mat under the DSP.  The sentiment has been stamped in VersaMark and then heat embossed with Copper Embossing Powder.  Heat Embossing is one of my favourite techniques – I never tire of watching the transformation as the powder melts and becomes raised.  The ribbon used on this project is the 1/2″ Scalloped Linen Ribbon.  The centre of the ribbon is woven linen and then edged with a scallop of colour with our 2019-2021 In Colors – here we’ve used the Purple Posy.  The faceted sequins give a subtle shimmer to the project.

Woven Heirlooms

Within this suite there is the Woven Heirlooms Bundle.  This bundle includes the Woven Heirlooms stamp set and the Heirloom Frames Dies & 3D Embossing Folders.  When you purchase any of our bundles you save 10% so well worth looking at the bundle options.

Don’t forget that during July for every NZD110 that you spend you earn an NZD11 Bonus Days Coupon to be spent on your next order in August.  Check out my Promotions page for more details PLUS if you sign to be become a Stampin’ Up ! Demonstrator during July and August you receive and extra NZD50 worth of product in your Starter Kit PLUS you will receive and NZD18 Coupon Code to be used the following month.  If you would like to know more details about either of these offers please contact me – I’d love to have you join my team.

Well that’s all from me for now.  Until next time …


Parcels and Petals in Mosaic Mood

By | July 15, 2019

Hi there

At our OnStage event back in April Stampin’ Up! gave us each a pack of the Mosaic Mood Specialty Designer Series Paper as an ‘all attendee’ giveaway.  Now this paper was not high on my wish list but I thought I’d cut into it and get creating.  I teamed it with one of the first items on my wish list – the Parcels & Petals bundle on page 27.  I LOVE 3D boxes so this die set was a real standout for me.  It’s a great size and as you’ll see later actually holds quite a bit of chocolate 🙂

Parcels & Petals

I used this card and gift box for our team swap so here are a couple of the colour combinations.

Parcels and Petals

This paper is a mix of mosaic tile designs and floral imagery with shiny accents on one side of the paper.  There is also a suite of products – Mosaic Mood Suite – that coordinate with this paper.  Check out pages 118-120 of the Annual Catalogue for more details.

Mosaic Mood Specialty Designer Series Paper

The front panel opens so that you get the full effect of this gorgeous paper – aren’t the Hummingbirds cute?  When Phil and I were in Sedona in 2012 the accommodation we stayed at had a Hummingbird feeder right outside our window.  You could spend hours watching them coming in for a feed.

Perfect Parcels Die

For those of you that know me you’ll know how much I love Whittakers Mini Slabs – this box is a great size and holds 6 mini slabs :).  It has a really cool closure and only requires a bit of adhesive to put together.  I would highly recommend this bundle being added to your next wish list.  You can get 3 boxes out of a sheet of 12 x 12 Designer Series Paper.

Perfect Parcels Die

The die set comes with the a number of tags and embellishment dies that coordinate with the stamp set.  You can create a lovely tag to go with your parcel or incorporate these on your card.  I’m sure you’ll be seeing more creations with this set.

I hope you’ve enjoyed seeing this bundle in action.  If you would like to order this bundle you can do so via my online store or by contacting me directly.

Unitl next time …

Floral Essence Gate Fold Card

By | July 11, 2019

Hi there

Yesterday I shared a card using products from the Perennial Essence Suite.  After making the first cut in the beautiful Perennial Essence Designer Series Paper I decided to do some more cutting with one of the other designs.  This is another card design by Patty Bennett with a few changes to fit our metric cardstock and also so that I could get two card bases from one sheet of A4 paper.

Floral Essence Gate Fold Card

Aren’t the colours and designs in this paper pack gorgeous?  Have you noticed the strip of Petal Pink on the right that was used from yesterday’s card?  This measures 3cm x 14.4cm and has been dry embossed with my favourite embossing folder – Subtle.  In the original design by Patty she had used some Designer Series Paper – either way will work.  Once you untie the bow this is what awaits you inside:

Floral Essence Gate Fold Card - Inside

The inside panels have been stamped with images from the Floral Essence stamp set – a mix of line art images and solid images.  The flowers have been stamped in Rich Razzleberry to coordinate with the card base.  The card base has been scored at 7.5cm and 17.5cm.  The white panels measure 7cm x 14.4cm and 9.5cm x 14.4cm.  The sentiment is from the Magnolia Blooms stamp set.

And here’s a shot of the outside flat so you can see how it looks.

I’m loving the 5/8″ Petal Pink Organdy Striped Ribbon – my ribbon measures 45cm and is adhered on the back of the card and to the underside of the flap.  The Designer Series Paper measures 7cm x 14.4cm.  I altered the front flap to be just a 7cm square with the stamped image being a 6.5cm square.  The flap has been adhered with Mini Dimensionals.

And here’s a view of the card standing open – there’s plenty of room to write a lovely birthday message in this card.

For the center of the flower I used the new Perennial Essence Floral Center embellishment.  These are adhesive-backed fuzzy yellow centers – perfect for adding some height and a bit of texture to your card.

Don’t forget to checkout my Promotions page to see what’s on offer for July.

Until next time …


Floral Essence Altered Fold Card

By | July 10, 2019

Hi there

I think it’s safe to say a fair number of us have fallen in love with the Perennial Essence Designer Series Paper – the colours and images are stunning.  If you don’t know what I’m talking about turn to page 108 and 166 of the Annual catalogue to see this gorgeous paper.  The images remind me of paintings by Monet.  It’s almost to lovely to cut into but I did and here’s my first creation.

Floral Essence

I CASED the card design from Patty Bennett – a US demo – but changed everything else :).  I decided I wanted to use as many new ‘paper products’ as possible.  We have the new Perennial Designer Series Paper (page 166), Petal Pink Perennial Essence Vellum Cardstock (page 169) and Old Olive Noble Peacock Foil Sheets (page 167).

The stamp sets I’ve used for this card are the Floral Essence set (part of the Perennial Essence Suite – page 107-108) and Magnolia Blooms set which is from the new Experience Creativity Beginners Brochure.

The flower image was stamped in Flirty Flamingo then I added Clear Embossing Powder.  This sets the ink as it can smudge a bit when stamped on the Vellum.  Once heat embossed the images were punched out with the new Perennial Flower punch on page 188.  If you look closely at the foil leaves you’ll see they too have been heat embossed with Clear Embossing Powder.  Did you know that the leaf image from the Floral Essence set coordinates with the Leaf Punch on page 187?

Floral Essence

I even remembered to photograph the inside of the card :).  Here I’ve used the smallest flower image and stamped it in Petal Pink with a So Saffron centre.  This set has three different flower sizes – one a line art image and the other two solid images.  The greenery has been stamped in Old Olive.

Floral Essence

To finish off the centre of the front flower I coloured one of our Basic Pearls with the new So Saffron Stampin Blend (page 179).  The sentiment has been stamped in Rich Razzleberry and two more pearls have been coloured in with the light Rich Razzleberry Stampin’ Blends.

You may have noticed that a section of the card front has been trimmed off (3cm to be exact) to show the insert.  You’ll need to check back tomorrow to see how I’ve used it for my second card using the Perennial Essence Designer Series Paper.

I hope you’ve enjoyed seeing this card – if you would like to order any of the supplies used please let me know – remember if your order comes to $110NZD you will earn yourself an $11NZD Bonus Days coupon to use next month towards your next order.

Until then …

Extra, Extra – July and August joining promotion

By | July 2, 2019

Extra, Extra

Have you ever thought of joining Stampin’ Up! and becoming a demonstrator?  Well now’s the time to turn that thought into an action – sign up today and get lots of extra value.  To find out more keep reading the below:

EXTRA!
If you sign up between 1st July and 31st August you will receive an additional $50NZD worth of product in your Starter Kit.  That means you will pay $189NZD and choose $335 NZD worth of product (usually $285NZD worth of product).

EXTRA, EXTRA!
But that’s not all – new demonstrators will also receive an $18NZD coupon code which can be used the following month.  Coupon codes will arrive between the 5th and 7th business day and will expire on 31st October 2019.

I would love to have you join my team – so if you’d like to join or want to know check out my Join My Team page.

Bonus Days are here again – 1st to 31st July

By | July 1, 2019

Bonus Days

How do Bonus Days work?  For every $110 NZD that you spend between 1st–31st July (before shipping and handling) you’ll earn an $11 NZD Bonus Days coupon code that can be used on any purchase during 1st–31st August.  Your coupon codes will be sent to you via email once you place your order.

So now’s a good time to tick some items off your wish list.  There’s no limit to the number of coupons you can earn, so you can shop all month 🙂

Bonus Days

Shop via my online store or contact me directly to earn Bonus Days Coupons

A Good Man – and not just a stamp

By | June 30, 2019

Hi there

Earlier this month my brother celebrated his birthday.  I used our new line art stamp set ‘A Good Man’ along with the ‘Birch’ background stamp.  Line art images are great as you can get so many different ‘colouring’ looks from the one set.  For this card I’ve used our Stampin’ Blends which are my favourite way to colour.

A Good Man

The ‘Birch’ stamp is a new background stamp – these stamps measure 11.4cm x 14.6cm and are in the new cling rubber style.   They really stick to your block so no chance of it coming off during stamping.  I’ve inked this stamp in Sahara Sand on Whisper White cardstock.

The image is stamped on Whisper White in Memento Black and coloured in with the following Stampin’ Blends: Hat and Sand – Crumb Cake, T-Shirt – Balmy Blue, Shorts – Soft Suede, Chair – Granny Apple Green.  I decided the ‘scene’ needed something in the background so did a light ‘wash’ with Pool Party.

The card base is Night of Navy and the image is double matted with Night of Navy and Granny Apple Green.

A Good Man

I love this sentiment and it’s so true of my brother – I am so blessed to call him ‘brother’.  Even though he teased me growing up, he is still very protective of me and would do anything for me.  He is a wonderful husband, father, son, brother, uncle and friend.  Thank you for being you.

Well that’s all from me – until next time …

Magnolia Blooms – Happy Birthday

By | June 29, 2019

Hi there

We’ve been having some beautiful days here in Auckland – although thankfully not as hot as in Europe – I’m not a fan of winter so to be able to see the sun and feel it’s warmth is great.

One of the new suites in the 2019-2020 Annual Catalogue is the beautiful Magnolia Lane Suite (page 36 – 39).  Did you know it also has a coordinating stamp set – Magnolia Blooms – in the new Beginners Brochure (page 8 – 9)?  I decided to use this beautiful set to create a card for our youngest niece who turns 23 today – Happy Birthday Hanna xx

Magnolia Blooms

The background paper is from the Magnolia Lane Designer Series Paper pack.  This pack consists of 12 sheets of 12″ x 12″ paper – 2 each of 6 double sided designs.  Some images from the paper can be cut  using the Magnolia Memory dies (page 194).  Stampin’ Up! have also released a special pack of this paper –  Magnolia Lane Designer Series Paper – 20 pack.  This pack features 10 sheets each of two lovely double-sided Magnolia Lane designs.  Below are the four designs.  The item code for this pack of paper is 152455 and the cost is $36.00 (for 20 sheets).

06.04.19_O1_MAGNOLIA-LANE-BULK-DSP

Magnolia Blooms

The flower has been stamped with Memento Black Ink then coloured in using Petal Pink and Mossy Meadow Stampin’ Blends’.  As I was putting the card together I noticed that the colouring on the DSP  had the flower a lot lighter near the tips of the petals than what I had.  So I grabbed my Colour Lifter and lightly went over the tips of the petals removing some of the colour and creating a more gradual transition.  I was really pleased with how this flower turned out.

Magnolia Blooms

I stamped one of the other images from this set on the inside of the card in Petal Pink.  I’m not really a ‘pink’ girl but I think this colour is fast becoming a favourite for me.  I’m glad it’s used in a number of our papers including the Perennial Essence Designer Series Paper.  The ribbon I’ve used on this card is the Organdy Stripped Ribbon in Petal Pink which is part of the Perennial Essence Suite (page 106 – 108).

The card stock coordinates with the colours in the DSP – Petal Pink and Mossy Meadow.  Other colours featuring in the paper pack are Basic Black, Early Espresso, So Saffron and Whisper White.

Well that’s all from me – until next time …


Daisy Lane – Notecards set of three

By | June 26, 2019

Hi there

Yesterday I shared the first project from my recent workshop using the new set A Good Man. Today I’ll share the second project using the new Daisy Lane Bundle – Daisy Lane stamp set and the Medium Daisy Punch (check out page 23).

Daisy Lane Bundle

One of the perks of being a Stampin’ Up! Demonstrator is receiving our quarterly magazine filled with sample ideas, tips and so much more.  In our latest magazine there was a sample using the Daisy Lane Bundle.  I decided to CASE (Copy And Share Everything) it and put my own twist on the design.  Resizing the design from a full sized card to a notecard size had a few trials to get everything to fit – but I got there and am pleased with how these turned out.

Daisy Lane

This card uses one of the new In Colors – Pretty Peacock.  It reminds me of Island Indigo which retired last year and I think this is going to become a favourite colour.

To create this card we started with a piece of Shimmery White and then added a watercolour wash using Pretty Peacock ink and an Aqua Painter.  NB:  Before you lay the colour on make sure you have wet the paper – this helps the ink flow across the card.

Allow time for the paper to dry before stamping the ferns – to speed this up you can use a heat tool to get rid of excess water .

Daisy Lane

The fern image was stamped in Pretty Peacock.  Each card has been stamped slightly differently – the first two cards use the ‘stamped off’ technique.  This is where you ink up your image then stamp two images before reinking again creating a lighter version for the second image.  The last card has each image stamped at full strength.

Daisy Lane

After stamping the fern images I adhered a piece of the new 1/2″ Scalloped Linen Ribbon with Pretty Peacock edging.  You can get this ribbon in all the new In Colors (page 174).  The sentiment is stamped in Pretty Peacock on Whisper White cardstock.  For two of them I used the Banner Triple Punch (page 186).  If you don’t own this punch I would recommend you add it to your next order – it’s a great ‘go to’ punch.  It has guides to cut banners to 1″, 1 1/2″ & 2″ (2.5cm, 3.8cm & 5.1cm) wide.

Lastly the centre piece – the daisy.  This set has two sizes of daisy and both have a coordinating punch which saves you a heap of time cutting out.  I layered two of the smaller daisy on top of each other then adhered to the card.  It’s hard to see in the photo but I added a bit of Wink of Stella to match the shimmer in the Shimmery White paper.

I think you’ll be seeing more of this colour in future projects.  Do you have a favourite new In Color?

Until next time …

A Good Man – Notecard set of three

By | June 25, 2019

Hi there

On Saturday I held my first 2019-2020 Annual Catalogue workshop with a group of 10 lovely ladies – a great way to spend a winters afternoon.  We made two projects using new stamp sets and colours.  The first project I’ll share features the stamp set ‘A Good Man’ which is a line art set with images and sentiment plus the new background stamp ‘Birch’.

A Good Man

The card bases are our Whisper White Note cards & envelopes which come in a pack of 20 – pre-cut and pre-scored.  These card bases are smaller than a standard card and it’s easy enough to downsize a layout to fit this size or if you’ve started out making your design to fit the Note cards it’s easy enough to ‘upsize’ it for a full size card.

As there were three different colours for the mat I decided we would stamp the Birch stamp in VersaMark then heat emboss with clear embossing powder – this gives a darker tone for each coloured cardstock.

Here are some close ups of the cards.  First up we have a new In Color – Terracotta Tile

A Good Man

Then Seaside Spray – also a new In Color for 2019-2021

A Good Man

And lastly Mint Macaron which is from the ‘Subtles’ family – love this colour

A Good Man

The first two cards were blank inside but the sentiment for this card has a ‘part two’ on the inside

A Good Man

To make it easy I listed the different Stampin’ Blends I used to colour each card – hope this helps if you want to recreate one of these cards.

A Good Man

A Good Man

A Good Man

I’ll be back tomorrow with the second project – watch this space 🙂

Until next time …


Come Sail Away Suite – Sailing Home Stamp Set

By | June 20, 2019

Hi there

Today’s share showcases the last of our OnStage projects featuring the Come Sail Away Suite.  This is a great maritime suite and will be great for creating projects for the men in our lives and those with a love for the sea.

Sail Away

And now for our project – the image has been stamped on Whisper White paper in Night of Navy, fussy cut out (don’t panic there is a coordinating die that will cut this out) and then adhered to a piece of Watercolour paper.  A light wash was applied first to the Watercolour paper before the other elements were added.  The sentiment has been punched out with the Everyday Label punch which has carried over.  Don’t you just love the little anchor trinket?

I love how each suite includes a range of products that help us create amazing projects – no two suites are the same.  In this suite you can find a stamp set and dies (again in a bundle), an Embossing folder, DSP, Memories & More Card Pack, Bakers Twine and Trinkets and yes one code (152175) can order you all the products with one hit 🙂

Here’s a sample card using the stamp set and dies:

Sailing Home sample

If you don’t want to purchase the whole suite I’d recommend the Come Sail Away Memories and More Card Pack as a great option to be able to create masculine cards.  Check out this quick video to find out more about this product which is on page 171 of the Annual Catalogue

I hope you’ve enjoyed seeing these projects – there will be more projects coming this way using new product from the 2019-2020 Annual Catalogue.

Until next time …

Follow Your Art Suite – It Starts With Art Stamp Set

By | June 19, 2019

Hi there

We’re now up to project number three featuring the Follow Your Art Suite.  This is a fun creative suite of products as you can see in the image below.

Follow Your Art Suite

The following items are included in the suite – Stamp set and dies (which can be purchased as a bundle saving you 10%), Designer Series Paper, Embossing folder, Embellishment kit, Washi Tape and super cute Mini shipping boxes.  Again all these products can be purchased with one code – 152181 – to place an order visit my online store or contact me directly.

Now onto the card we made:

It Starts With Art

The stamp set consists of 4 sentiments and 8 line art images  – 5 of these images have coordinating dies for easy cutting out.  The DSP has a mix of crafting images that will appeal to a number of crafts – not just stamping.  One side of the paper has your crafting images while the other side is more of a background design that will compliment.  We used Stampin’ Blends to colour our ribbon spools.

This set has so many creative uses – and not just for cards.  I’ve seen some amazing home decor pieces using this suite.

You can find the Follow Your Art Suite on pages 52 to 54 of the Annual Catalgoue

Here’s are a couple more sample to share with you

Follow Your Art - Mini Shipping Box

Isn’t this box cute?

Follow Your Art

Well that’s it from me – I’ll be back tomorrow to share the last of our OnStage samples using the products from the Come Sail Away Suite.

Until then …